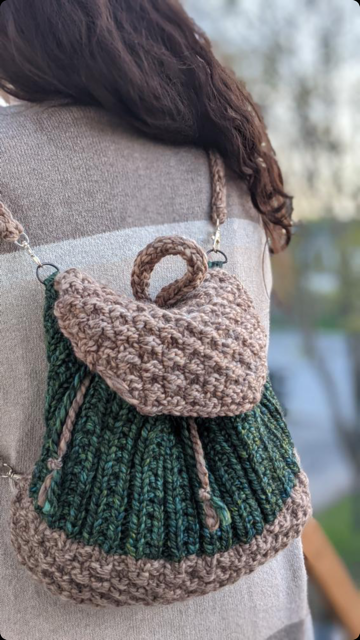
Marble & Bricks BackPack

Today I have something very special for you all! I was asked by AllFreeKnitting to design a pattern for their 10th Birthday! They are hosting new patterns on their website throughout the entire month of May! I was so happy to participate in this celebration! AllFreeKnitting is an amazing catalog of free knitting patterns of all types. It is by far the most expansive database of free patterns I’ve seen. Go and check out the event!
AllFreeKnitting's 10th Birthday Celebration
ABOUT THIS BACK PACK:
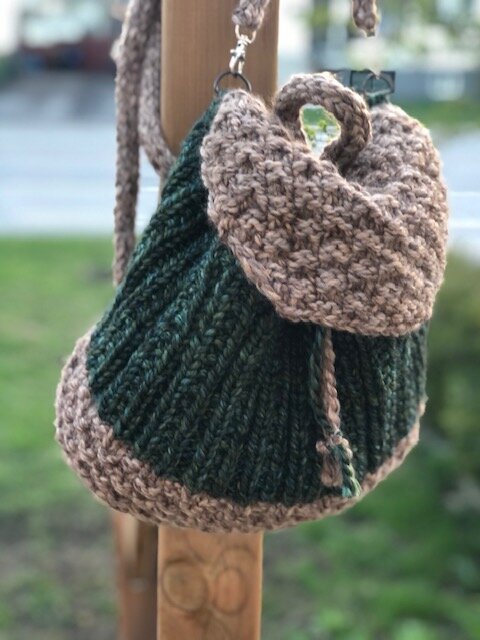
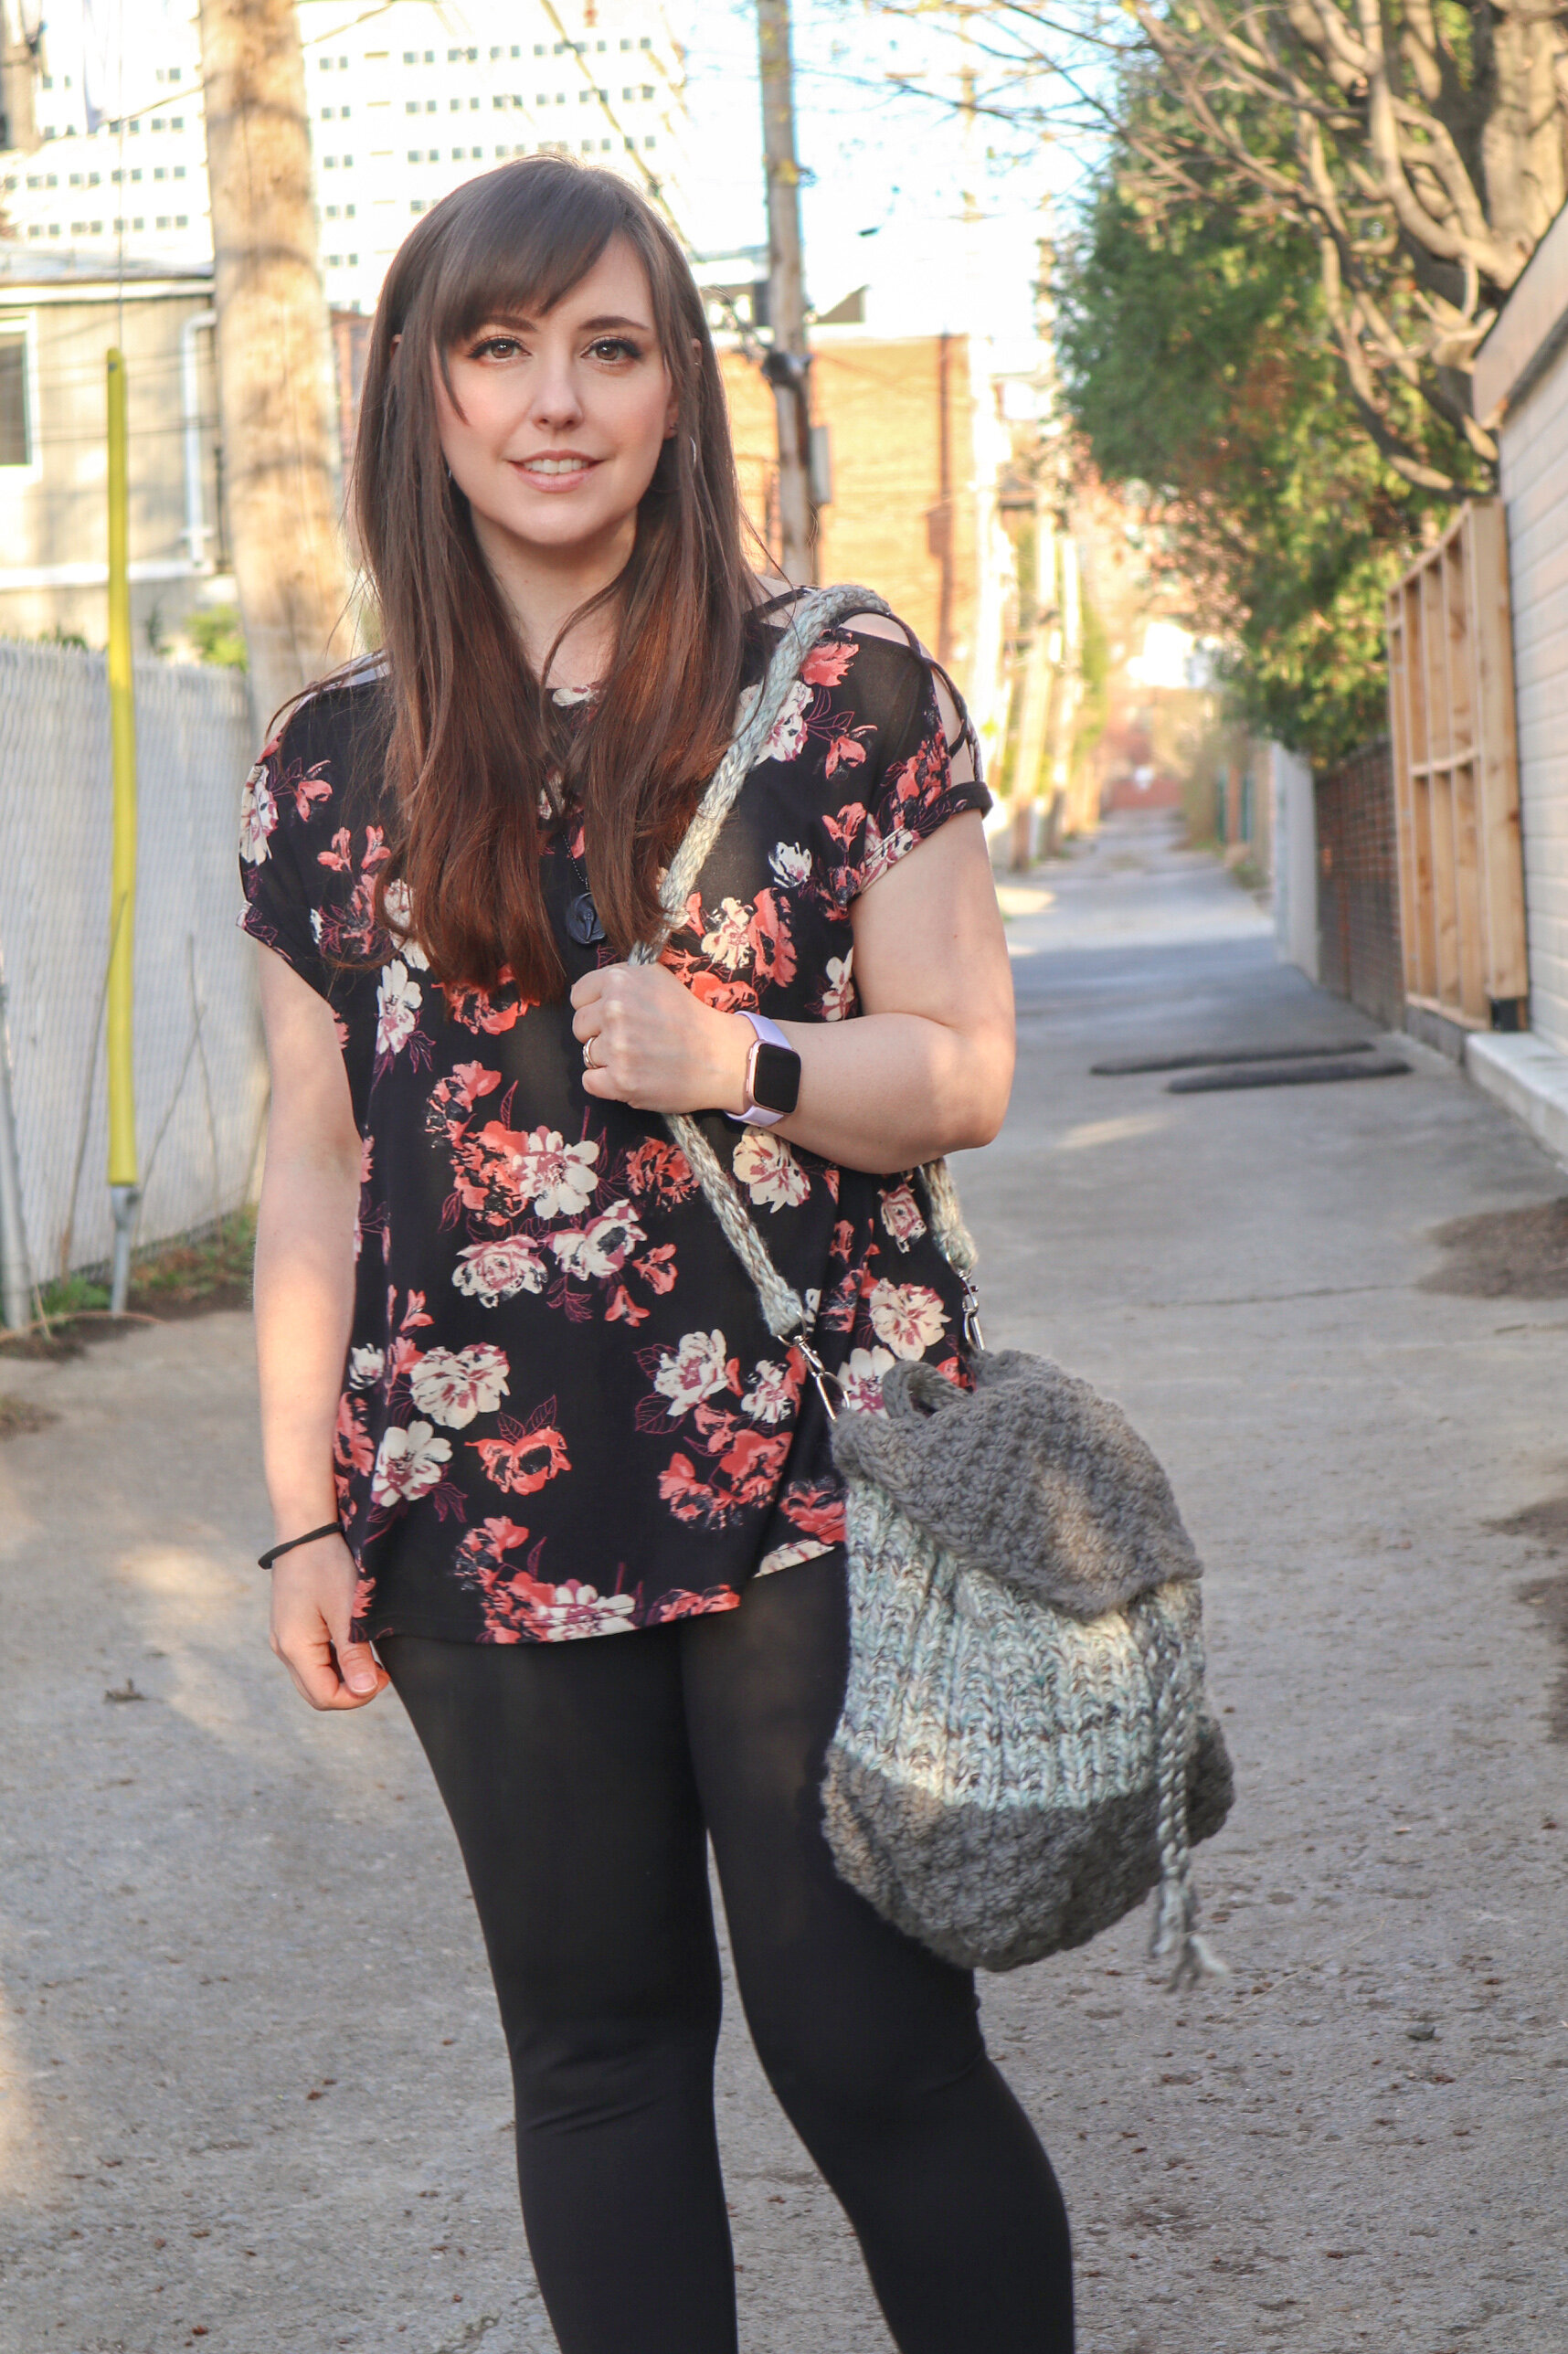
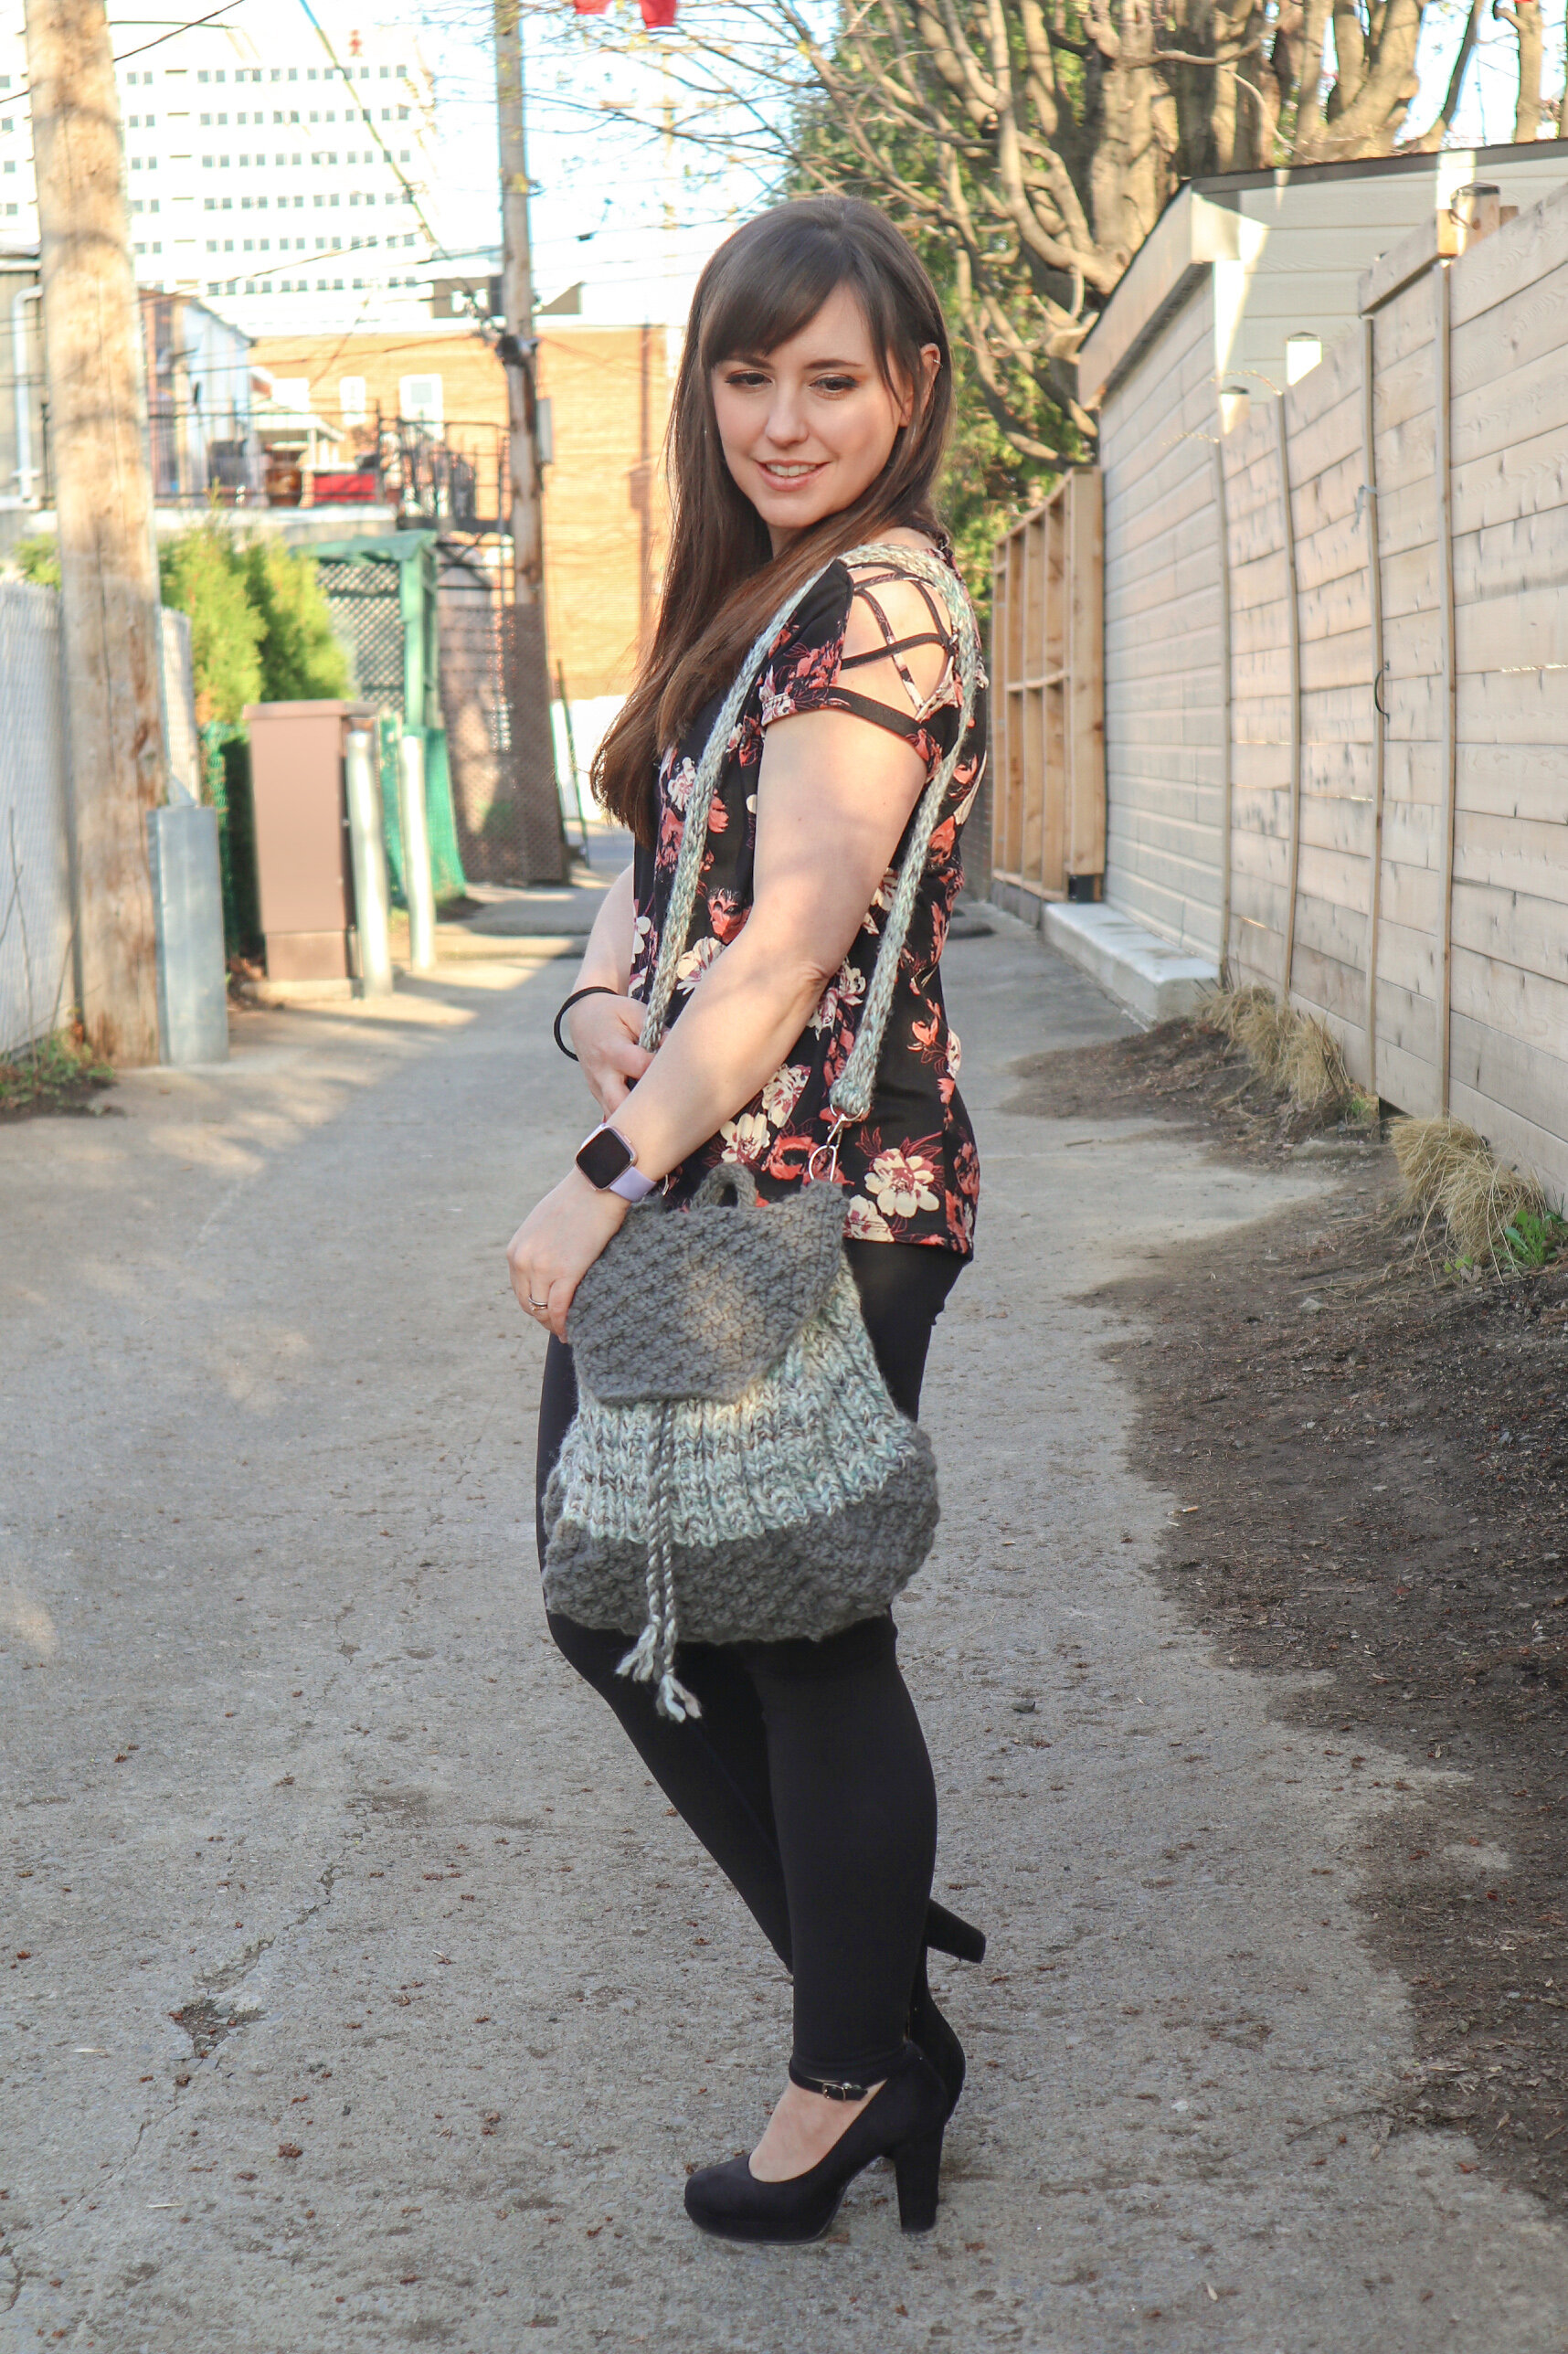
I love mini backpacks! They’re pretty much a staple in my bag collection. How I haven’t gotten around to designing one before this, I don’t know. But, I am TOTALLY in love with the Marble & Bricks back pack!
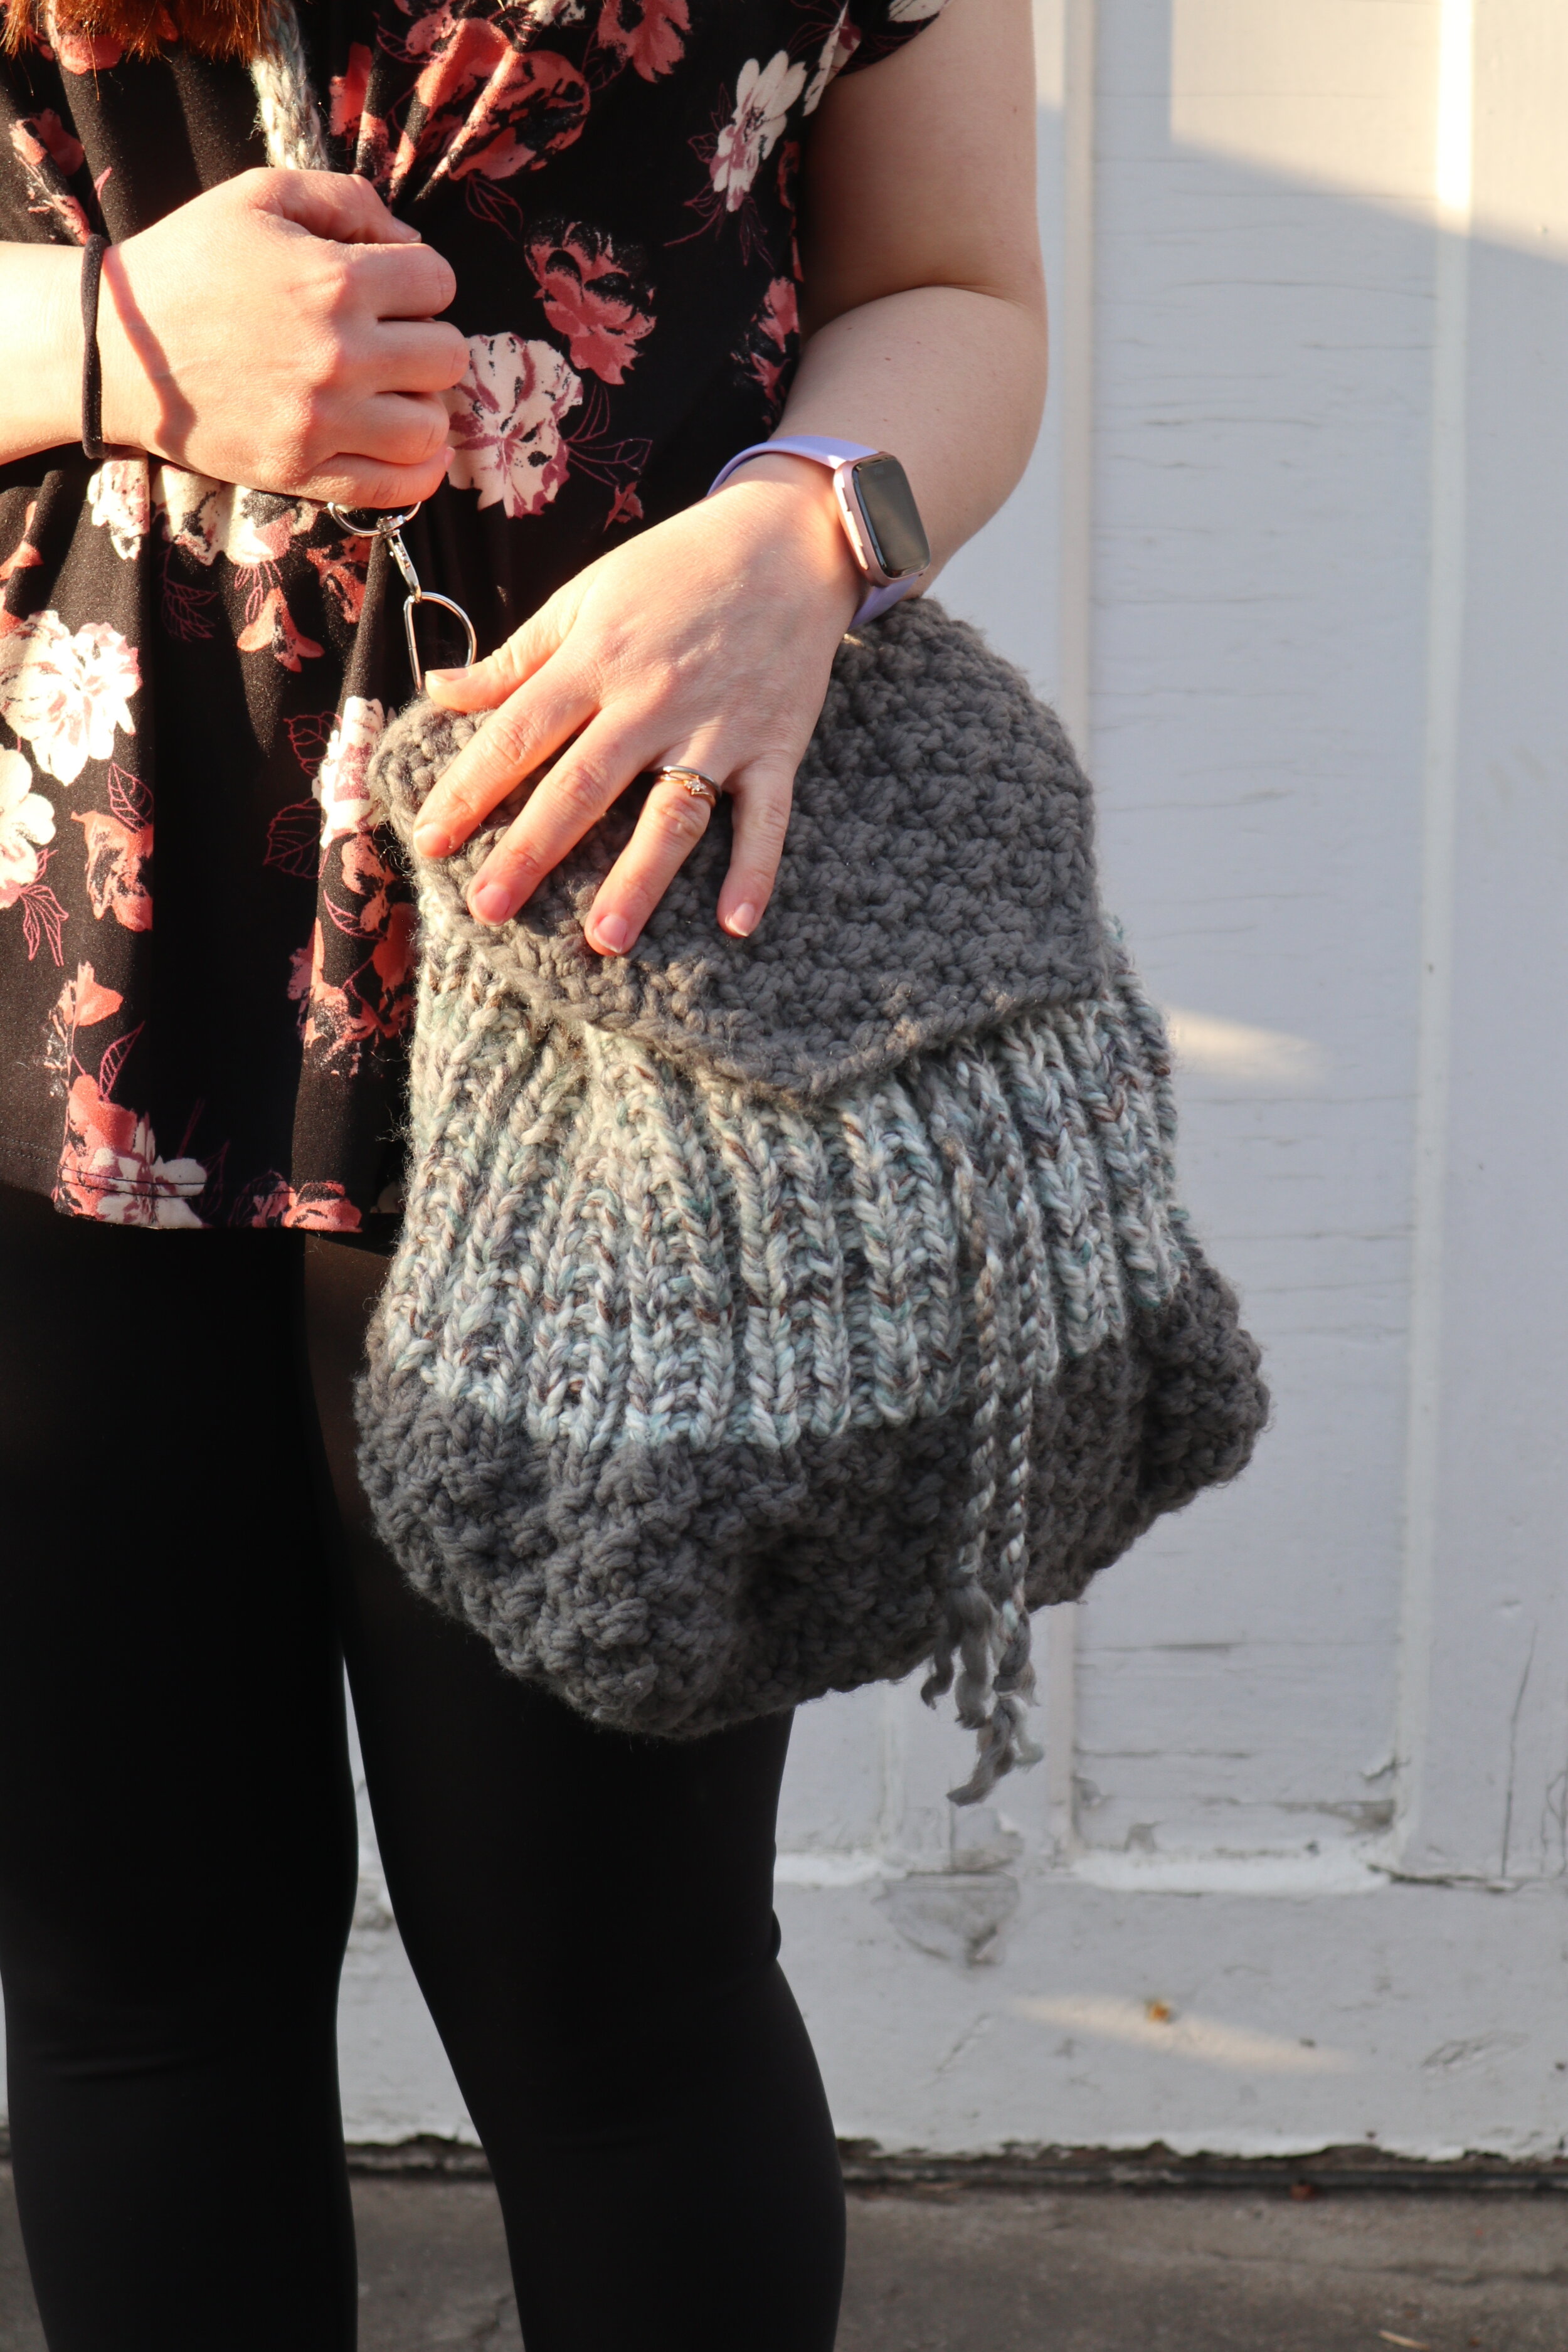
This bag is knitted using 2 lovely and simple textured stitches: the Box Stitch and the Beaded Rib Stitch. The combination creates a stunning contract that makes the book bag really stand out from the crowd. And, to make things even better, these two stitches are easy to memorize, but still interesting enough to keep you from getting bored!
The sample for this book bag is made with weight 6 super bulky yarn and 6.5mm needles, which are much smaller than suggested for weight 6 yarn. Using smaller needles creates a tighter knit fabric that will prevent the bag from sagging when in use.
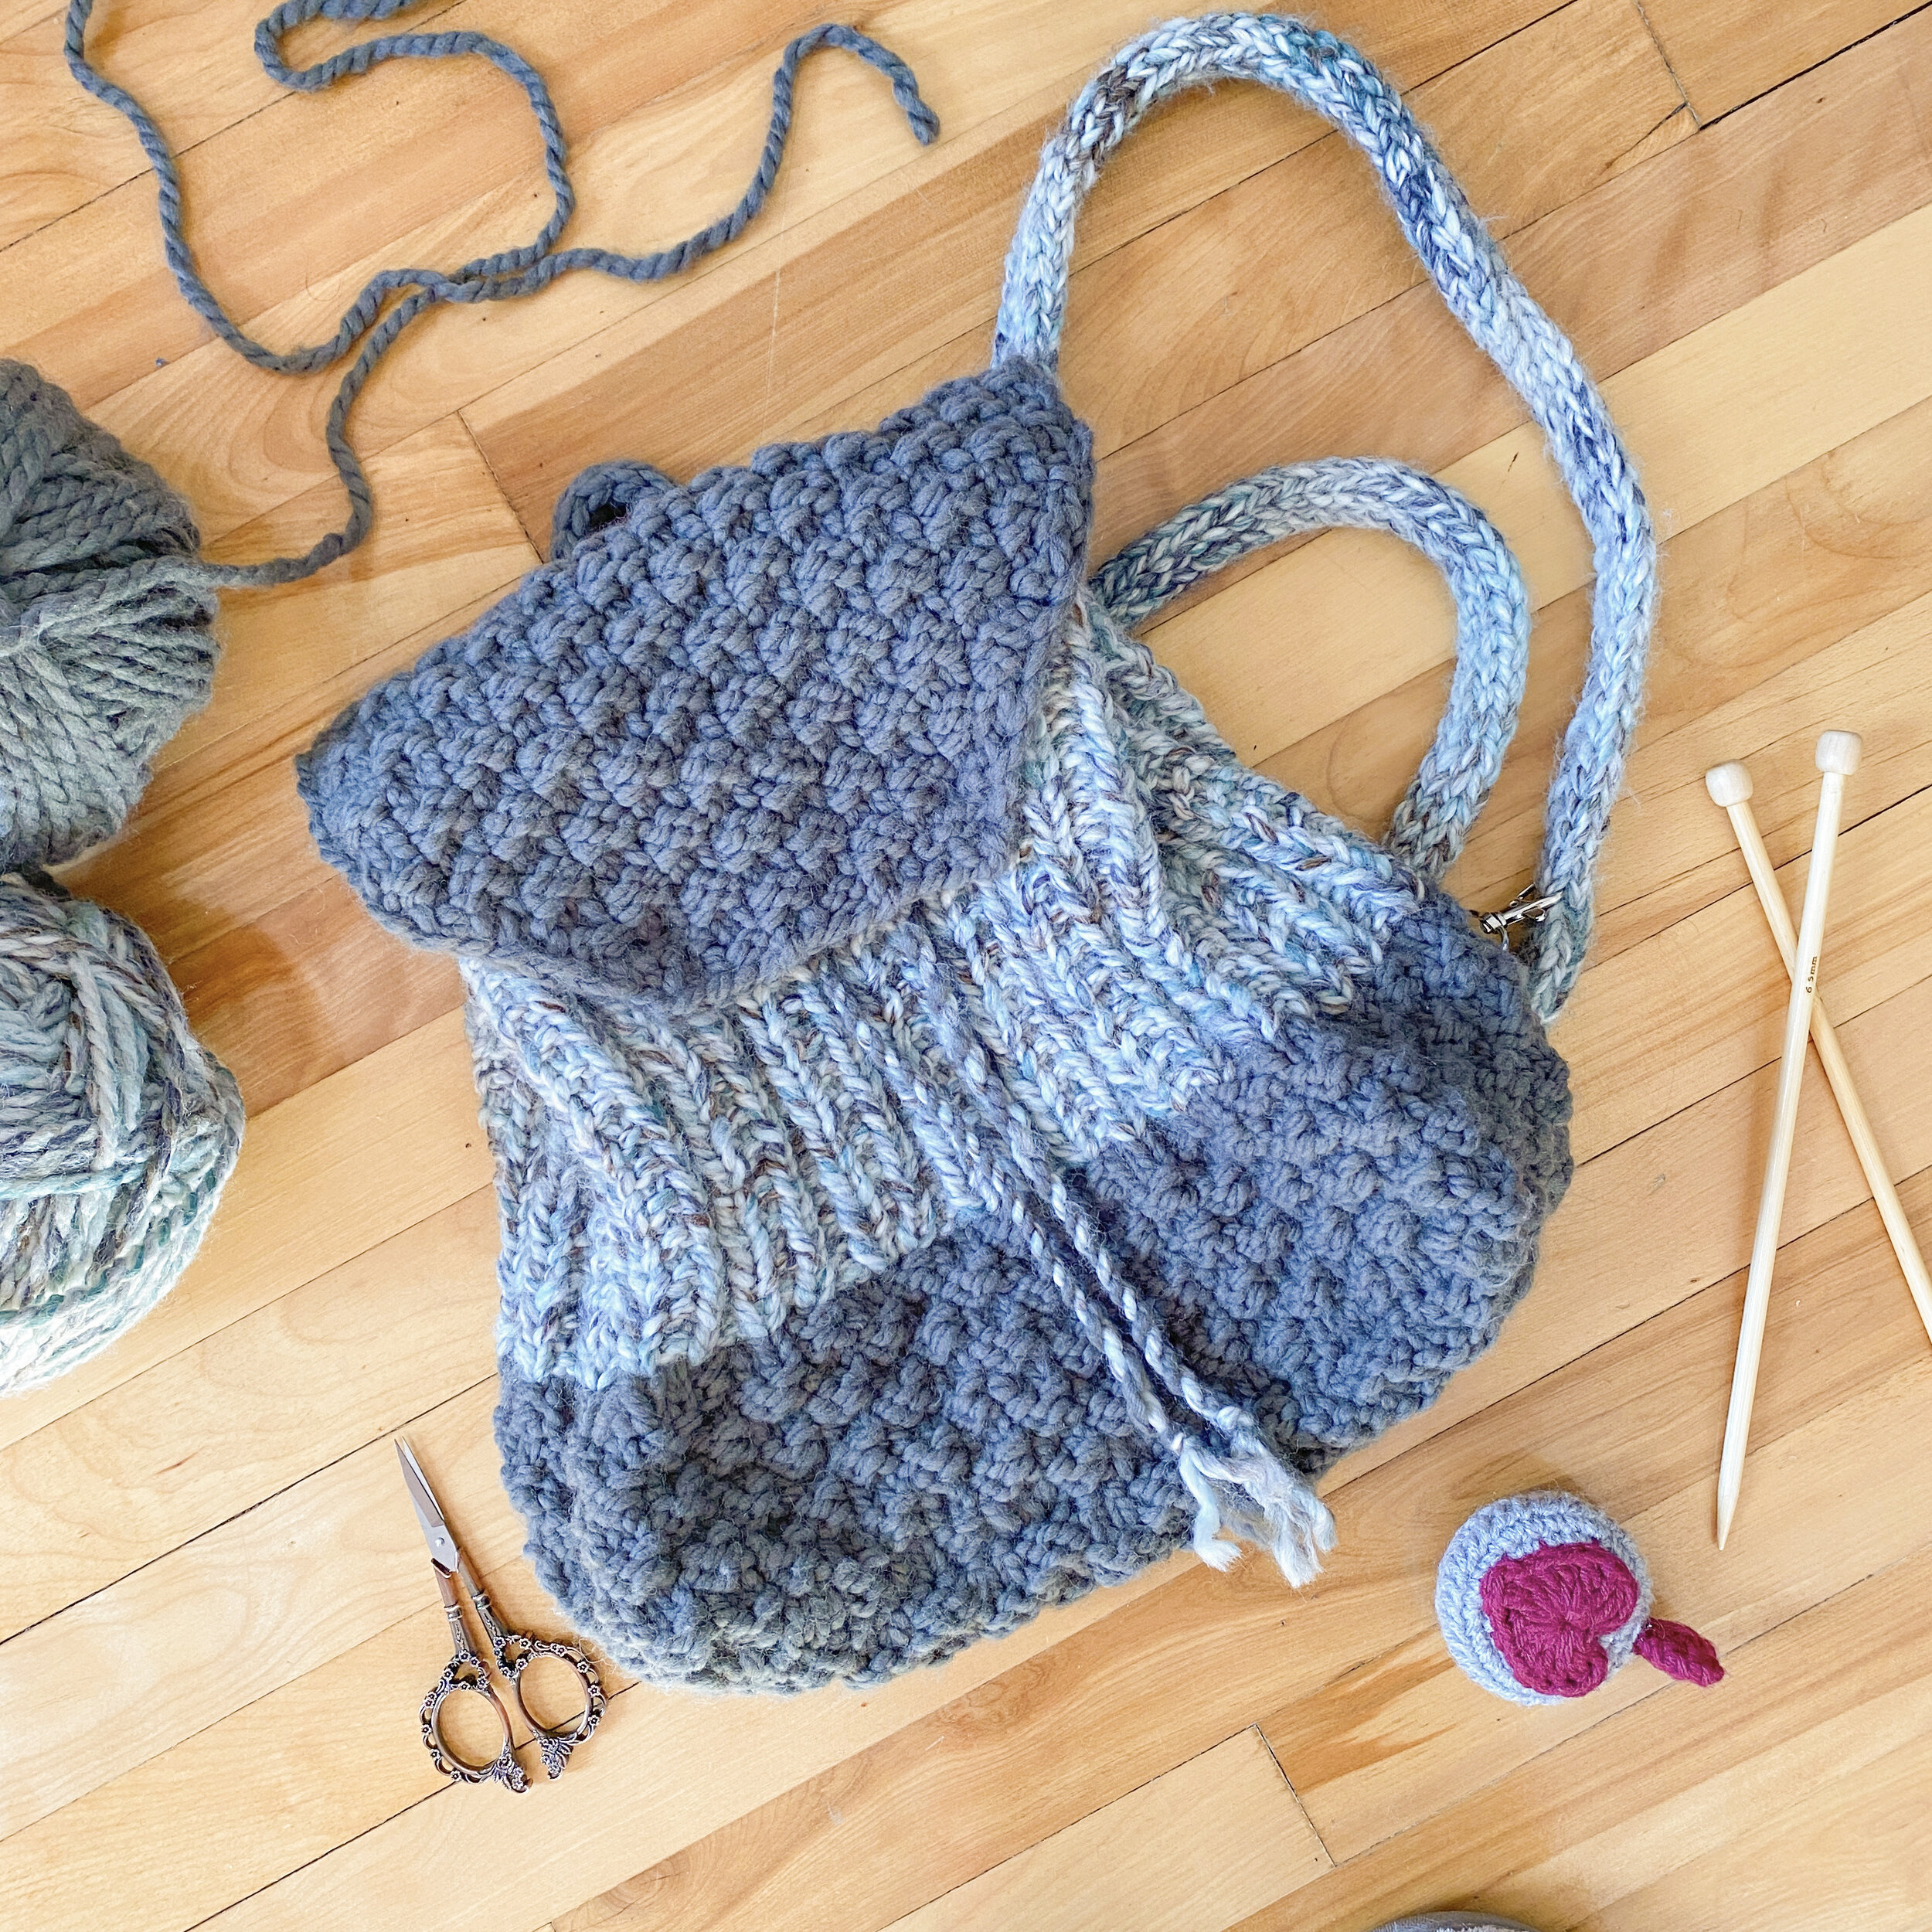
I used a combination of Lion Brand Wool-Ease Thick & Quick and Loops & Threads Comfy Wool to create the sample bag. Both of these yarns have approximately the same gauge and are very similar is look.
There are many ways of finishing the book bag. I chose to line mine, though it isn’t particularly necessary. I also used metal hardware for my straps to create a bag that was convertible from a back pack to a sling bag or purse.
Hope you enjoy knitting the Marble & Bricks backpack!
THANK YOU! Kat, for your awesome pictures of your backpack!
I LOVE TO SEE WHAT YOU CREATE!
Please share your creations with the community on social media tagging @ravinsekaidesigns and hashtag #marbleandbricks
I can’t wait to see the beautiful things you come up with!
FOLLOW ME ON SOCIAL MEDIA
Facebook: Ravin Sekai Designs
Ravelry: RavinSekai
Instagram: @ravinsekaidesigns
Pinterest: Ravin Sekai Designs
Patreon: Ravin Sekai Designs
WHAT YOU NEED:
Needles: 6.5 mm, 32” - 48” circular needles, Or size needed to achieve gauge. (48” if you prefer a magic loop style of knitting)
Yarn: Weight 6 Super Bulky Yarn. Sample knit in Lion Brand Wool-Ease Thick & Quick. 175 yrds MC, 100 yrds AC
Gauge: Box Stitch (base and flap): 11sts/20rows = 4”, Beaded Rib Stitch (main body): 14sts/18.5rows = 4”
Finished Bag Size: laid flat: 12” tall, 13” at widest base.
Optional Hardware: fastenings to close the flap: buttons, snaps, or a buckle. Hardware to attach the straps: d-rings, d-ring clips, etc. see notes.
ABBREVIATIONS:
CO: cast on
RS: right side
WS: wrong side
St/Sts: stitch/stitches
AC: accent color (base and flap)
MC: main color (body)
K: knit
P: purl
Sl1kw: slip one knitwise. Slip right-hand needle into the st on the left-hand needle like you are going to knit it. Without knitting it, simply slip it to the right-hand needle. Continue knitting as usual.
Sl1wyib: slip one with yarn in back. With the yarn in back as if you were about to knit, slip the next st from the left needle to the right one knitwise, leaving it unworked, then continue knitting as normal
Sl1wyif: slip one with yarn in front. With the yarn in the front as if you about to purl, slip the next st from the left needle to the right one purlwise, leaving it unworked, then continue knitting as normal
Rep: repeat
SM: stitch marker
Cont: continue
BO: bind off

Notes:
I used snaps to fasten my bag closed, but there are many different methods for closing the bag such as buttons or buckles. You can also choose to not fasten the flap at all as the drawstring keeps the bag closed.
You can sew your straps directly to the book bag, but using hardware such as d-rings and d-ring clips will make your back pack straps adjustable. Also, you can change the straps to make the back pack into a sling bag or a purse if you use clips. You can find these types of hardware at most crafting store or on Amazon.
THE PATTERN:
For the free pattern of this bag please continue on this page. Please consider supporting me by purchasing the 100% ad-free PDF with full charts for this pattern on my Ravelry or ETSY pages. Or consider joining my Patreon for member perks.
June 24th: correction on Row 41 - Row 66. You should repeat Round 39 - 40

Base:
CO 28st with AC
Row 1: *k2, p2* rep * * across
Row 2: *k2, p2* rep * * across
Row 3: *p2, k2* rep * * across
Row 4: *p2, k2* rep * * across
Row 5 - Row 20: rep Rows 1 - 4
You should have an approx. 10” x 4” rectangle.
Main Body:
Row 21: k across, when you get to the end, turn your piece and working down the side, pickup and knit 20 sts (one for each Row), turn and pick up and knit 28sts across the bottom of the rectangle, and then 20sts up the right side for 96 sts on your needles. Connect to knit in the round. Place a sm to show the beginning of the round.
Round 22: *k2, p2* rep * * around
Round 23: *k2, p2* rep * * around
Round 24: *p2, k2* rep * * around
Round 25: *p2, k2* rep * * around
Round 26 - Round 37: rep Round 22 - Round 25
Round 38: change to MC, k around increasing evenly 4 sts (one on each side), 100 sts total
Round 39: *p2, k1, p1, k1* rep * * around
Round 40: *p2, k3* rep * * around
Round 41 - Round 66: Rep Round 39 - 40
Round 67: change to AC, k all sts decreasing the row by 4 sts evenly. You should have 96 sts again.
Round 68: *k2, p2* rep * * around
Round 69: *k2, p2* rep * * around
Round 70: *p2, k2* rep * * around
Round 71: *p2, k2* rep * * around

Flap:
You will now be knitting back and forth in rows to create the flap for the bag.
Row 1: *k2, p2* x7, BO remaining sts until just your last BO st is on your needles with the 28 beginning sts.
Row 2 (RS): k the first st of this row then pass the last BO st over the st to finish BO, p2, *k2, p2* rep * * across.
Row 3: *p2, k2* rep * * across
Row 4: sl1kw, p1, k2, *p2, k2* rep * * across to last 4sts, p2, k1, sl1kw
Row 5: p1, k1, p2, *k2, p2* rep * * across
Row 6: sl1kw, k1, p2, *k2, p2* rep * * across to last 4sts, k2, p1, sl1kw
Row 7: *p2, k2* rep * * across to last 4sts, p2, k1, p1
Row 8: sl1kw, p1, k2, *p2, k2* rep * * across ro last 4sts, p2, k1, sl1kw
Row 9 - Row 16: rep Rows 5 - 8
Row 17: p1, p2tog, p1, *k2, p2* rep * * across to last 4 sts, k1, k2tog, p1
Row 18: sl1kw, *p2, k2* rep * * across to last st, sl1kw
Row 19: p1, k2tog, *p2, k2* rep * * across to the last 3sts, p2tog, k1
Row 20: sl1kw, k1, *p2, k2* rep * * across to last 2sts, p1, sl1kw
Row 21: p1, k2tog, k1, *p2, k2* rep * * across to last 4 sts, p1, p2tog, p1
Row 22: sl1kw, *k2, p2* rep * * across to last st, sl1kw
Row 23: p1, p2tog, *k2, p2* rep * * across to last 3sts, k2tog, p1
Row 24: sl1kw, p1, *k2, p2* rep * * to last 2sts, k1, sl1kw
Row 25: p1, p2tog, p1, *k2, p2* rep * * across to last 4 sts, k1, k2tog, p1
Row 26: sl1kw, *p2, k2* rep * * across to last st, sl1kw
Row 27: p1, k2tog, *p2, k2* rep * * across to last 3sts, p2tog, p1
Row 28: sl1kw, k1, *p2, k2* rep * * across to last 2sts, p1, sl1kw
Row 29: p1, k2tog, k1, *p2, k2* rep * * across to last 4sts, p1, p2tog, p1
BO in pattern.
Straps (make 2):
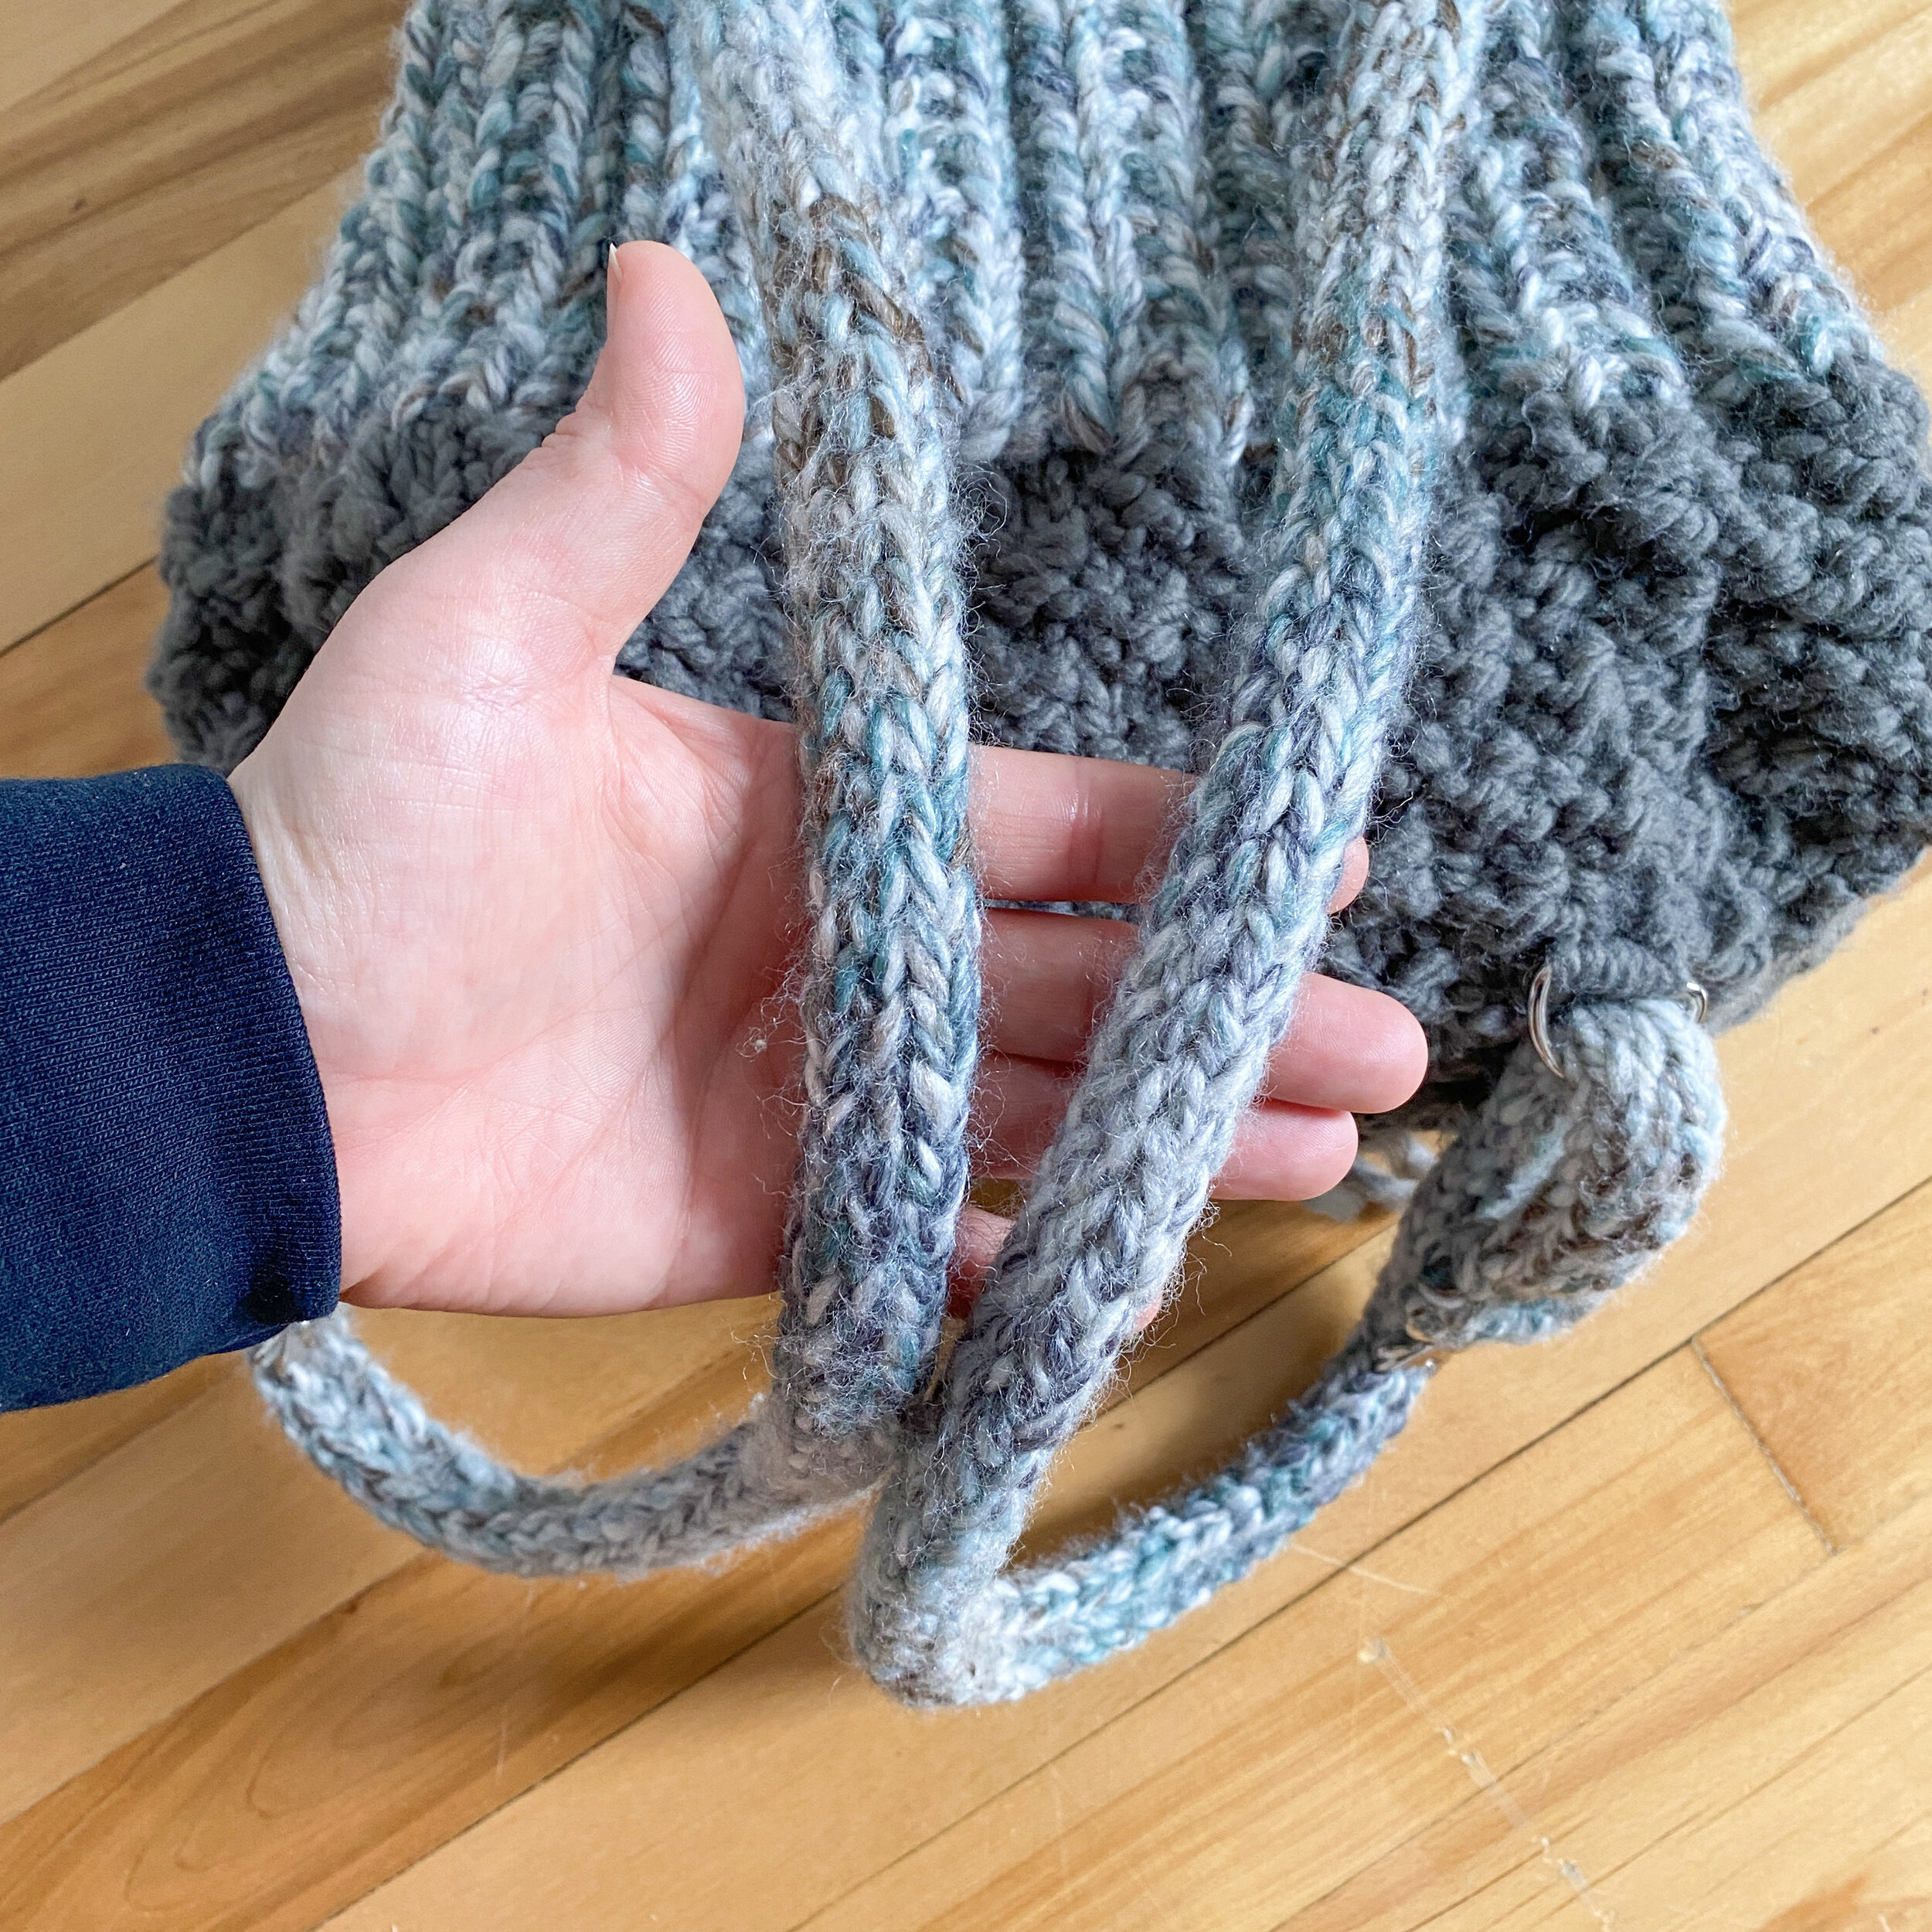
The straps are created using slipped stitches, which makes a sturdy and less stretchy fabric.
With MC CO 6 sts
Row 1: *s1wyib, k1* x2, sl1wyib, sl1wyib
Row 2: p2, sl1wyif, p1, sl1wyif, p1
Cont. Rows 1 - 2 until straps are the length you want. For my bag, I made my straps 28” long. But, you might prefer shorter or longer straps.
BO
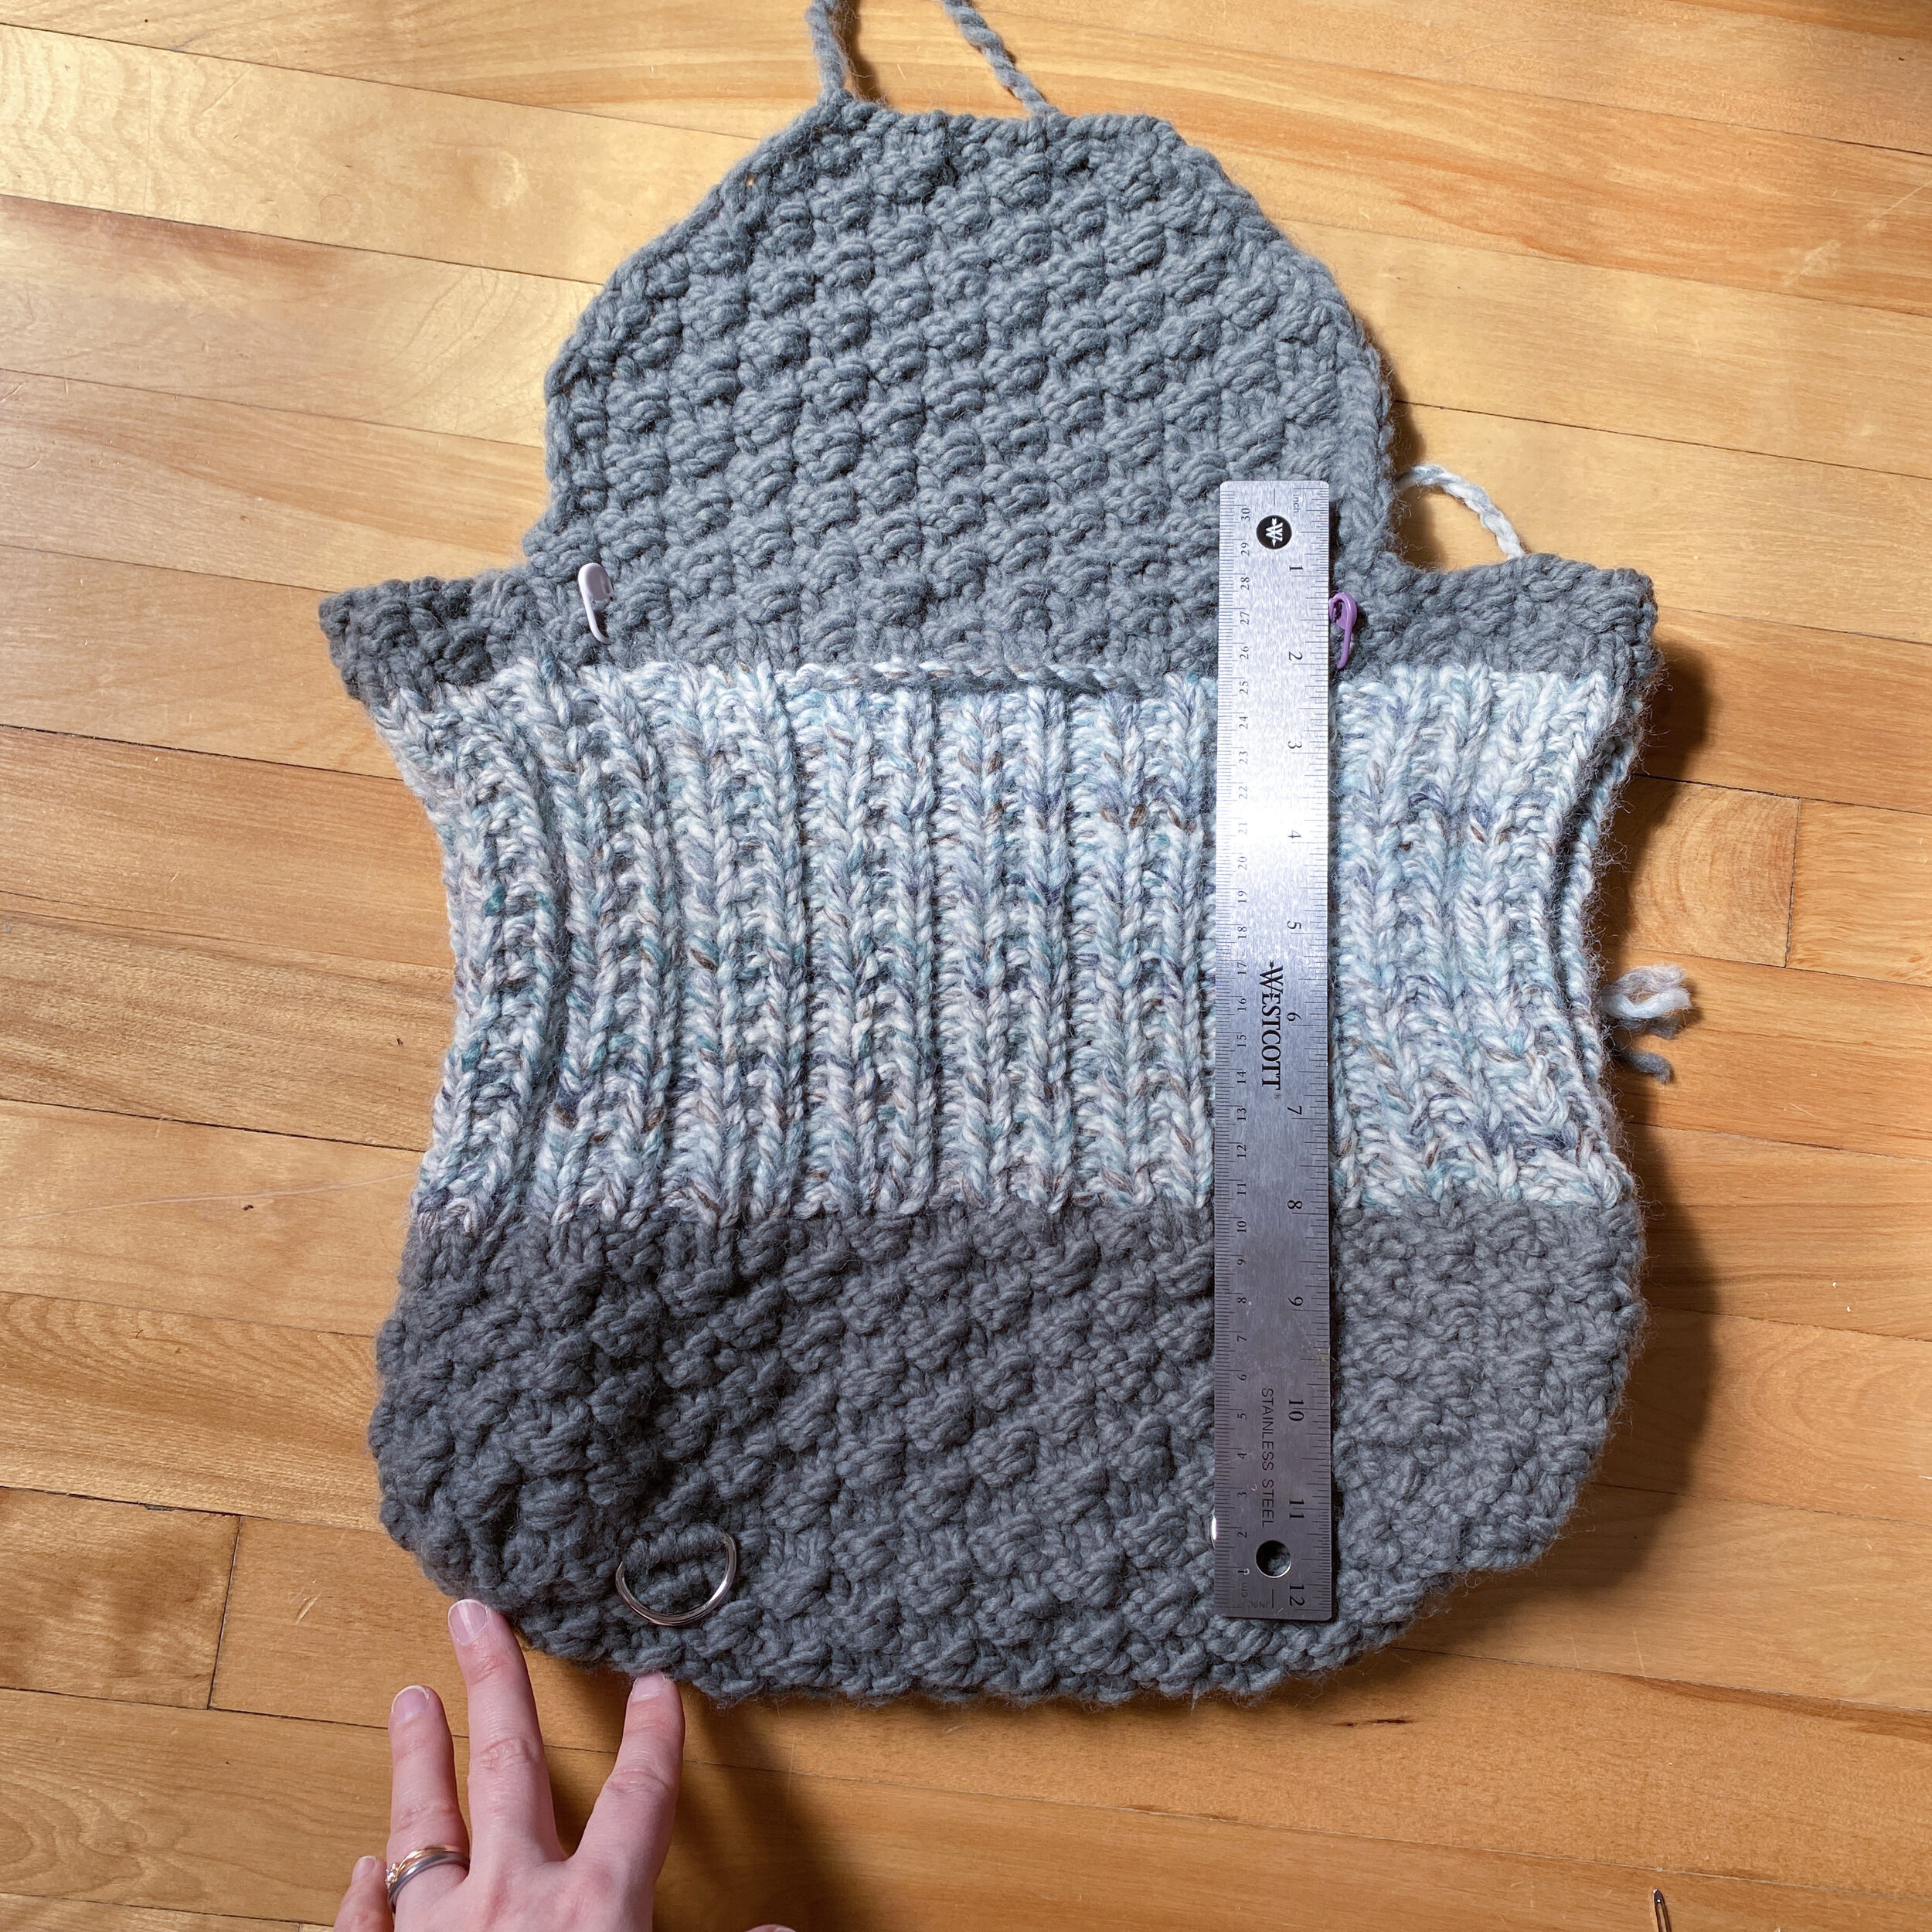
If you do not want to use hardware, you should use the flap to center and sew your straps to you bag. Use a ruler to place your straps about the same distance apart as the sides of the flap as shown in the picture.
If you are using hardware, sew the ends of the strap to the d-ring clips and sew the d-rings of the hardware to the back of the bag using the flap and ruler to guide you. With the use of hardware, you can change the back pack into a purse. Check it out at the end of this blog post
Drawstring
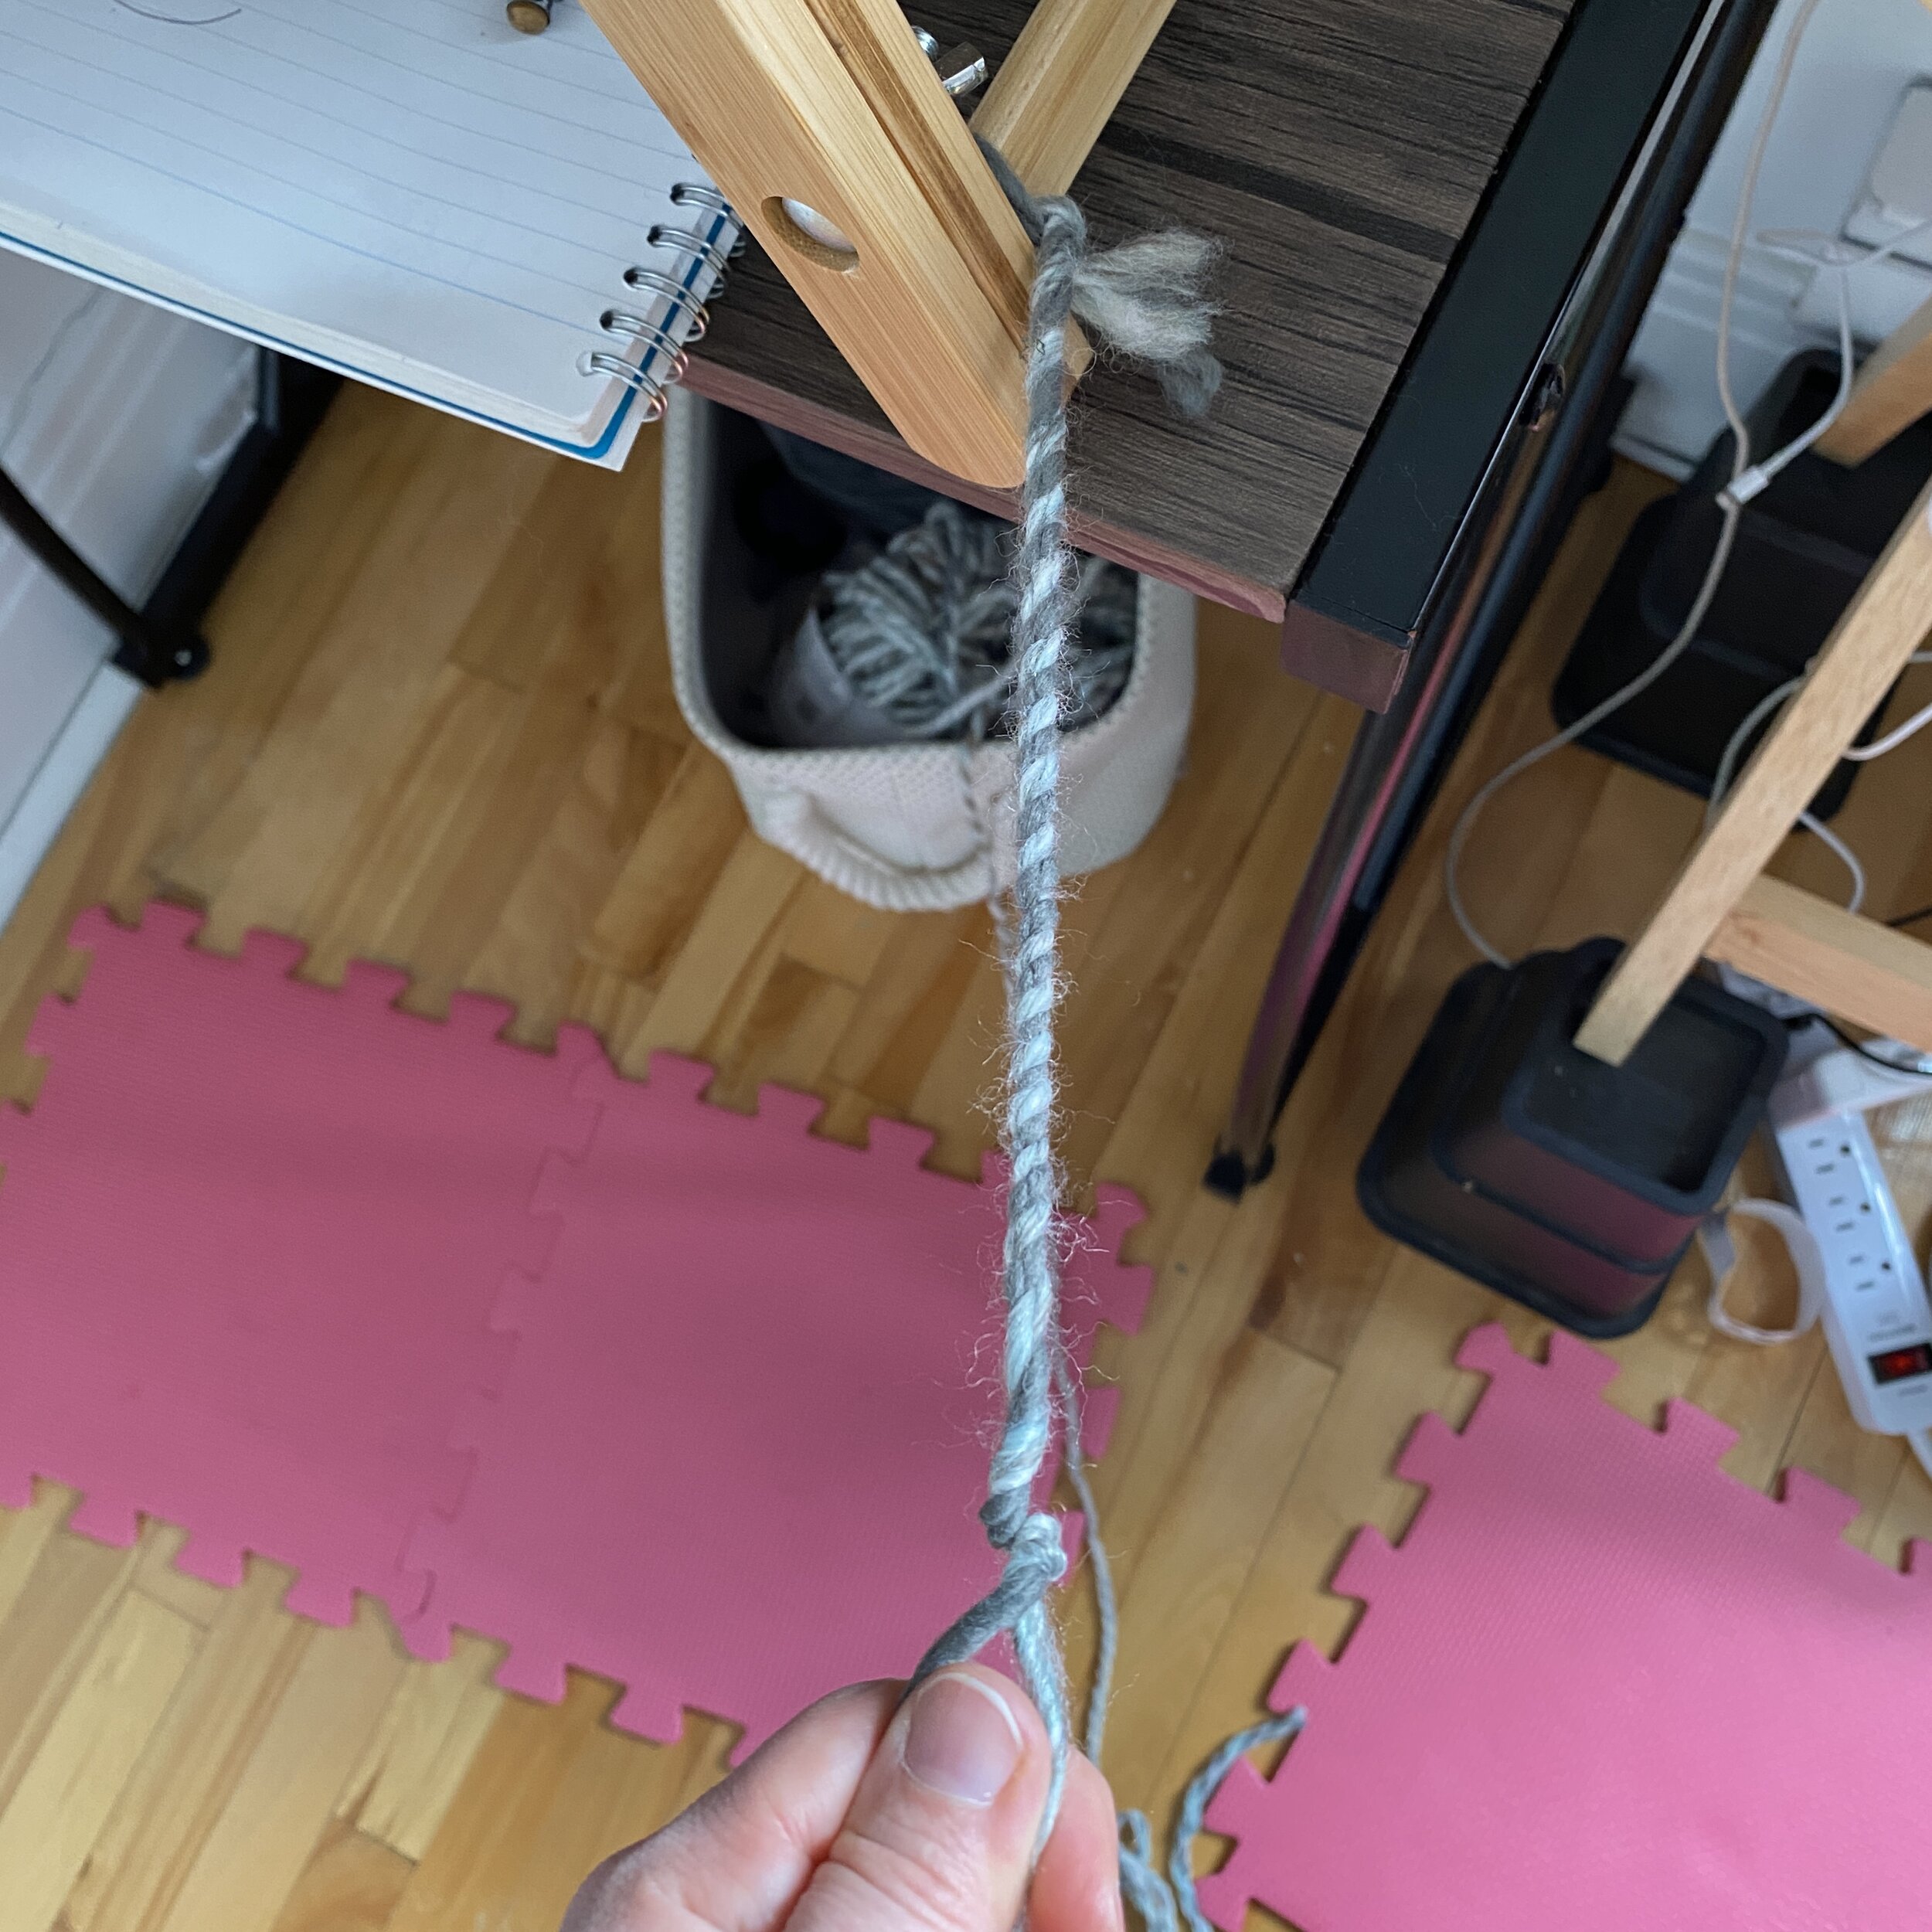
1. Take a long strand of each color (at least 50”) and holding the ends together, fasten the end to something sturdy. Twist the 2 strands together like you are braiding them until they start to twist back on themselves and you have about 42” of cord. Tie a knot on both ends. The cord will untwist into a nice 2 toned drawstring.
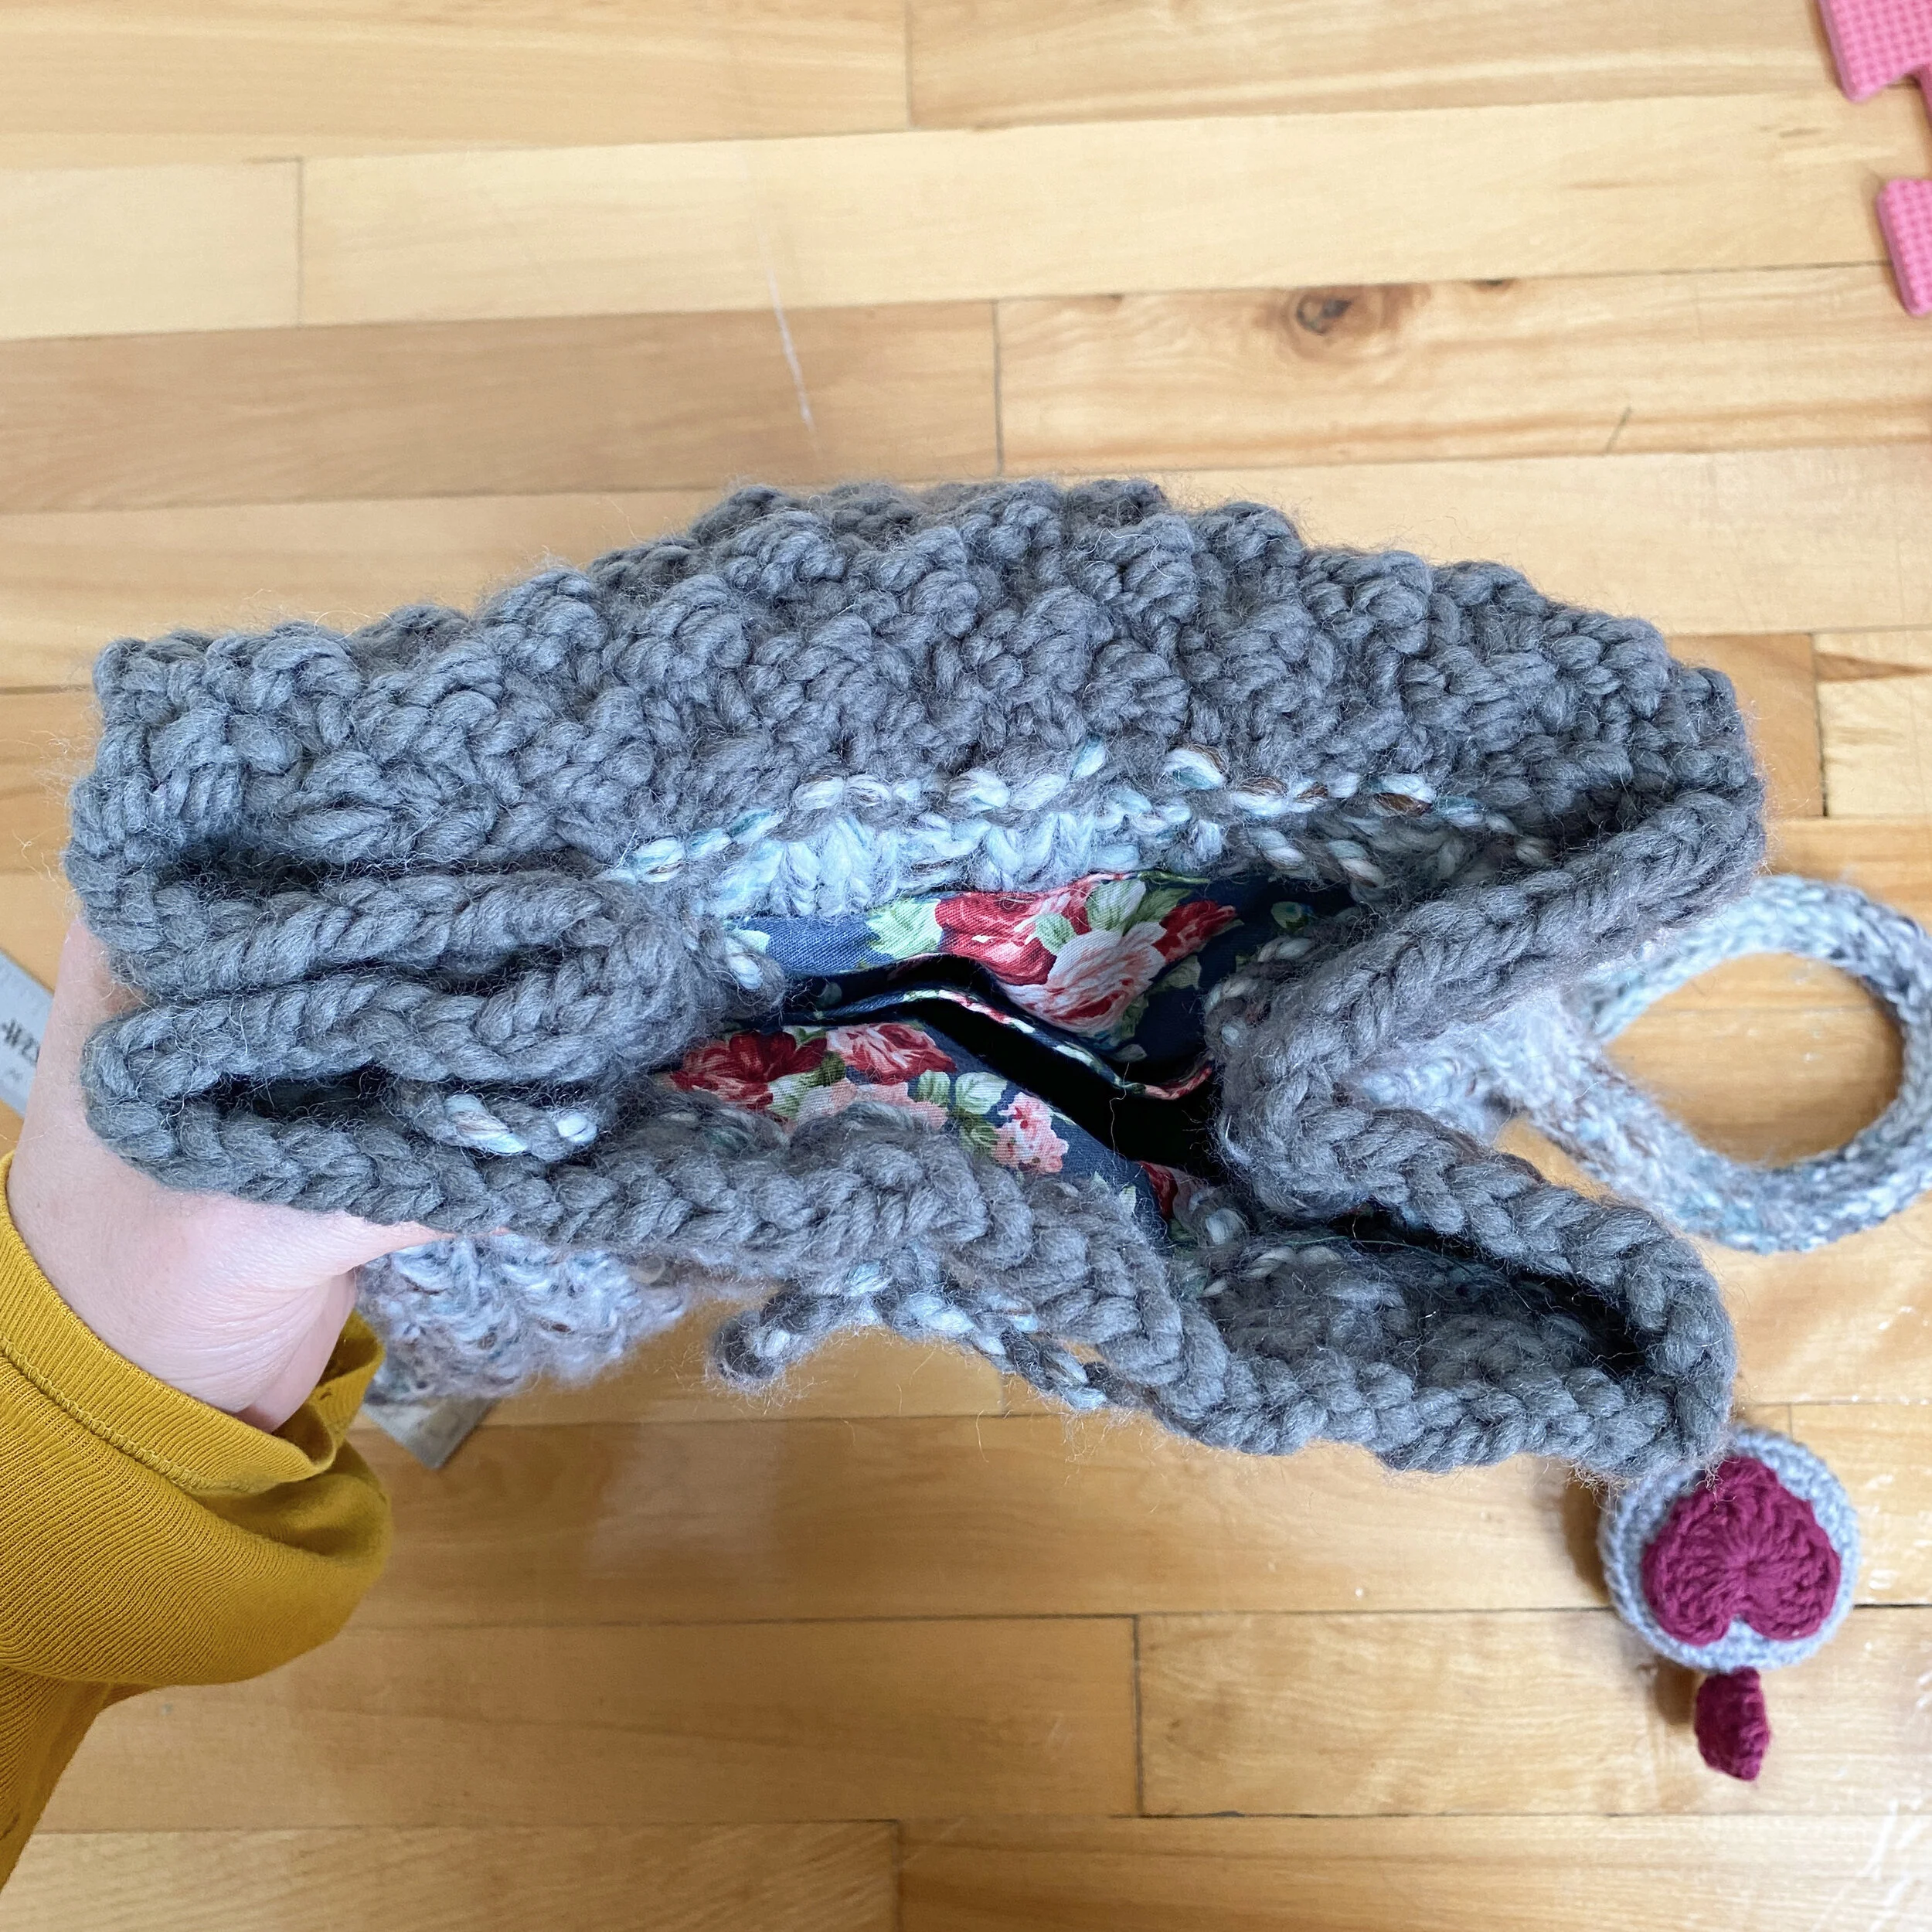
2. Fold your bag like the picture. The bag will naturally want to fold in on the sides.
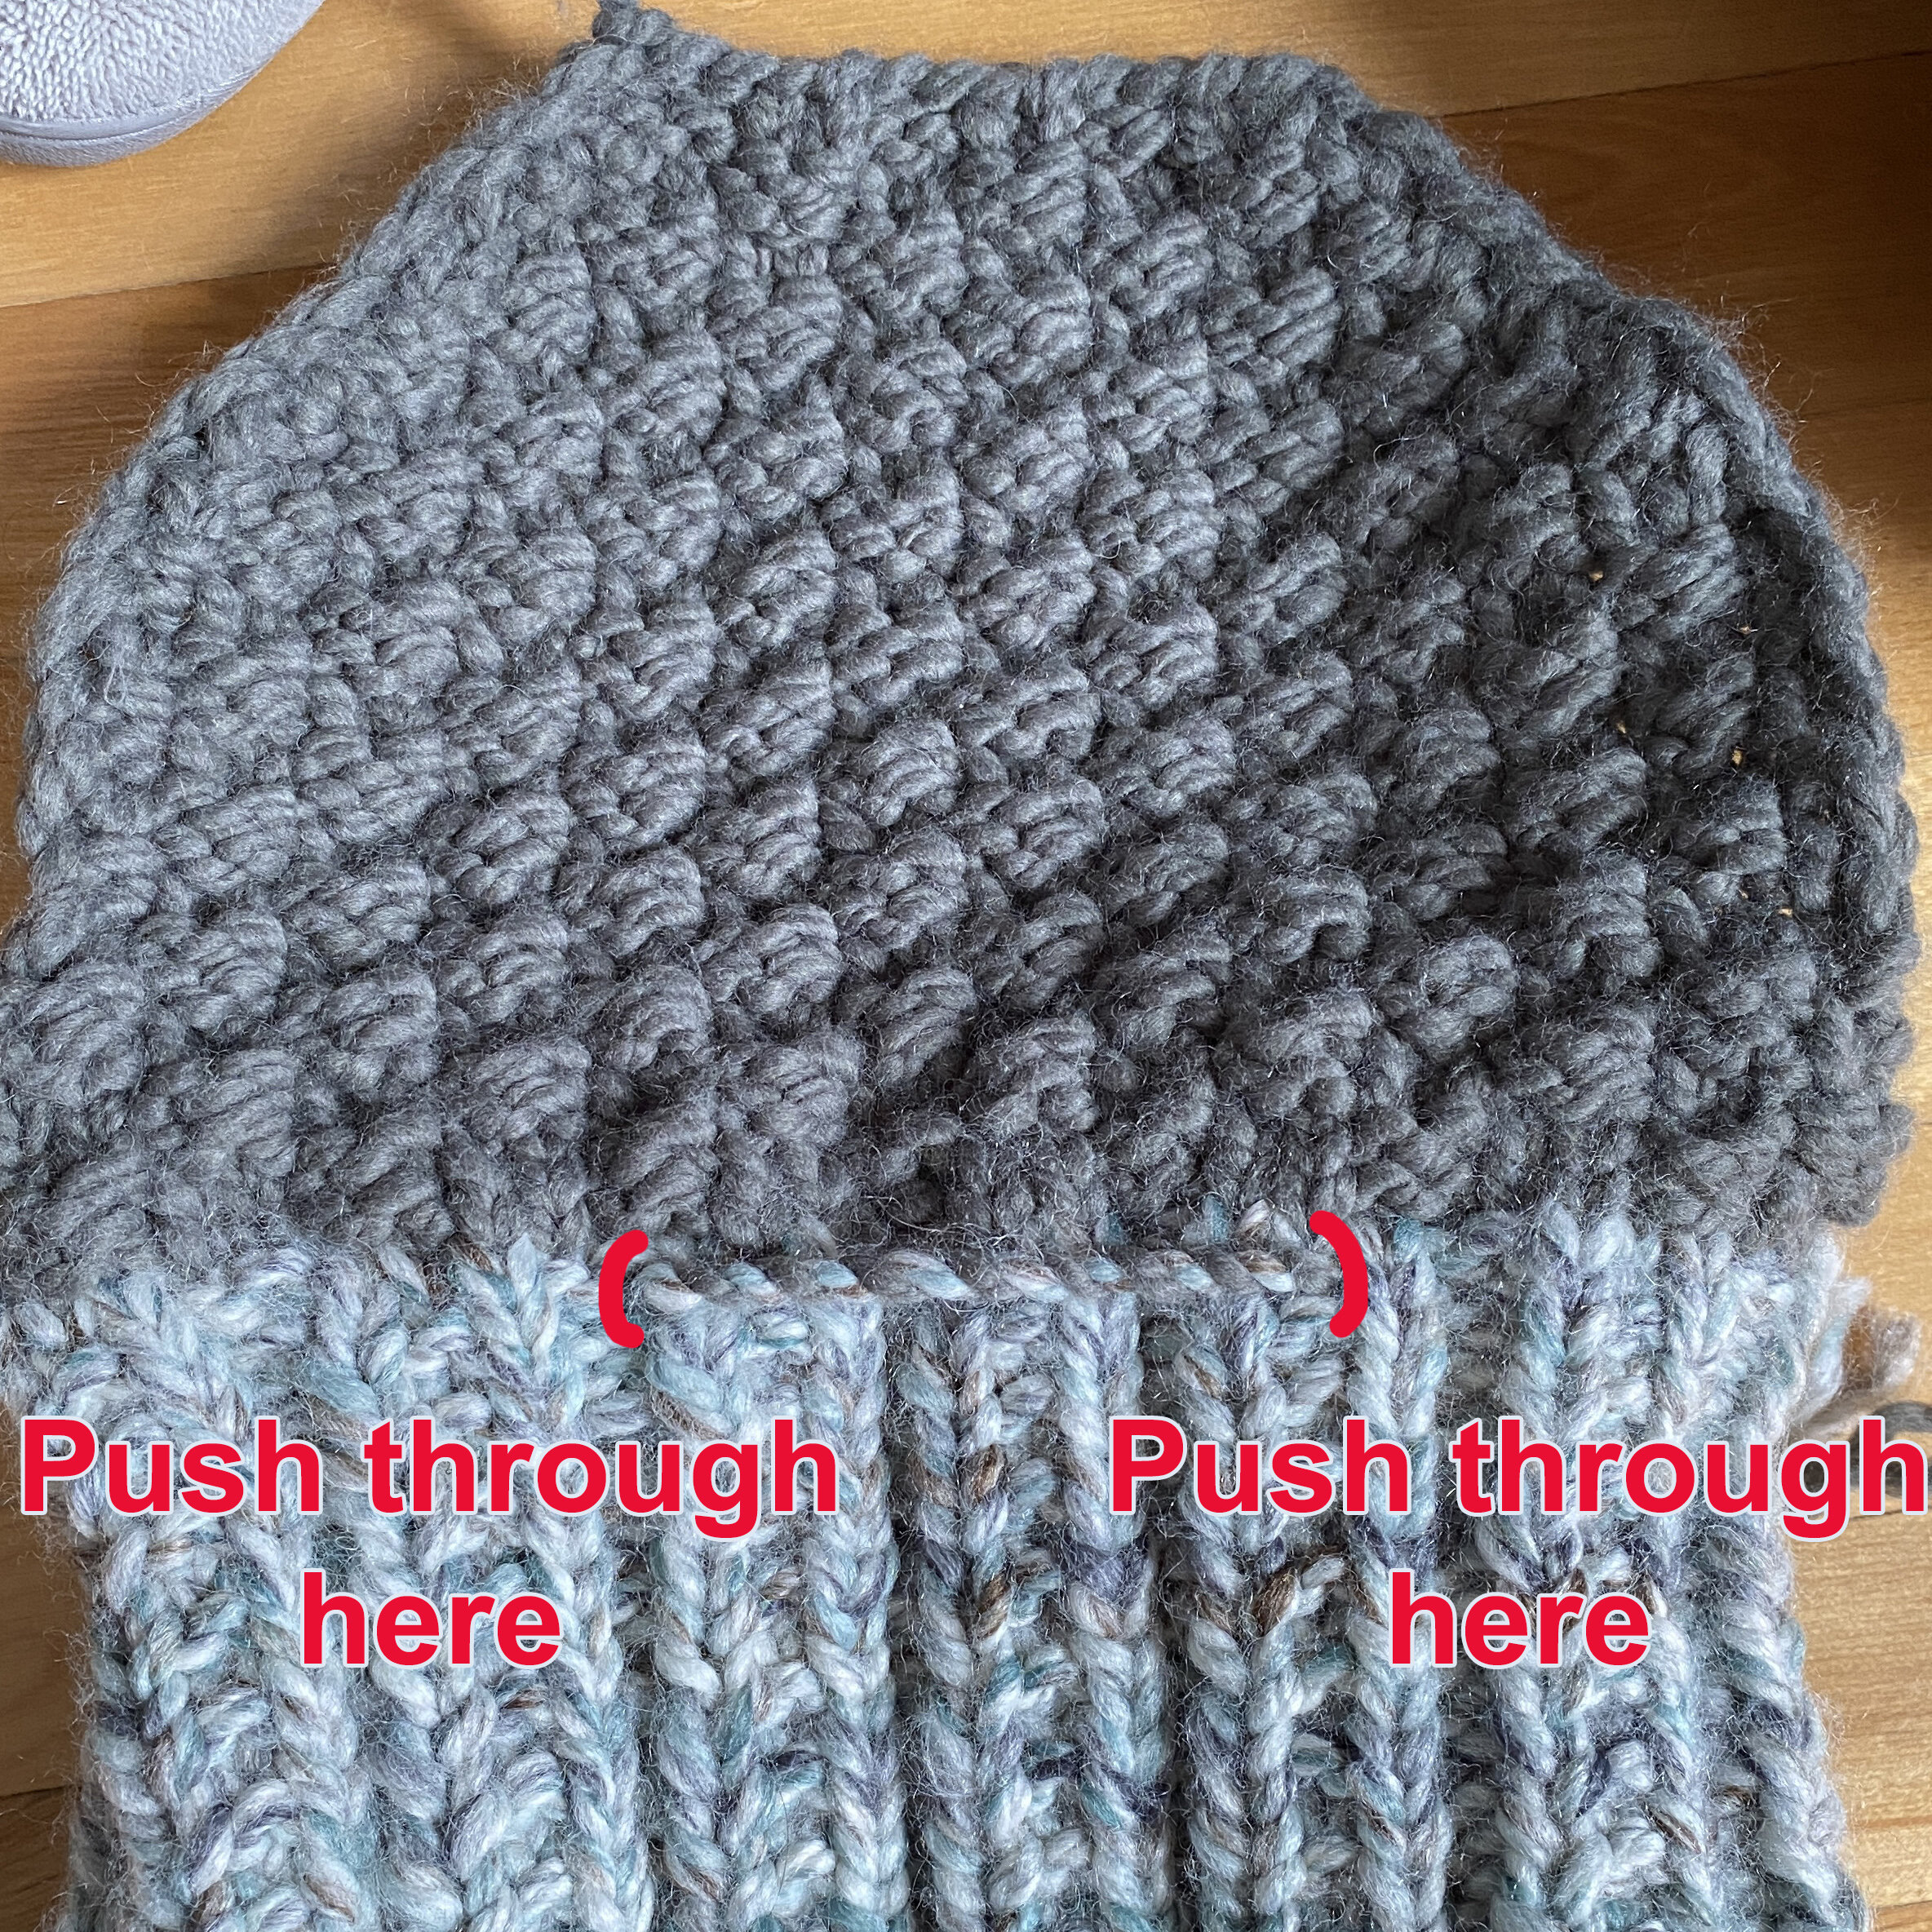
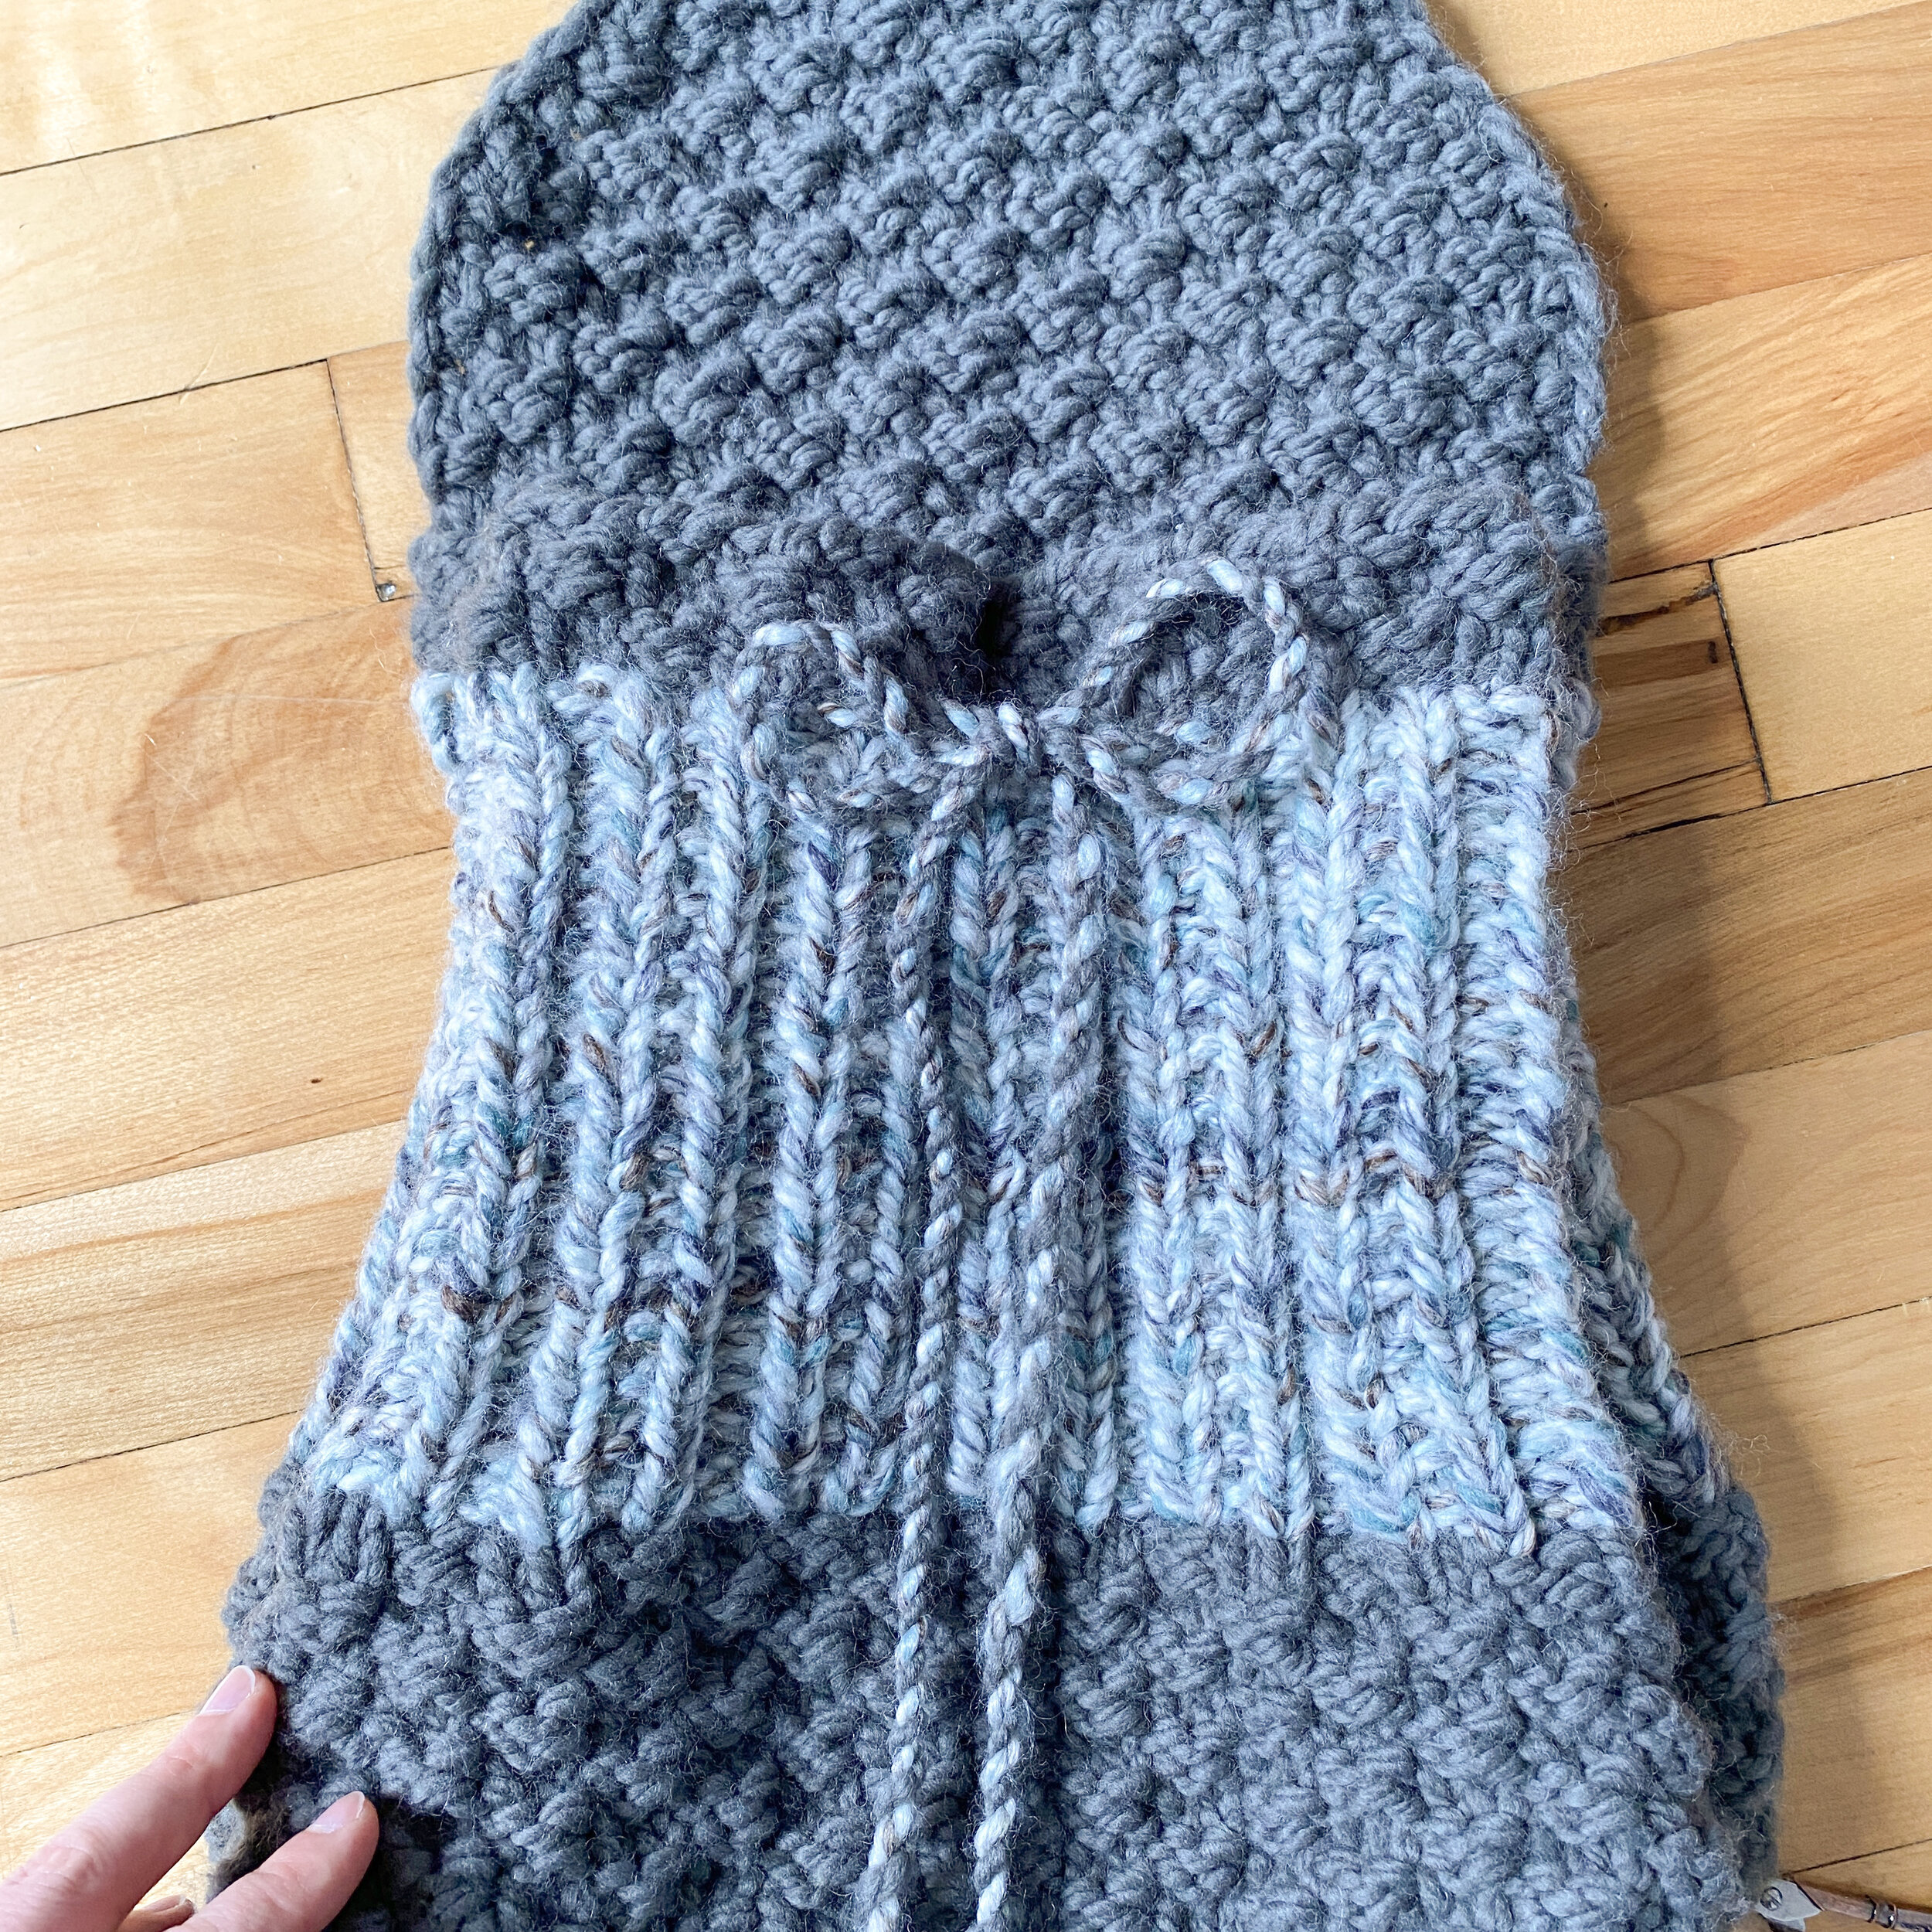
3. From the back, poke both ends of the drawstring through the bag.
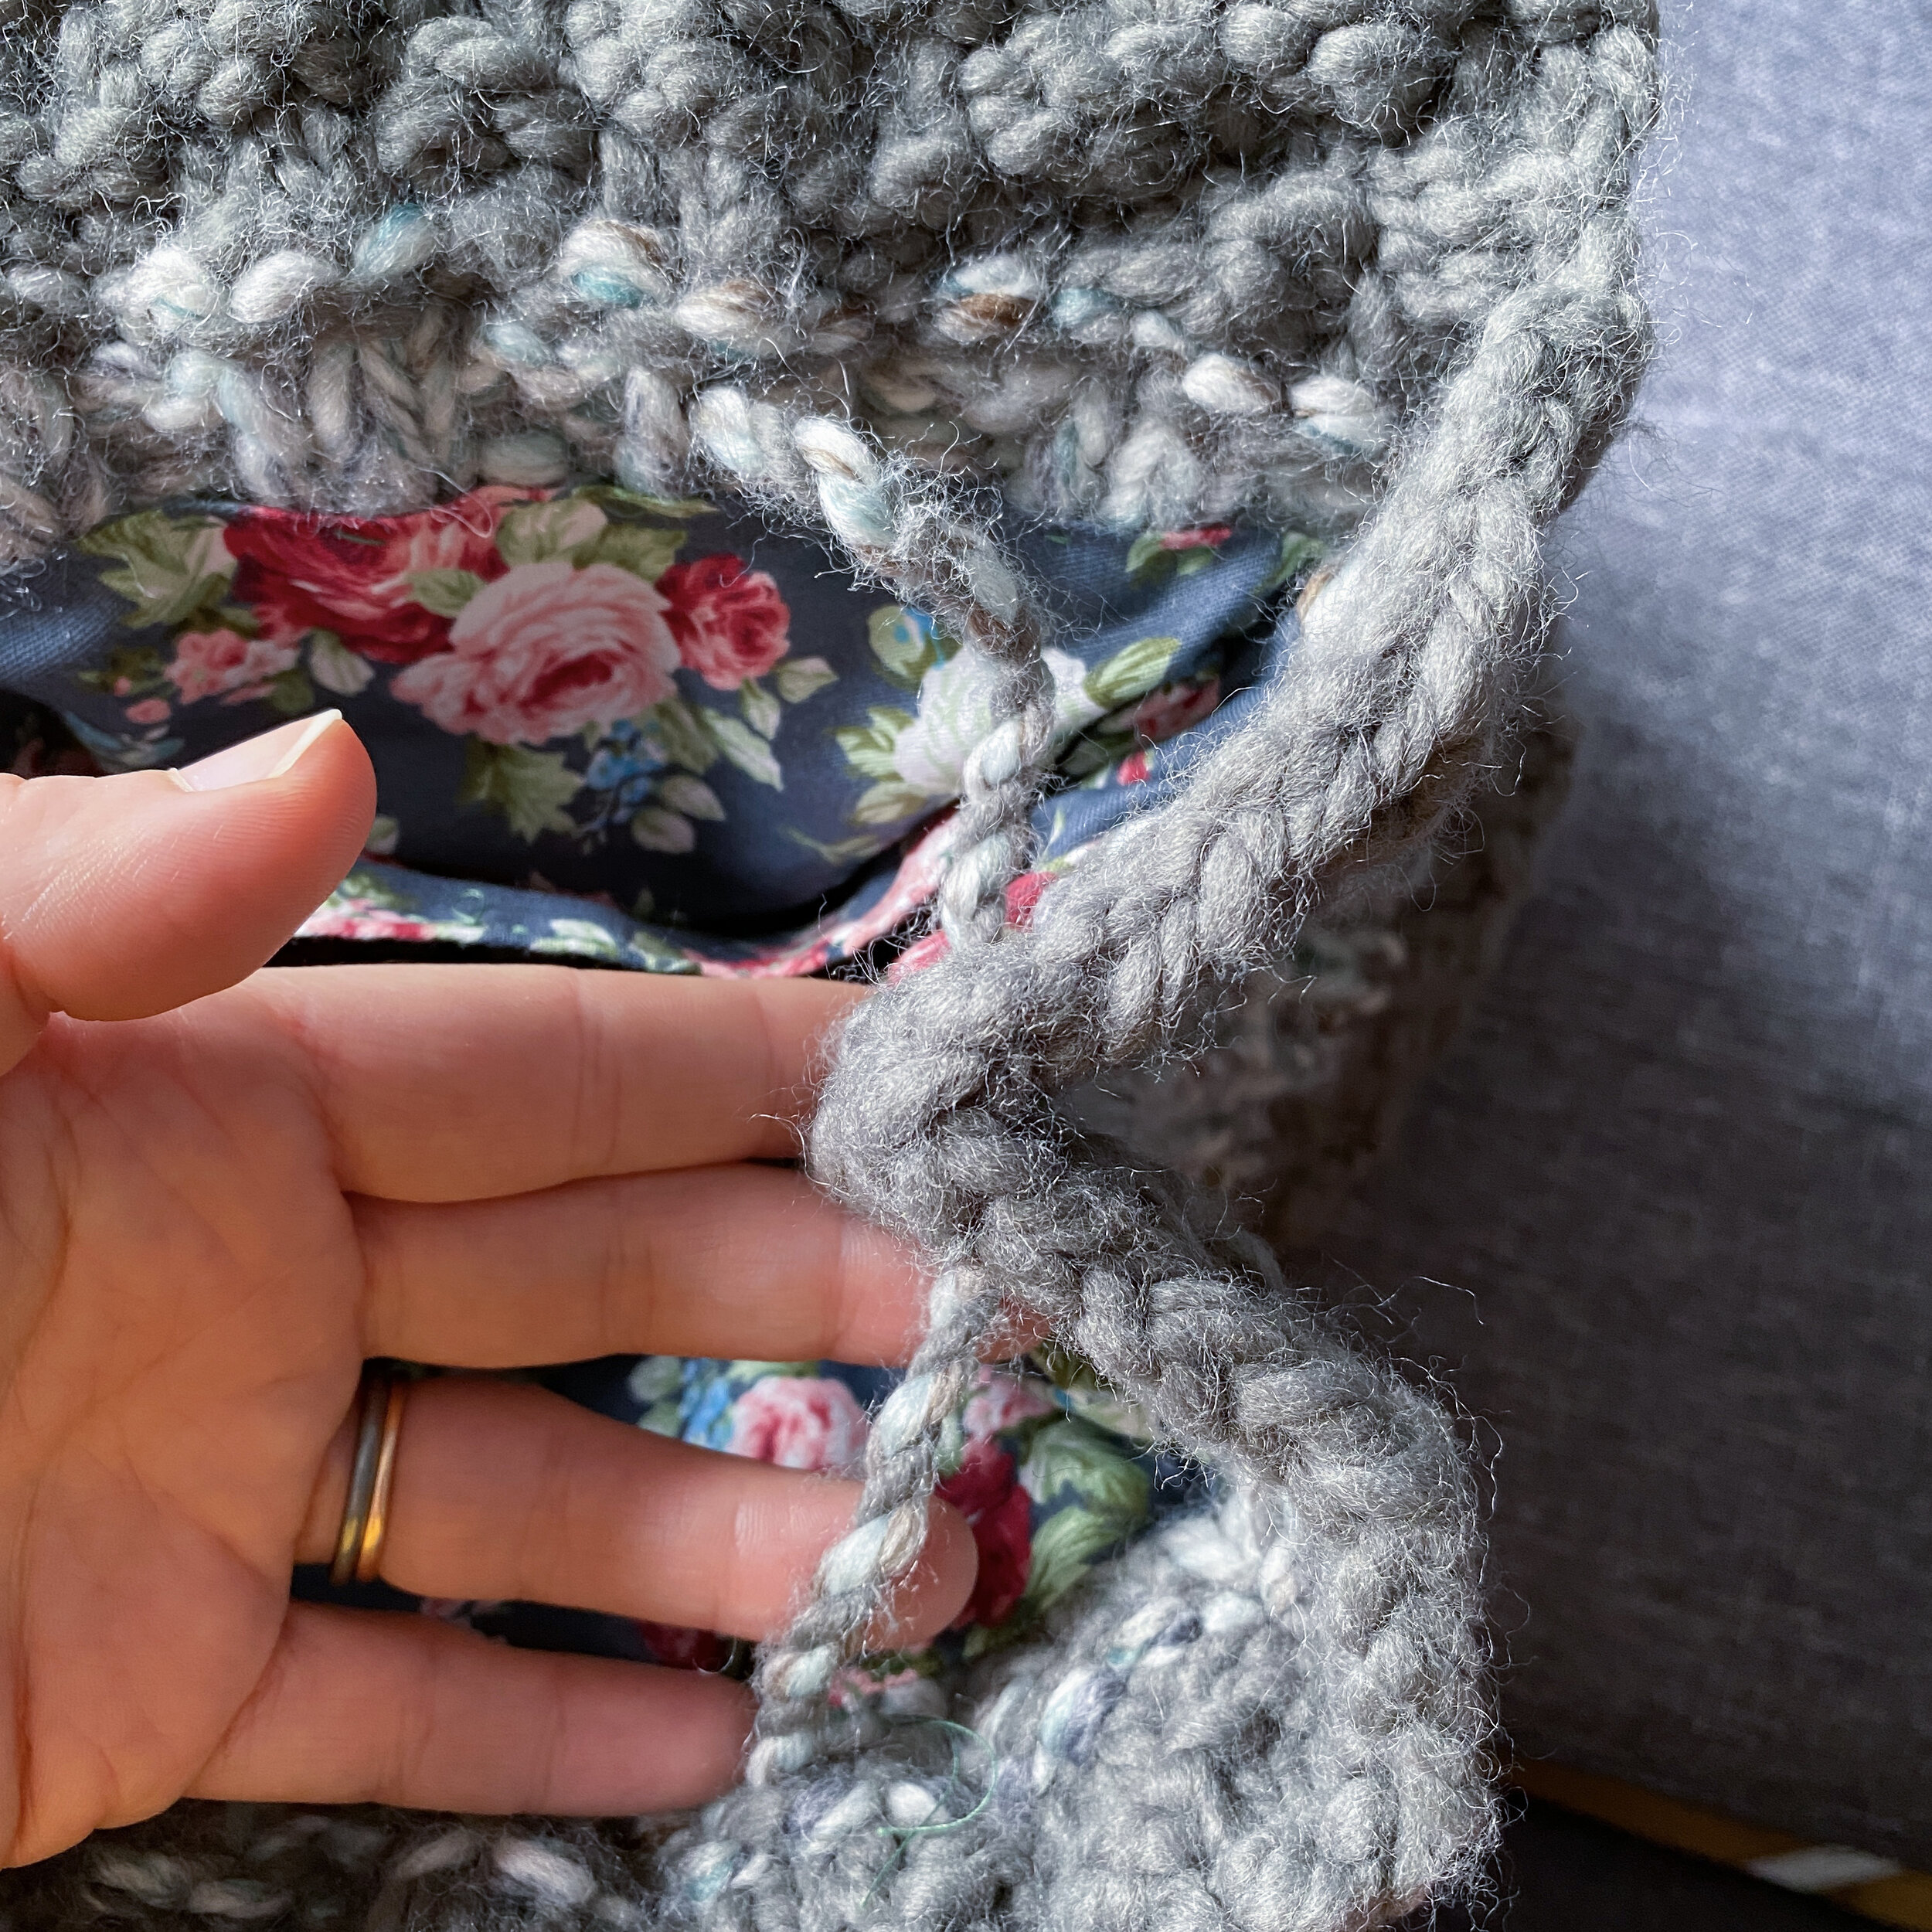
4. Pull the drawstrings through both sides of the corners of the fold.
5. Push both ends of the drawstring through the front at about the same place as it went through at the back and tie.
Optional Finishing:
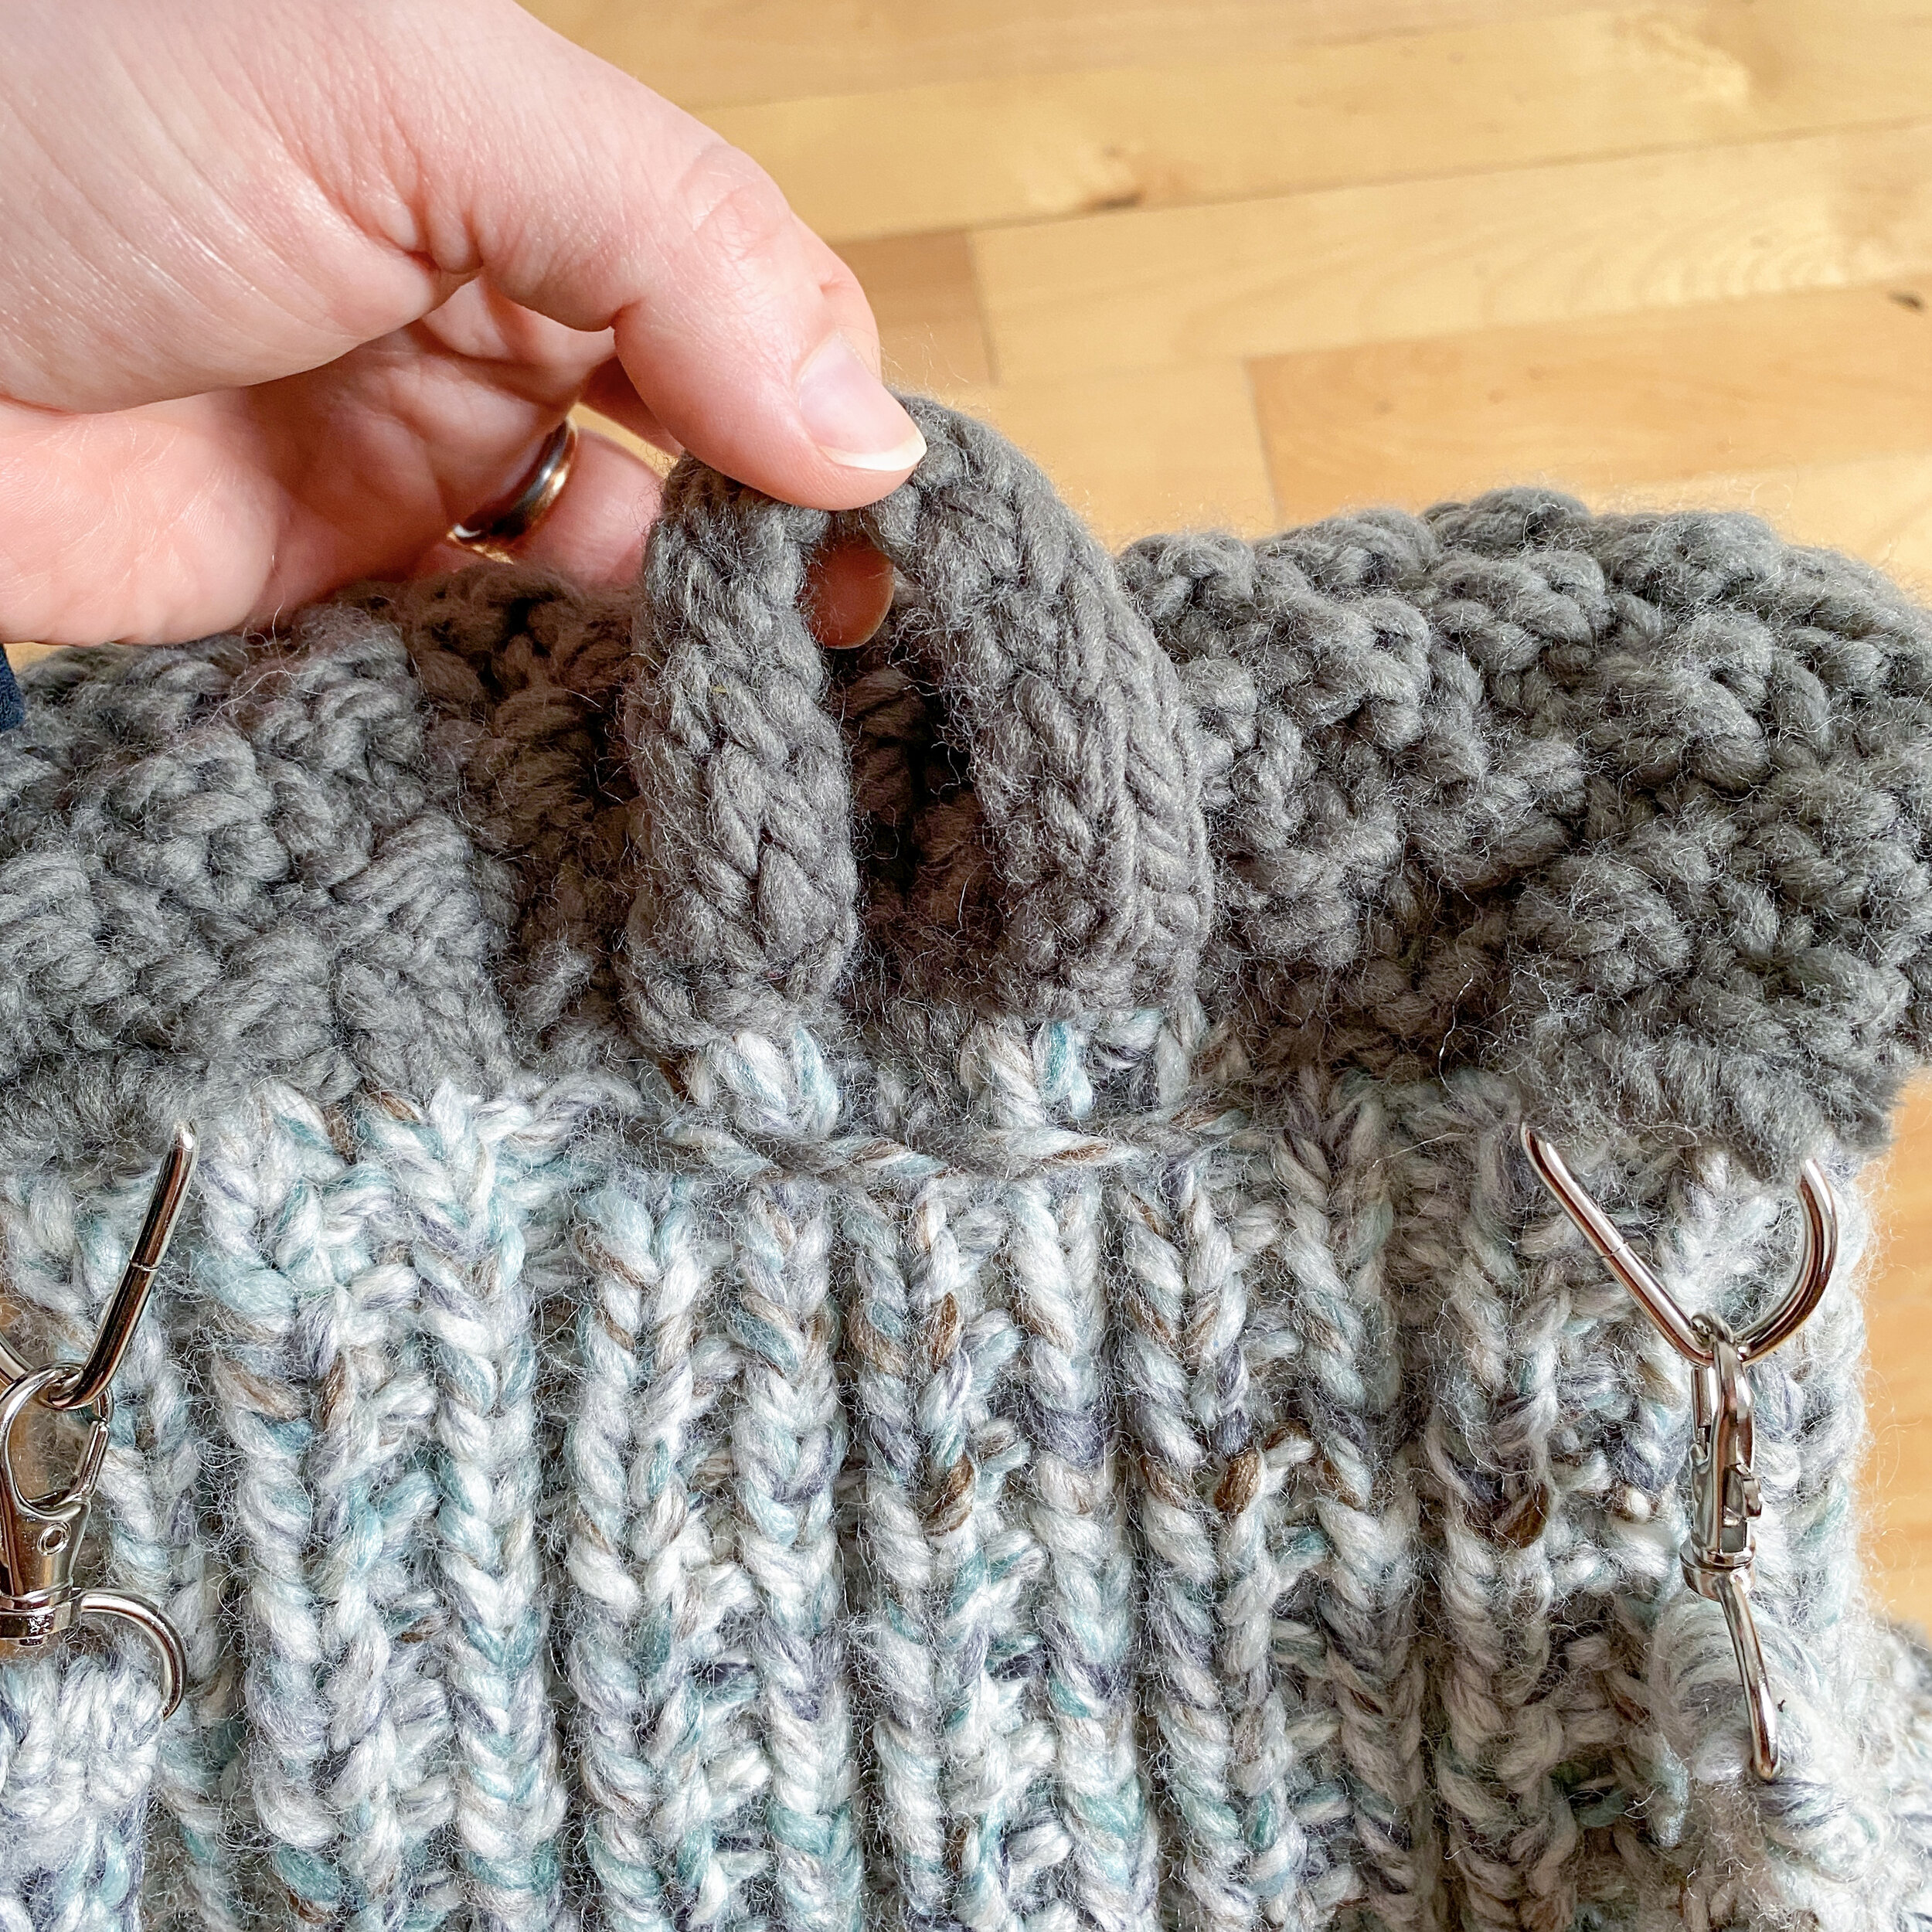
Hanger Loop:
CO 4 sts
Row 1: sl1wyib, k1, sl1wyib, sl1wyib
Row 2: p2, sl1wyif, p1
Row 3 - Row 24: rep Rows 1 - 2
BO
Sew the loop onto the back of the bag in the center above the MC.
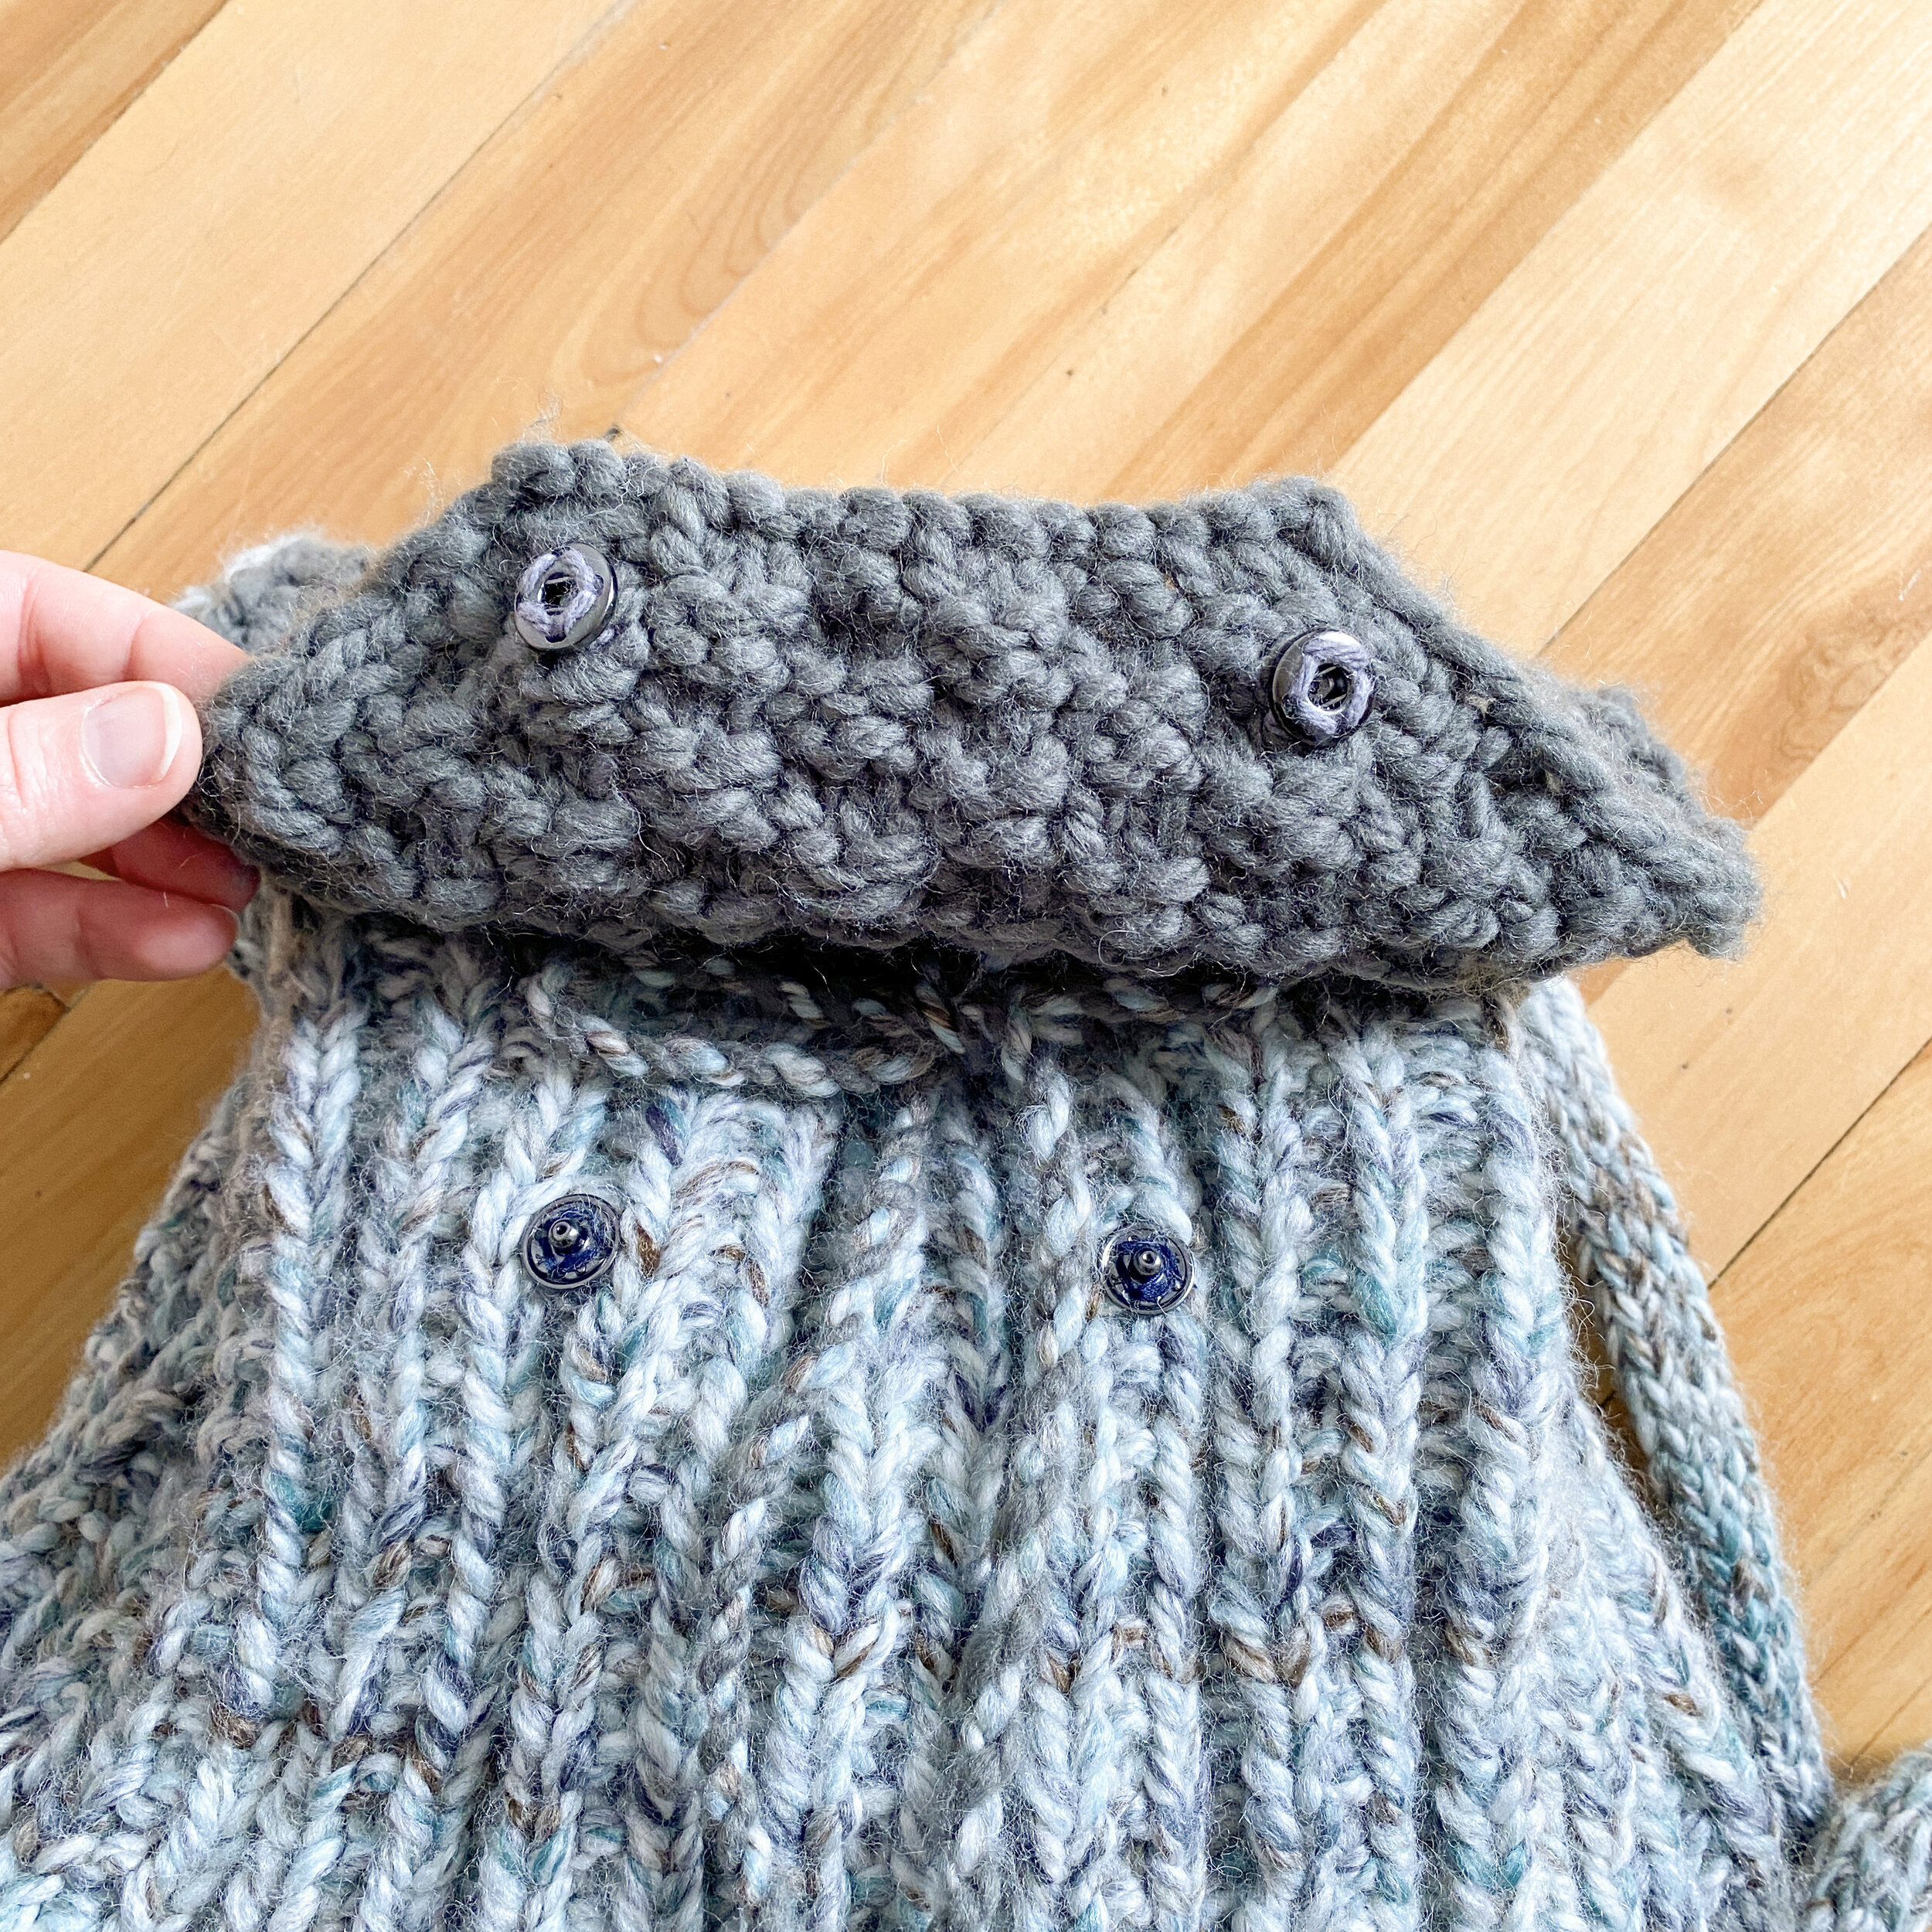
Closure:
I used snaps to fasten my bags flap, but you can use a buckle or buttons for your closure.

Lining:
After you have the drawstring through, you can feel free to add a lining to your bag if you’d like. It’s definitely not 100% necessary because the bag has good structure on it’s own. But, I had this really pretty fabric, so I decided to put one in my bag. I made my lining with a base that was 9.5” x 3.5”, 2 size panels that were 4” x 9”, and 2 front/back panels of 9.5” x 9”.

Pin to Pinterest
Happy knitting!
IF YOU LIKED THIS PATTERN, PLEASE SUPPORT ME ON PATREON OR BUY ME A COFFEE!

BUY ME A COFFEE
SUPPORT ME ON PATREON
I LOVE TO SEE WHAT YOU CREATE!
Please share your creations with the community on social media tagging @ravinsekaidesigns and hashtag #marbleandbricks
I can’t wait to see the beautiful things you come up with!
FOLLOW ME ON SOCIAL MEDIA
Facebook: Ravin Sekai Designs
Ravelry: RavinSekai
Instagram: @ravinsekaidesigns
Pinterest: Ravin Sekai Designs
Patreon: Ravin Sekai Designs

Hi! I’m Rachel.
I’m a quirky world traveller, avid knitter, crochet lover, pattern maker, and all around nerd! I spend a lot of time clowning around, and I often have the goofiest smile on my face. This website is the landing place for my new patterns, random thoughts, and general craziness. I hope you enjoy my randomness and my yarnie goodness!
Archive
- LGBTQ+
- PRIDE
- accessories
- accessory
- asymmetrical
- autumn
- backpack
- bag
- beach
- beanie
- bias shawl
- blanket
- blog hop
- blue
- bobble
- bookbag
- boyfriend
- cardigan
- case
- celtic weave stitch
- clutch
- clutch bag
- collaboration
- color block
- color work
- cover
- cover-up
- cowl
- crochet
- crochet pattern
- crochetpattern
- crop top
- croptop
- decor
- diy
- dress
- ds case
- duster
- earwarmer
- easy
- fall
- festivaltop
- free pattern
- gauge
- ghost
- granny squares
- halloween
- handbag
- hat
- headband