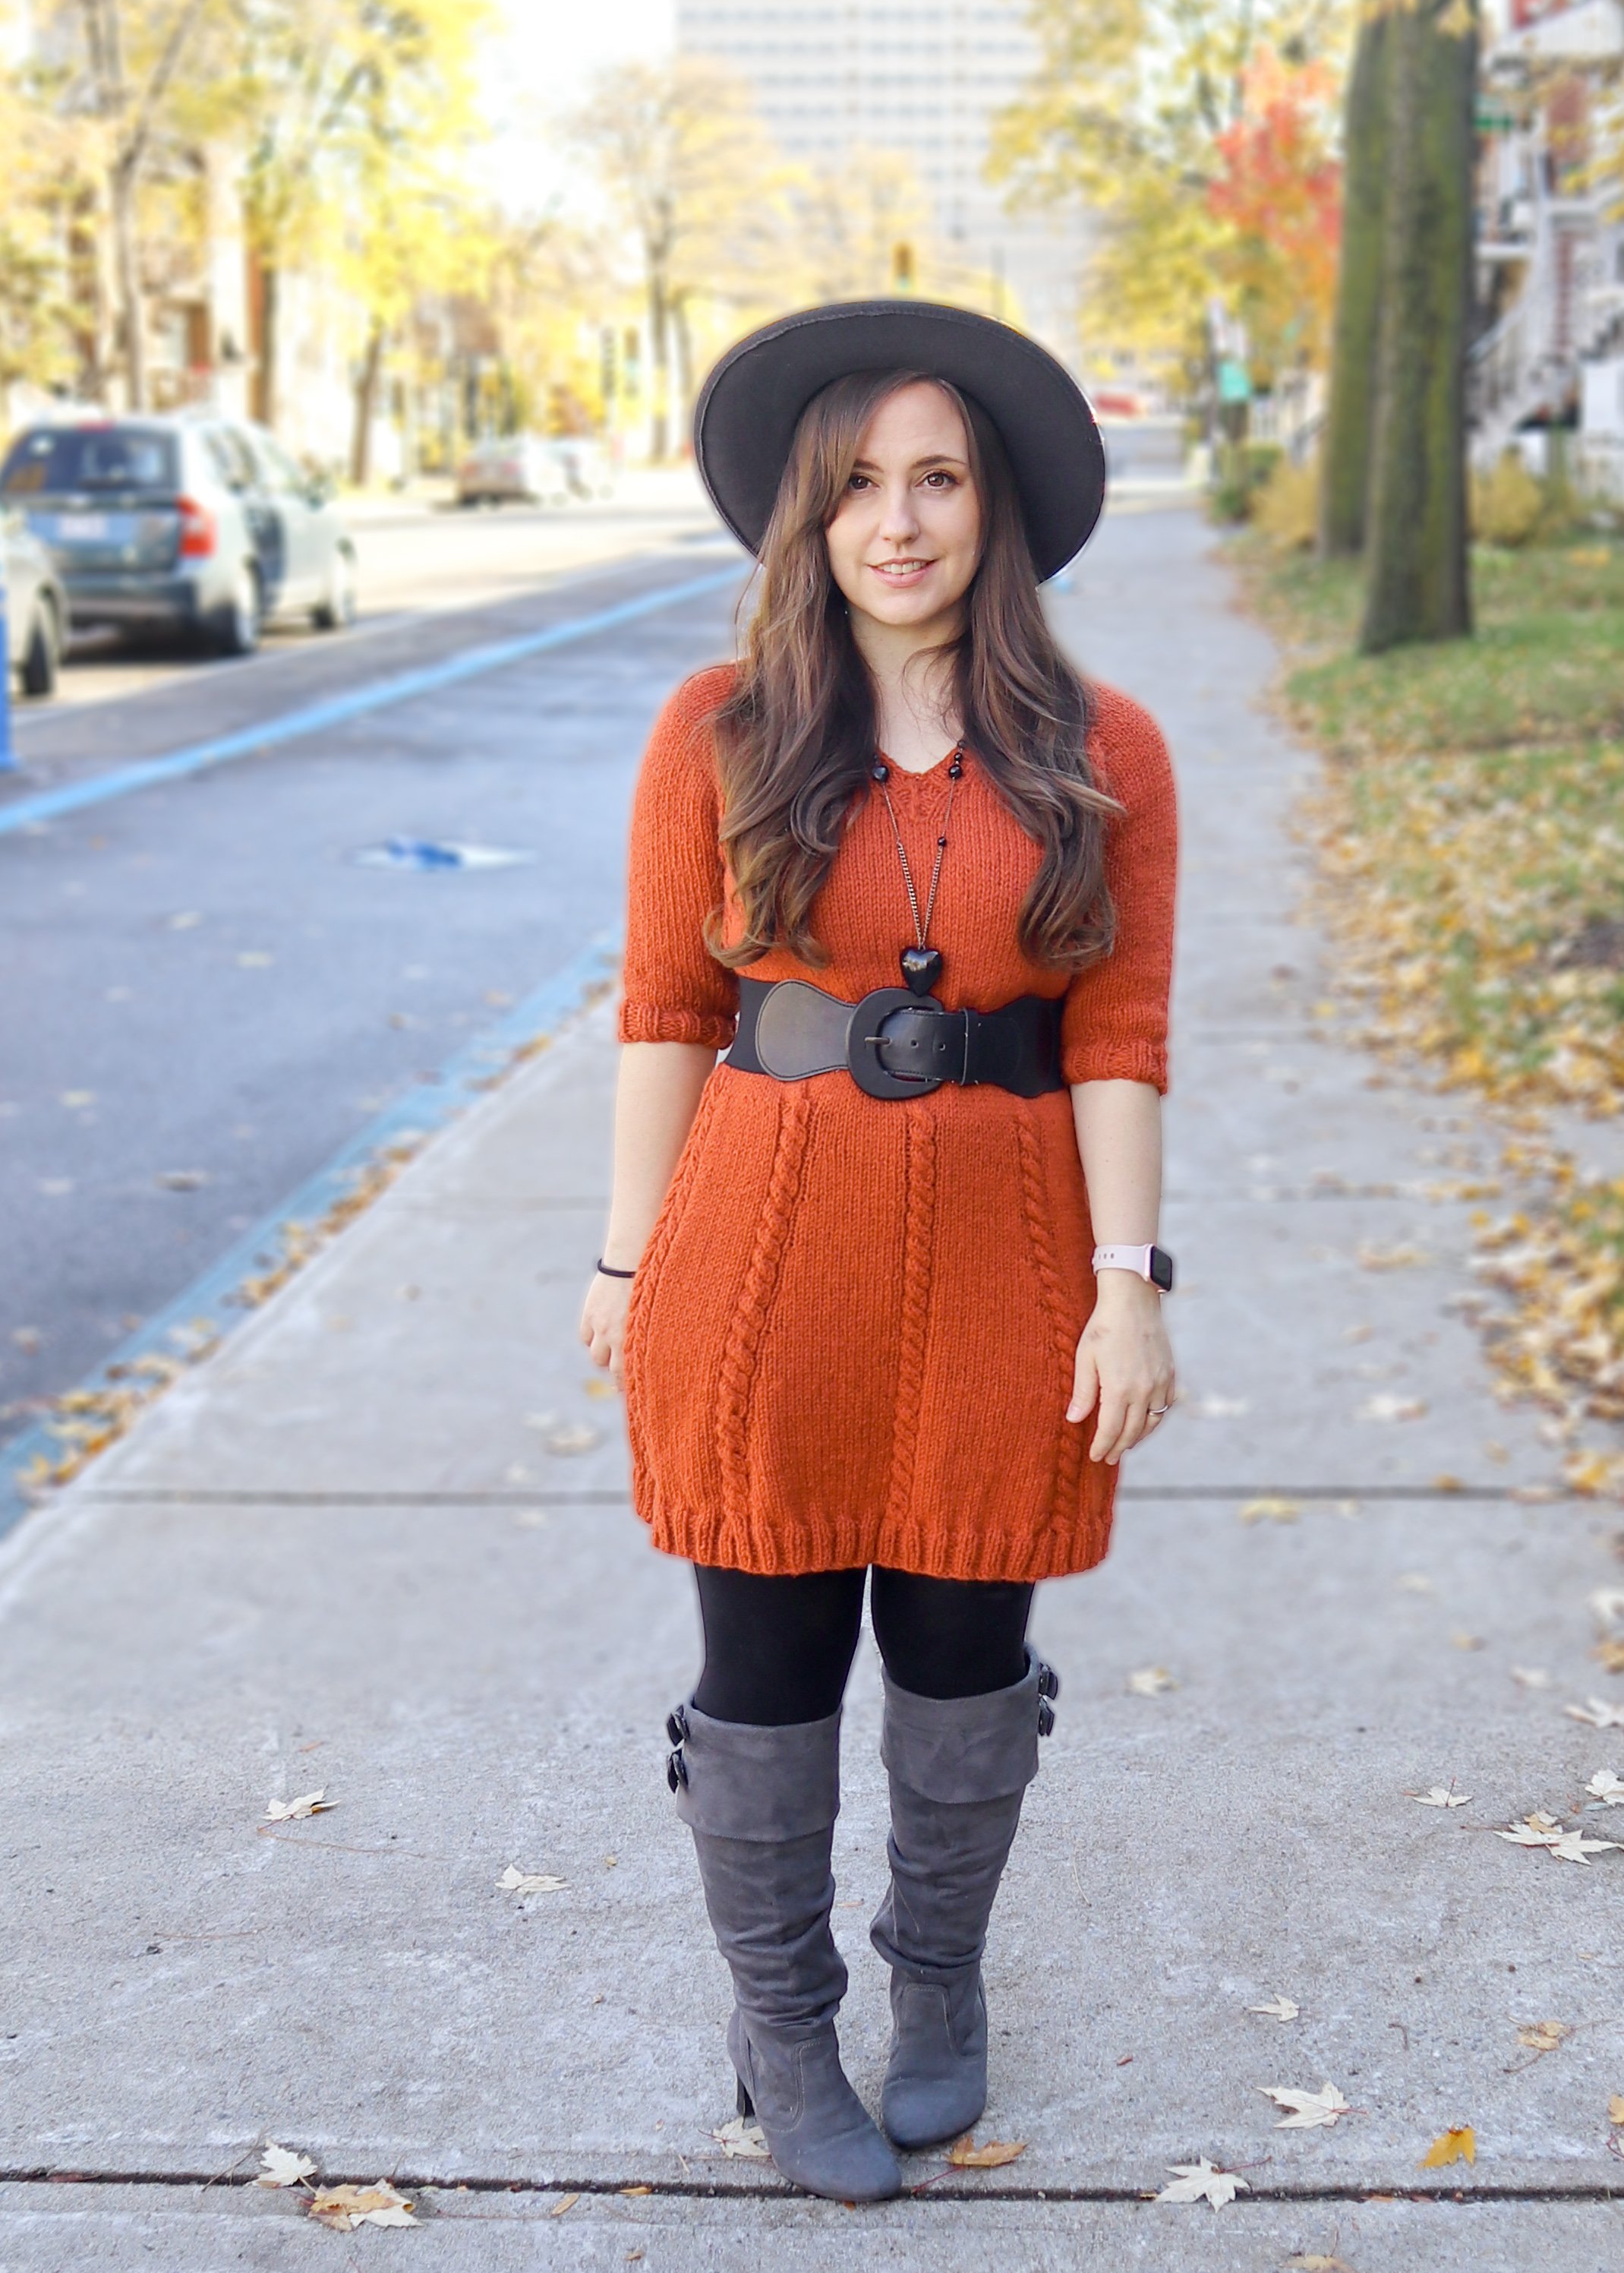
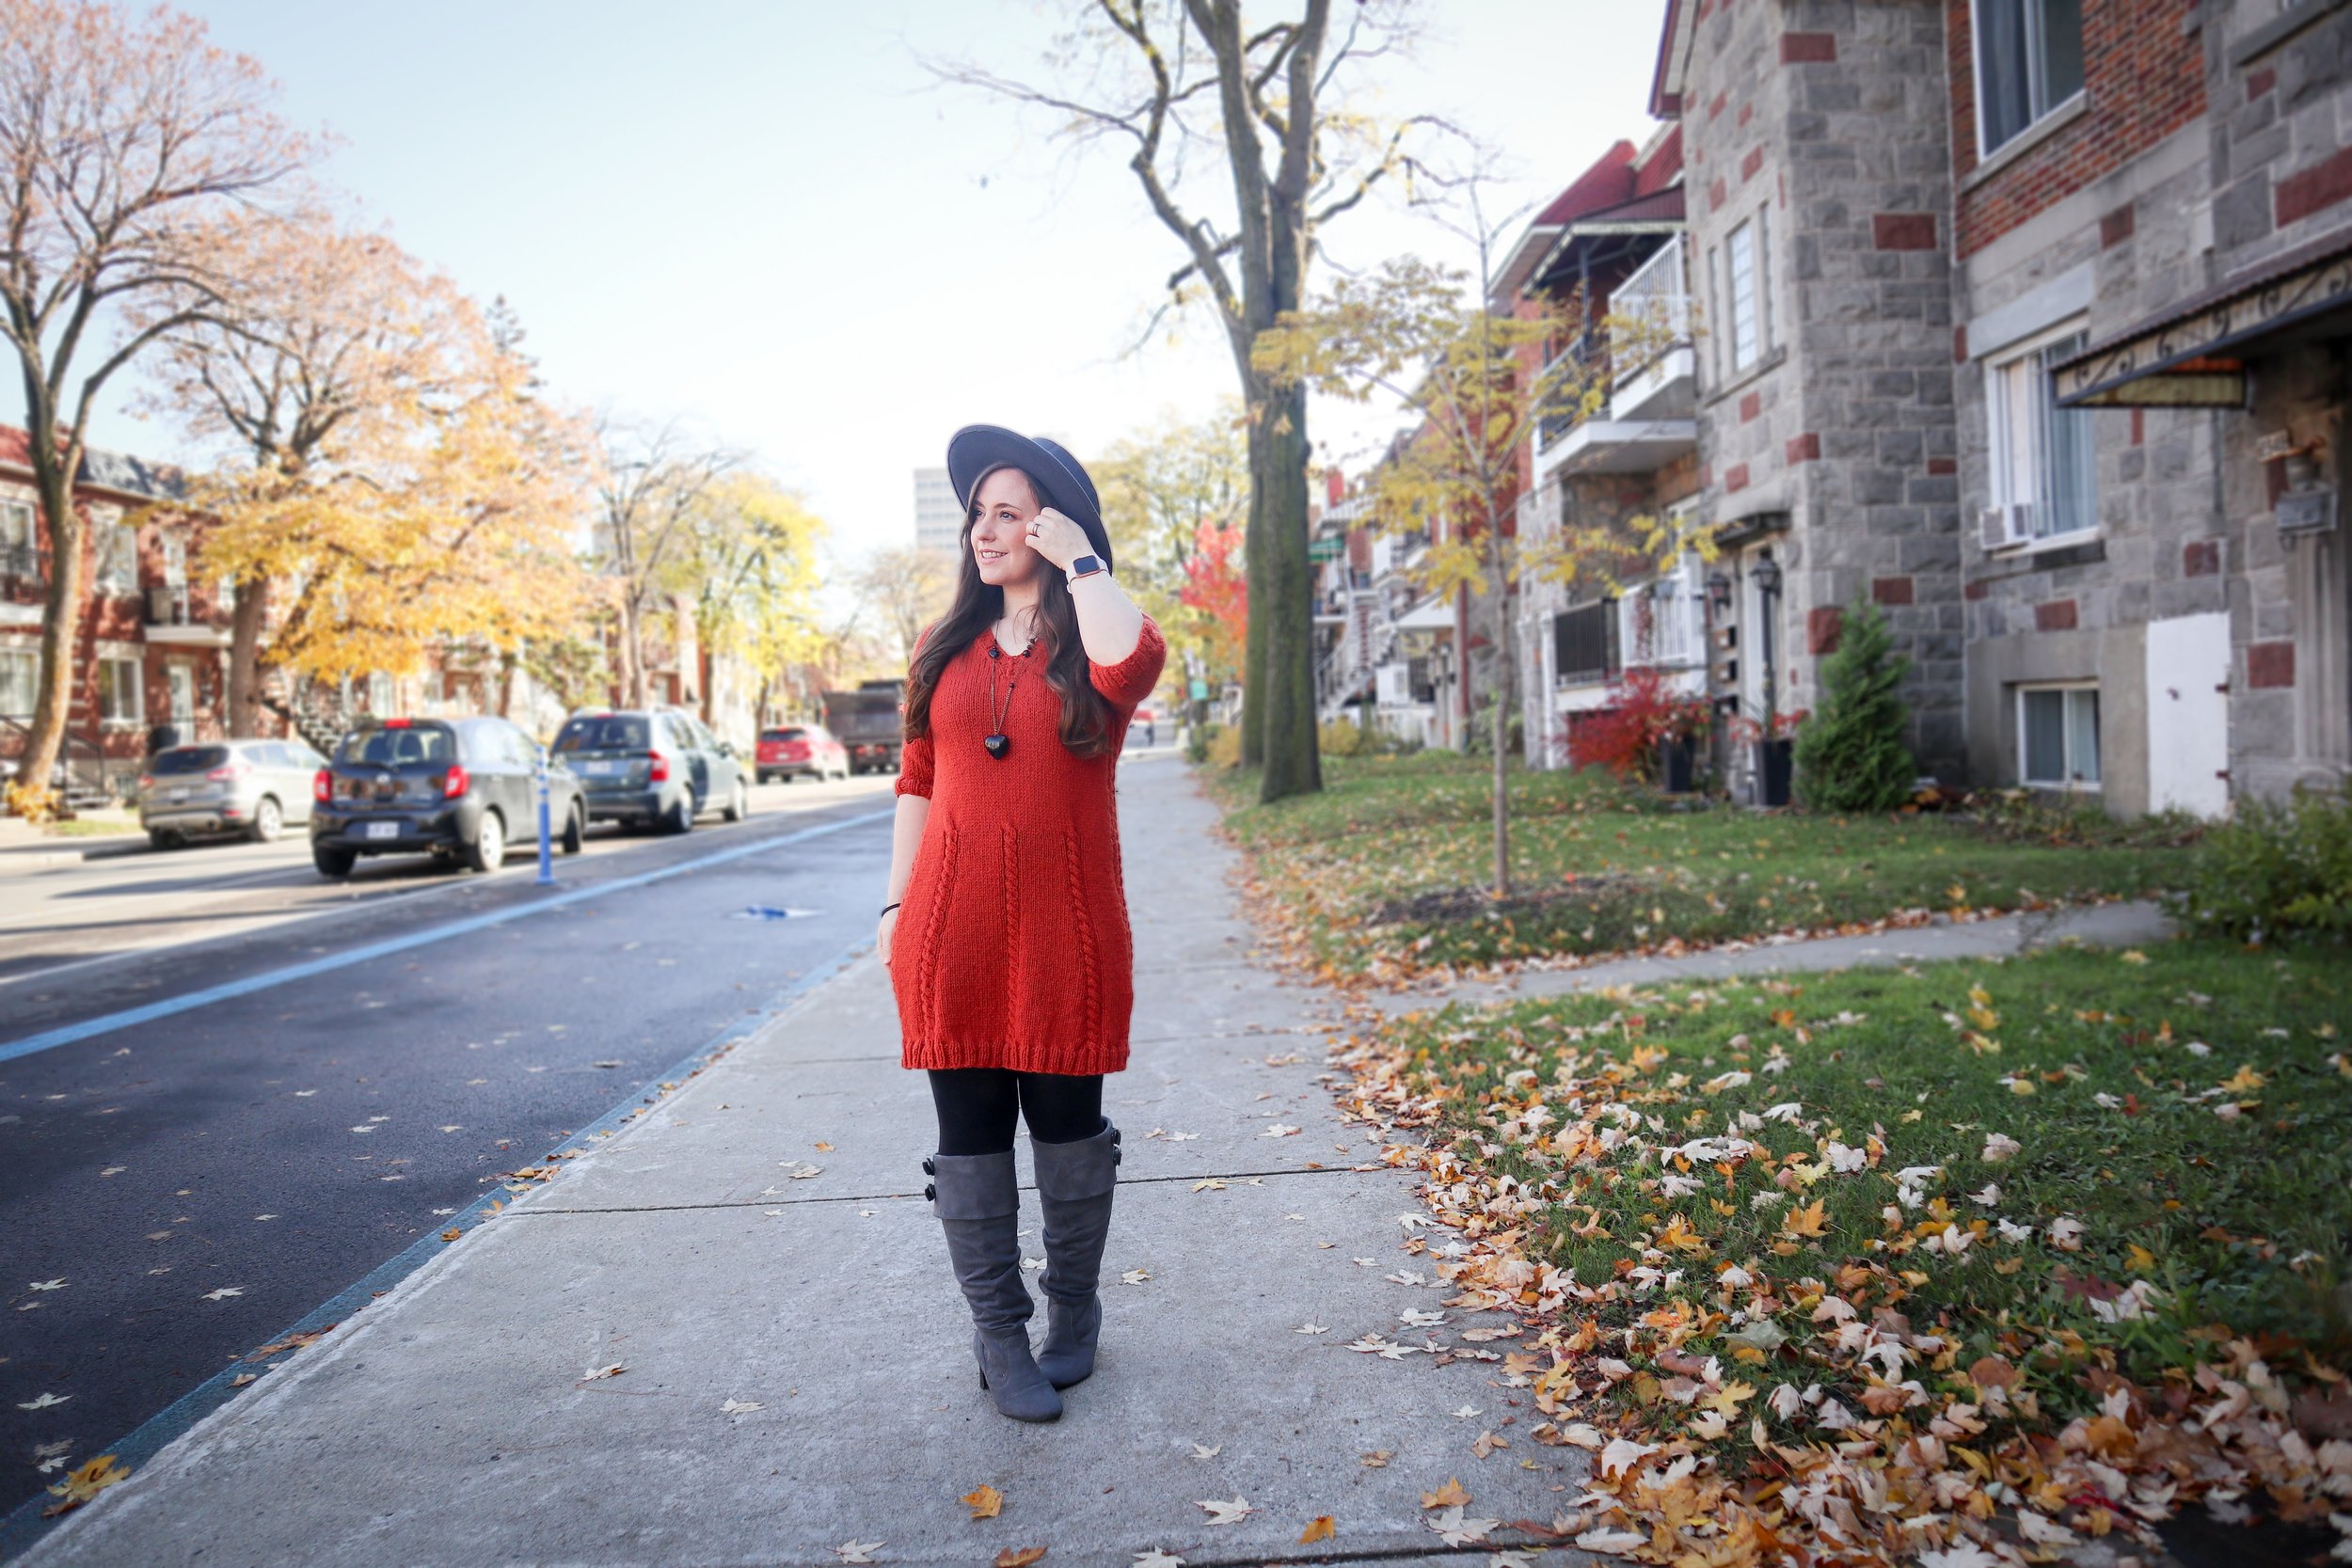
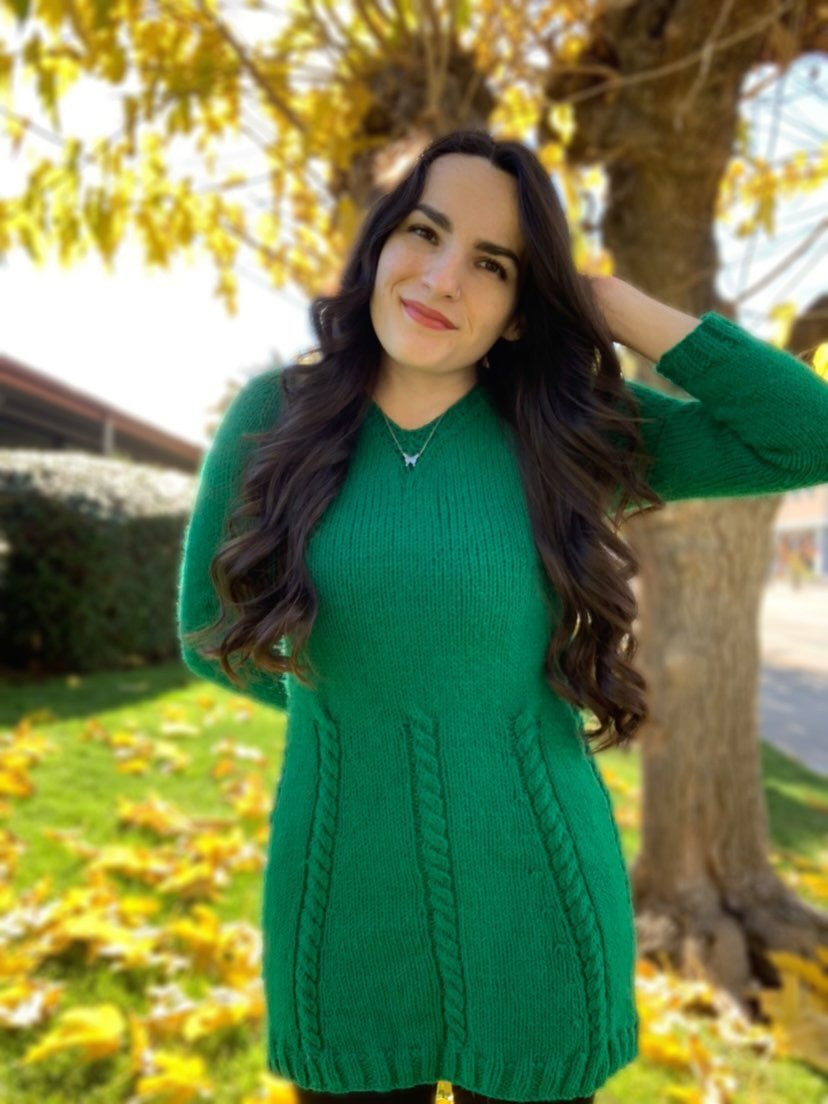
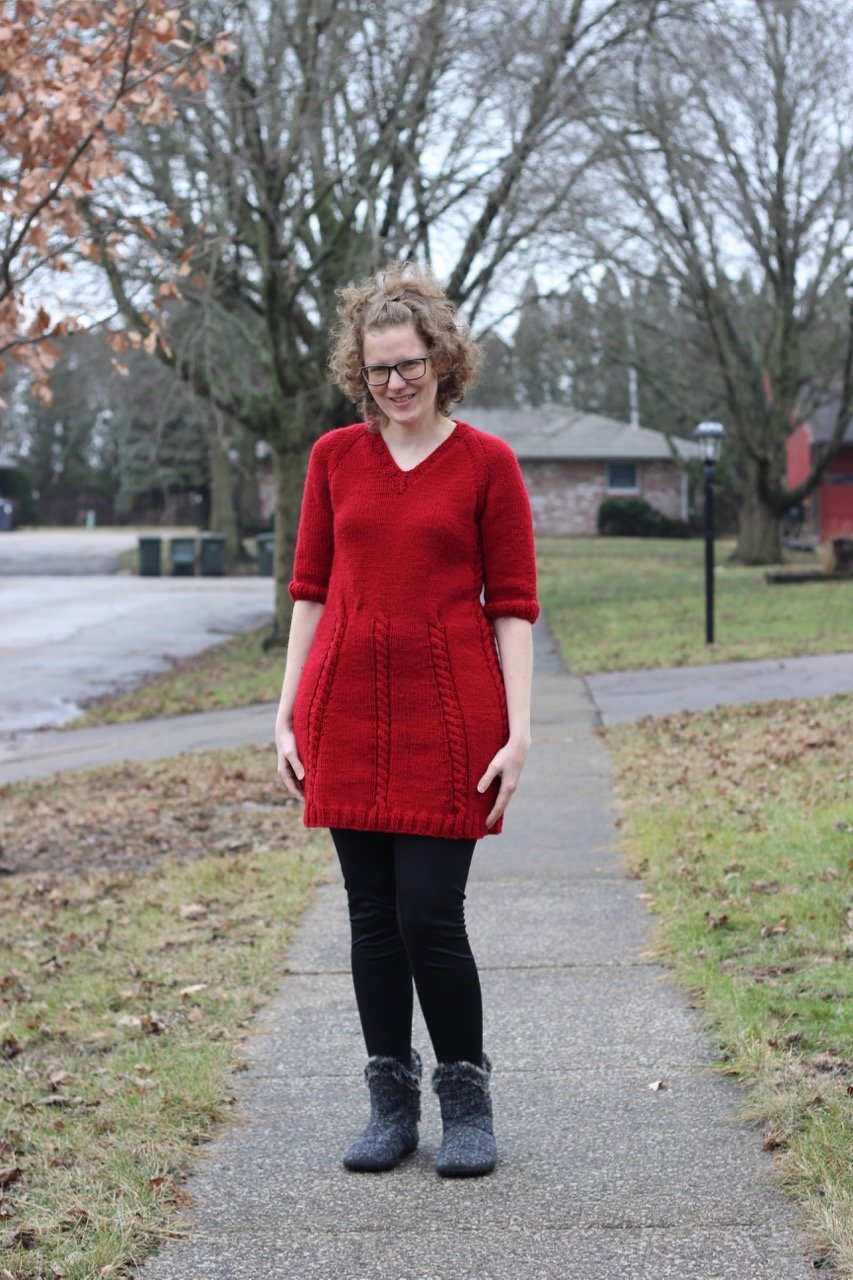
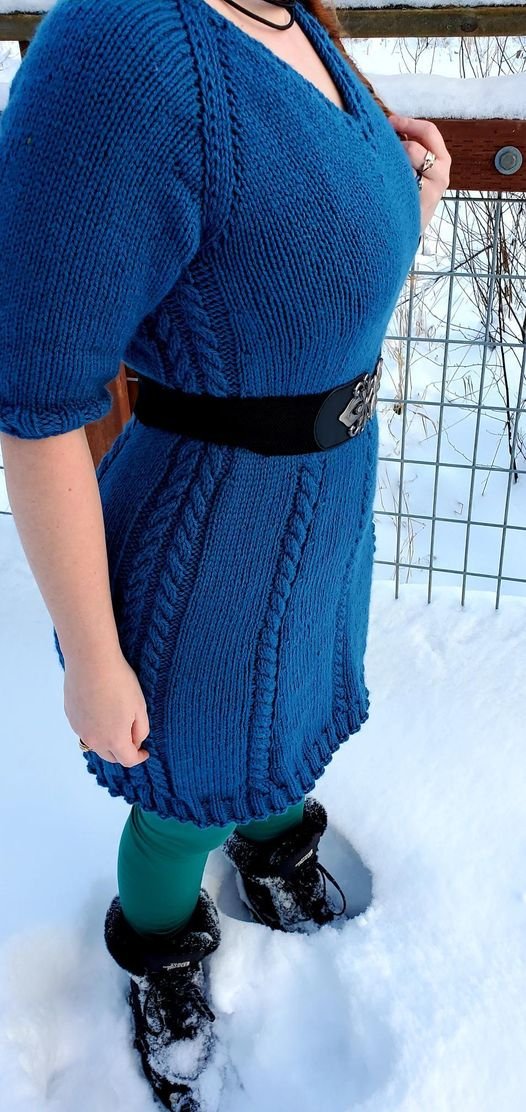
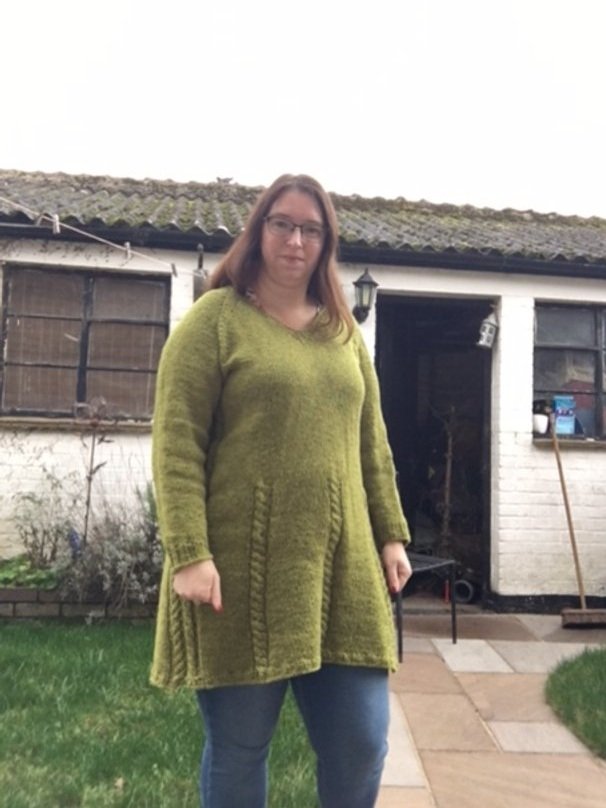
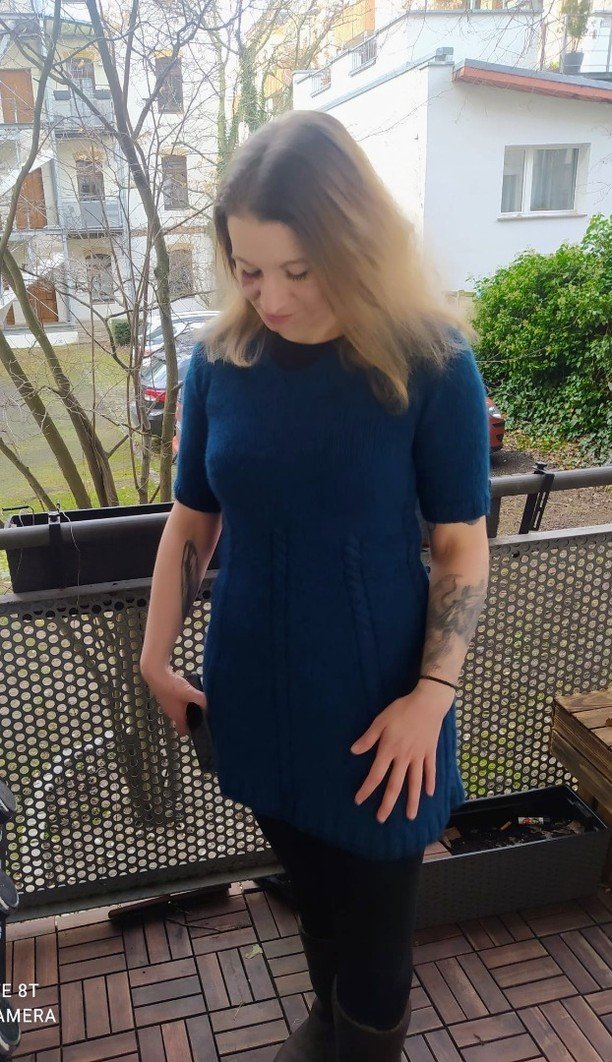
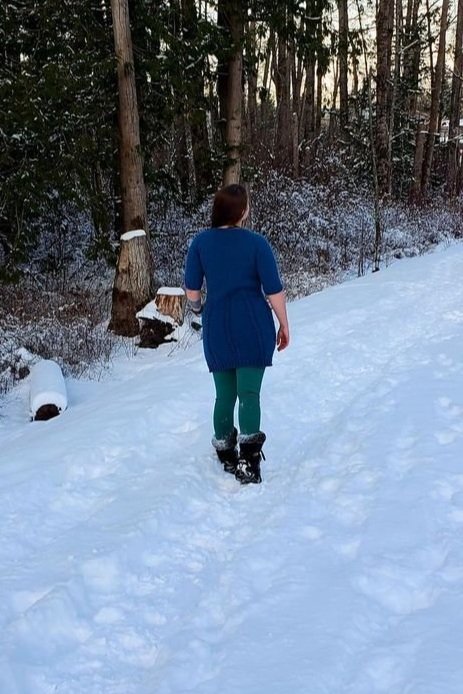
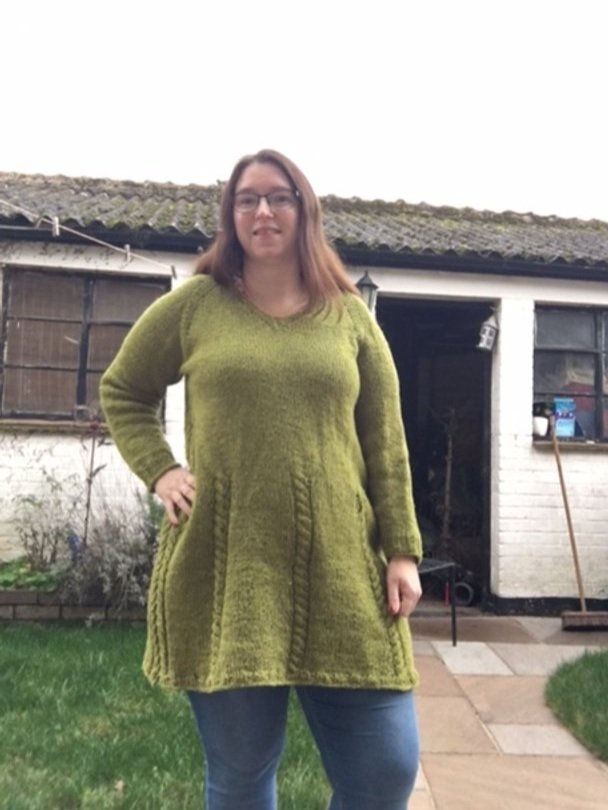
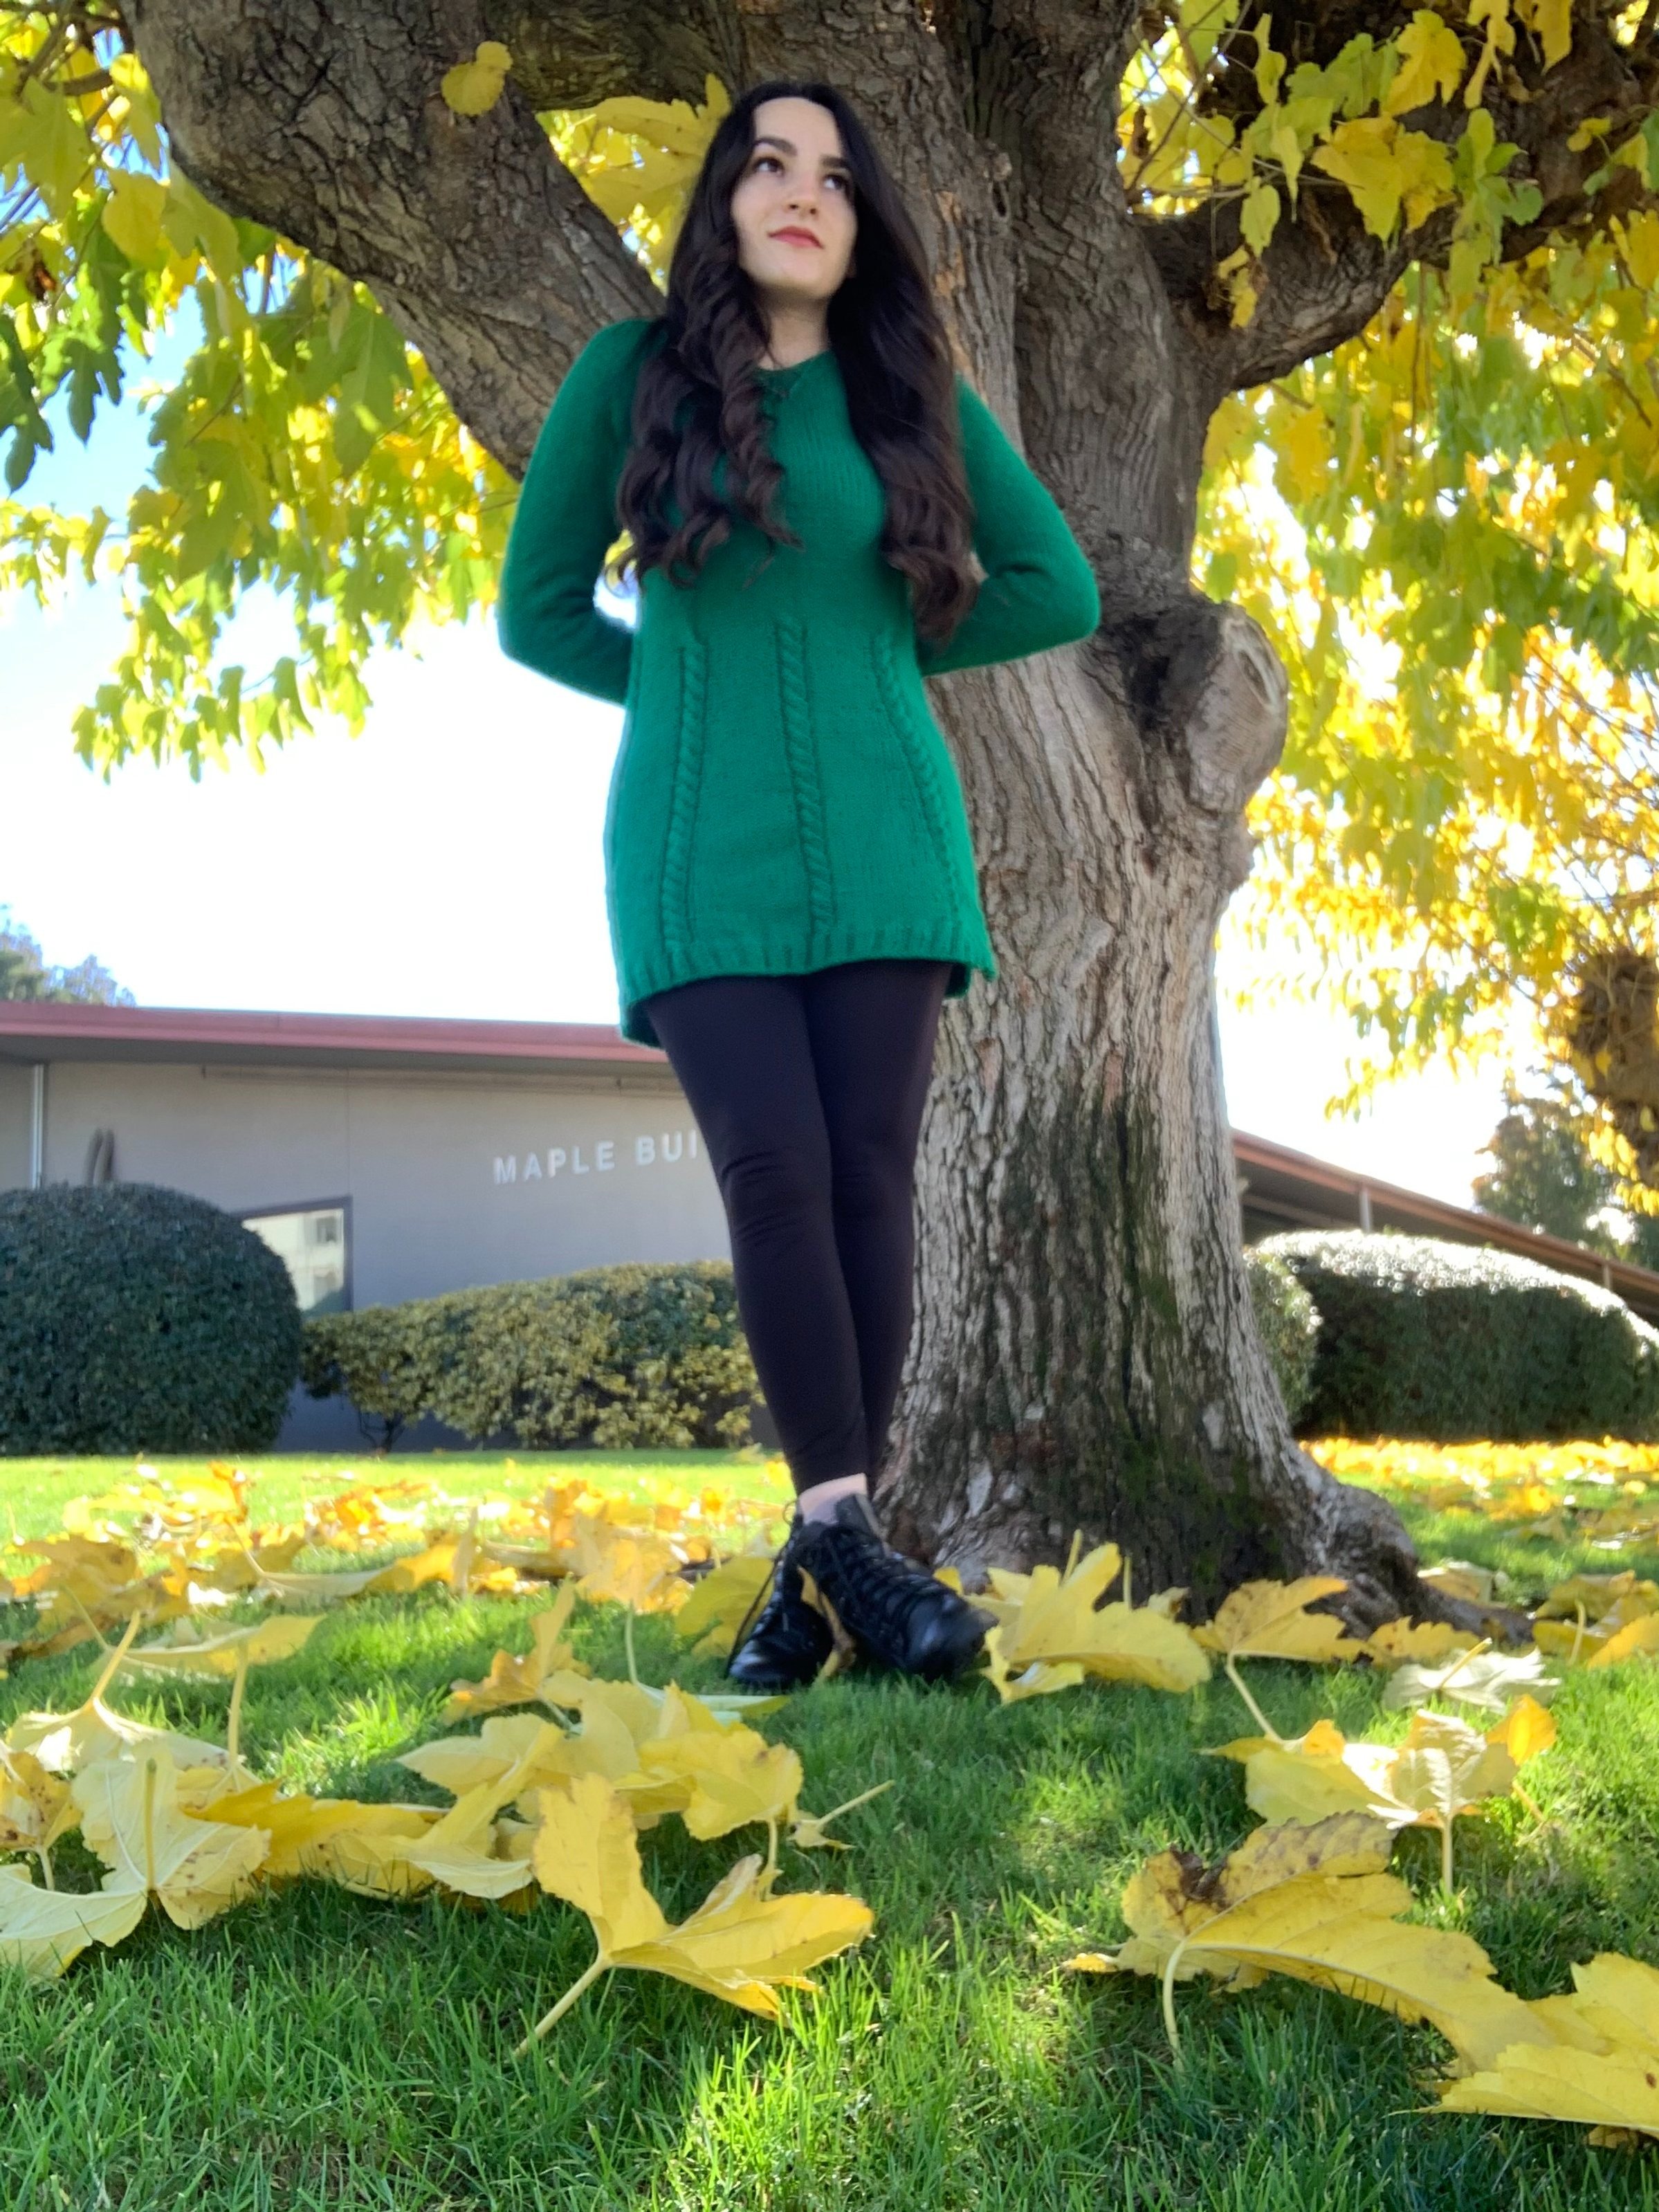
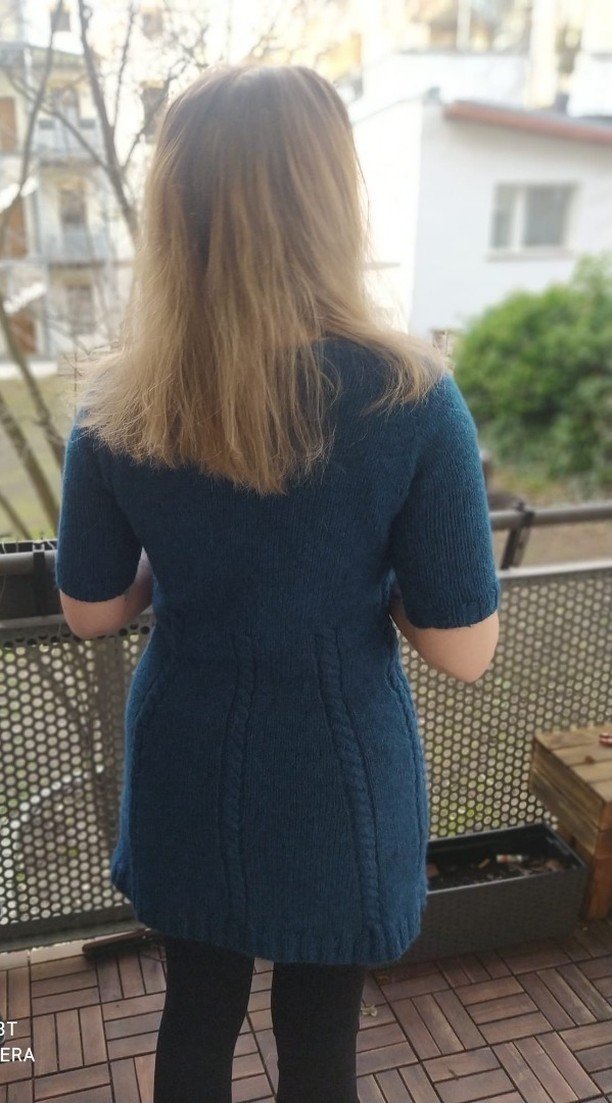
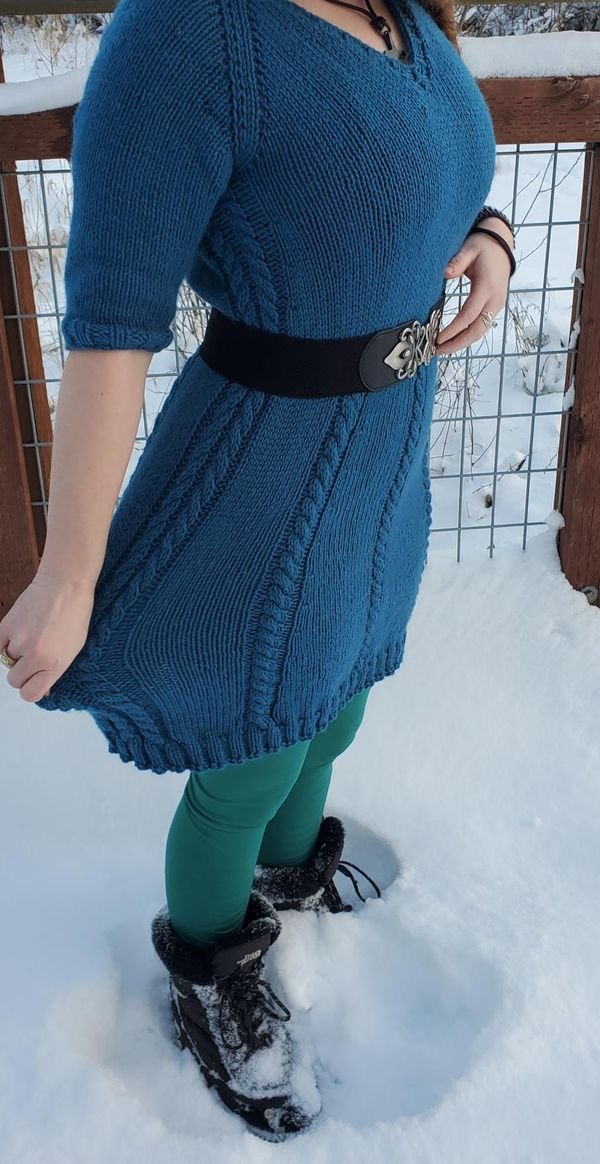
Autumnity Tunic Dress pt. 2


I LOVE TO SEE WHAT YOU CREATE!
Please share your creations with the community on social media tagging @ravinsekaidesigns and hashtag #autumnitytunicdress
I can’t wait to see the beautiful things you come up with!
FOLLOW ME ON SOCIAL MEDIA
Facebook: Ravin Sekai Designs
Ravelry: RavinSekai
ETSY: Ravin Sekai Designs
Instagram: @ravinsekaidesigns
Pinterest: Ravin Sekai Designs
Patreon: Ravin Sekai Designs

WHAT YOU NEED:
Needles: Size 6.5mm circular needles or size needed to obtain gauge (see notes for more information)
Yarn: Worsted/Aran Weight 4 yarn. Sample knit in Lion Brand Pound of Love. Approx. 850(900, 1000, 1150, 1250, 1460, 1500) yards
Gauge: 15 st/21 rows = 4” in stockinette
Other: waste yarn or st holders, an extra circular cable (see notes)
Suggested Bust Measurements: S: 32”-35”, M: 36”-39”, L: 40”-43”, XL: 44”-47”, 2XL: 48”-51”, 3XL: 52”-55”, 4XL: 56”-58”
Finished Garment: finished garments has about +2” to -2” ease, Bust: S: 34", M: 38”, L: 42”, XL: 46”, 2XL: 50”, 3XL: 54”, 4XL: 58” Length: variable. Chart on last page.
Model: model is 4’11”, 38” bust, 27.5” waist, 40” hips wearing a medium with 0” positive ease in bust

ABBREVIATIONS:
CO: cast on. I used the long tail CO.
RS: right side
WS: wrong side
St/sts: stitch/stitches
Inc: increase row
Pm: place stitch marker
Marker: the stitch marker that is next in the pattern.
Sm: slip marker from left needle to right.
Rep: repeat
Cont: continue
K: knit
P: purl
KFSB: knit front slip back. This is an increase st. Knit the stitch as normal, but do not slip it off the left needle after knitting. Slip the right hand needle through the back loop of the same st you just knitted, and slip the st off the needle.
M1: make one. This is an increase st. Make one can be a number of different types of increase sts; you can make one right or left. Or, at this part of the pattern, you can use k1fb or KFSB. I used KFSB throughout my tunic.
M1p: make one purlwise. With the left needle, pick up the horizontal strand between the last stitch you knit and the one you’re about to knit, bringing the needle from front to back, then purl through back loop of the strand. This makes a left-leaning increase on the right, or knit, side of the fabric.
C4b: cable 4 back. Slip 2 st onto the cable needle. With the cable needle held in the back of the work, k2 from the left hand needle, then k2 from the cable needle.
C4f: cable 4 forward. Slip 2 st onto the cable needle. With the cable needle held in front of the work, k2 from the left hand needle, then k2 from the cable needle.
C6f: cable 6 forward. Slip 3 st onto the cable needle. With the cable needle held in front of the work, k3 from the left hand needle, then k3 from the cable needle.
Ssk: slip, slip, knit. Slip the first stitch as if to knit onto right-hand needles, slip the second stitch as if to knit, then slide the left-hand needle into the front part of both stitches and knit them together.
K2tog: knit two together
Knit Straight: knit in pattern without making any increases or decreases until you reach the required number of rows.
BOR: beginning of row
MD: mitered decrease. Slip next 2 sts knitwise onto your right-hand needle and k the next st, sl both slipped sts over the last knitted st at the same time and off right hand needle. A good video of this is here by VeryPink Knits: https://youtu.be/jjUN_hTwbCE
BO: bind off. Make sure you bind off loosely so that the ribbing on the bottom has a good stretch.

Save It For Later
Pin to Pinterest
THE PATTERN:
For the free pattern of this design please continue on this page. Please consider supporting me by purchasing the 100% ad-free PDF with full tapestry charts for this pattern on my Ravelry or ETSY pages. Or consider joining my Patreon for member perks.
THIS IS PART 2 OF THE PATTERN. IF YOU ARE LOOKING FOR PART 1, PLEASE CLICK HERE
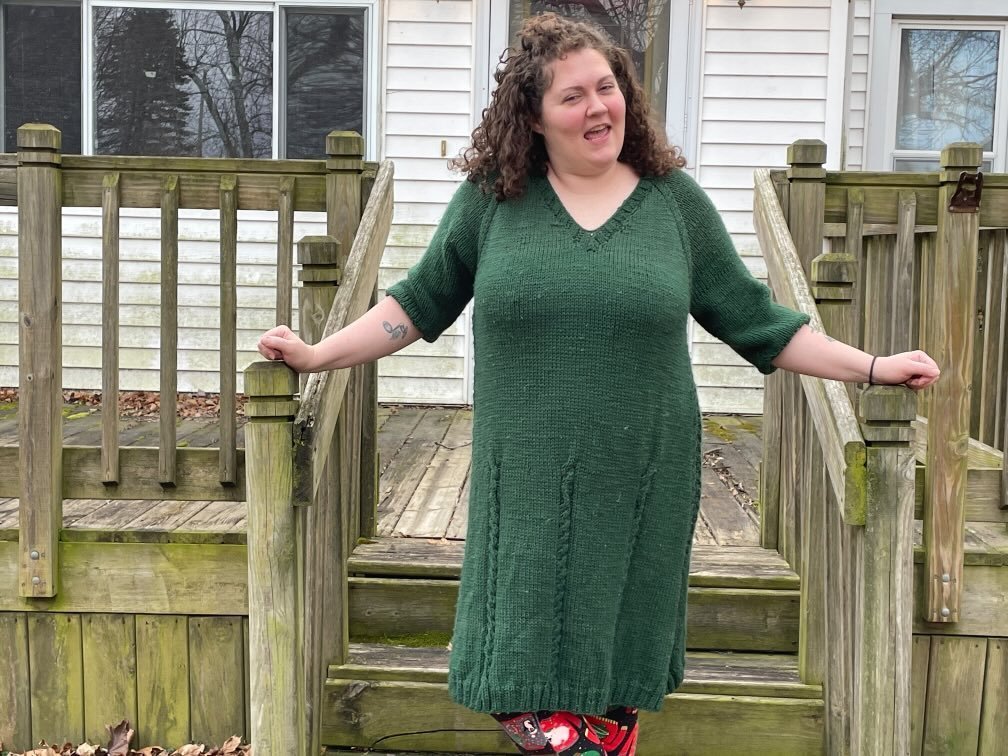
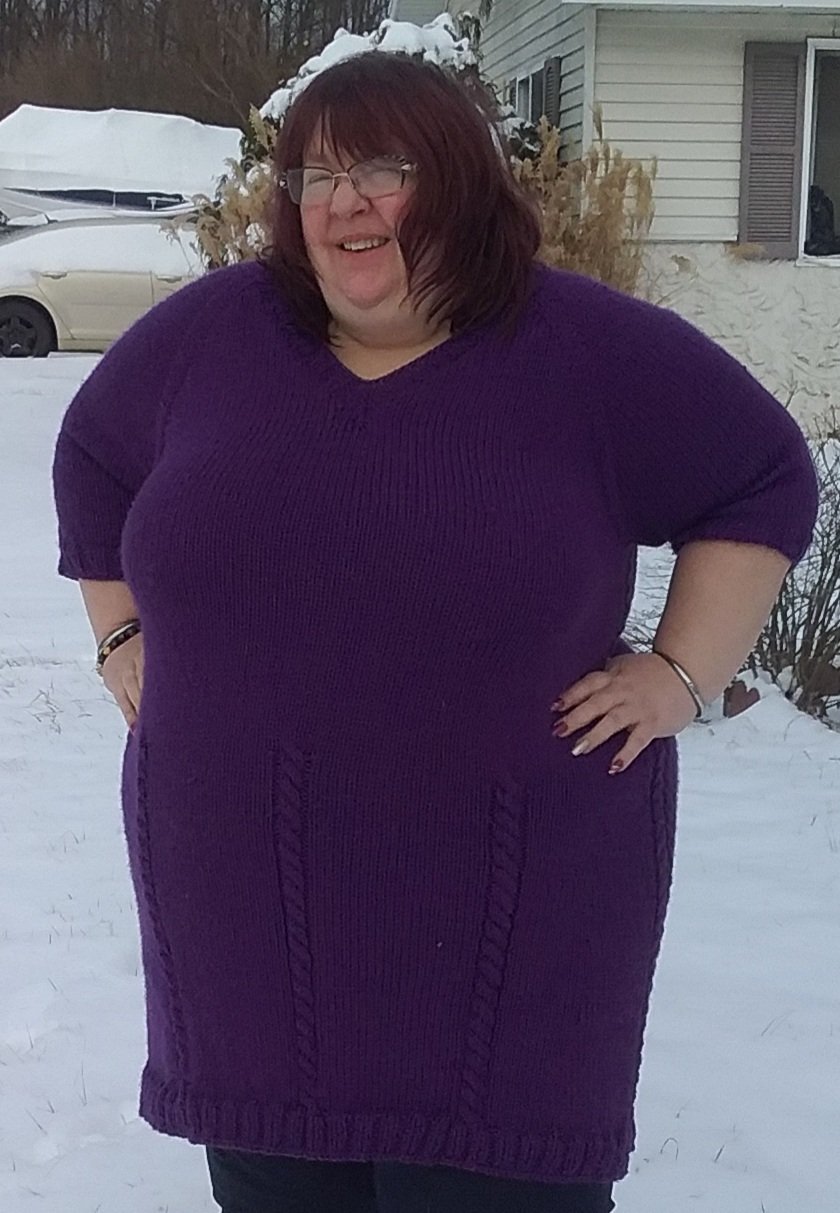
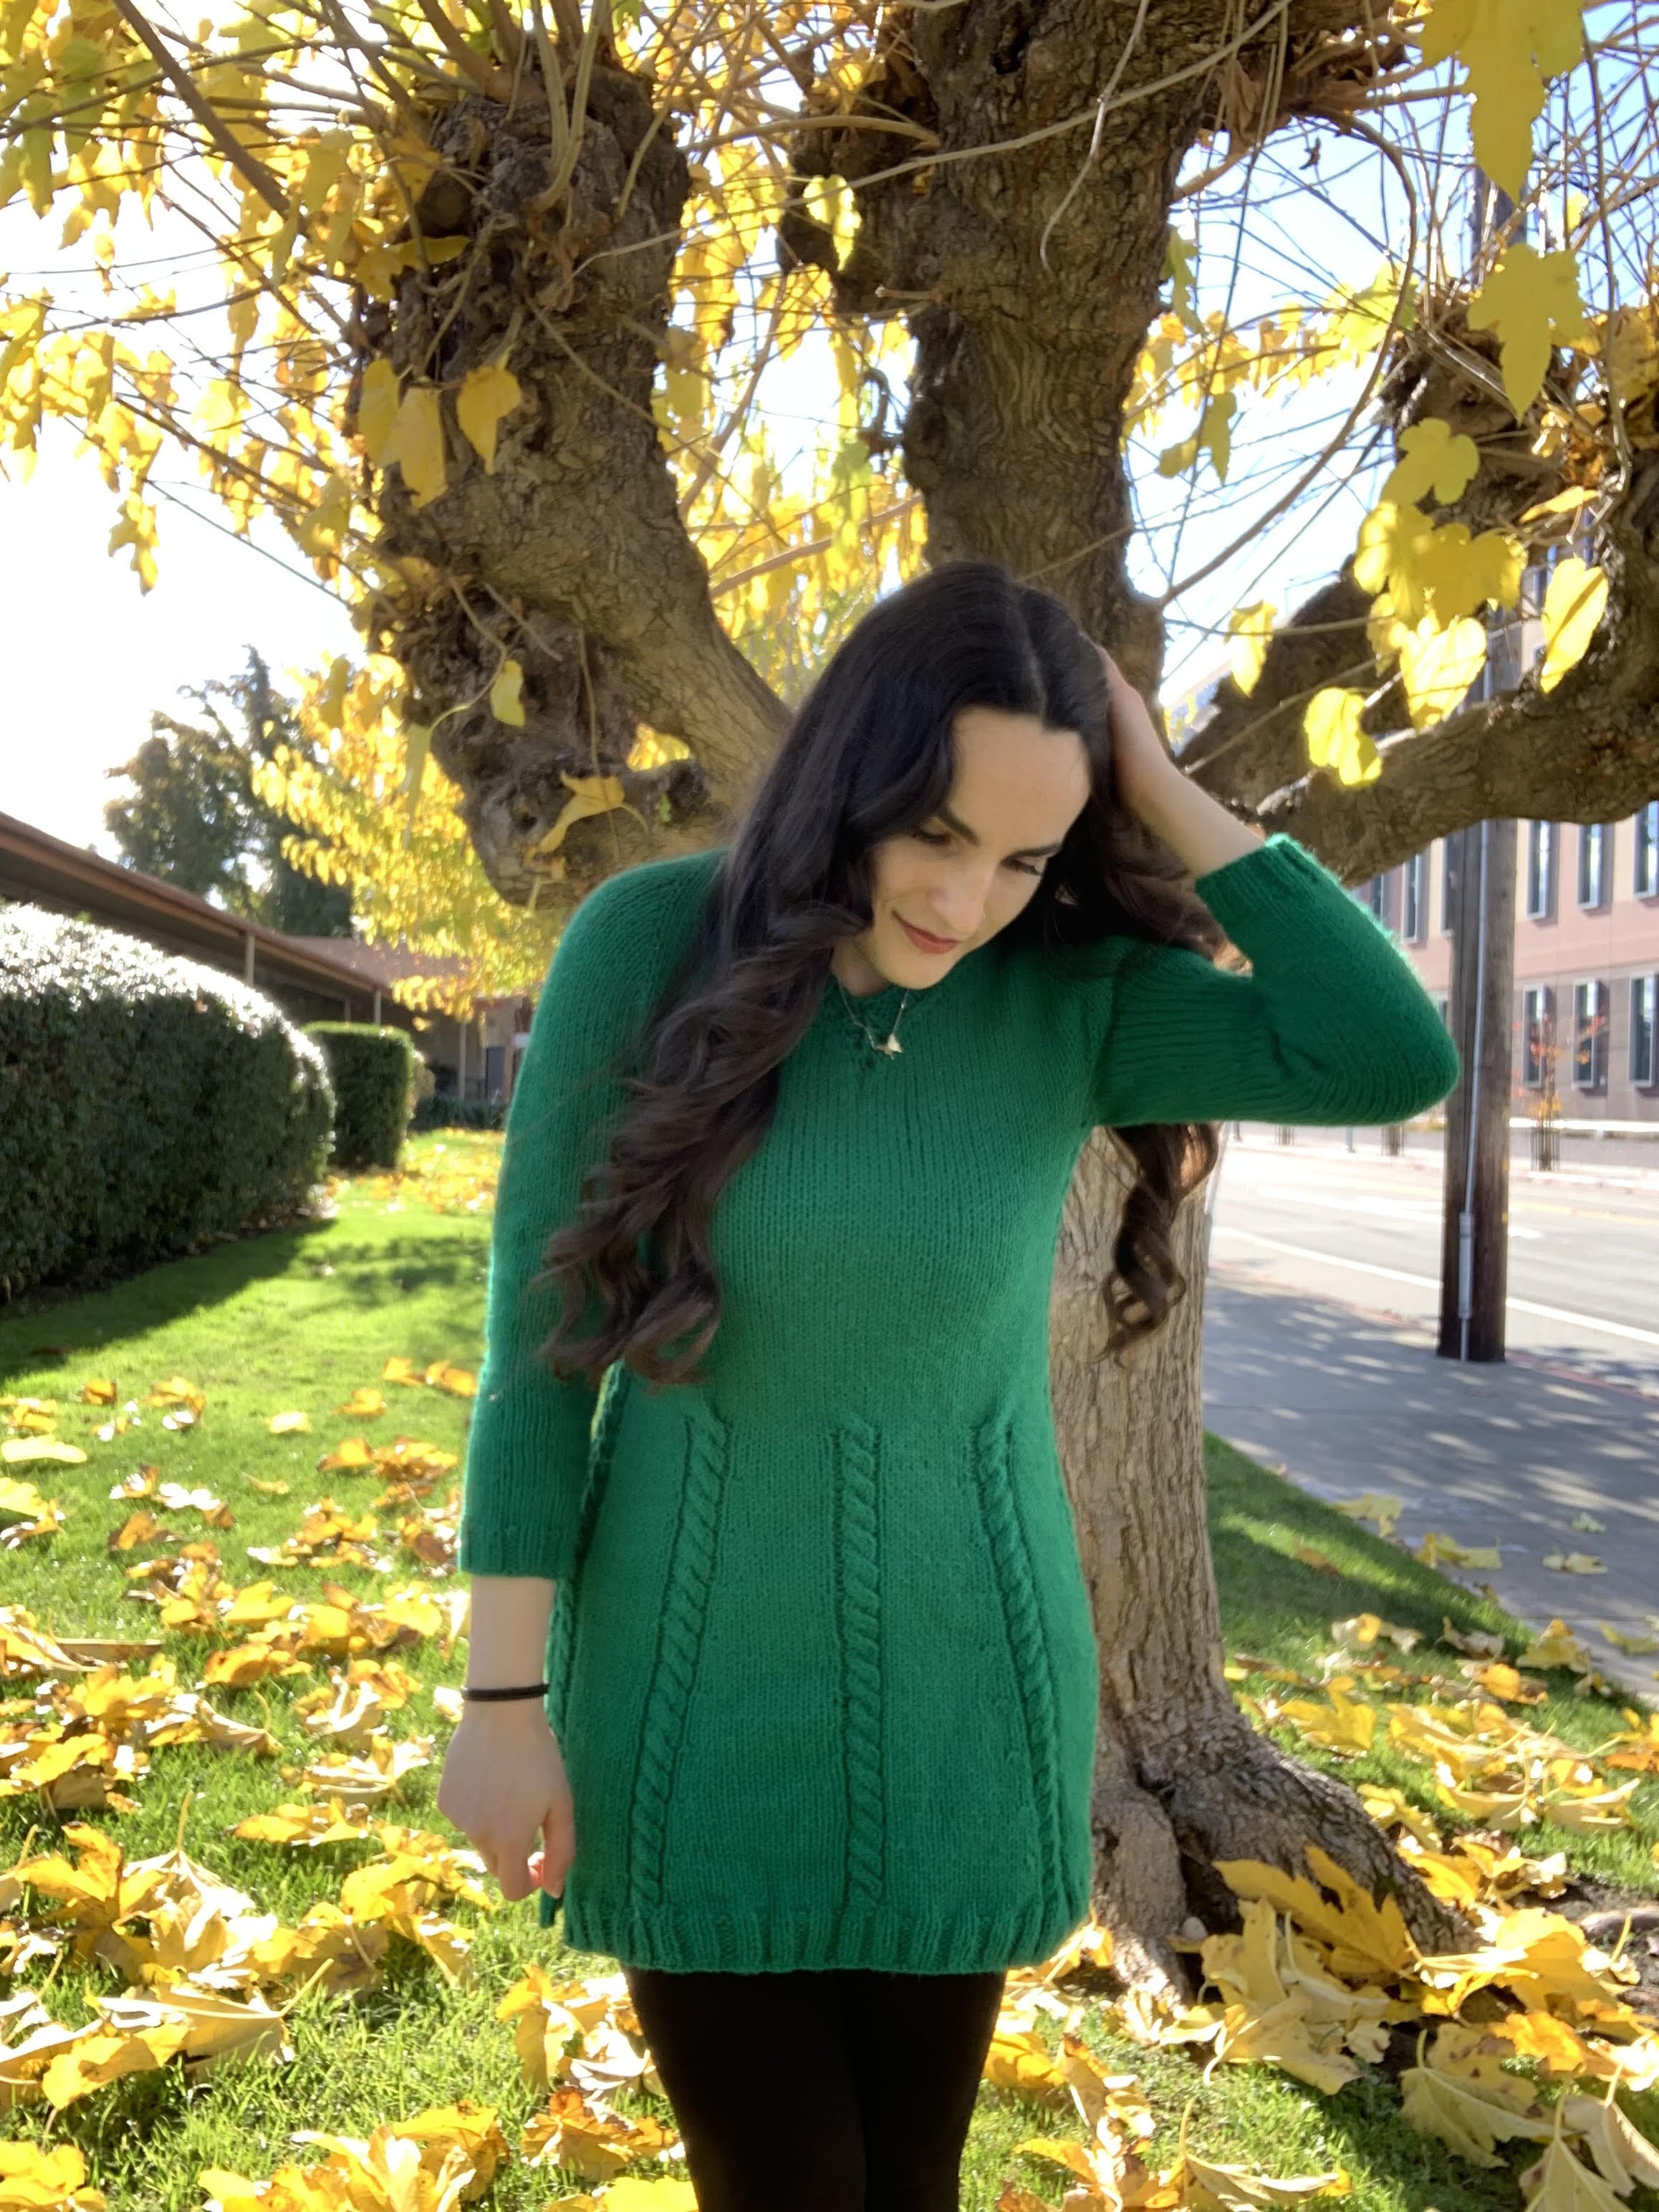
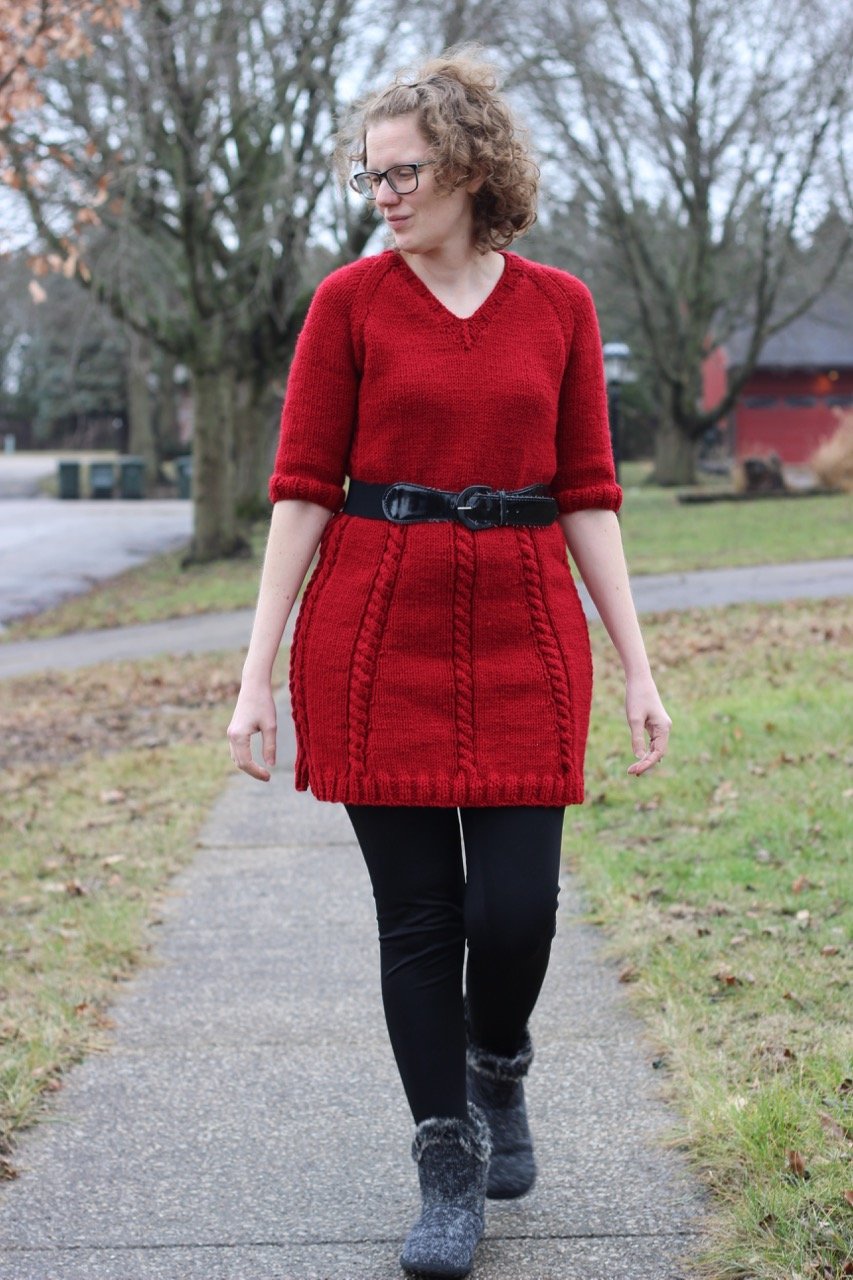
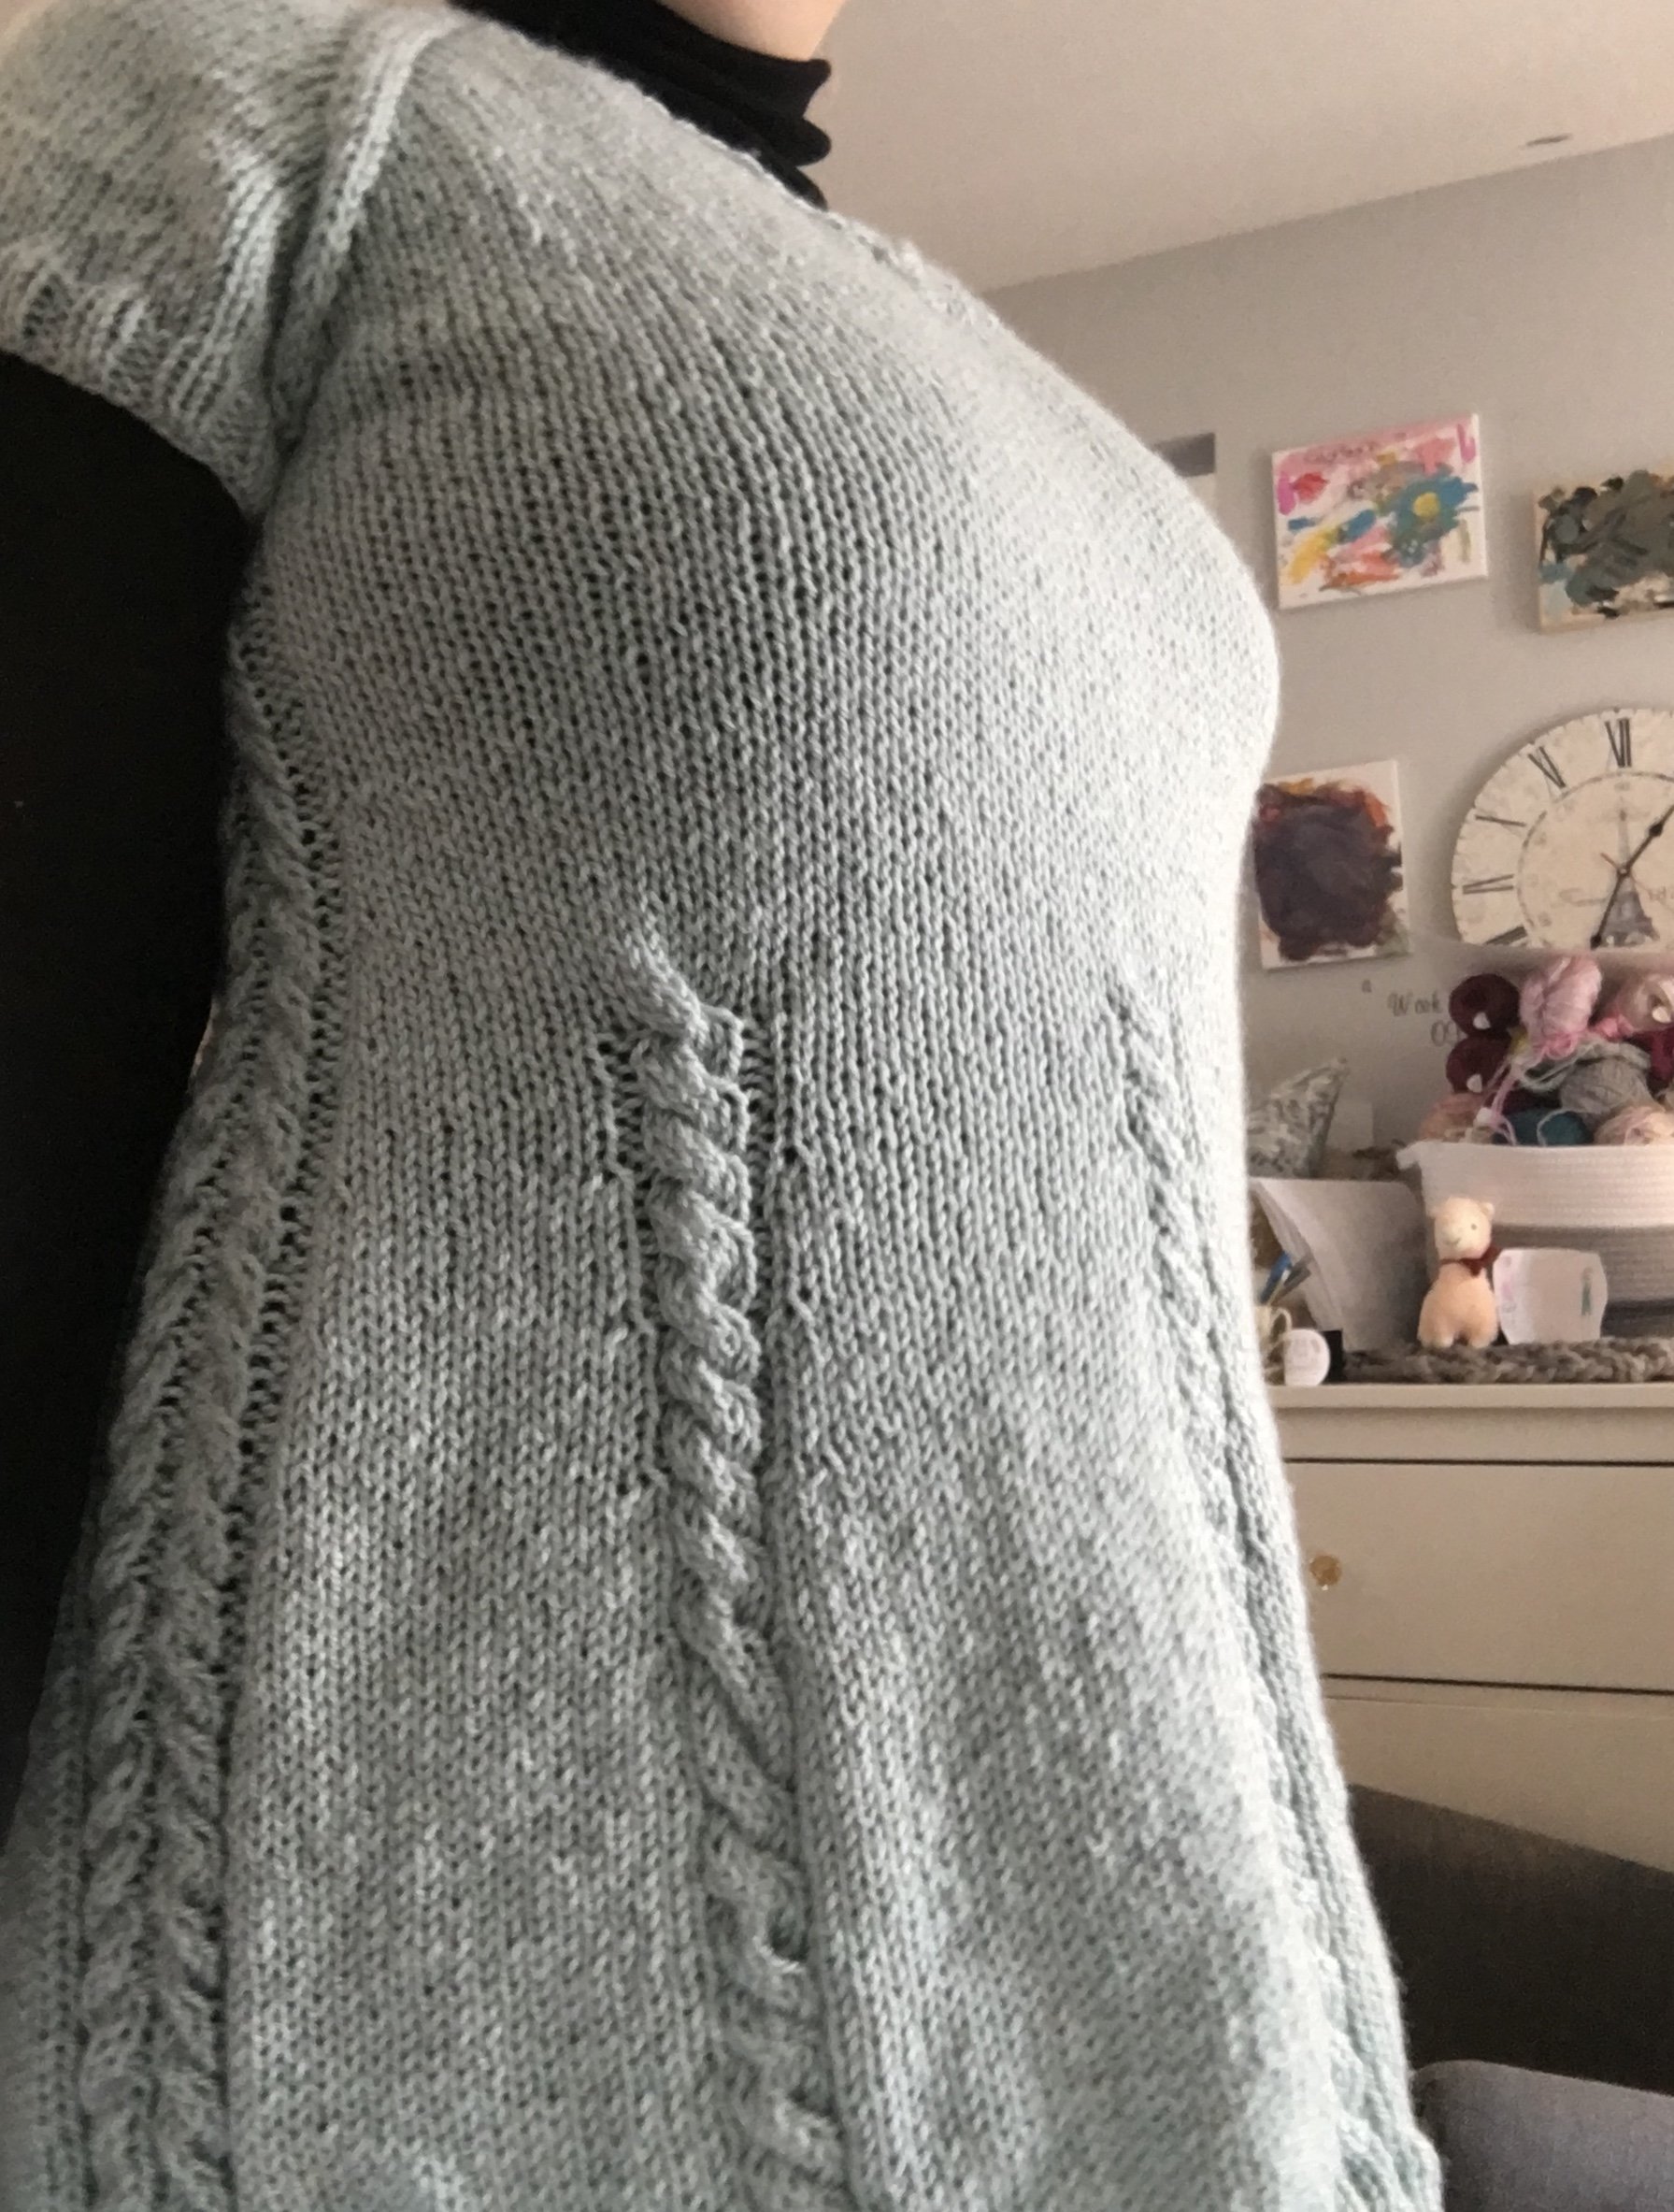
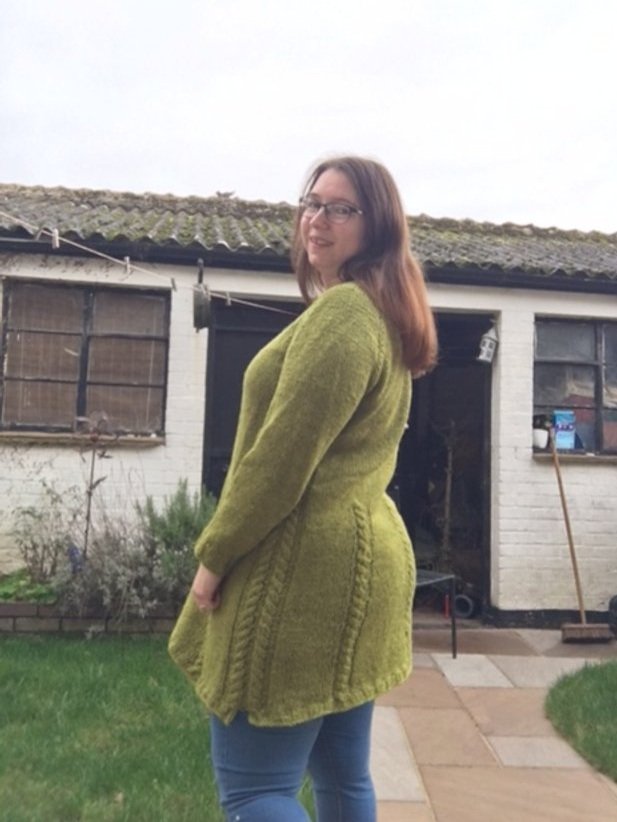
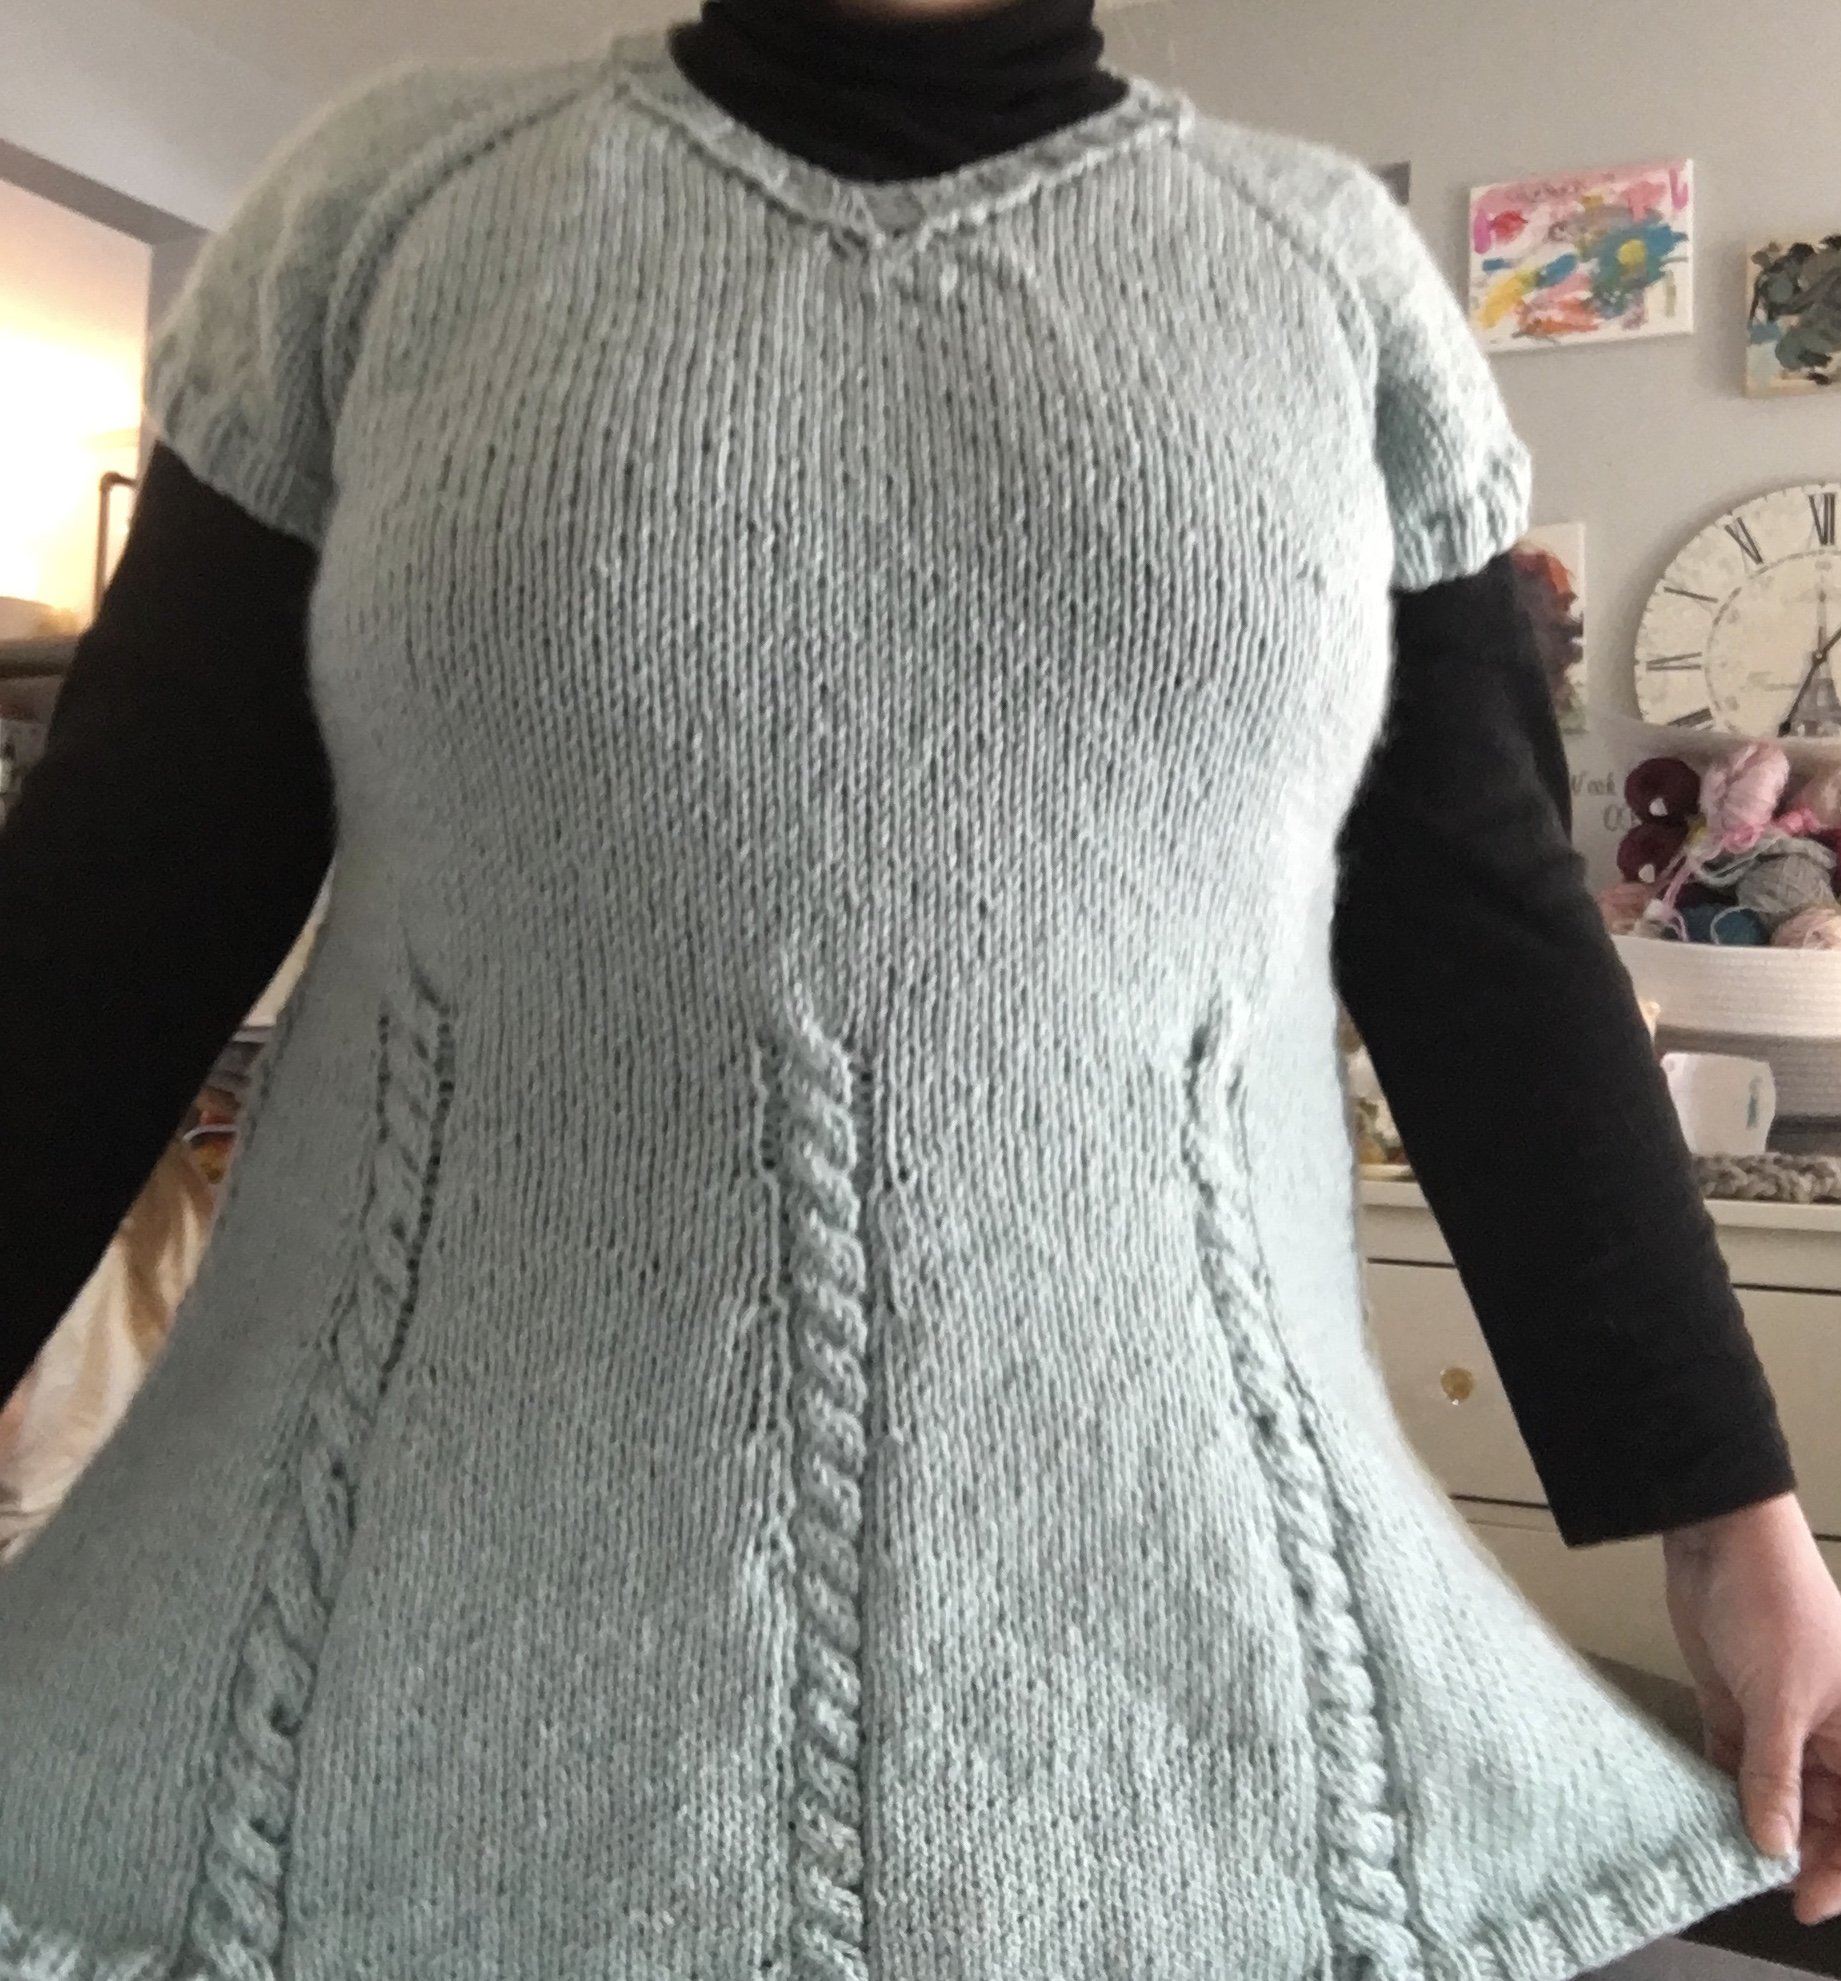
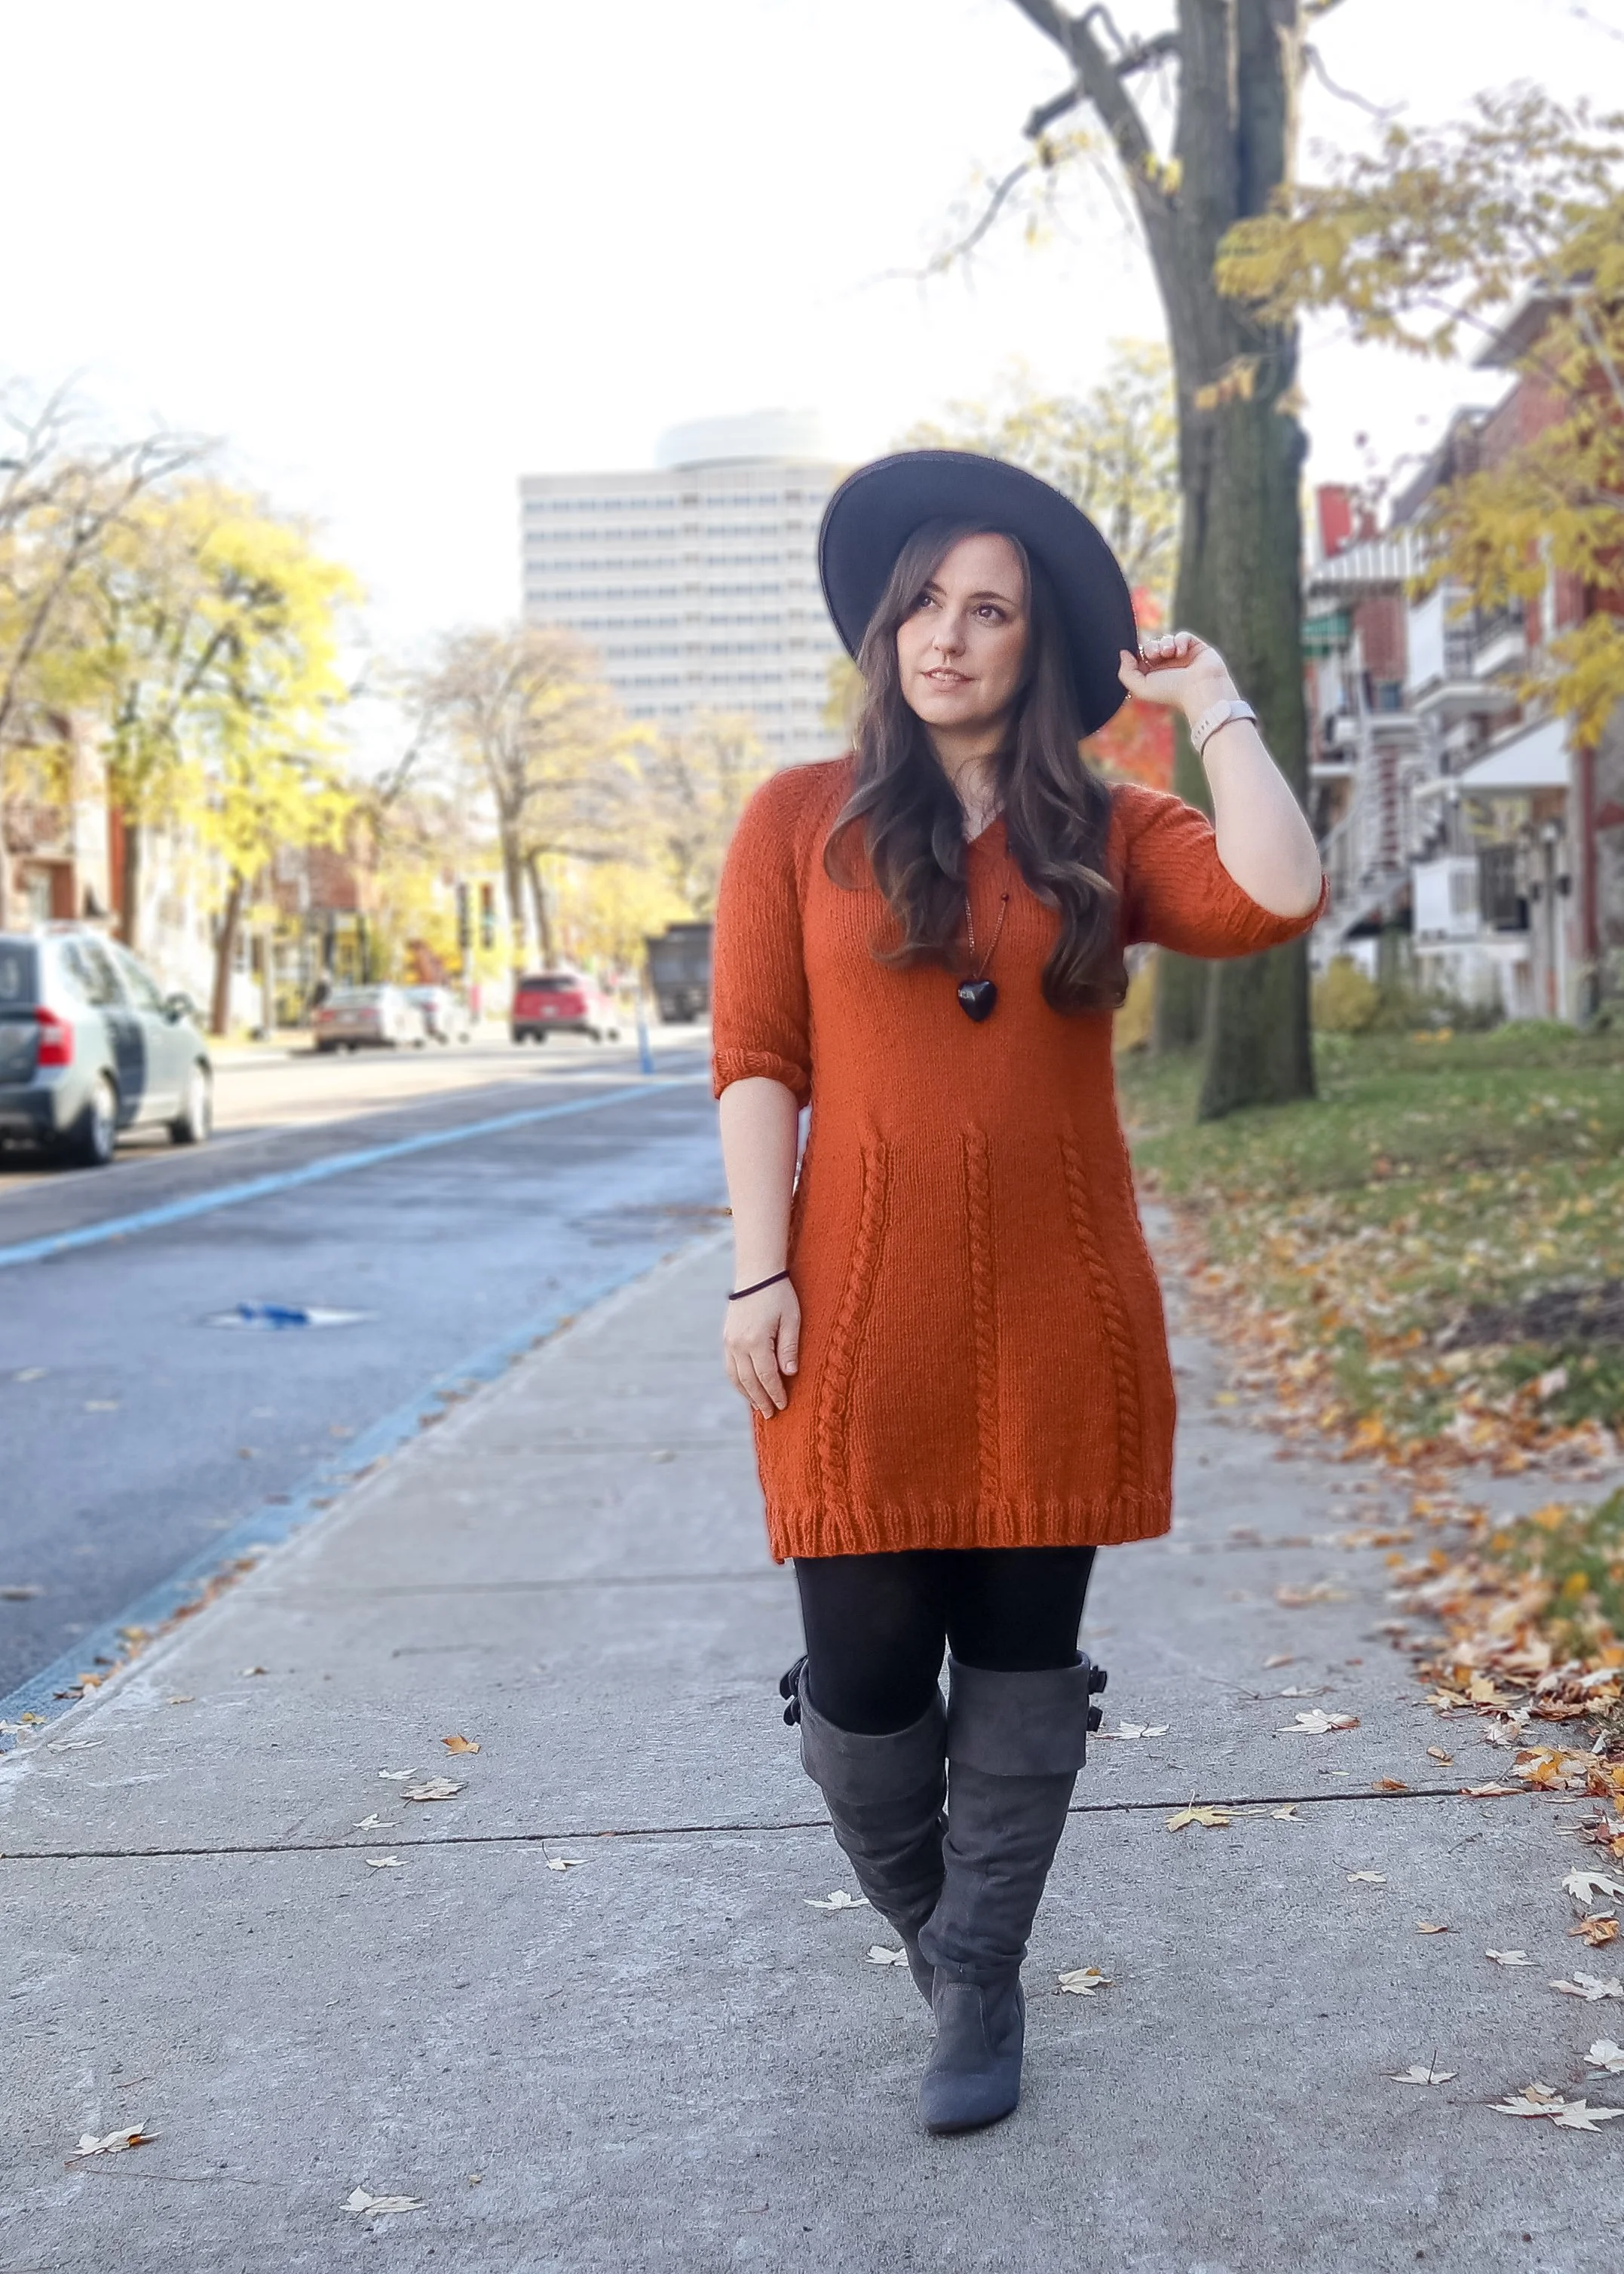
Body:
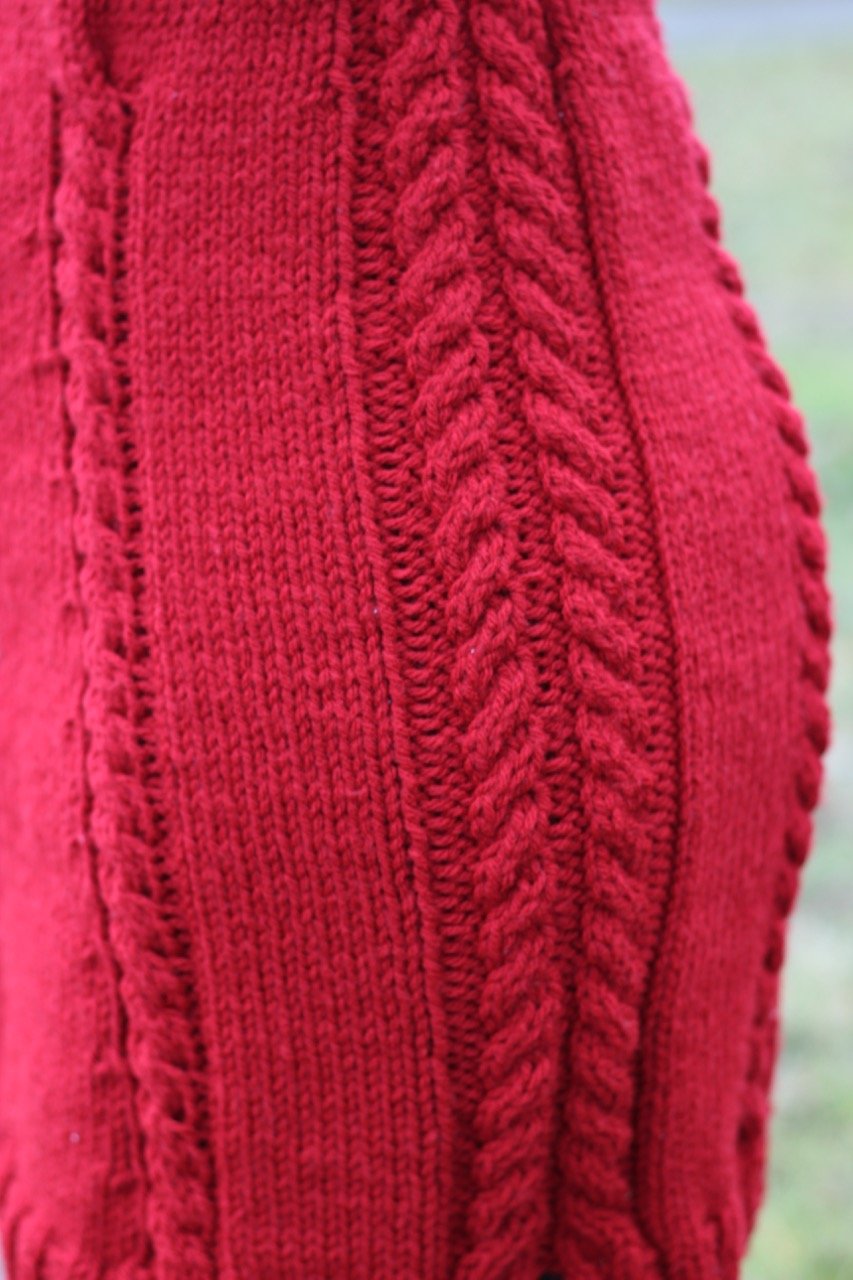
The body has 8 cable motifs that create the design on the front and back; two down either side, and 3 each on the front and back. The side cables start shortly after finishing the Yoke. The others start around the waist area. Also, starting from the end of the Yoke, the body will be increasing 4 sts every 8 rows in order to create the tunic dress shape.
Round 38(38, 43, 46, 49, 52, 59): knit all sts
Round 39(39, 44, 47, 50, 53, 60): k until 7 sts before BOR, pm (this will be your new BOR), remove previous BOR marker as you come to it on the next row.
Round 40(40, 45, 48, 51, 54, 61): p2, k4, p2, k4, p2, pm, k to 7 sts before next marker, pm, (remove next marker as you come to it) p2, k4, p2, k4, p2, pm, k to BOR.

Start of Side cables.
Round 41(41, 46, 49, 52, 55, 62): p2, c4b, p2, c4f, p2, sm, k to marker, sm, p2, c4b, p2, c4f, p2, sm, k to BOR
Round 42(42, 47, 50, 53, 56, 63): p2, k4, p2, k4, p2, sm, k to marker, sm, p2, k4, p2, k4, p2, sm, k to BOR
Round 43(43, 48, 51, 54, 57, 64): p2, k4, p2, k4, p2, sm, k to marker, sm, p2, k4, p2, k4, p2, sm, k to BOR
Round 44(44, 49, 52, 55, 58 65): p2, k4, p2, k4, p2, sm, k to marker, sm, p2, k4, p2, k4, p2, sm, k to BOR
Round 45(45, 50, 53, 56, 59, 66): p2, c4b, p2, c4f, p2, sm, k to marker, sm, p2, c4b, p2, c4f, p2, sm, k to BOR
Round 46(46, 51, 54, 57, 60, 67): p2, k4, p2, k4, p2, sm, k to marker, sm, p2, k4, p2, k4, p2, sm, k to BOR
Round 47(47, 52, 55, 58, 61, 68): p2, k4, p2, k4, p2, sm, k to marker, sm, p2, k4, p2, k4, p2, sm, k to BOR
Round 48(48, 53, 56, 59, 62, 69) (inc): p2, k4, p2, k4, p2, sm, m1, k to 1 st before marker, m1, sm, p2, k4, p2, k4, p2, sm, m1, k to 1 st before BOR, m1
Round 49(49, 54, 57, 60, 63, 70) - Round 80(80, 93, 96, 107, 110, 117): rep Rounds 41(41, 46, 49, 52, 55, 62) - 48(48, 53, 56, 59, 62 69) another 4(4, 5, 5, 6, 6, 6) times. [5(5, 6, 6, 7, 7, 7) increases total]
Start of front and back cables. (Inc will now move to between the cables to angle them away from the center)
Round 81(81, 94, 97, 108, 111, 118): *p2, c4b, p2, c4f, p2, sm, k10(12, 14, 16, 18, 20, 22), pm, p1, c6f, p1, pm, k9(11, 14, 15, 18, 20, 22), pm, p1, c4f, p1, pm, k9(11, 14, 15, 18, 20, 22), pm, p1, c6f, p1, pm, k10(12, 14, 16, 18, 20, 22), sm*, rep * *
Round 82(82, 95, 98, 109, 112, 119): *p2, k4, p2, k4, p2, sm, k to marker, sm, p1, k6, p1, sm, k to marker, sm, p1, k4, p1, sm, k to marker, sm, p1, k6, p1, sm, k to marker, sm* rep * *
Round 83(83, 96, 99, 110, 113, 120): *p2, k4, p2, k4, p2, sm, k to marker, sm, p1, k6, p1, sm, k to marker, sm, p1, k4, p1, sm, k to marker, sm, p1, k6, p1, sm, k to marker, sm* rep * *
Round 84(84, 97, 100, 111, 114, 121): *p2, k4, p2, k4, p2, sm, k to marker, sm, p1, k6, p1, sm, k to marker, sm, p1, k4, p1, sm, k to marker, sm, p1, k6, p1, sm, k to marker, sm* rep * *
Round 85(85, 98, 101, 112, 115, 122): *p2, c4b, p2, c4f, p2, sm, k to marker, sm, p1, c6f, p1, sm, k to marker, sm, p1, c4f, p1, sm, k to marker, sm, p1, c6f, p1, sm, k to marker, sm* rep * *
Round 86(86, 99, 102, 113, 116, 123): *p2, k4, p2, k4, p2, sm, k to marker, sm, p1, k6, p1, sm, k to marker, sm, p1, k4, p1, sm, k to marker, sm, p1, k6, p1, sm, k to marker, sm* rep * *
Round 87(87, 100, 103, 114, 117, 124): *p2, k4, p2, k4, p2, sm, k to marker, sm, p1, k6, p1, sm, k to marker, sm, p1, k4, p1, sm, k to marker, sm, p1, k6, p1, sm, k to marker, sm* rep * *
Round 88(88, 101, 104, 115, 118, 125) (inc): *p2, k4, p2, k4, p2, sm, k to marker, sm, p1, k6, p1, sm, M1, k to marker, sm, p1, k4, p1, sm, k to 1 st before marker, M1, sm, p1, k6, p1, sm, k to marker, sm* rep * *
Round 89(89, 102, 105, 116, 119, 126) - Round 168(168, 173, 176, 179, 182, 189) [see notes below for length]: rep Rounds 81(81, 94, 97, 108, 111, 118) - Round 88(88, 101, 104, 115, 118, 125) another 10(10, 9, 9, 8, 8, 8) times, increasing 4 sts every 8th row, until you have 192(208, 224, 236, 252, 268, 284) sts total. [16 inc rows total from start of cables]
**Once you get the hang of where each cable motif is, feel free to remove all of the markers except the BOR marker. I remove all of them except the BOR and the markers on the front and back where I will be increasing. **
**When you get closer to the bottom of the tunic, it's a good idea to start trying it on to check the length. This tunic dress measurements are designed to land right under your bottom. If you want a longer dress, it will be good to add rows in pattern before you start the bottom band. I am incredibly short (4'11", 150cm), so I actually only knitted 156 rounds for the medium (14 inc rows, 30") before I did the bottom band. So, if you’re short like me, you might want to finish your dress before the stated row count. (See note on length from Part 1) If you have longer legs or are taller, you may want to add a handful of rows at the bottom. Keep your gauge in mind! Remember after blocking, the dress will stretch. Check your gauge on your dress to your blocked gauge swatch to get an idea of how much your garment might grow.**
SMALL/MEDIUM ONLY
Bottom Band:
To make the bottom band, we will be working back and forth again instead of in the round.
Row 169: cut yarn leaving a tail to weave in (make sure it's not too short that you lose it while you're knitting) sl the first 7 sts of the next round onto the right-hand needle without knitting them, they will be knit with the other side. *k2, p2* rep * * until you have knitted 96(104) sts. This is half of your working sts. You can slip the other half onto waste yarn, or you can use a separate circular cable to hold them so they are ready to be knit when you finish the first half.
Row 170 - Row 175: *k2, p2* rep * * to end.
BO in pattern.
Rep for opposite side.

LARGE ONLY:
Round 174: *p2, c4b, p2, c4f, p2, sm, k to marker, sm, p1, c6f, p1, sm, k to marker, sm, p1, c4f, p1, sm, k to marker, sm, p1, c6f, p1, sm, k to marker, sm* rep * *
Round 175: *p2, k4, p2, k4, p2, sm, k to marker, sm, p1, k6, p1, sm, k to marker, sm, p1, k4, p1, sm, k to marker, sm, p1, k6, p1, sm, k to marker, sm* rep * *
Round 176: *p2, k4, p2, k4, p2, sm, k to marker, sm, p1, k6, p1, sm, k to marker, sm, p1, k4, p1, sm, k to marker, sm, p1, k6, p1, sm, k to marker, sm* rep * *
Round 177: *p2, k4, p2, k4, p2, sm, k to marker, sm, p1, k6, p1, sm, k to marker, sm, p1, k4, p1, sm, k to marker, sm, p1, k6, p1, sm, k to marker, sm* rep * *
Round 178 - Round 179: rep Round 174 - 175
Bottom Band:
To make the bottom band, we will be working back and forth again instead of in the round.
Row 180: cut yarn leaving a tail to weave in (make sure it's not too short that you lose it while you're knitting) sl the first 7 sts of the next round onto the right hand needle without knitting them, they will be knit with the other side. *k2, p2* rep * * until you have knitted 112 sts. This is half of your working sts. You can slip the other half onto waste yarn, or you can use a separate circular cable to hold them so they are ready to be knit when you finish the first half.
Row 181 - Row 187: *k2, p2* rep * * to end.
BO in pattern.
Rep for opposite side.
XL ONLY:
Round 177: *p2, c4b, p2, c4f, p2, sm, k to marker, sm, p1, c6f, p1, sm, k to marker, sm, p1, c4f, p1, sm, k to marker, sm, p1, c6f, p1, sm, k to marker, sm* rep * *
Round 178: *p2, k4, p2, k4, p2, sm, k to marker, sm, p1, k6, p1, sm, k to marker, sm, p1, k4, p1, sm, k to marker, sm, p1, k6, p1, sm, k to marker, sm* rep * *
Round 179: *p2, k4, p2, k4, p2, sm, k to marker, sm, p1, k6, p1, sm, k to marker, sm, p1, k4, p1, sm, k to marker, sm, p1, k6, p1, sm, k to marker, sm* rep * *
Bottom Band:
To make the bottom band, we will be working back and forth again instead of in the round.
Row 180: cut yarn leaving a tail to weave in (make sure it's not too short that you lose it while you're knitting) sl the first 7 sts of the next round onto the right hand needle without knitting them, they will be knit with the other side. *k2, p2* rep * * until you have knitted 118 sts. This is half of your working sts. You can slip the other half onto waste yarn, or you can use a separate circular cable to hold them so they are ready to be knit when you finish the first half.
Row 181 - Row 187: *k2, p2* rep * * to end
BO in pattern.
Rep for opposite side.
2XL ONLY:
Round 180: *p2, c4b, p2, c4f, p2, sm, k to marker, sm, p1, c6f, p1, sm, k to marker, sm, p1, c4f, p1, sm, k to marker, sm, p1, c6f, p1, sm, k to marker, sm* rep * *
Round 181: *p2, k4, p2, k4, p2, sm, k to marker, sm, p1, k6, p1, sm, k to marker, sm, p1, k4, p1, sm, k to marker, sm, p1, k6, p1, sm, k to marker, sm* rep * *
Round 182: *p2, k4, p2, k4, p2, sm, k to marker, sm, p1, k6, p1, sm, k to marker, sm, p1, k4, p1, sm, k to marker, sm, p1, k6, p1, sm, k to marker, sm* rep * *
Round 183: *p2, k4, p2, k4, p2, sm, k to marker, sm, p1, k6, p1, sm, k to marker, sm, p1, k4, p1, sm, k to marker, sm, p1, k6, p1, sm, k to marker, sm* rep * *
Bottom Band:
To make the bottom band, we will be working back and forth again instead of in the round.
Row 184: cut yarn leaving a tail to weave in (make sure it's not too short that you lose it while you're knitting) sl the first 7 sts of the next round onto the right hand needle without knitting them, they will be knit with the other side. *k2, p2* rep * * until you have knitted 126 sts. This is half of your working sts. You can slip the other half onto waist yarn, or you can use a separate circular cable to hold them so they are ready to be knit when you finish the first half.
Row 185 - Row 191: *k2, p2* rep * * to end
BO in pattern.
Rep for opposite side.
3XL ONLY:
Round 183: *p2, c4b, p2, c4f, p2, sm, k to marker, sm, p1, c6f, p1, sm, k to marker, sm, p1, c4f, p1, sm, k to marker, sm, p1, c6f, p1, sm, k to marker, sm* rep * *

Round 184: *p2, k4, p2, k4, p2, sm, k to marker, sm, p1, k6, p1, sm, k to marker, sm, p1, k4, p1, sm, k to marker, sm, p1, k6, p1, sm, k to marker, sm* rep * *
Round 185: *p2, k4, p2, k4, p2, sm, k to marker, sm, p1, k6, p1, sm, k to marker, sm, p1, k4, p1, sm, k to marker, sm, p1, k6, p1, sm, k to marker, sm* rep * *
Round 186: *p2, k4, p2, k4, p2, sm, k to marker, sm, p1, k6, p1, sm, k to marker, sm, p1, k4, p1, sm, k to marker, sm, p1, k6, p1, sm, k to marker, sm* rep * *
Bottom Band:
To make the bottom band, we will be working back and forth again instead of in the round.
Row 187: cut yarn leaving a tail to weave in (make sure it's not too short that you lose it while you're knitting) sl the first 7 sts of the next round onto the right hand needle without knitting them, they will be knit with the other side. *k2, p2* rep * * until you have knitted 134 sts. This is half of your working sts. You can slip the other half onto waist yarn, or you can use a separate circular cable to hold them so they are ready to be knit when you finish the first half.
Row 188 - Row 194: *k2, p2* rep * * to end
BO in pattern.
Rep for opposite side.
4XL ONLY:
Round 190: *p2, c4b, p2, c4f, p2, sm, k to marker, sm, p1, c6f, p1, sm, k to marker, sm, p1, c4f, p1, sm, k to marker, sm, p1, c6f, p1, sm, k to marker, sm* rep * *
Round 191: *p2, k4, p2, k4, p2, sm, k to marker, sm, p1, k6, p1, sm, k to marker, sm, p1, k4, p1, sm, k to marker, sm, p1, k6, p1, sm, k to marker, sm* rep * *
Round 192: *p2, k4, p2, k4, p2, sm, k to marker, sm, p1, k6, p1, sm, k to marker, sm, p1, k4, p1, sm, k to marker, sm, p1, k6, p1, sm, k to marker, sm* rep * *
Round 193: *p2, k4, p2, k4, p2, sm, k to marker, sm, p1, k6, p1, sm, k to marker, sm, p1, k4, p1, sm, k to marker, sm, p1, k6, p1, sm, k to marker, sm* rep * *
Bottom Band:
To make the bottom band, we will be working back and forth again instead of in the round.
Row 194: cut yarn leaving a tail to weave in (make sure it's not too short that you lose it while you're knitting) sl the first 7 sts of the next round onto the right hand needle without knitting them, they will be knit with the other side. *k2, p2* rep * * until you have knitted 142 sts. This is half of your working sts. You can slip the other half onto waist yarn, or you can use a separate circular cable to hold them so they are ready to be knit when you finish the first half.
Row 195 - Row 201: *k2, p2* rep * * to end
BO in pattern.
Rep for opposite side.

Neckline
Mark the center of your v-neck and also the center of the back of your sweater, like in the picture. Starting at the center of the back, pick up and knit a multiple of 4 sts around the neckline. (I picked up 3 sts for every 4 sts/rows, I ended up with 100 sts for the M size. Make sure you pick up the same number of sts on either side of the neckline).
Round 1: *k2, p2* until 2sts before your v-neck center st, k1, MD, remark the center, k1, *k2, p2* to the end of round, ending on 2p sts to keep a 2x2 rib. (If you picked up a multiple of 4, it should end on 2 purl sts, if it didn’t, pick back to the center st, and make those sts whatever they need to be in order to end on 2 purl sts)
Round 2: *k2, p2* until 1 st before your v-neck center st, MD, *k2, p2* to end of round
Round 3 - Round 4: rep in pattern making a MD at the center
BO knitwise
Sleeves:
Pick up Round: At underarm, pick up and knit 5(5, 5, 6, 6, 7, 7) of the under arm cast on stitches that appear on the left side of the marker you placed when you separated the sleeves from the body. Then, pick up and knit the st from waste yarn [39(43, 47, 49, 51, 53, 57)sts]. Pick up and knit the last 5(5, 5, 6, 6, 7, 7) of the under arm cast on stitches you added. Pm.
Round 1: k around until you come to your last st before the marker, k the first and last st of the round together. Replace marker. [48(52, 56, 60, 62, 66, 70)sts sts total]
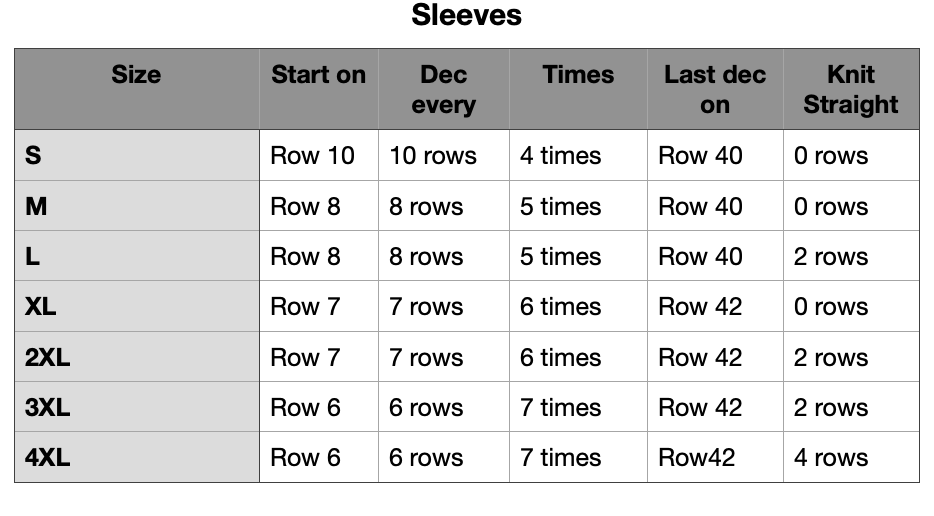
Round 2 - Round 40(40, 42, 42, 44, 44, 46): Starting on Round 10(8, 8, 7, 7, 6, 6), dec 2 sts [one at the beginning of the round and one at the end of the round. I used ssk on the right side of the marker and k2tog on the left] every 10(8, 8, 7, 7, 6, 6) rows, 4(5, 5, 6, 6, 7, 7) times, then knit straight 0(0, 2, 0, 2, 2, 4) more rows. [40(42, 46, 48, 50, 52, 56) sts total] (refer to the chart)
Cuff:
M/L/2XL ONLY
Round 41(43, 45): k1, k2tog, *p2, k2* rep to last 3 sts, p2tog, p1(we do this because we need a multiple of 4 for the cuff).
All Sizes:
Rounds 41(42, 44, 43, 46, 45, 47) - Round 47(47, 49, 49, 51, 51, 53): *k2, p2* rep around.
BO in pattern
**If you’d like long sleeves, cont decreasing in pattern until you have 32(32, 36, 36, 40, 40, 40) sts left on you needles. This should give you 17(17, 17.5, 17.5, 18, 18, 18.5)” sleeves before the cuff. Then do the cuff portion from All Sizes.
Weave in your ends and block to measurements on schematic in Part 1. Bust measurements are as stated in the chart. Your length depends on the length you decided to knit your tunic to. Make sure you don’t stretch out the ribbing for the bottom band and the sleeves.
Happy Creating!
IF YOU LIKED THIS PATTERN, PLEASE SUPPORT ME ON PATREON OR BUY ME A COFFEE!

BUY ME A COFFEE
SUPPORT ME ON PATREON
I LOVE TO SEE WHAT YOU CREATE!
Please share your creations with the community on social media tagging @ravinsekaidesigns and hashtag #autumnitytunicdress
I can’t wait to see the beautiful things you come up with!
FOLLOW ME ON SOCIAL MEDIA
Facebook: Ravin Sekai Designs
Ravelry: RavinSekai
Instagram: @ravinsekaidesigns
Pinterest: Ravin Sekai Designs
Patreon: Ravin Sekai Designs

Archive
- LGBTQ+
- PRIDE
- accessories
- accessory
- asymmetrical
- autumn
- backpack
- bag
- beach
- beanie
- bias shawl
- blanket
- blog hop
- blue
- bobble
- bookbag
- boyfriend
- cardigan
- case
- celtic weave stitch
- clutch
- clutch bag
- collaboration
- color block
- color work
- cover
- cover-up
- cowl
- crochet
- crochet pattern
- crochetpattern
- crop top
- croptop
- decor
- diy
- dress
- ds case
- duster
- earwarmer
- easy
- fall
- festivaltop
- free pattern
- gauge
- ghost
- granny squares
- halloween
- handbag
- hat
- headband