Autumnity Tunic Dress pt. 1
THIS IS PART 1 OF THE PATTERN. IF YOU ARE LOOKING FOR PART 2, PLEASE CLICK HERE
Hey all! Long time no see! I took about a month off there in December to get my head around a couple things. Mostly, we had an emergency house move, so I had to focus on packing and getting everything associated with moving one’s life finished in 2 weeks. Boy, was that 2 very hectic weeks! But, we survived, and I’m back at it! And, I’m here to give you all a NEW PATTERN! Woohoo! I hope you guys enjoy this one, because it’s one of my favorites! (Who am I kidding? They’re all my favorites!)
ABOUT THIS Design:
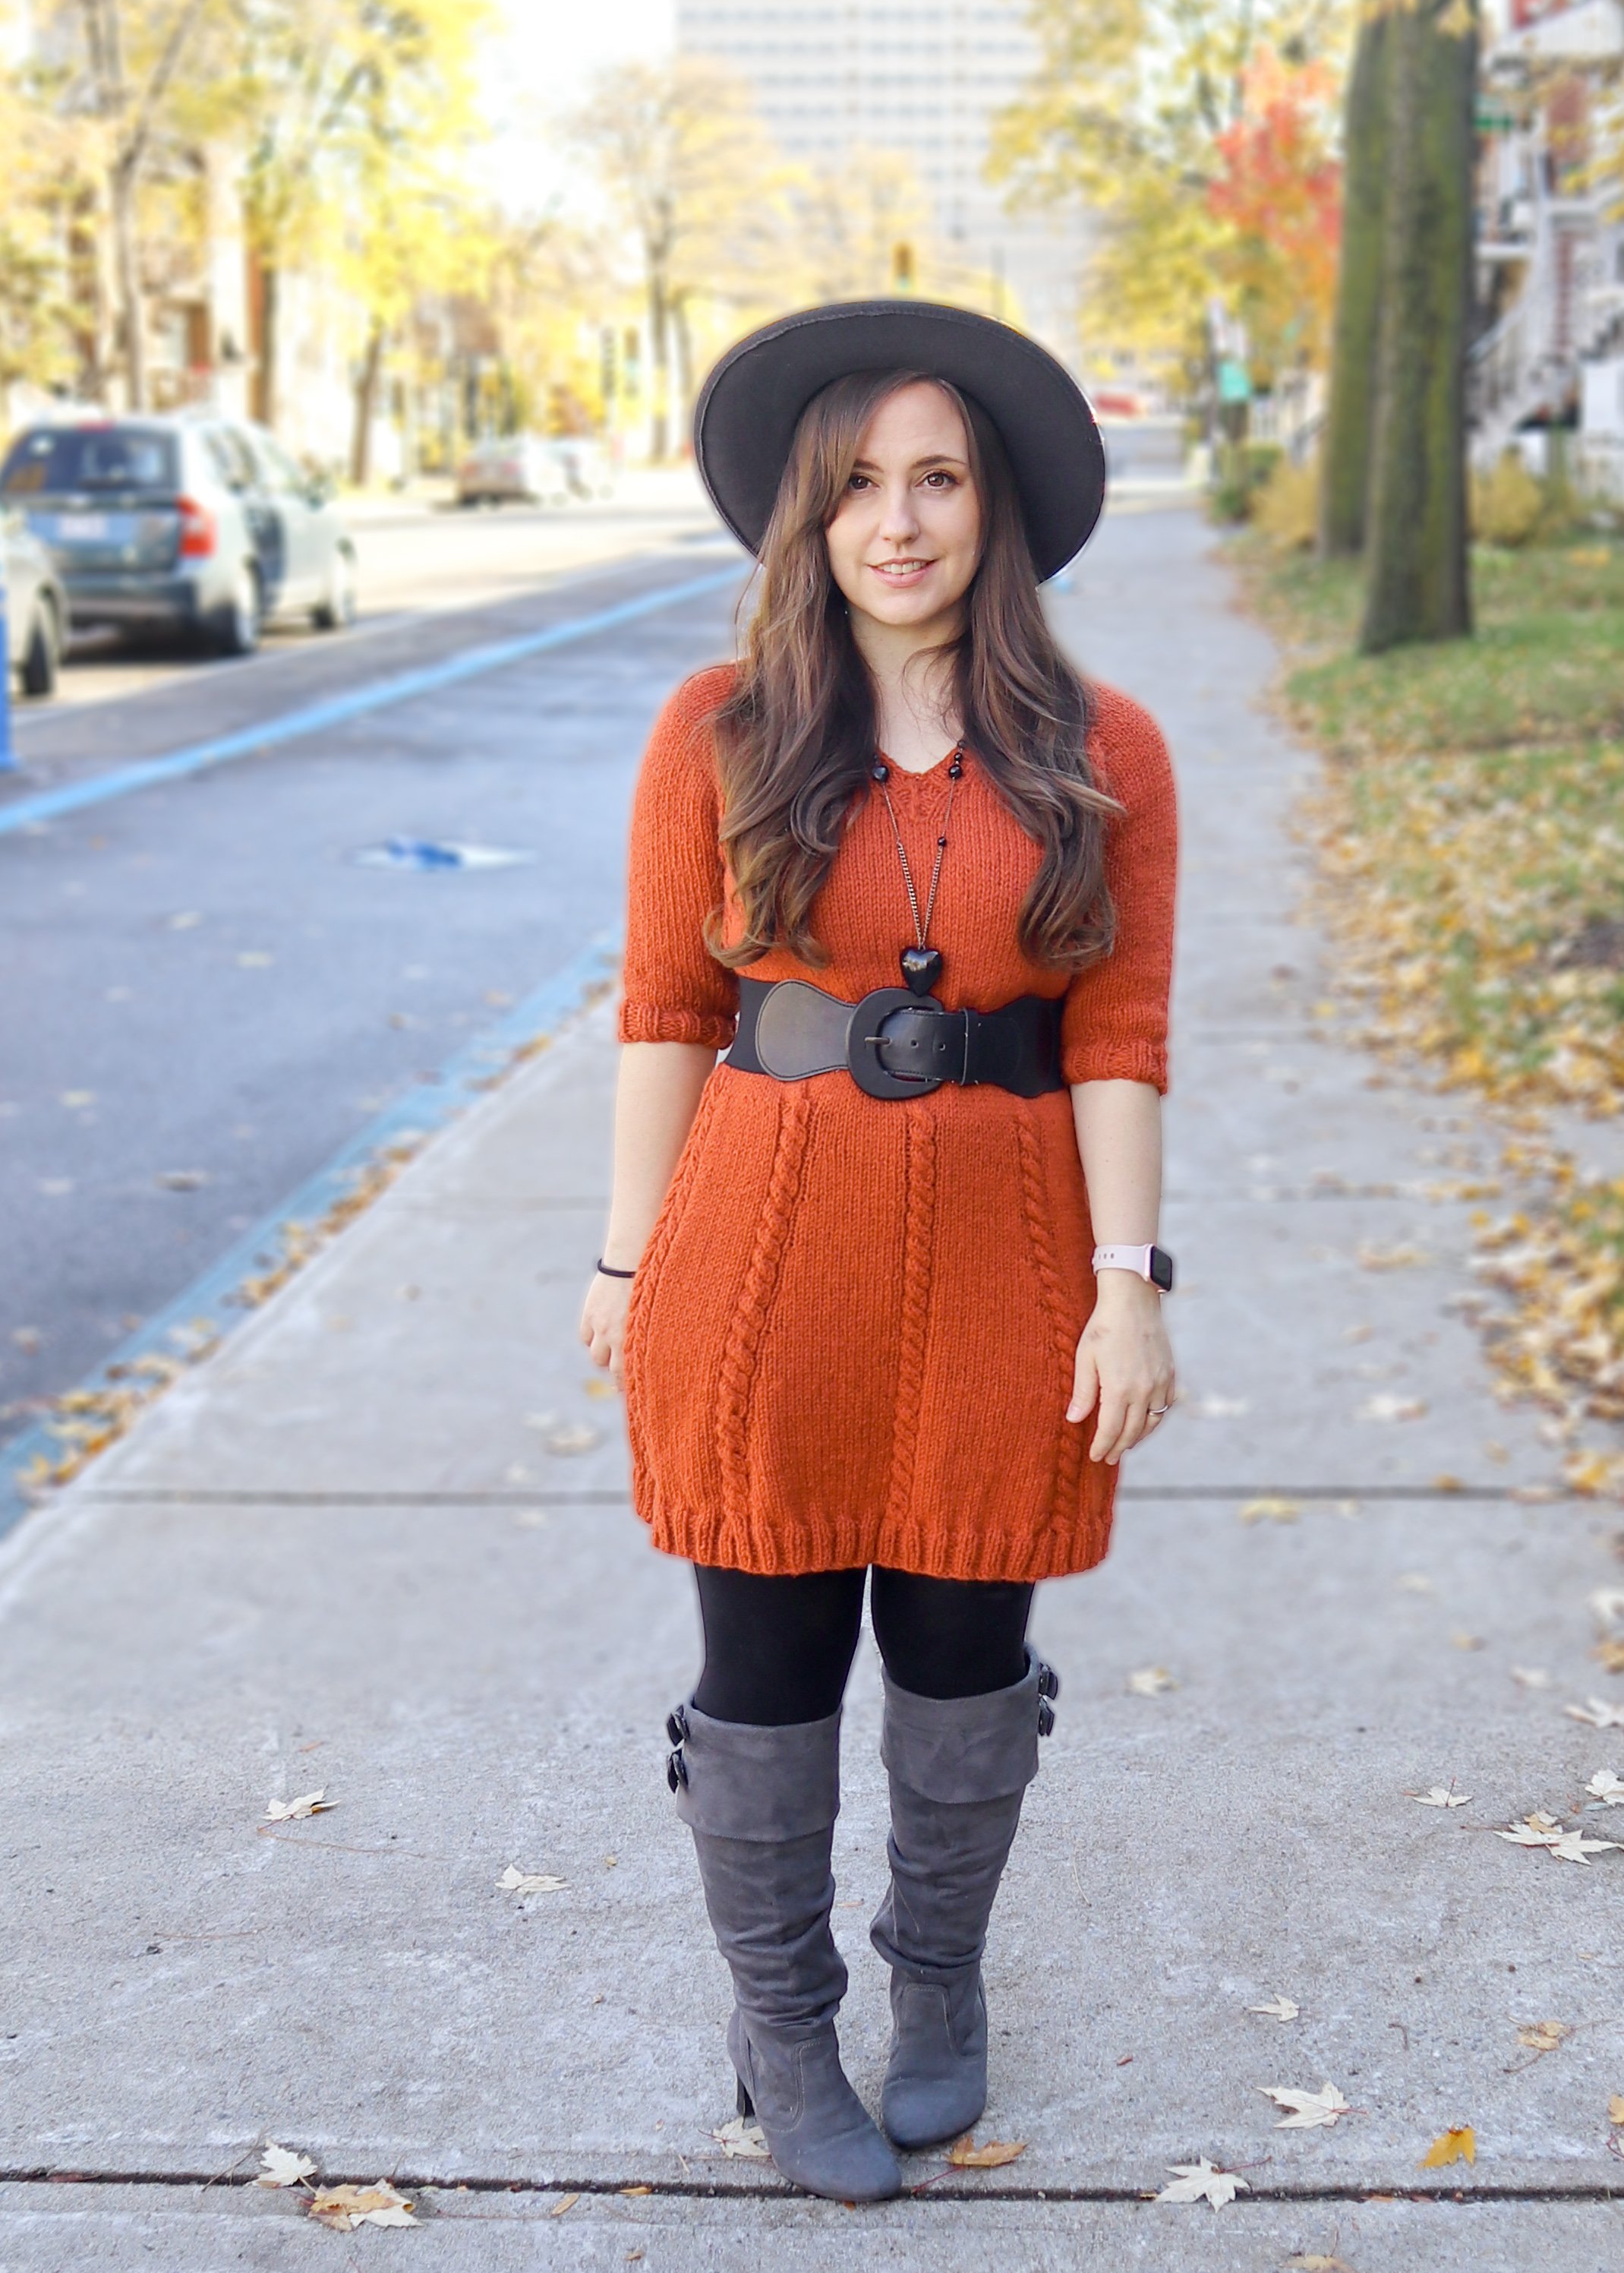
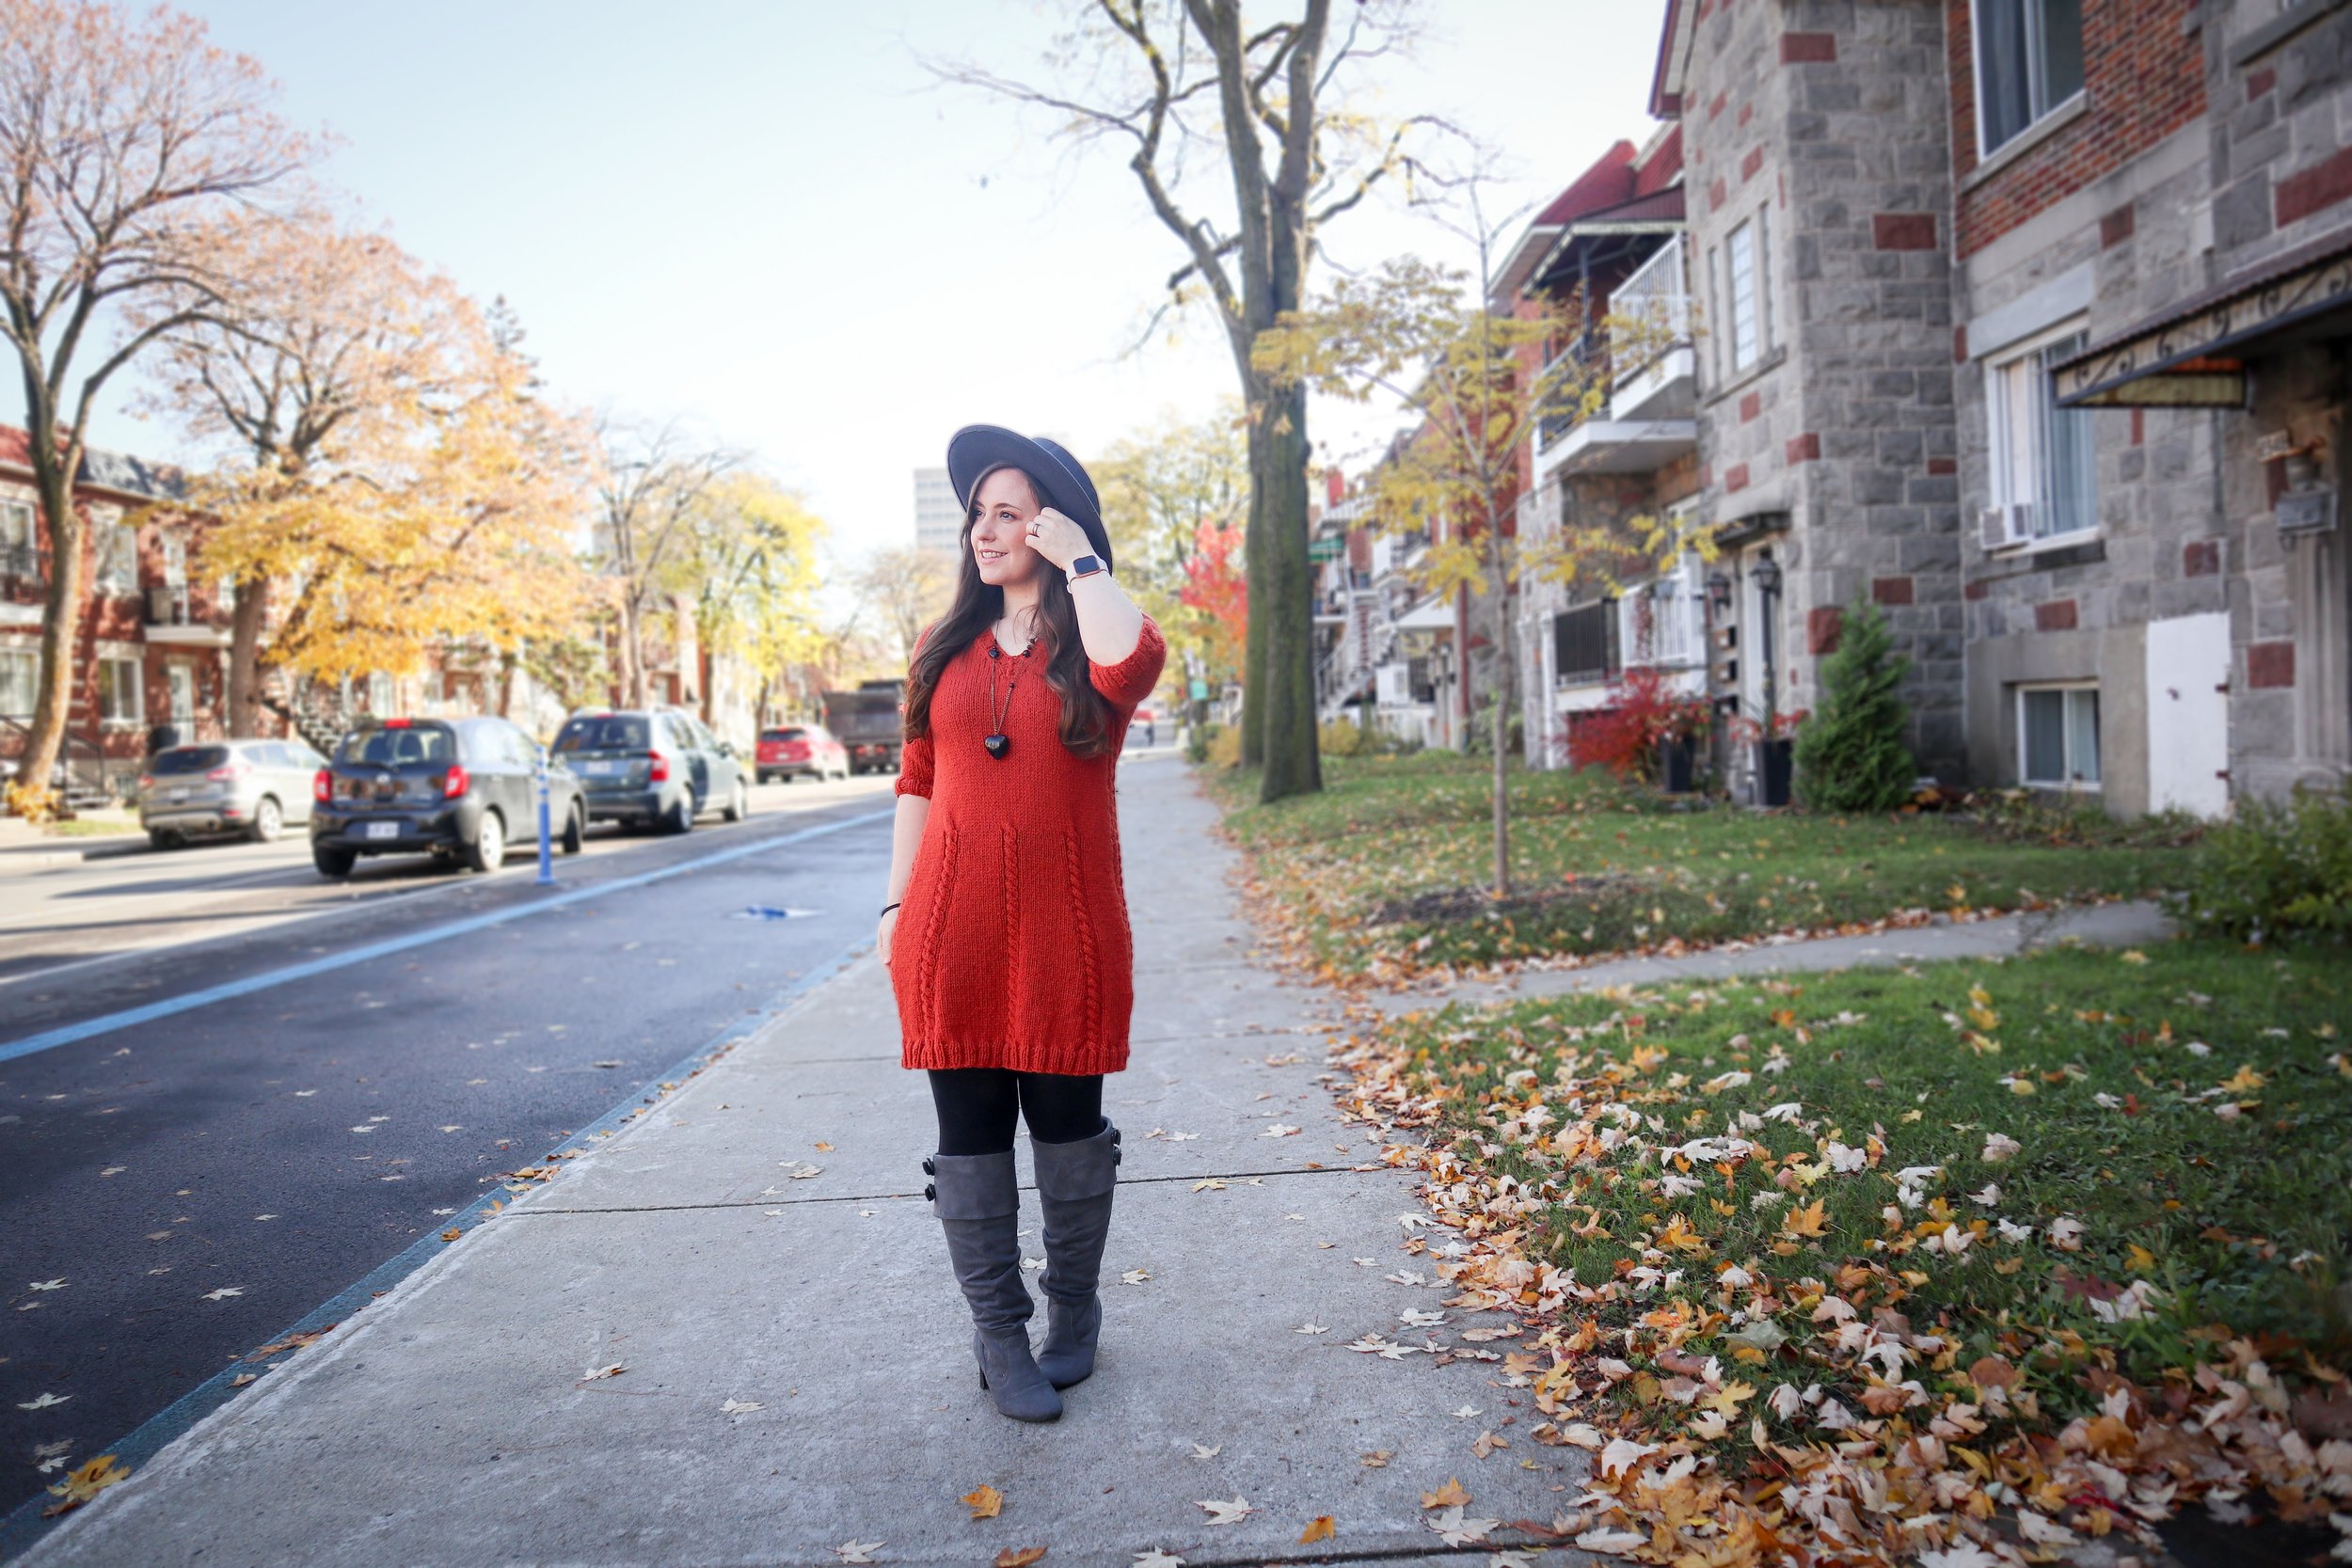
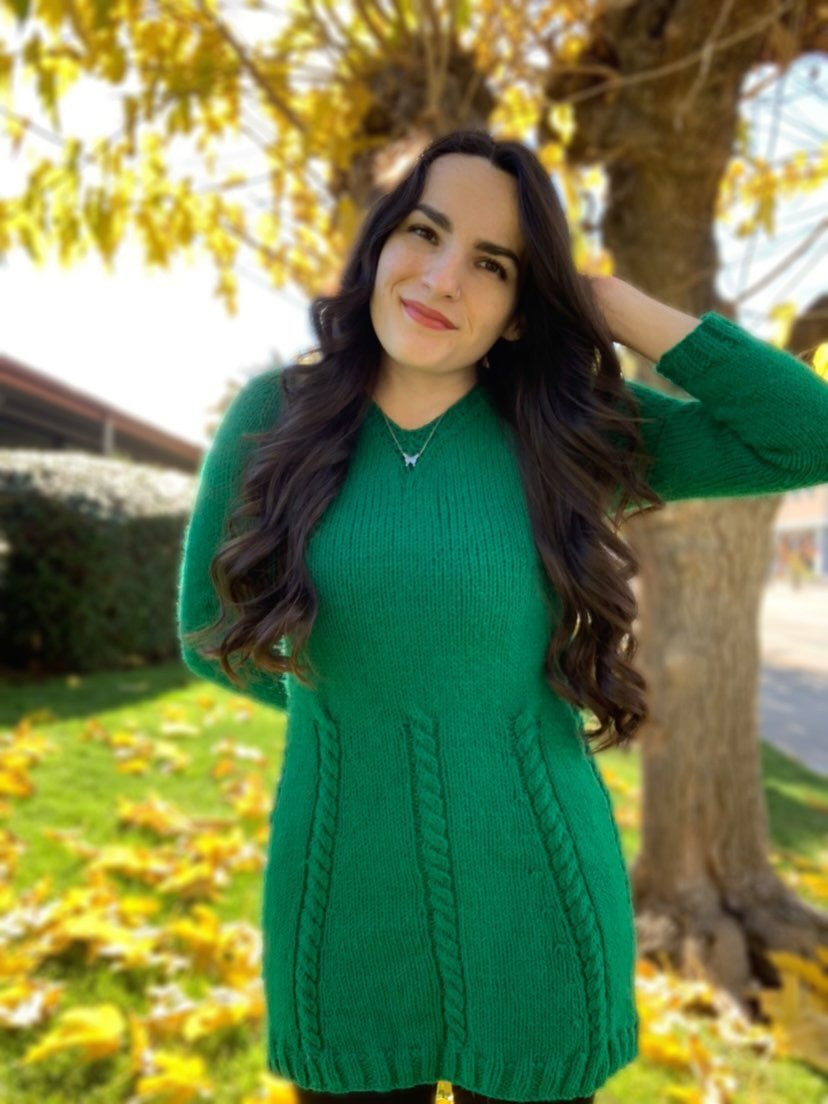
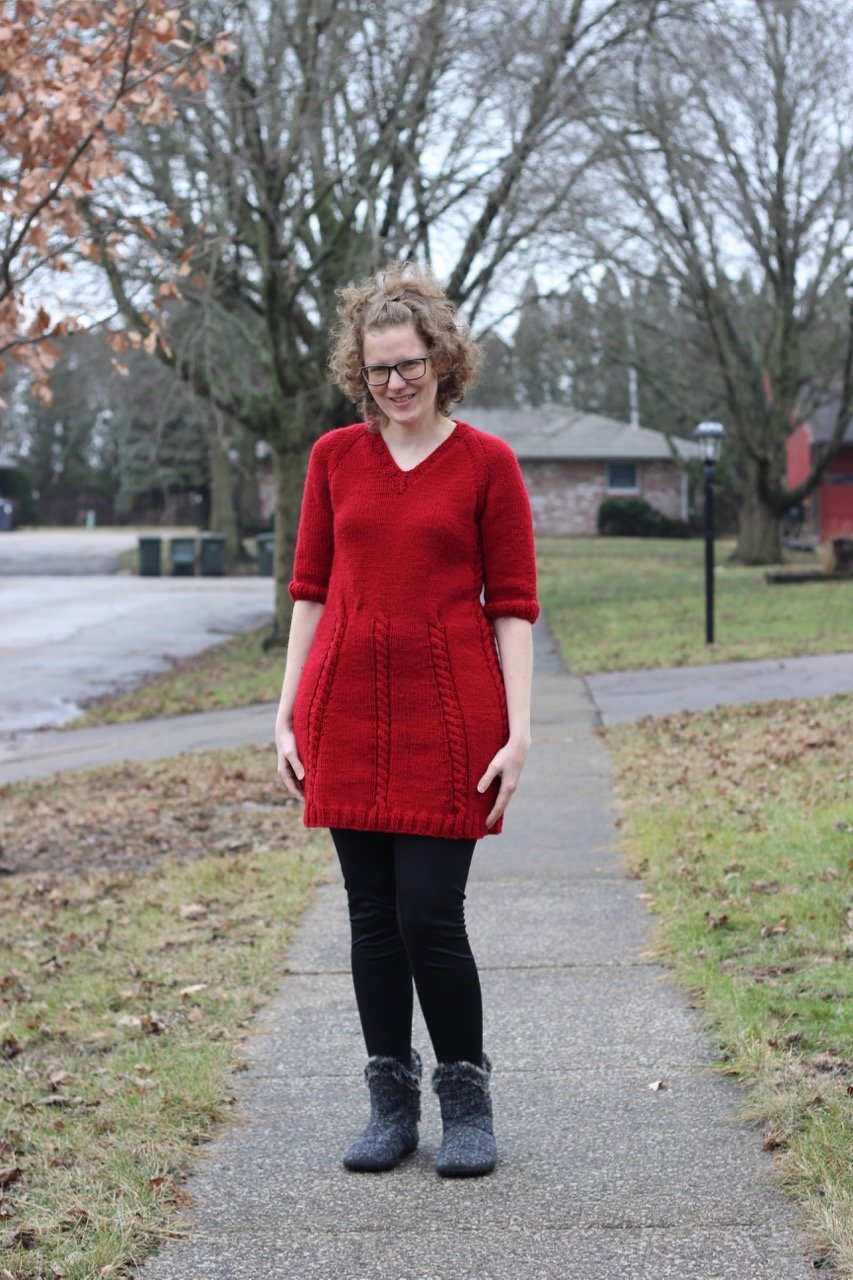
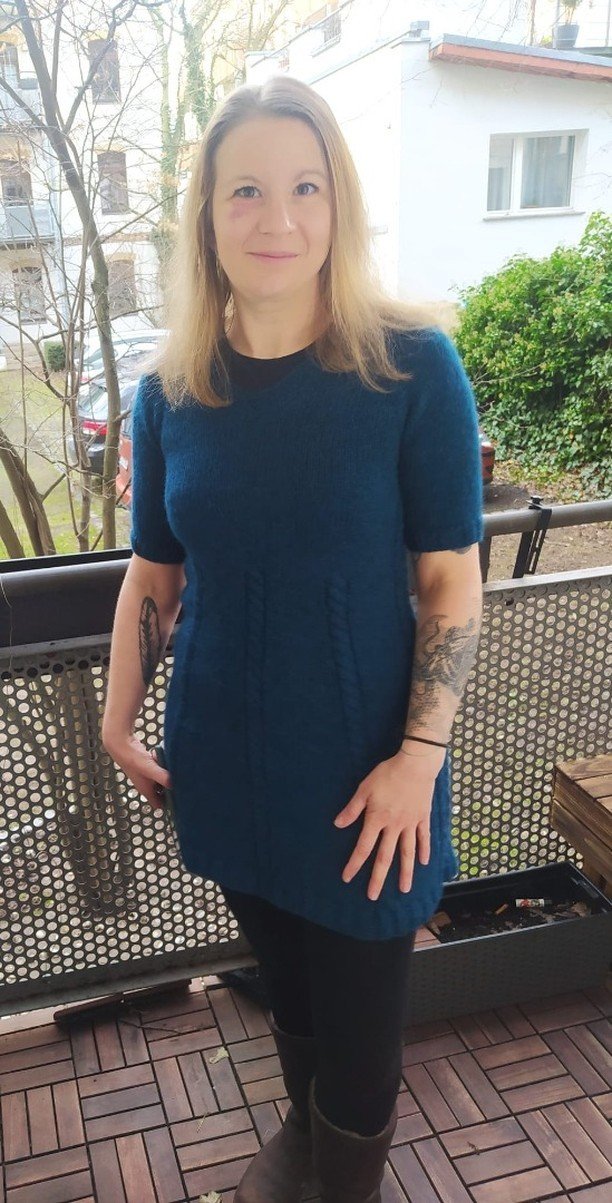
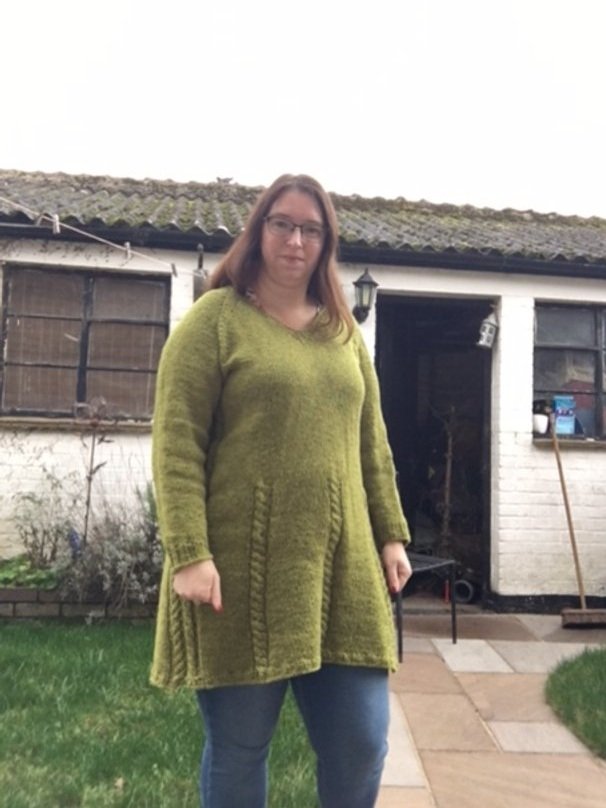
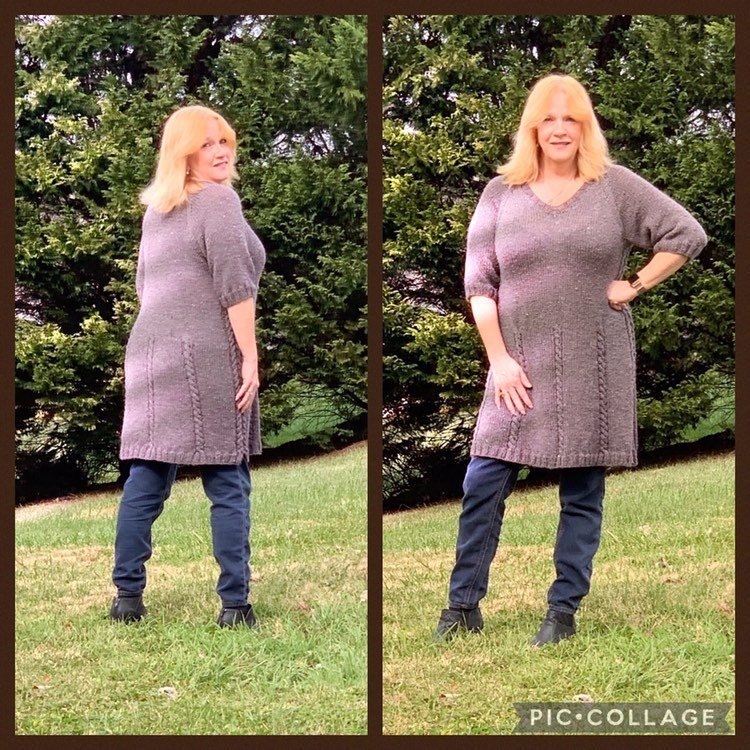
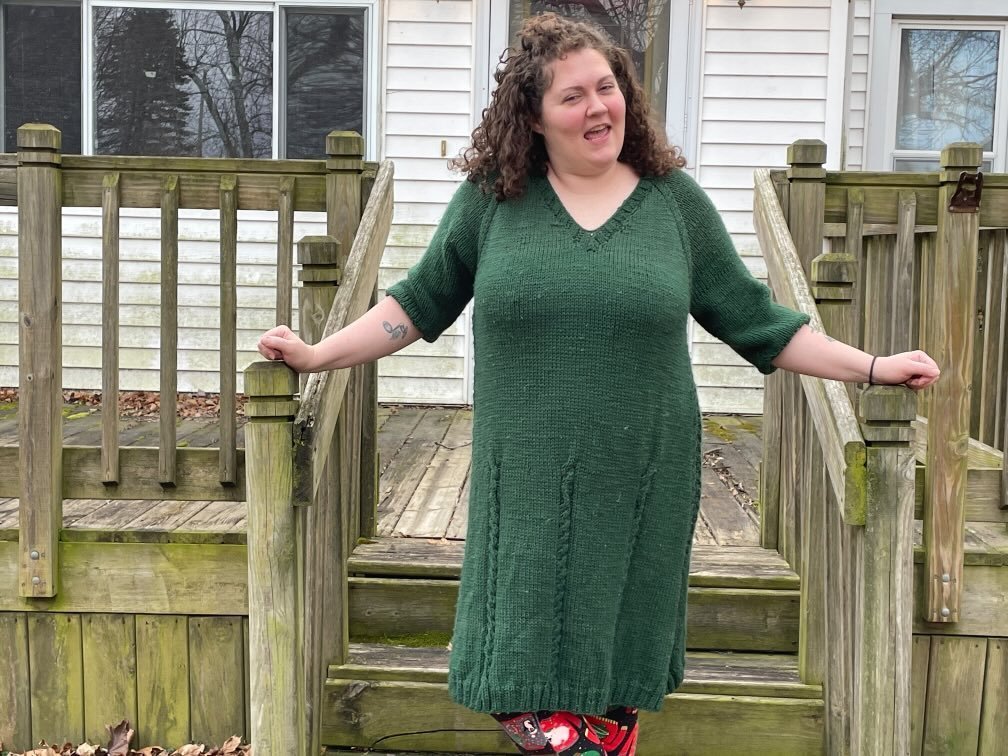
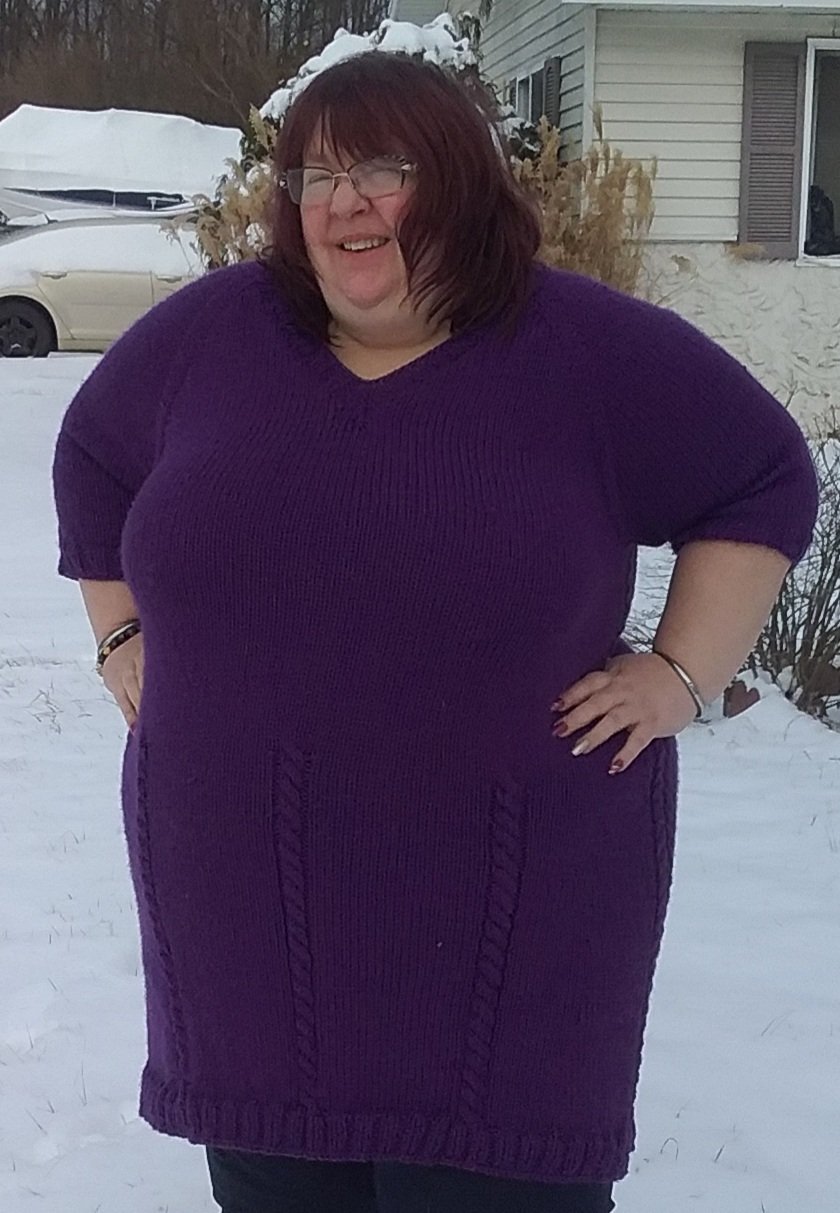
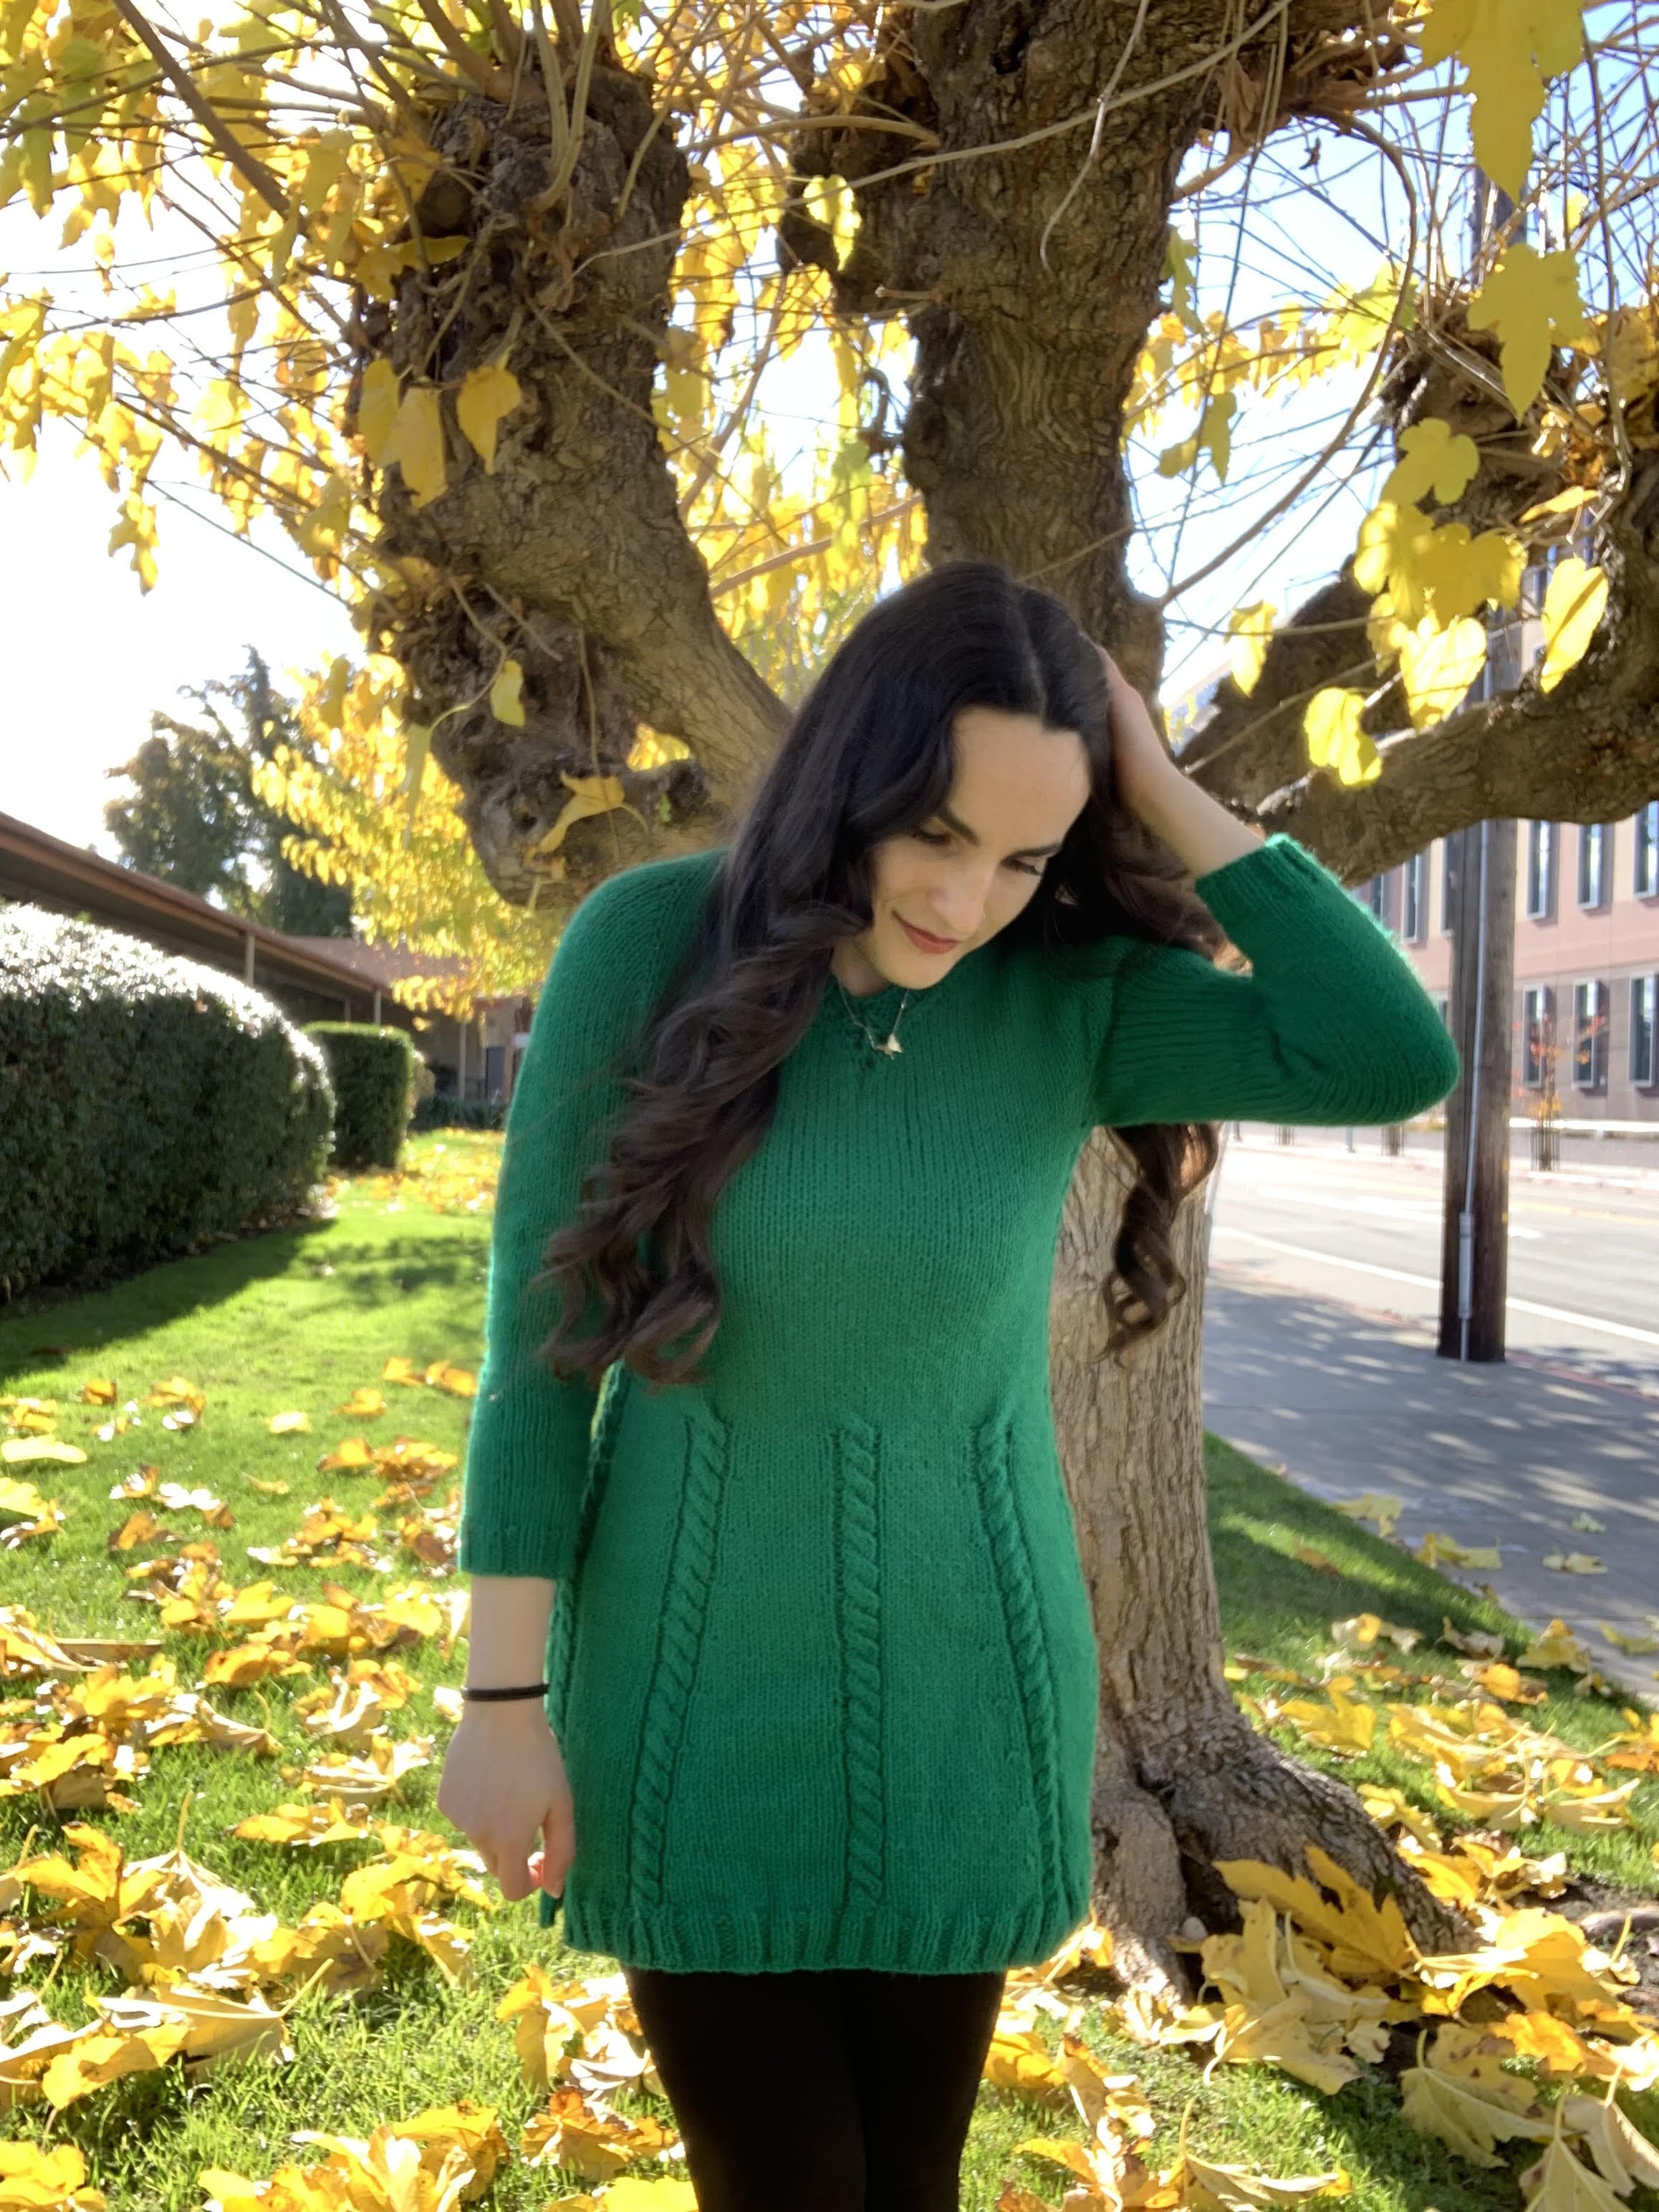
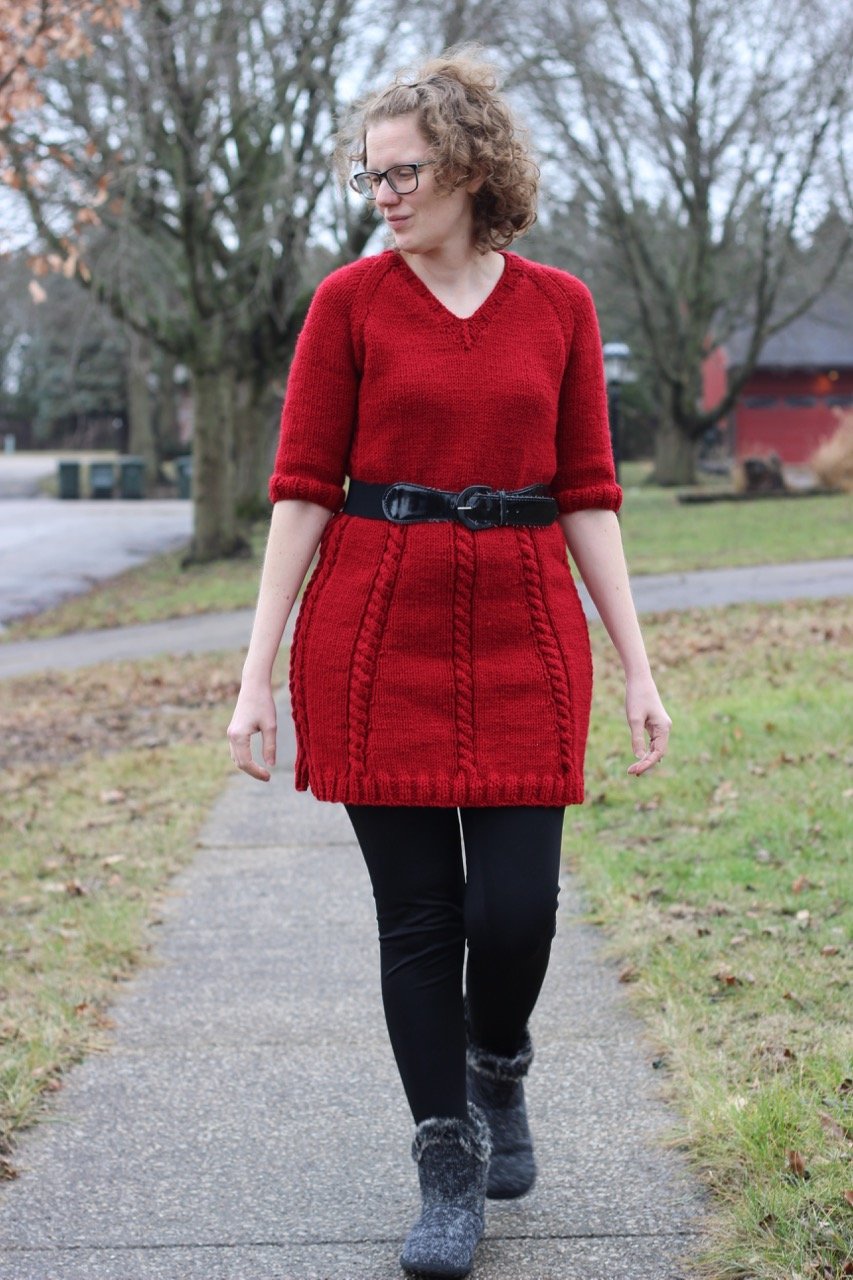
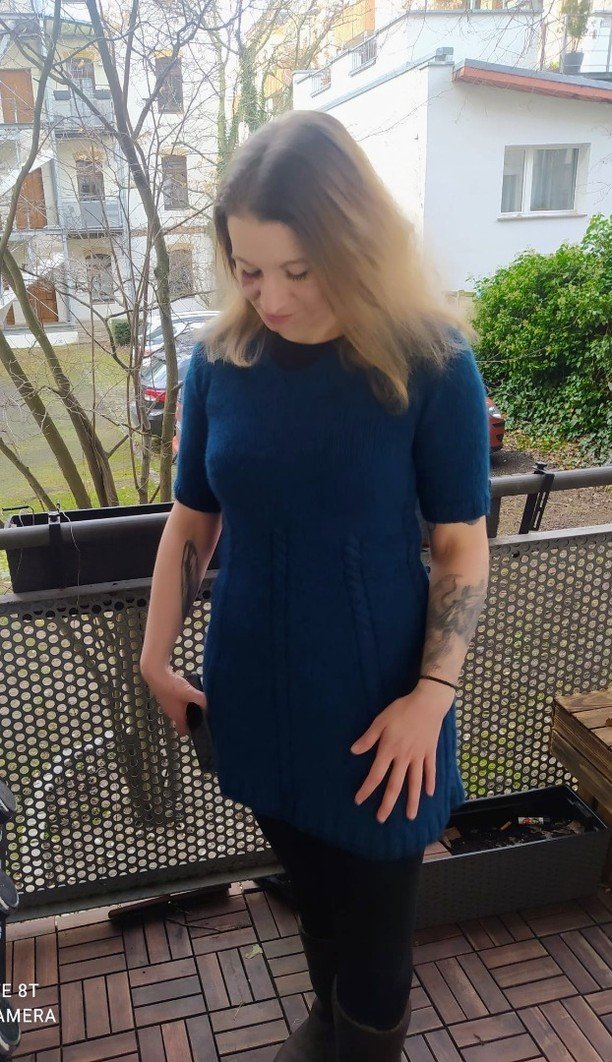
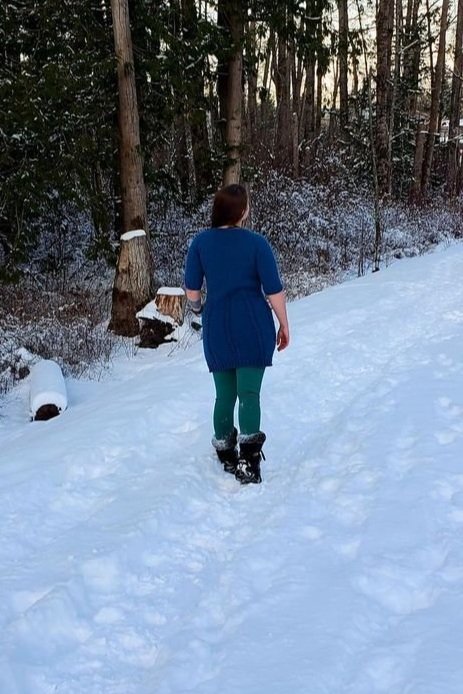
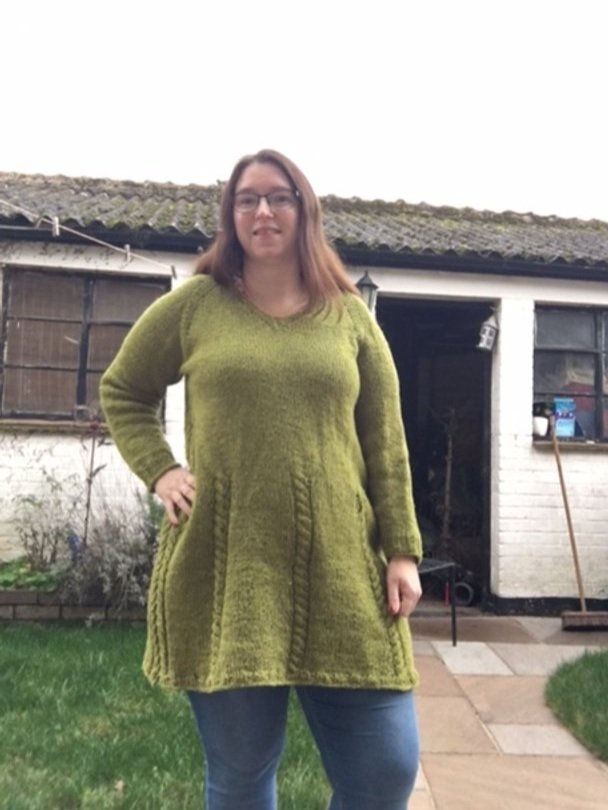
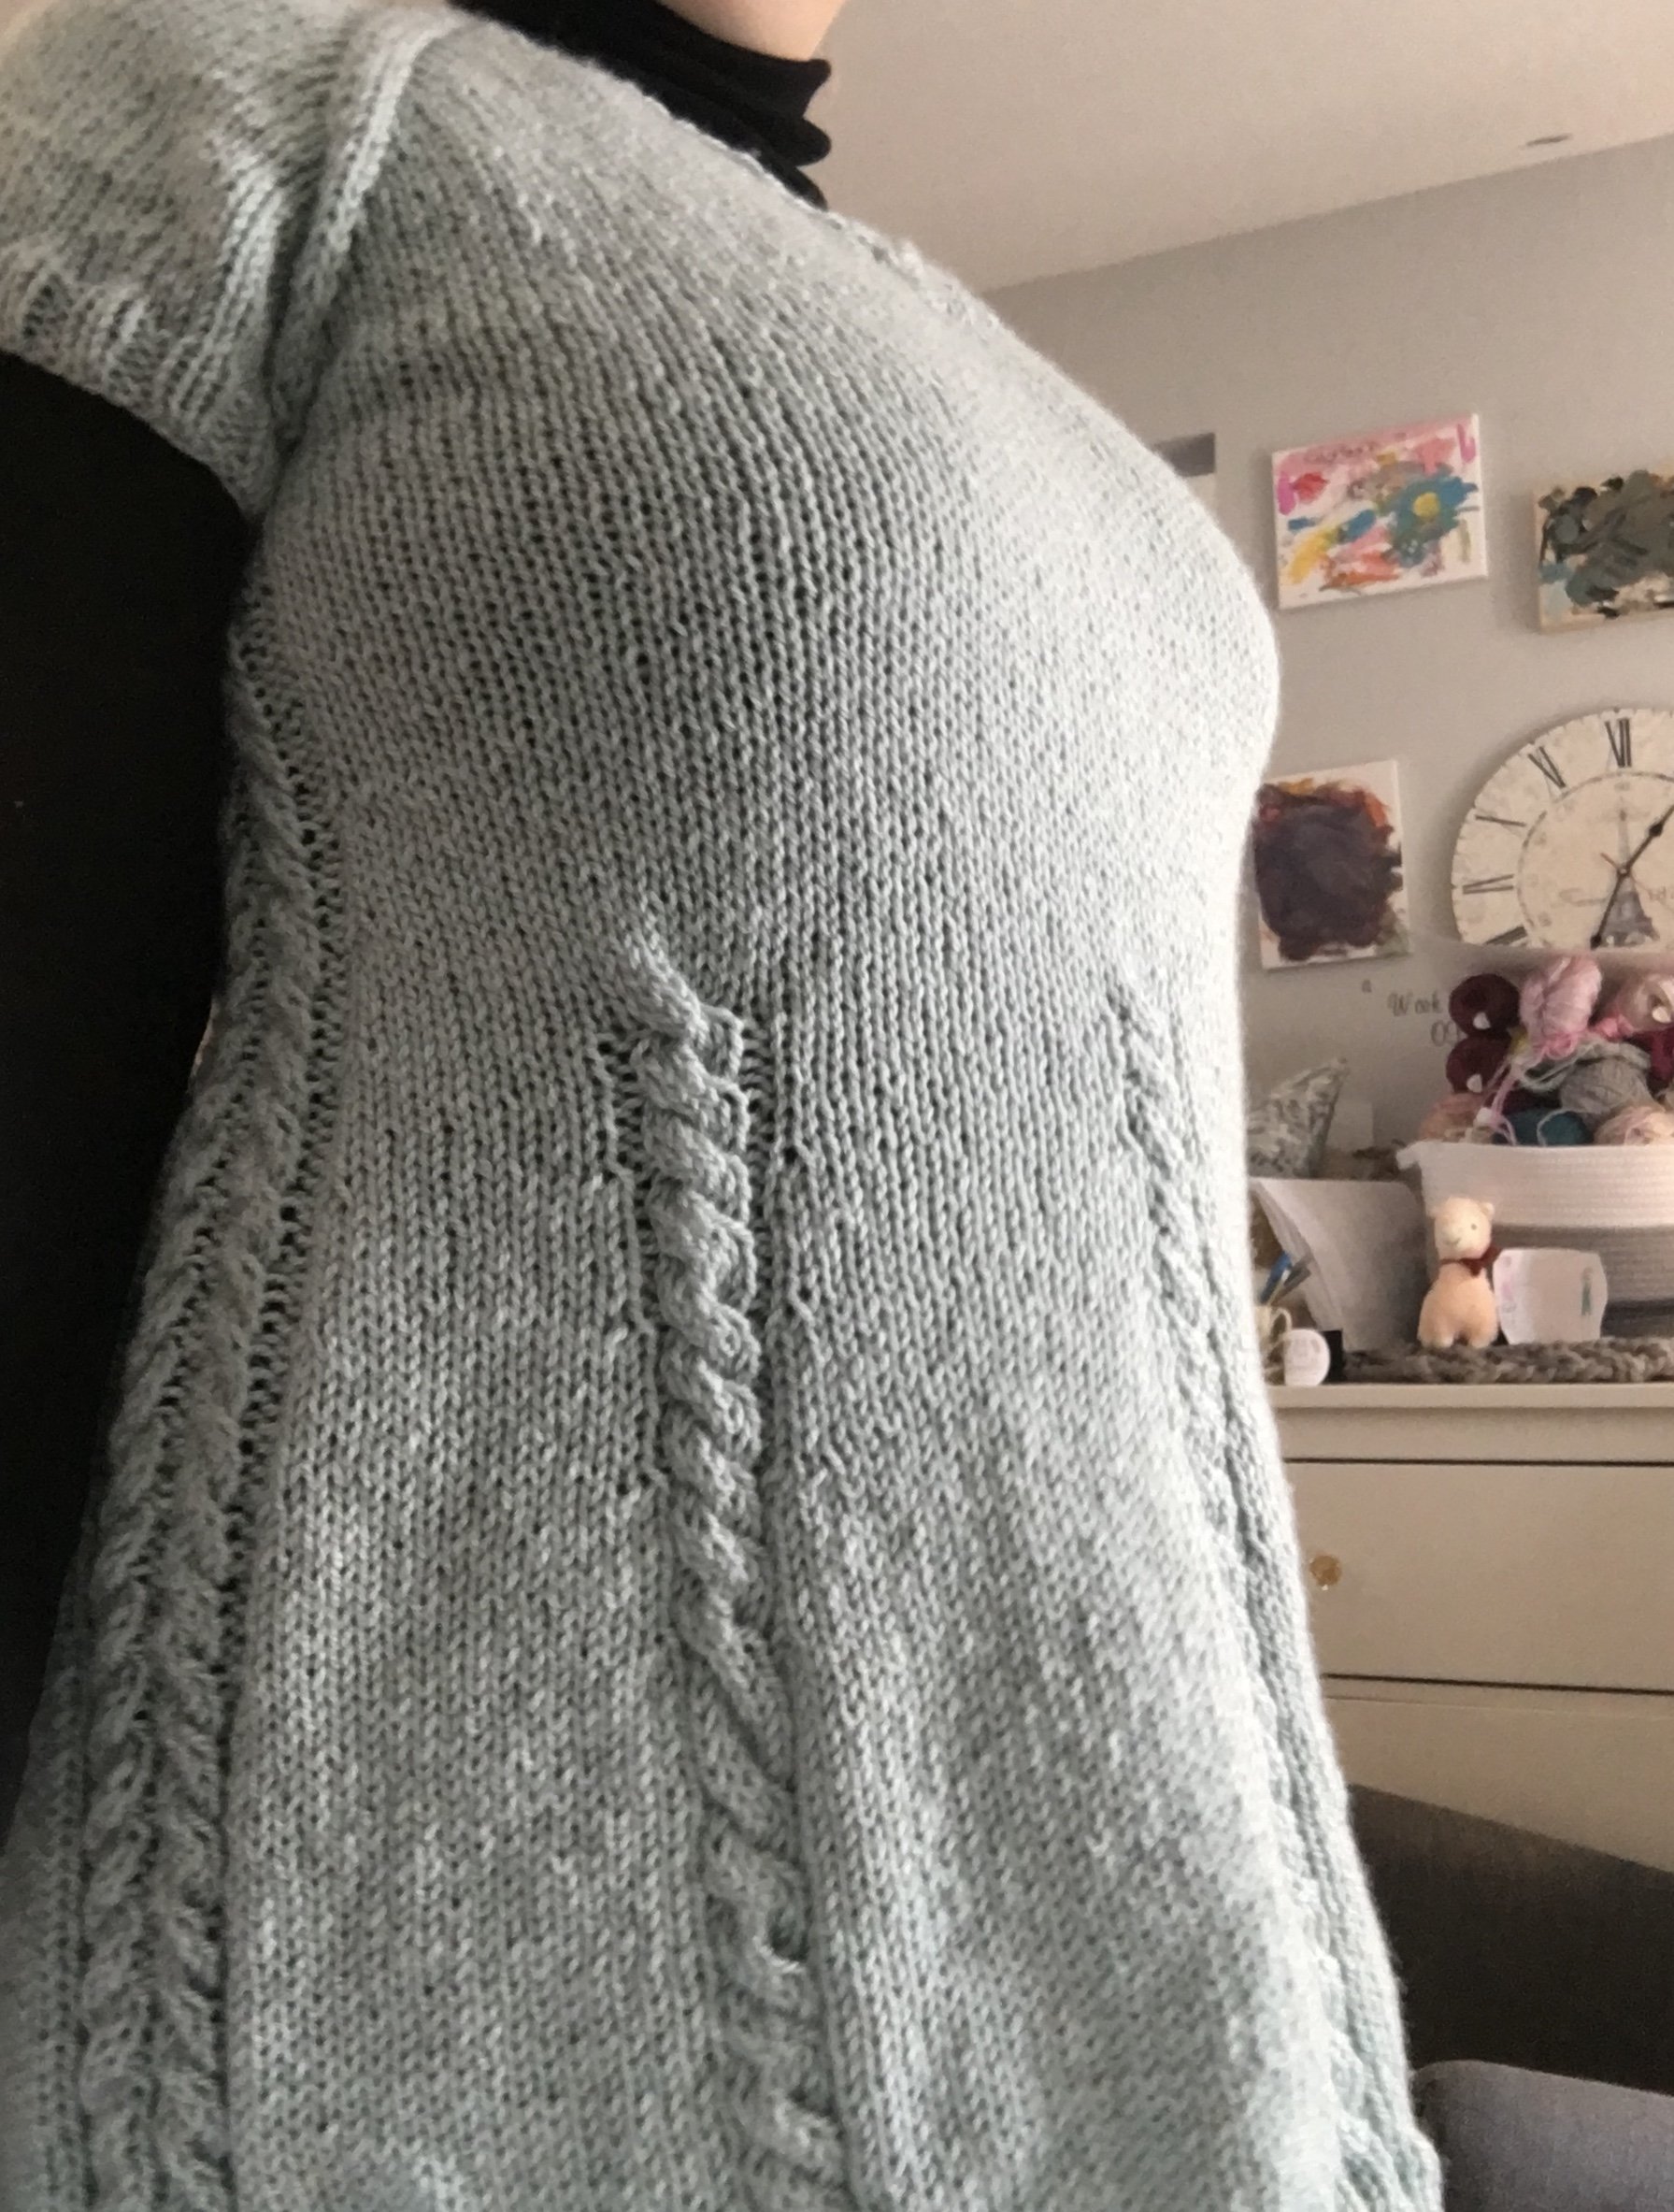
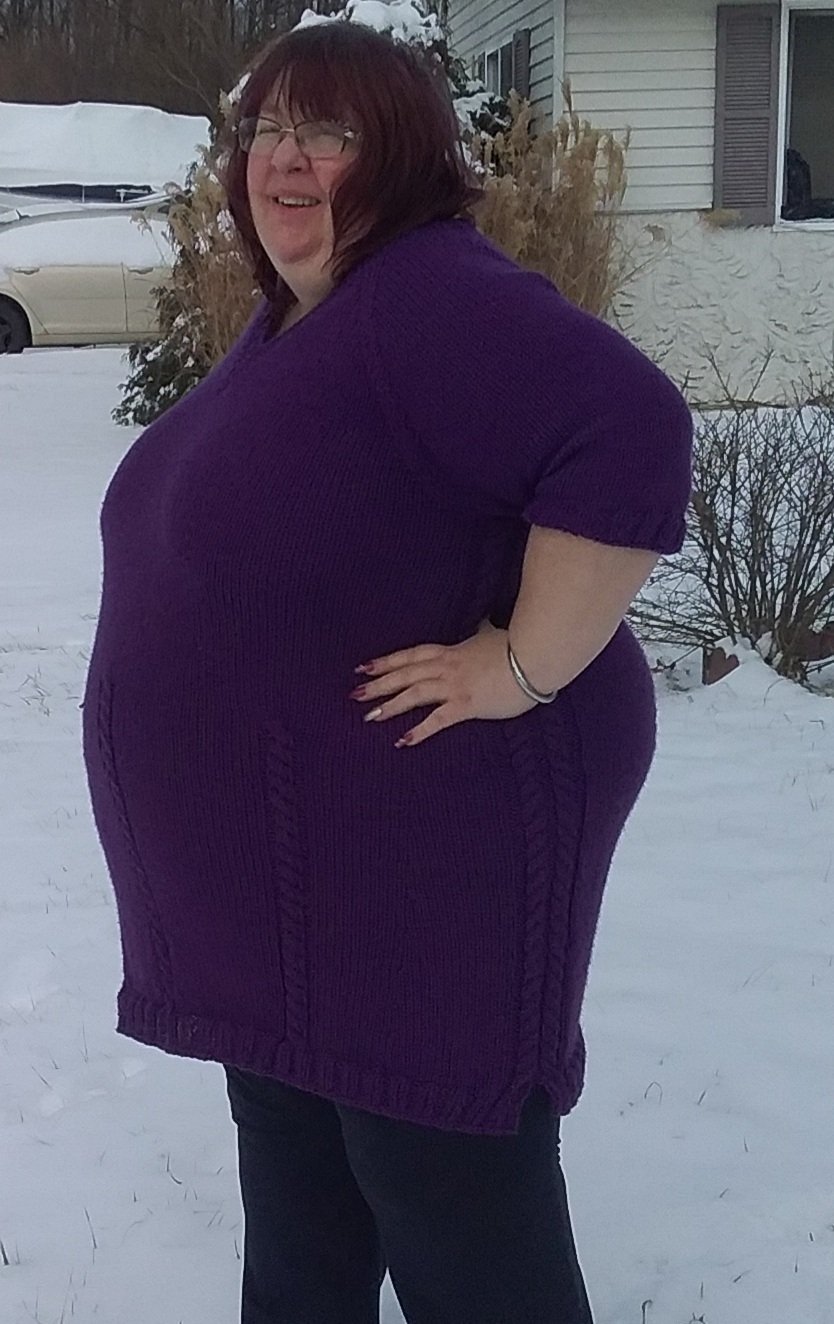
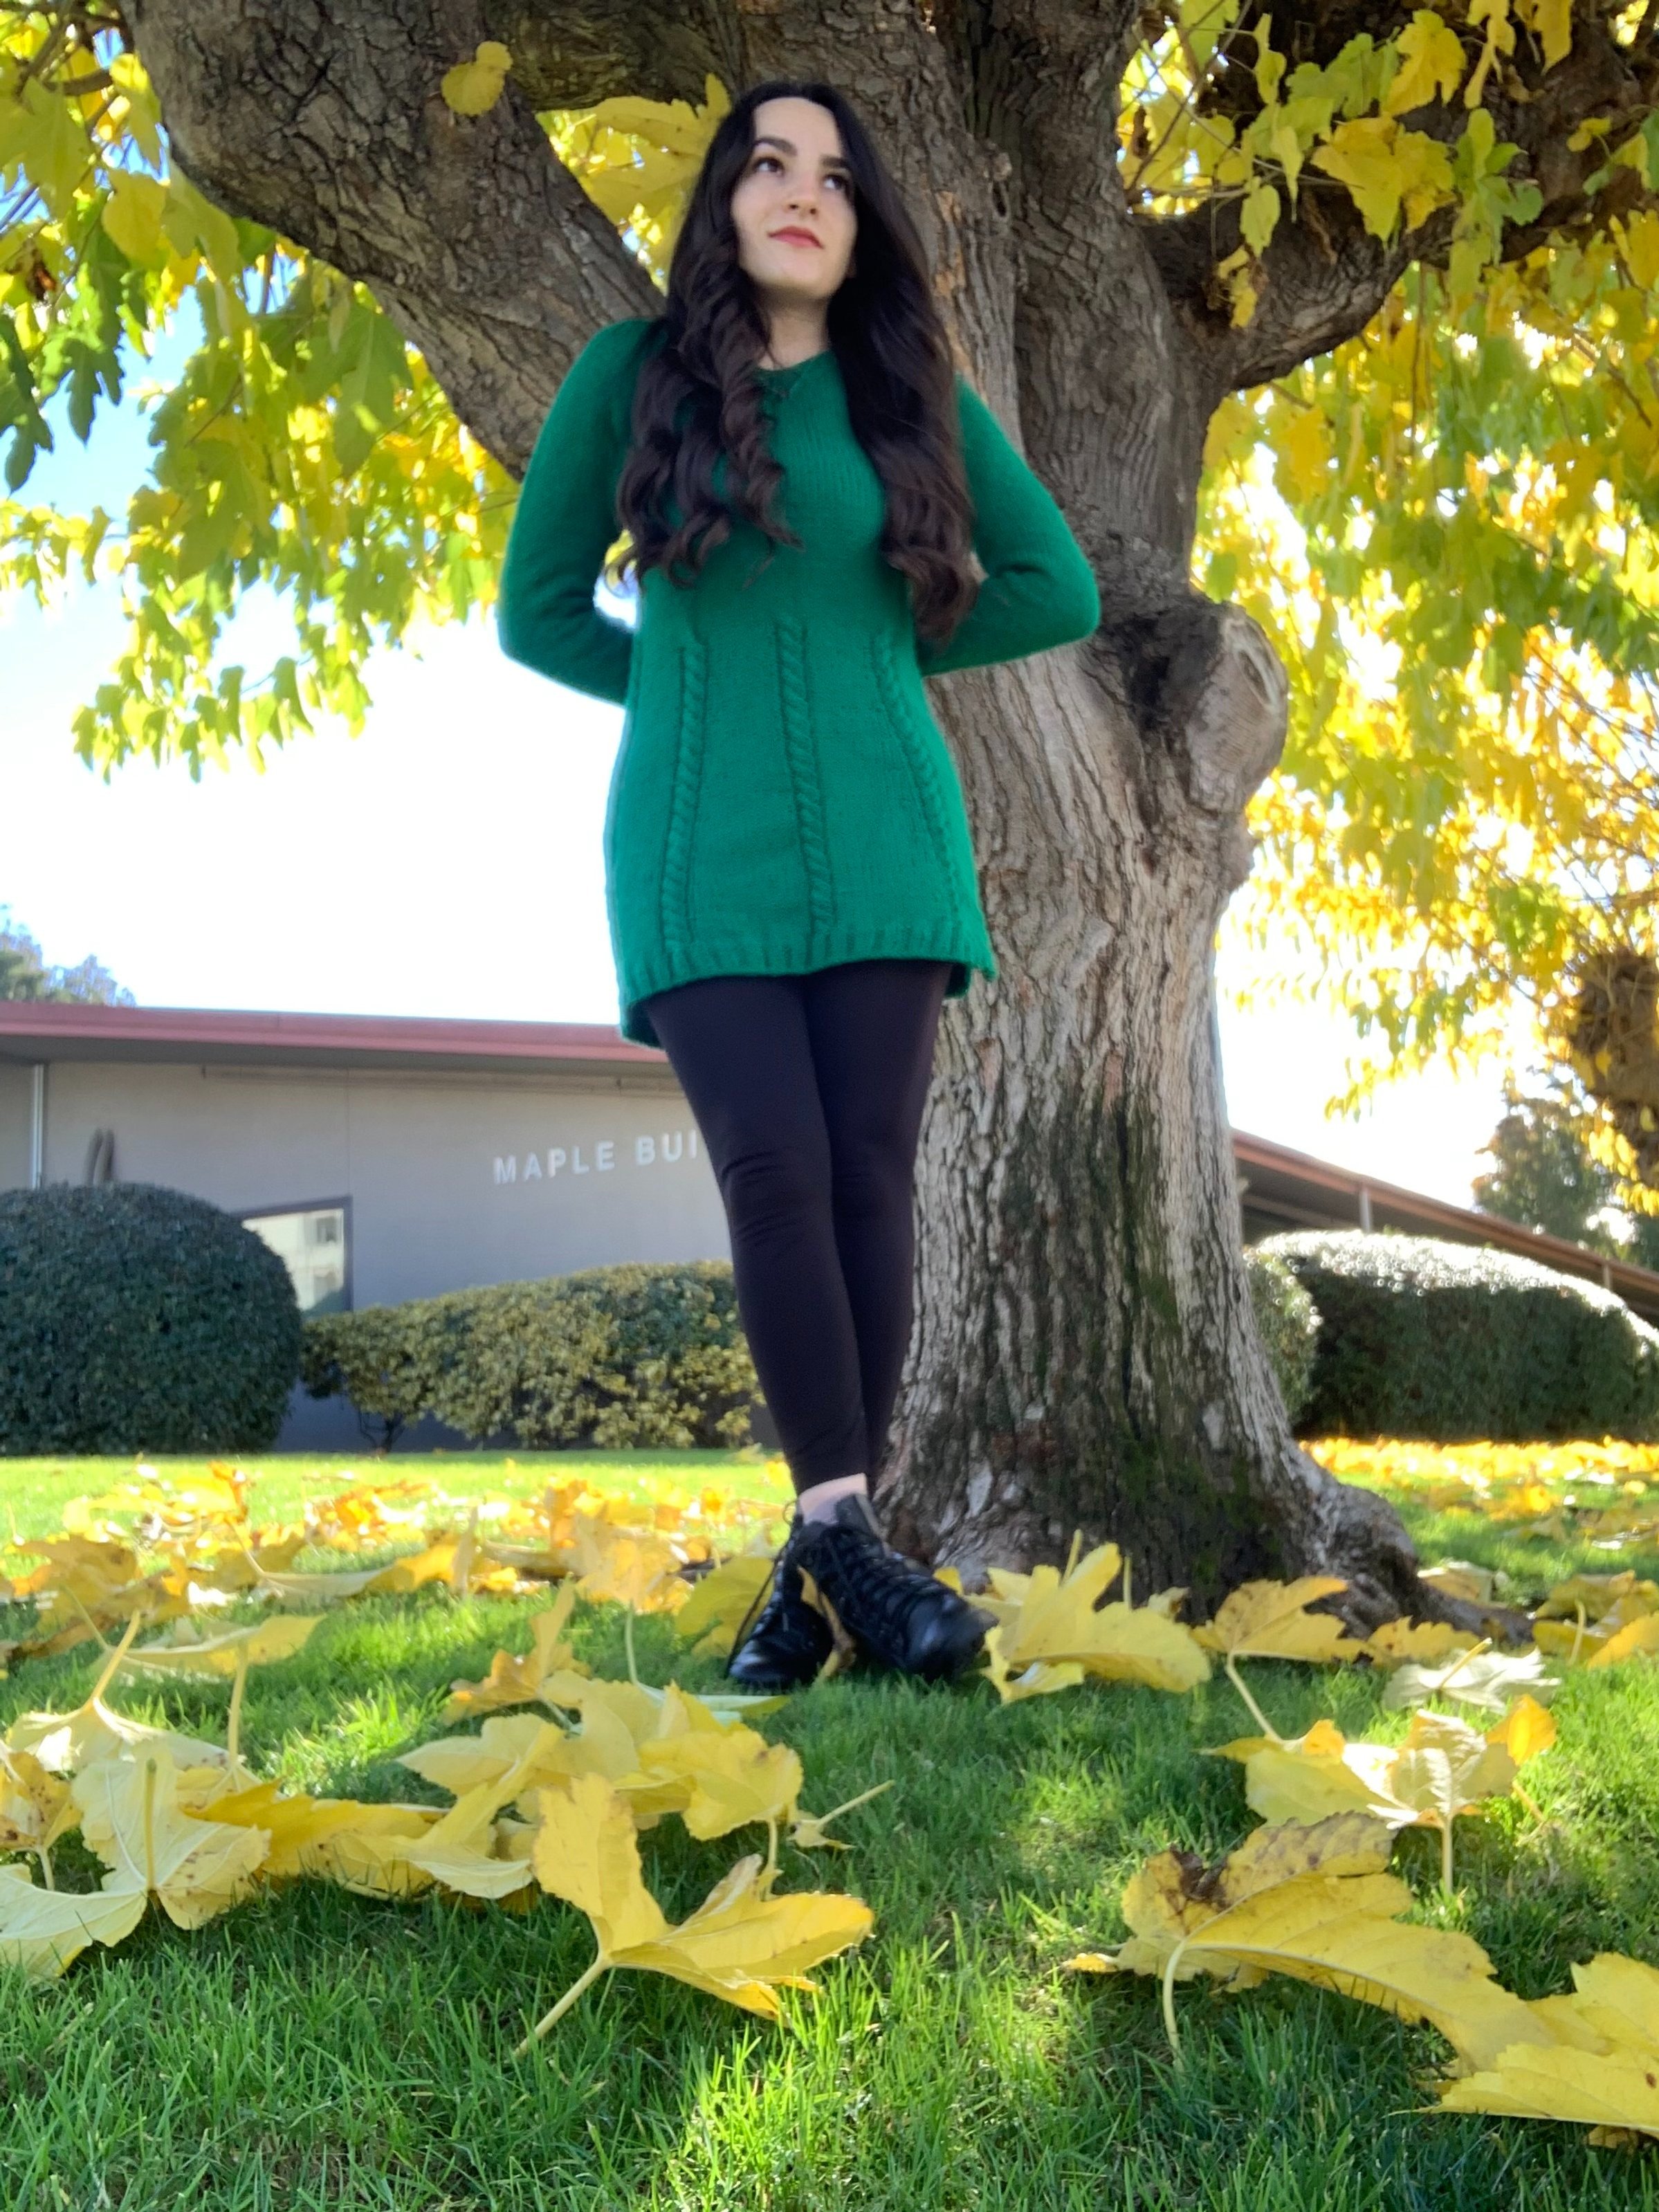
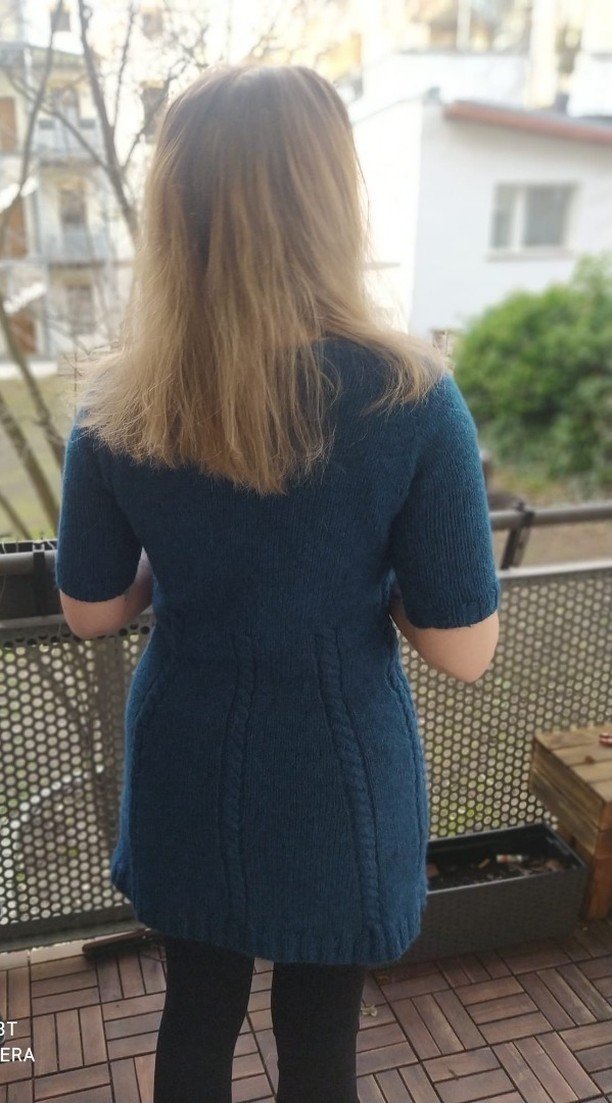
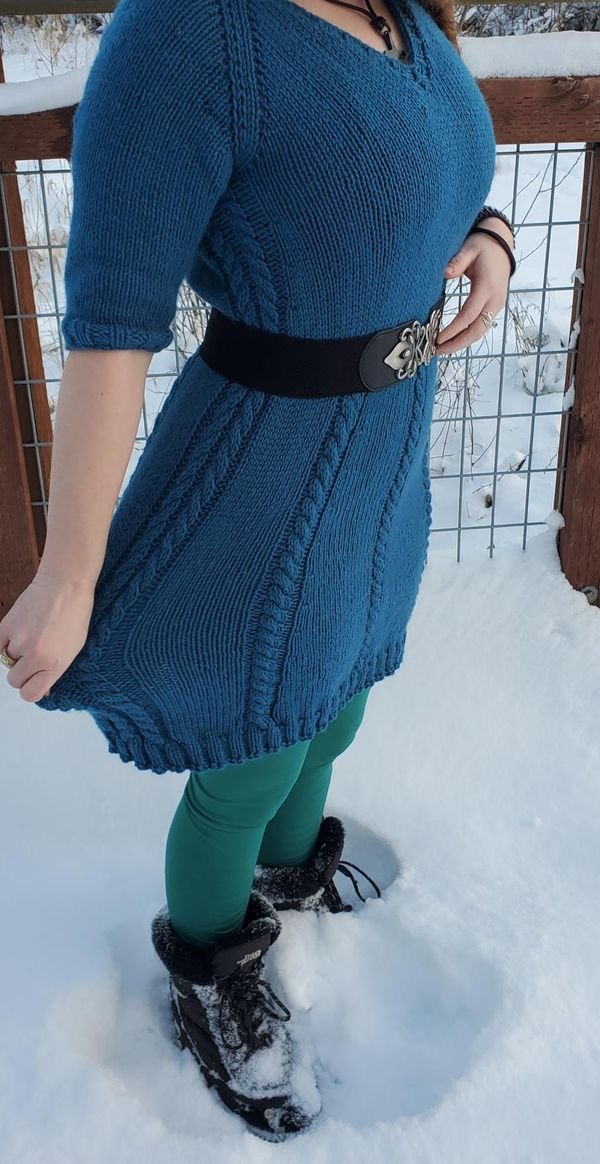
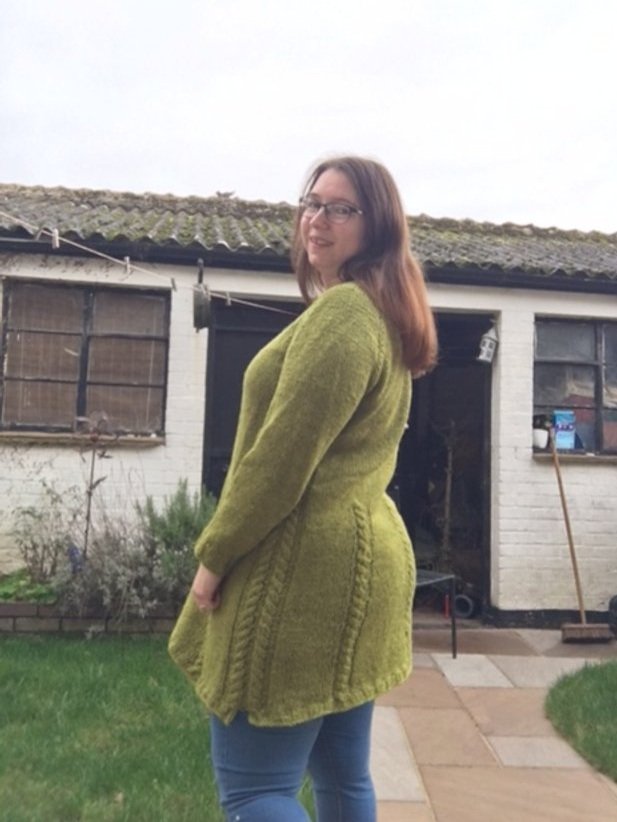
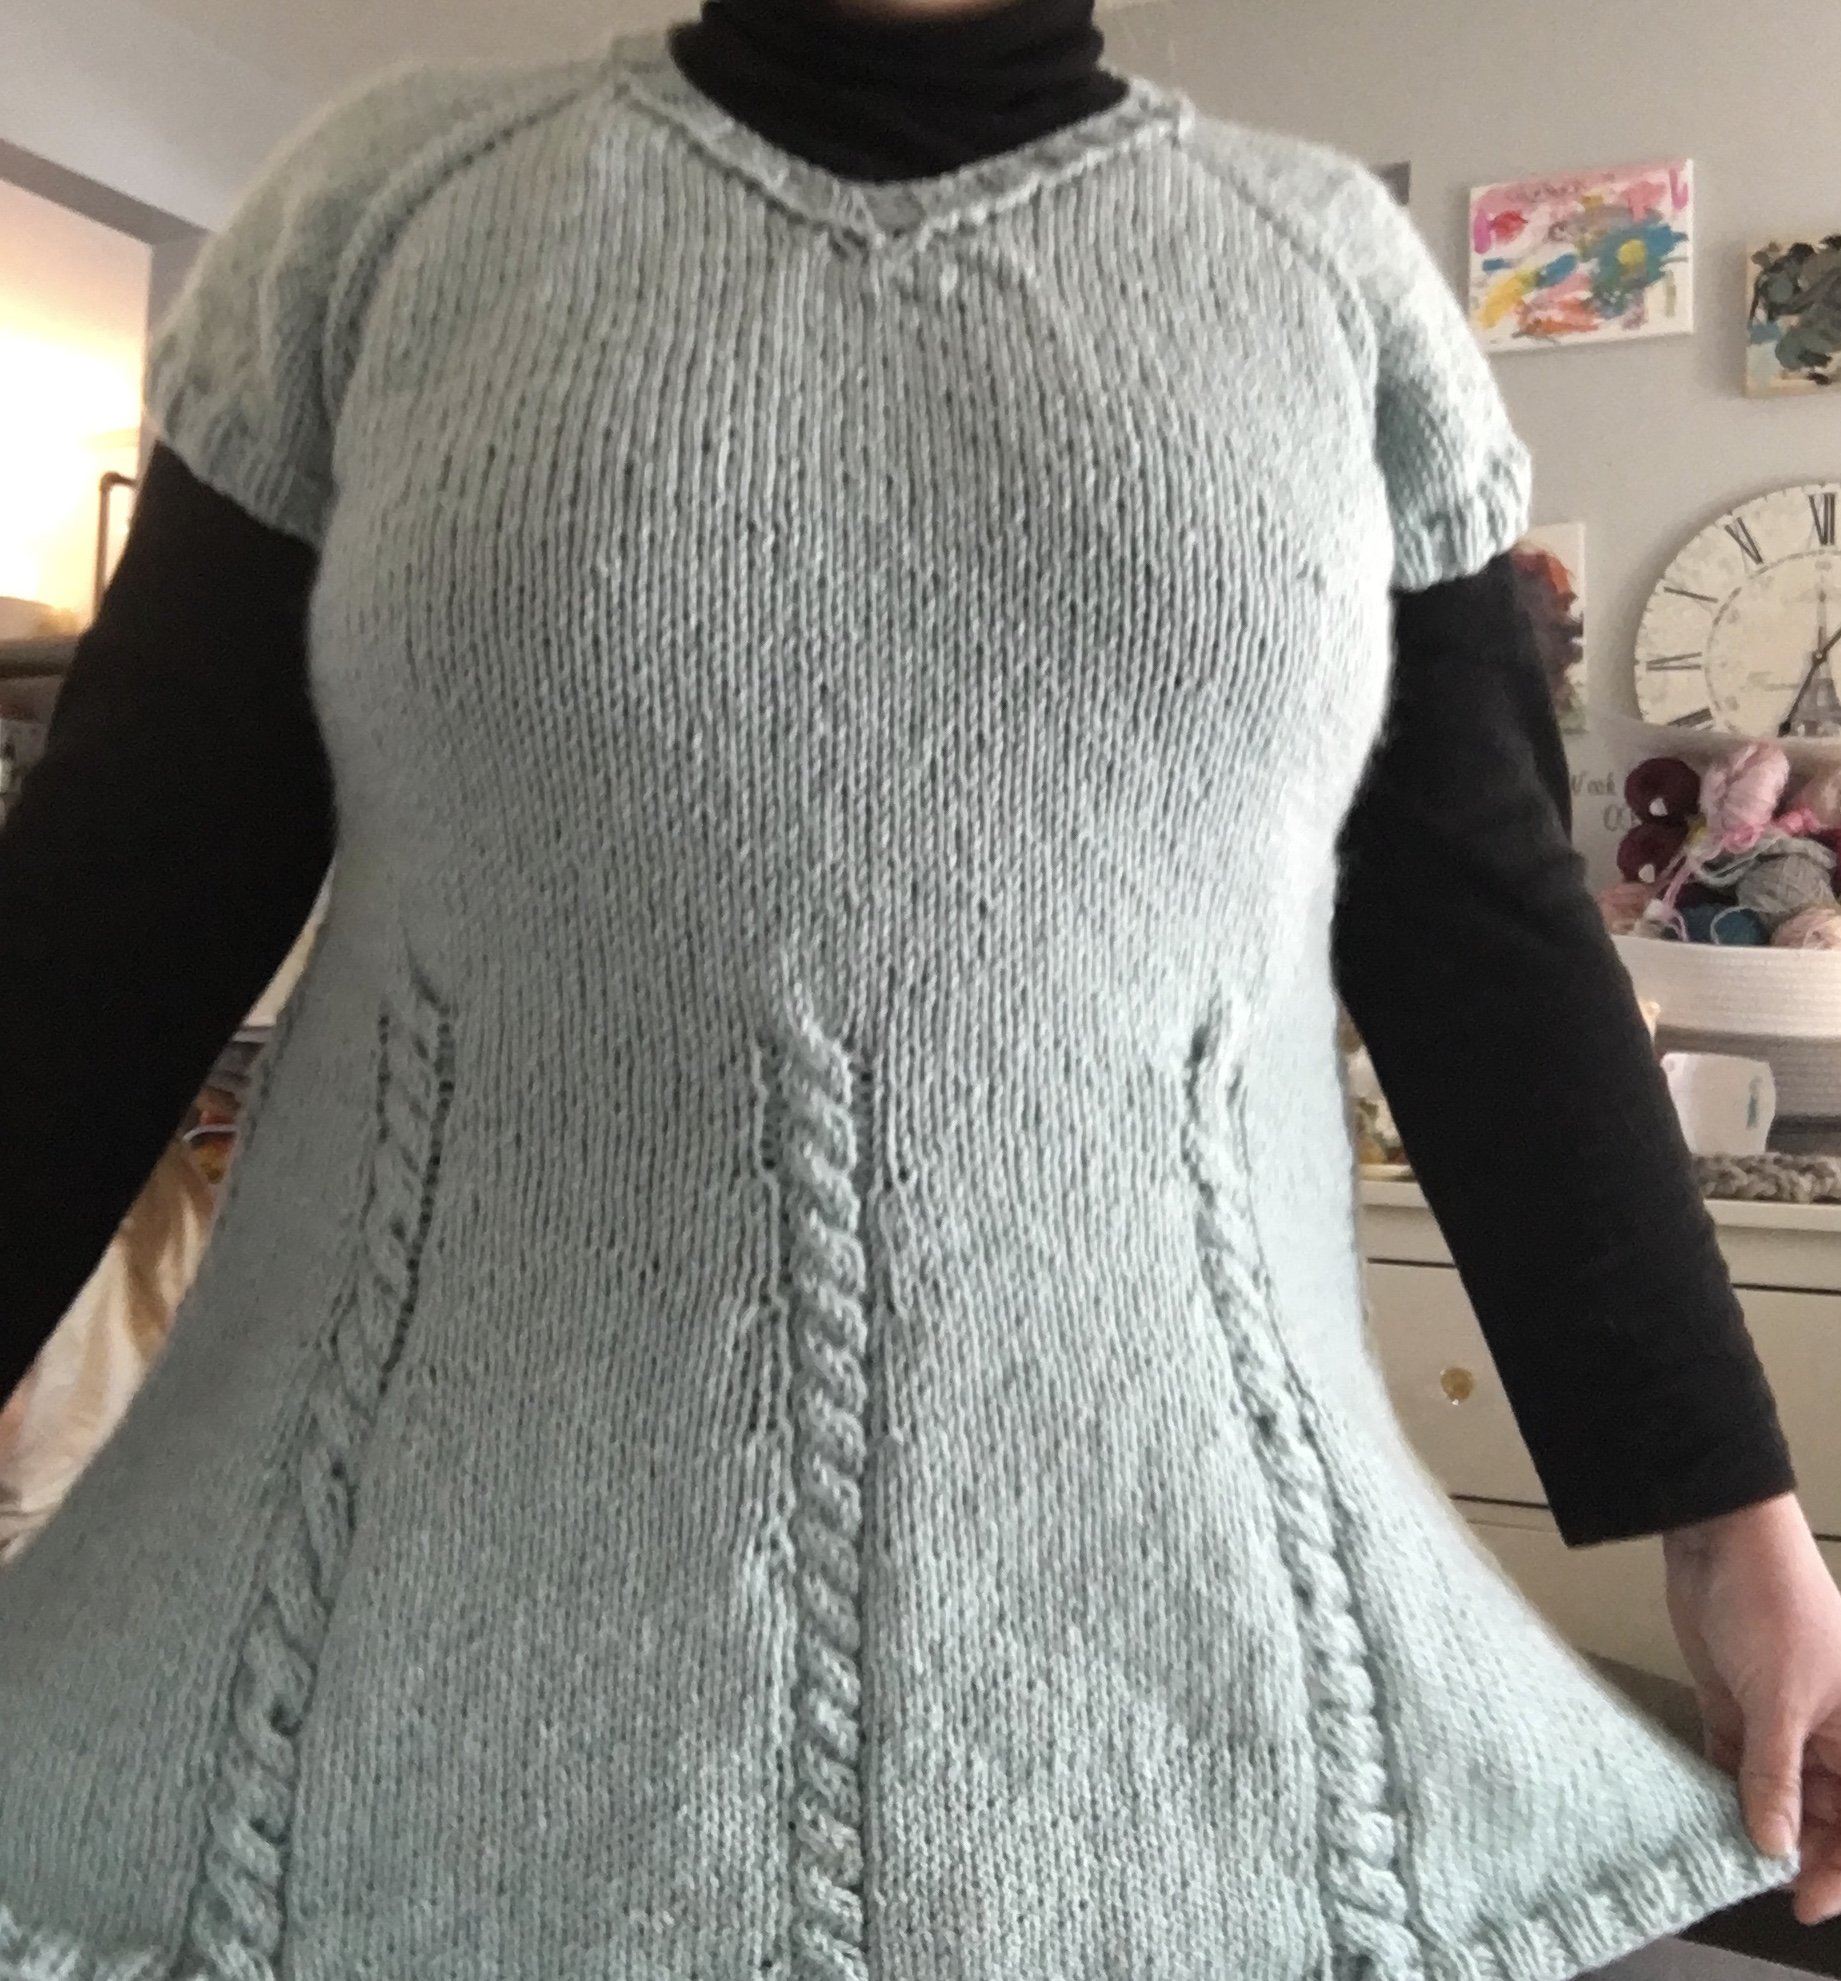
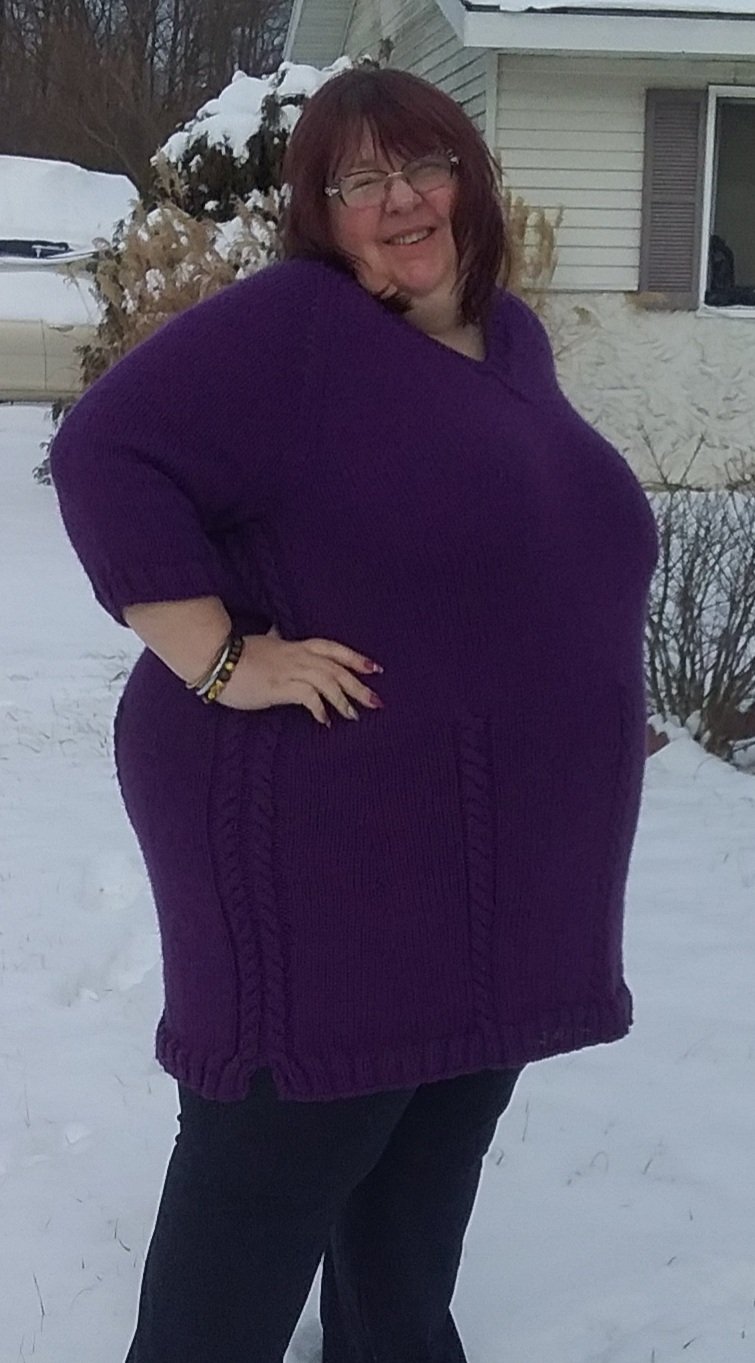
This is the Autumnity Tunic Dress. It is a raglan-style A-line garment that can be worn as either a tunic of a dress depending on how long you decide to knit it. This shape is flattering for so many different body types! And, bonus, the pattern directions are size inclusive! We have directions for sizes S - 4XL!
This dress is really easy to modify to fit you as well. If you’d like a more form-fitting dress, choose a size that gives you less positive ease. If you’re really hankering for a nice over sized tunic style, then choose the size that gives you all that wonderful positive ease. It really is up to you how you’d like to wear it!
The sample dress is knit with Aran/Worsted weight 4 yarn and 6.5mm needles to give it a nice loose drape.
I hope you all love this tunic dress as much as I do!


I LOVE TO SEE WHAT YOU CREATE!
Please share your creations with the community on social media tagging @ravinsekaidesigns and hashtag #
I can’t wait to see the beautiful things you come up with!
FOLLOW ME ON SOCIAL MEDIA
Facebook: Ravin Sekai Designs
Ravelry: RavinSekai
Etsy: Ravin Sekai Designs
Instagram: @ravinsekaidesigns
Pinterest: Ravin Sekai Designs
Patreon: Ravin Sekai Designs

WHAT YOU NEED:
Needles: Size 6.5mm circular needles or size needed to obtain gauge (see notes for more information)
Yarn: Worsted/Aran Weight 4 yarn. Sample knit in Lion Brand Pound of Love. Approx. 850(900, 1000, 1150, 1250, 1460, 1500) yards
Gauge: 15 st/21 rows = 4” in stockinette
Other: waste yarn or st holders, an extra circular cable (see notes)
Suggested Bust Measurements: S: 32”-35”, M: 36”-39”, L: 40”-43”, XL: 44”-47”, 2XL: 48”-51”, 3XL: 52”-55”, 4XL: 56”-58”
Finished Garment: finished garments has about +2” to -2” ease, Bust: S: 34", M: 38”, L: 42”, XL: 46”, 2XL: 50”, 3XL: 54”, 4XL: 58” Length: variable. Chart on last page.
Model: model is 4’11”, 38” bust, 27.5” waist, 40” hips wearing a medium with 0” positive ease in bust

ABBREVIATIONS:
CO: cast on. I used the long tail CO.
RS: right side
WS: wrong side
St/sts: stitch/stitches
Inc: increase row
Pm: place stitch marker
Marker: the stitch marker that is next in the pattern.
Sm: slip marker from left needle to right.
Rep: repeat
Cont: continue
K: knit
P: purl
KFSB: knit front slip back. This is an increase st. Knit the stitch as normal, but do not slip it off the left needle after knitting. Slip the right hand needle through the back loop of the same st you just knitted, and slip the st off the needle.
M1: make one. This is an increase st. Make one can be a number of different types of increase sts; you can make one right or left. Or, at this part of the pattern, you can use k1fb or KFSB. I used KFSB throughout my tunic.
M1p: make one purlwise. With the left needle, pick up the horizontal strand between the last stitch you knit and the one you’re about to knit, bringing the needle from front to back, then purl through back loop of the strand. This makes a left-leaning increase on the right, or knit, side of the fabric.
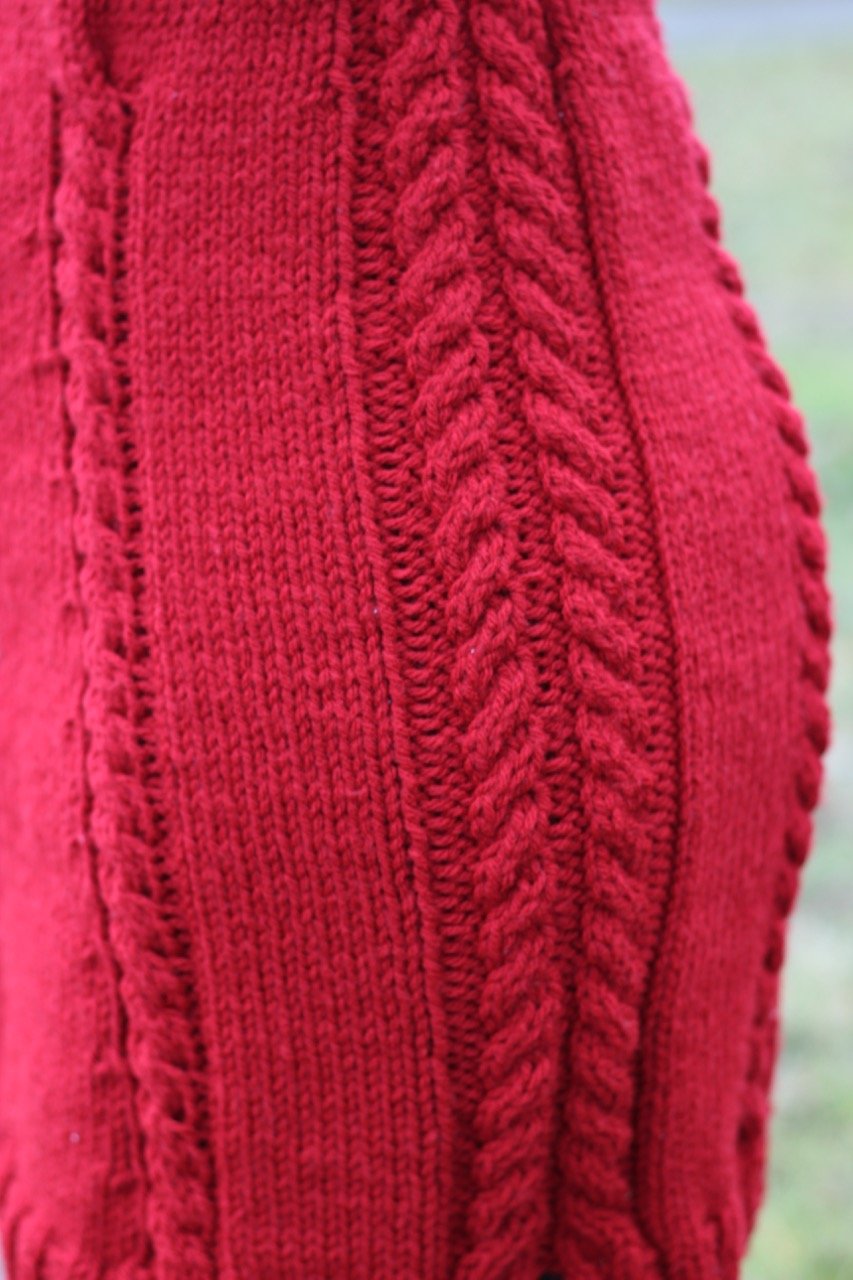
C4b: cable 4 back. Slip 2 st onto the cable needle. With the cable needle held in the back of the work, k2 from the left hand needle, then k2 from the cable needle.
C4f: cable 4 forward. Slip 2 st onto the cable needle. With the cable needle held in front of the work, k2 from the left hand needle, then k2 from the cable needle.
C6f: cable 6 forward. Slip 3 st onto the cable needle. With the cable needle held in front of the work, k3 from the left hand needle, then k3 from the cable needle.
Ssk: slip, slip, knit. Slip the first stitch as if to knit onto right-hand needles, slip the second stitch as if to knit, then slide the left-hand needle into the front part of both stitches and knit them together.
K2tog: knit two together
Knit Straight: knit in pattern without making any increases or decreases until you reach the required number of rows.
BOR: beginning of row
MD: mitered decrease. Slip next 2 sts knitwise onto your right-hand needle and k the next st, sl both slipped sts over the last knitted st at the same time and off right hand needle. A good video of this is here by VeryPink Knits: https://youtu.be/jjUN_hTwbCE
BO: bind off. Make sure you bind off loosely so that the ribbing on the bottom has a good stretch.
Notes:
Basic Raglan Shaping: Raglans are created in 4 sections: The front, the back, and 2 sleeves. When you cast on, you CO 1 st for the front, the top of sleeve #1, the back of neck, the top of sleeve #2, and 1 st for the other side of the front. Then, you create paired inc (1 st on either side of each stitch marker) on every RS row and 1 st on either side of the front according to the chart below until it is time to join the front. Then, you no longer have a WS row and you continue to knit in the round.
Ease: The pattern is written without waist shaping. If you want a more form-fitting tunic, choose the size that gives you zero or a few inches negative ease (be mindful of your hip area). If you’d like a tunic that is looser, choose a size that gives you more positive ease
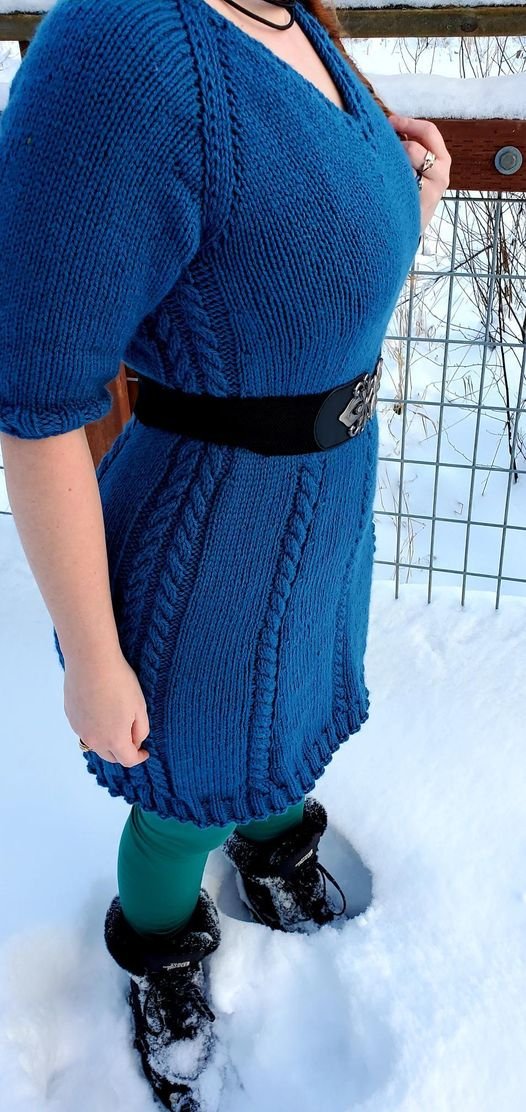
Neckline: This top has a V neckline, and the neckline chart below will tell you on which rows to inc. The inc start by being knit on every RS row the same as the raglan line. But, they will change to every 3rd row at a certain point. This is to maintain a smooth v-neck line. Once you reach the number of rows/sts needed for the neckline, you will join the 2 front portions together and cont. by knitting in the round. (no more WS)
Bust/Sleeves/Yoke: You will cont. knitting in the round, making paired inc in both the bust and sleeves until you reach the row/number of sts needed for each section according to your size in the chart below. Be aware, bust and sleeve increases finish on different rows to maintain correct shaping and fit.
Length: As you get towards the bottom of the tunic, you'll want to try it on. If you're short like me (4'11", 150cm) you might want to finish a few rows early like I did. Also, if you're taller than average, you might want to add a couple rows/repeats at the end. (remember it will be a bit longer after blocking). Be aware, if you stop early and do not do all the increases, you will have fewer stitches when you separate the front and back for the bottom band. You will still be slipping 7 sts to start it.
Knitting needles/extra cable: Make sure you either use circular needles with a cable that is long enough to try your top on as you knit or that you have waste yarn you can slip the stitches onto for when it’s time to check the fit. This is key to being able to figure out the length of sections such as the yoke and hemline. Also, having an extra circular needle cable will help with knitting the ribbing along the bottom of the tunic.

Save It For Later
Pin to Pinterest
THE Schematic:

THE PATTERN:
For the free pattern of this design please continue on this page. Please consider supporting me by purchasing the 100% ad-free PDF with full tapestry charts for this pattern on my Ravelry or ETSY pages. Or consider joining my Patreon for member perks.
The chart below will tell you at what row your increases for each section will finish, and also on what row you will finish the yoke and separate the sleeves from the body. Refer to this chart as you knit your sweater. Neckline increases are shown in italic.

Yoke:
CO 44(48, 54, 58, 60, 66, 68) st
Set Up Row (WS): p1, pm, p2, pm, p7(7, 9, 9, 9, 11, 11), pm, p2, pm, p20(24, 26, 30, 32, 34, 36), pm, p2, pm, p7(7, 9, 9, 9, 11, 11), pm, p2, pm, p1
Row 1 (RS) (inc): KFSB, sm, k2, sm, KFSB, k to 1 st before marker, KFSB, sm, k2, sm, KFSB, k to 1 st before marker, KFSB, sm, k2, sm, KFSB, k to 1 st before marker, KFSB, sm, k2, sm, KFSB [52(56, 62, 66, 68, 74, 76)sts]
Row 2 and all WS rows: p all sts, sm as you come to them.
Row 3 (inc): KFSB, KFSB, sm, k2, sm, KFSB, k to last st before marker, KFSB, sm, k2, sm, KFSB, k to 1 st before marker, KFSB, sm, k2, sm, KFSB, k to last st before marker, KFSB, sm, k2, sm, KFSB, KFSB [62(66, 72, 76, 78, 84, 88)sts]
For S Only: DO NOT DO the italic neckline increase on Row 5. But, follow the rest of the row directions. See below for more details
Row 5 (inc): k1, KFSB, k to 1 st before marker, KFSB, sm, k2, sm, KFSB, k to 1 st before marker, KFSB, sm, k2, sm, KFSB, k to 1 st before marker, KFSB, sm, k2, sm, KFSB, k to 1 st before marker, KFSB, sm, k2, sm, KFSB, k to 2 sts before end, KFSB, k1 [72(76, 82, 86, 88, 94, 96)sts]
Cont. making the 8 raglan increases every other row as written in Row 5 (one st on either side of each st marker, increases on RS/odd rows). However, in order to make the v-neck, the front neckline of the sweater (the first and last increases starting on Row 3, shown in italic above) will increase independently from the raglan increases. The front neckline will cont. to increase according to the chart below. Some of your increases will be on the WS to maintain a smooth neckline. Use m1p on the WS increases on the neckline.

Joining Neckline:
At the end of Row 29(33, 33, 35, 37, 39, 43), cut your yarn leaving a tail to weave in later. With RS facing you, sl all the front sts on the left needle to the right needle purl wise without knitting them until you reach the first raglan marker (these sts will now be knit at the end of the row), place a unique marker. This is your new BOR.
Front and back should have: 50(58, 60, 66, 70, 74, 80)
Sleeves should have: 37(41, 43, 45, 47, 51, 55)
Round 30(34, 34, 36, 38, 40, 44): Reattach the yarn and cont. knitting in pattern until you come back around to the front. Knit across the front and join the neckline when you reach it by simply knitting over it. Remember that now that you have joined to knit in the round, there is no longer a WS, but we will still only be inc on the odd rows and you will knit stitches on the even rows instead of purling them.
Cont. in pattern for your size until the top reaches the designated number of rows for your sleeves, bust/body, and yoke size (see Increase Chart Above). When you reach the row that you will be separating the sleeves, go to “Separating Sleeves”
Separating Sleeves (end of Yoke):
At this point, your top should reach to a little bit higher than mid-bust. If it needs a couple more rows to reach, knit straight for a few more rows. We will then be placing the sts for the sleeves onto waste yarn to be finished later. Also, you will be casting on your underarm sts to complete the bust and sleeve circumference now. Remember that the 2 sts trapped in your raglan lines will now be split, one going to the body and one to the sleeves from each line.
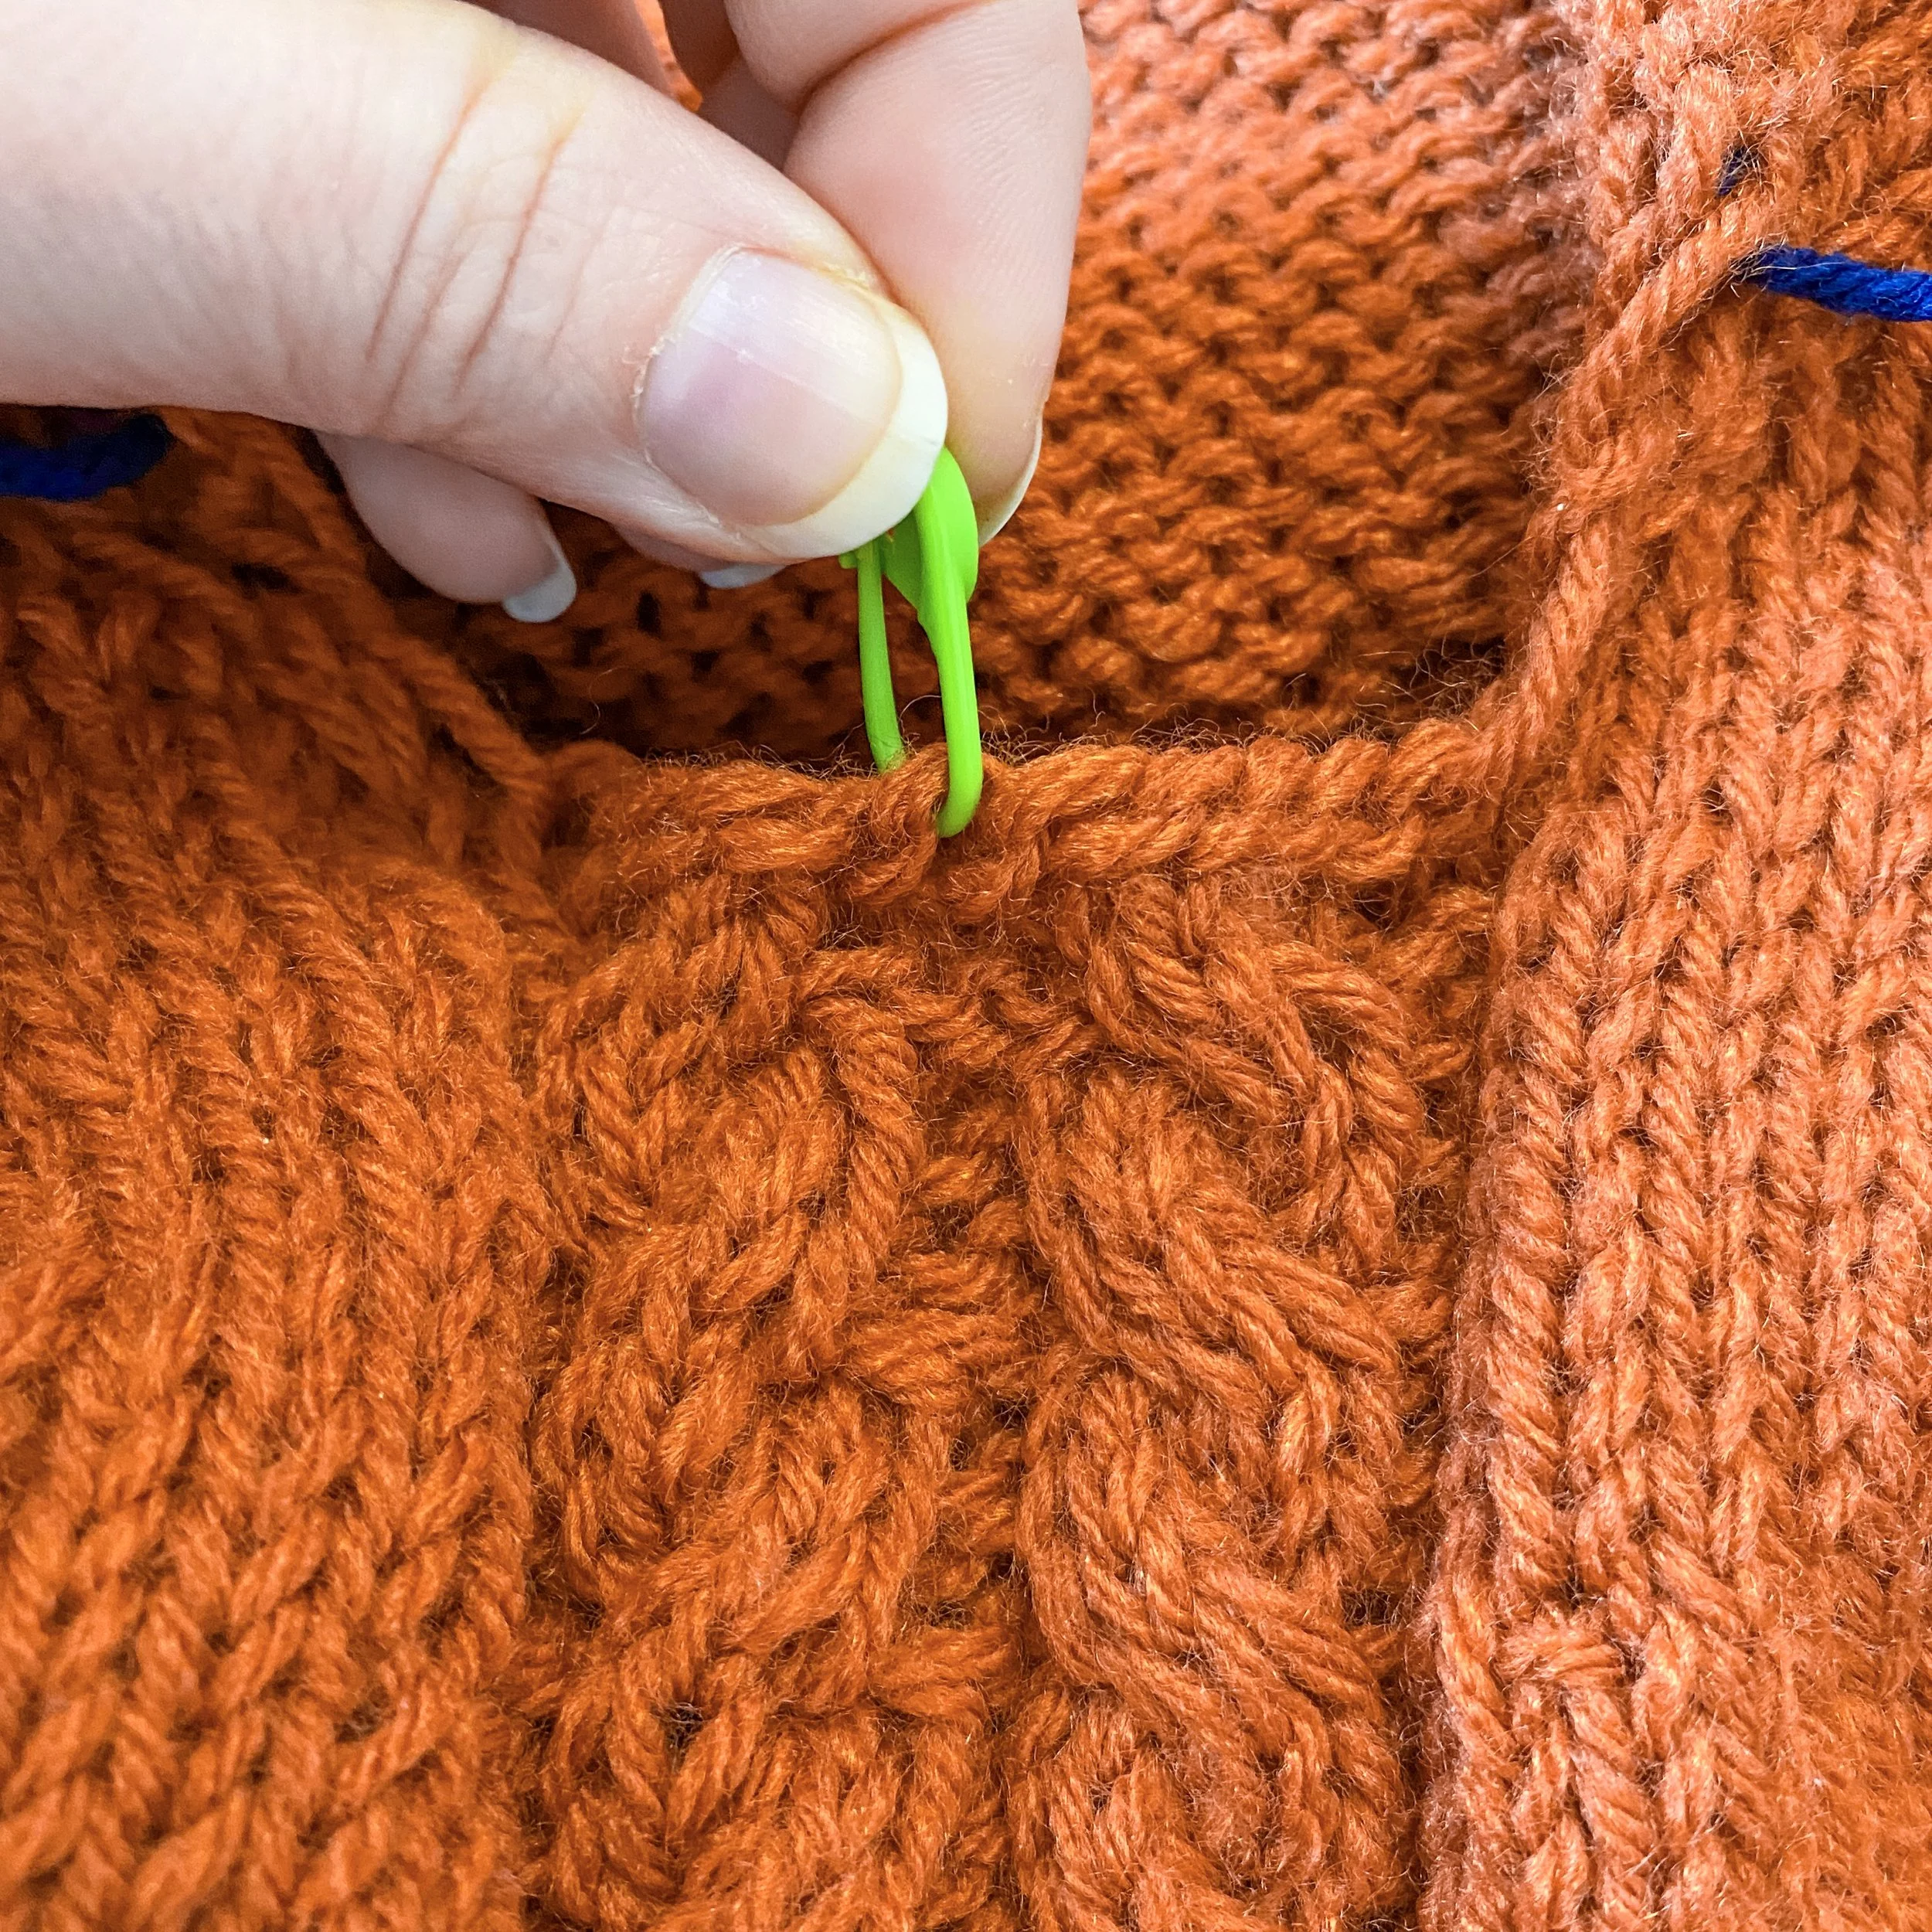
Round 37(37, 42, 45, 48, 51, 58): At BOR, remove BOR marker, *knit 1st st from the seam (that st belongs to the body), next, without knitting, transfer 2nd st from seam, the 37(41, 45, 47, 49, 51, 55) sleeve sts, and 1st st of the next seam onto waste yarn [39(43, 47, 49, 51, 53, 57)sts total]. On the right needle, CO 5(5, 5, 6, 6, 7, 7) sts, pm (this is your new temporary BOR marker. Use a unique marker so it’s recognizable.). [Also, mark this spot on both sides to pick up the sleeves later, see image] CO 5(5, 5, 6, 6, 7, 7)sts, remove sleeve markers.* Join the back to the front side by knitting the next seam st and continue knitting in pattern across to the next raglan marker. At the next raglan marker repeat * *. The marker you place on this side is NOT your BOR. Join the back to the front. Knit back to your BOR. 128(144, 160, 172, 188, 204, 220) sts on needles.
Go to Part 2
Happy Creating!
IF YOU LIKED THIS PATTERN, PLEASE SUPPORT ME ON PATREON OR BUY ME A COFFEE!

BUY ME A COFFEE
SUPPORT ME ON PATREON
I LOVE TO SEE WHAT YOU CREATE!
Please share your creations with the community on social media tagging @ravinsekaidesigns and hashtag #
I can’t wait to see the beautiful things you come up with!
FOLLOW ME ON SOCIAL MEDIA
Facebook: Ravin Sekai Designs
Ravelry: RavinSekai
Instagram: @ravinsekaidesigns
Pinterest: Ravin Sekai Designs
Patreon: Ravin Sekai Designs

Hi! I’m Rachel.
I’m a quirky world traveller, avid knitter, crochet lover, pattern maker, and all around nerd! I spend a lot of time clowning around, and I often have the goofiest smile on my face. This website is the landing place for my new patterns, random thoughts, and general craziness. I hope you enjoy my randomness and my yarnie goodness!
Archive
- LGBTQ+
- PRIDE
- accessories
- accessory
- asymmetrical
- autumn
- backpack
- bag
- beach
- beanie
- bias shawl
- blanket
- blog hop
- blue
- bobble
- bookbag
- boyfriend
- cardigan
- case
- celtic weave stitch
- clutch
- clutch bag
- collaboration
- color block
- color work
- cover
- cover-up
- cowl
- crochet
- crochet pattern
- crochetpattern
- crop top
- croptop
- decor
- diy
- dress
- ds case
- duster
- earwarmer
- easy
- fall
- festivaltop
- free pattern
- gauge
- ghost
- granny squares
- halloween
- handbag
- hat
- headband