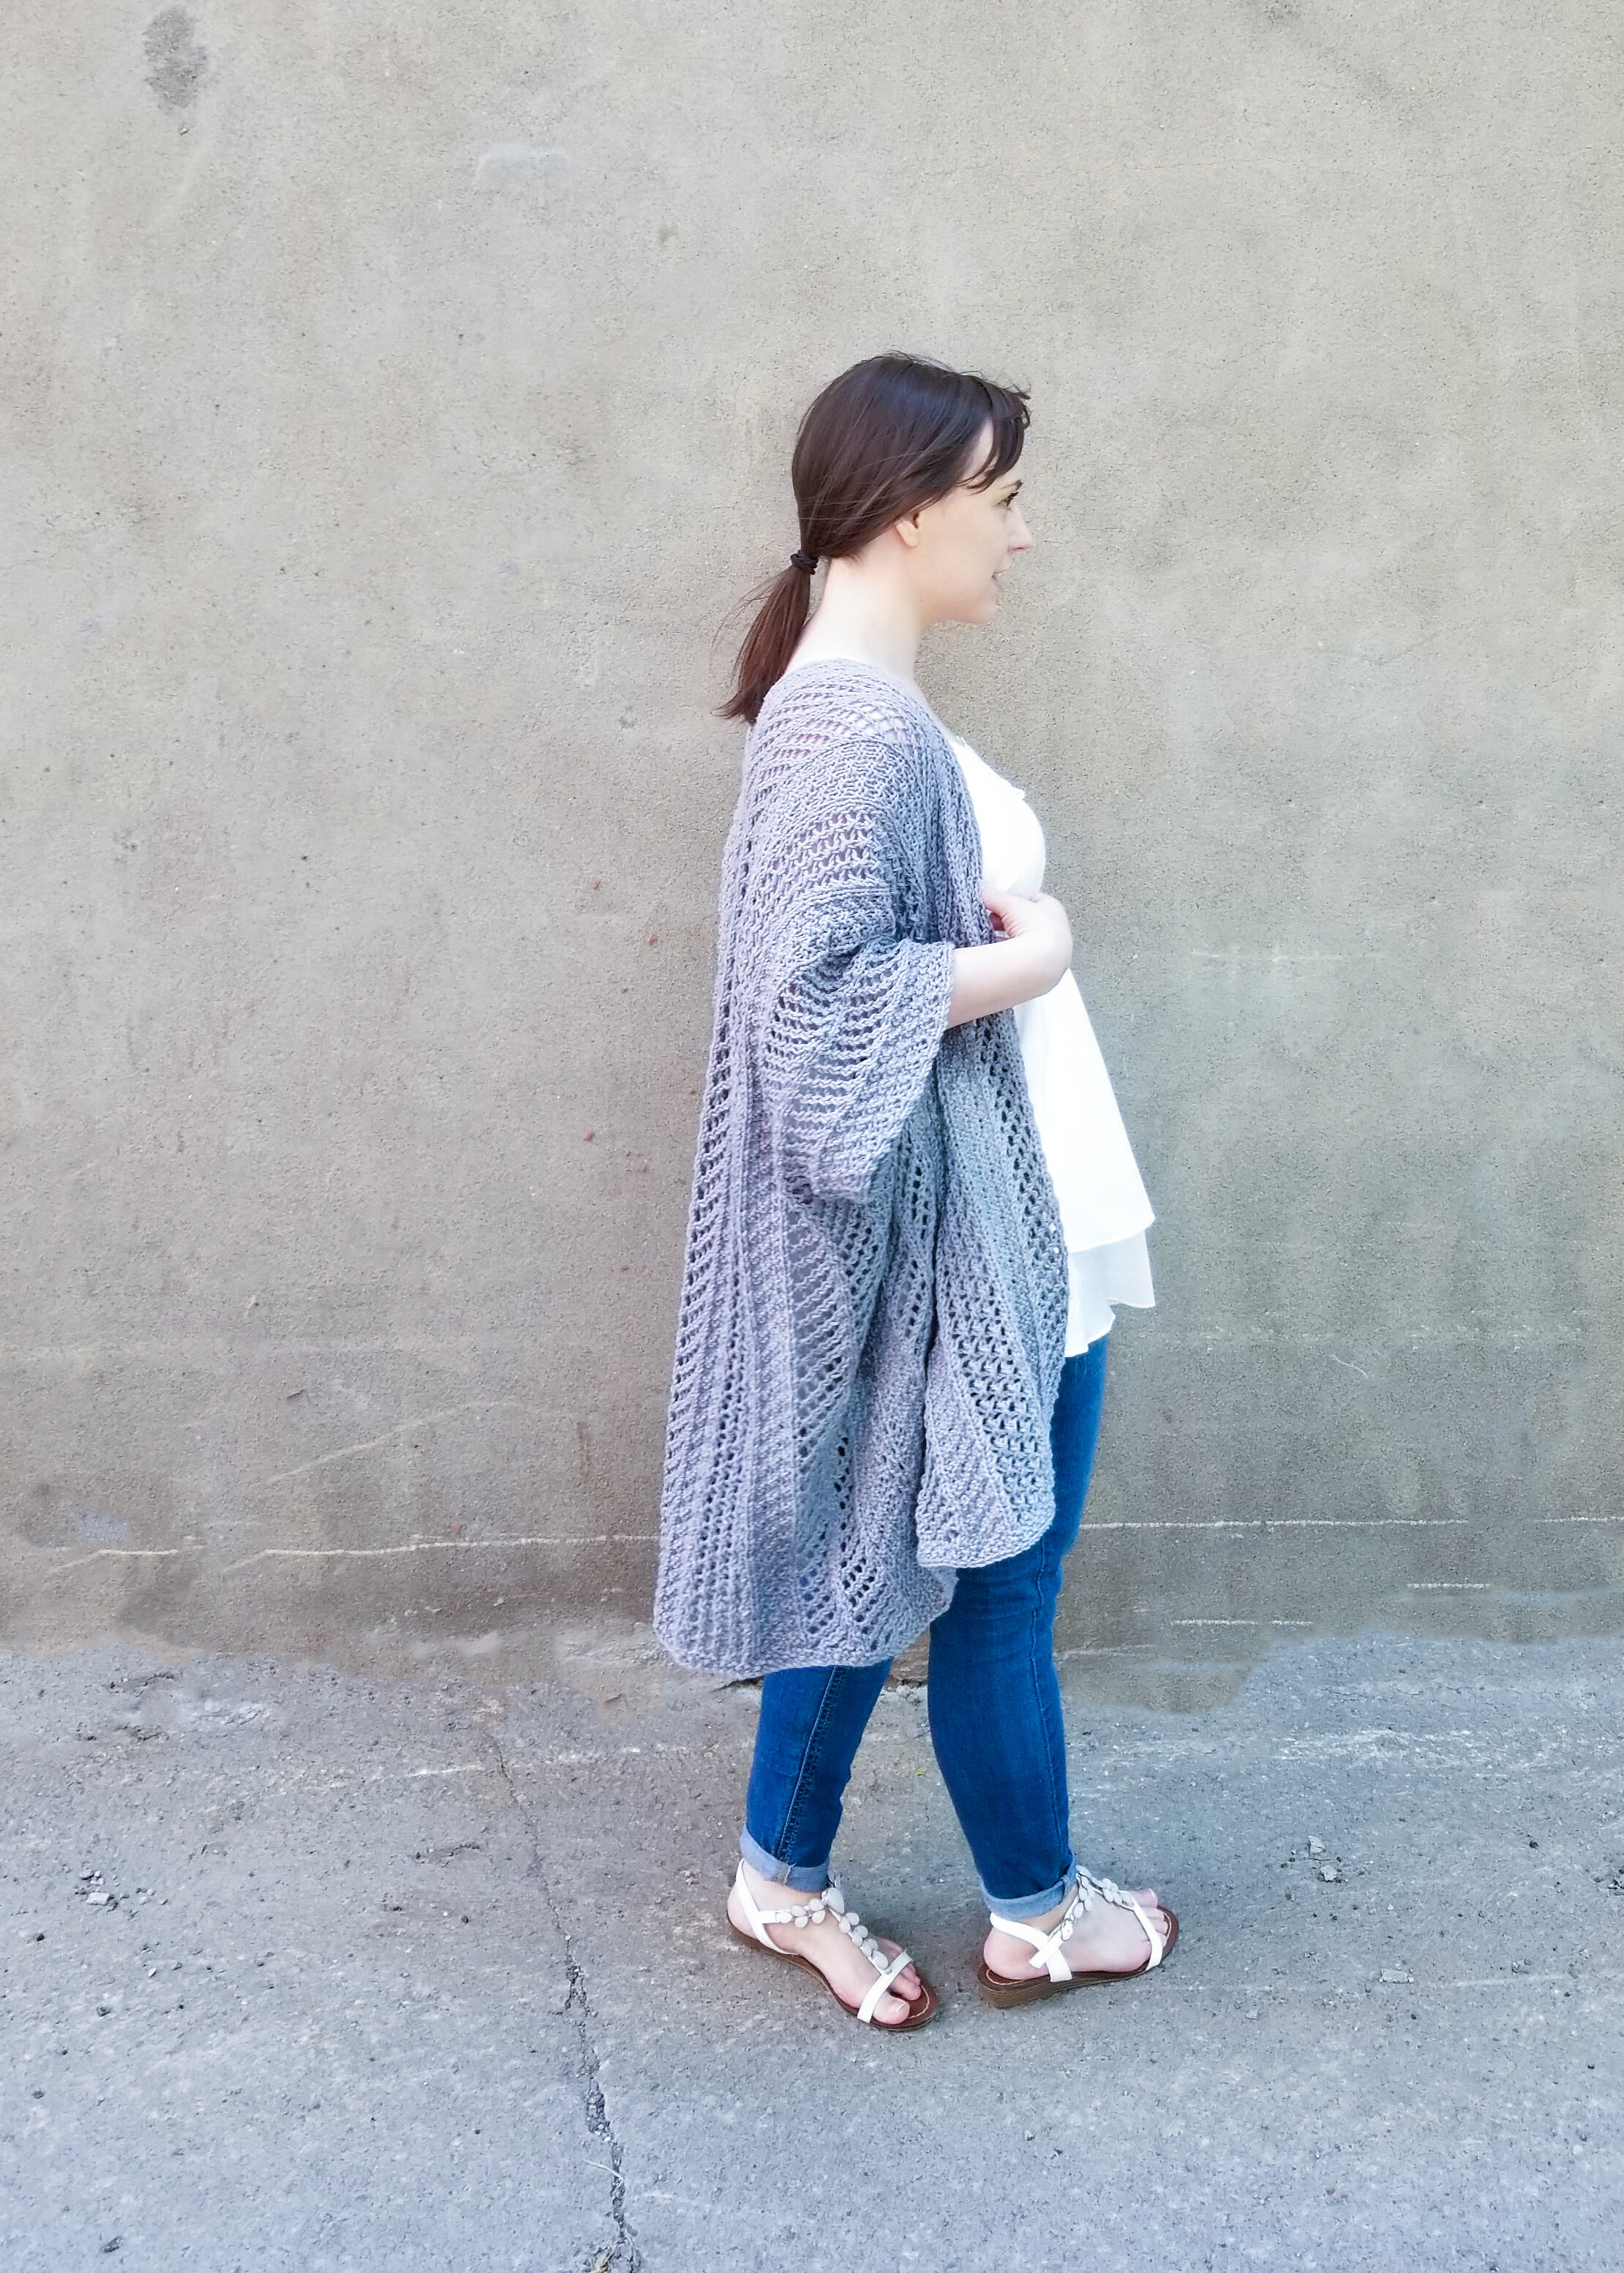
Walkiria Kimono

For the free pattern of this kimono please continue on this page. Please consider supporting me by purchasing the 100% ad-free PDF with full charts for this pattern on my Ravelry or ETSY pages. Or consider joining my Patreon for member perks.
Hey all! How is your summer going so far? Or if you’re in the Southern Hemisphere, how’s winter? Here we’ve been having a bit of a heat wave. Today as I’m writing this, we’re supposed to get up to 32°C ( 89.6°F), which, granted, really isn’t that hot, but I’m weak in the heat! My husband and I at least now have an air conditioner in the bedroom and office so we can sleep and I can work. It still boggles my mind that most houses in Montreal don’t have central air. So crazy to me! But, it seems to be a normal thing here. We still don’t have anything in the living room or kitchen, though. That’s been making cooking dinner and TV time a bit of a challenge, but we’ll manage! (or melt, one or the other…probably both!)
ABOUT THIS kimono:
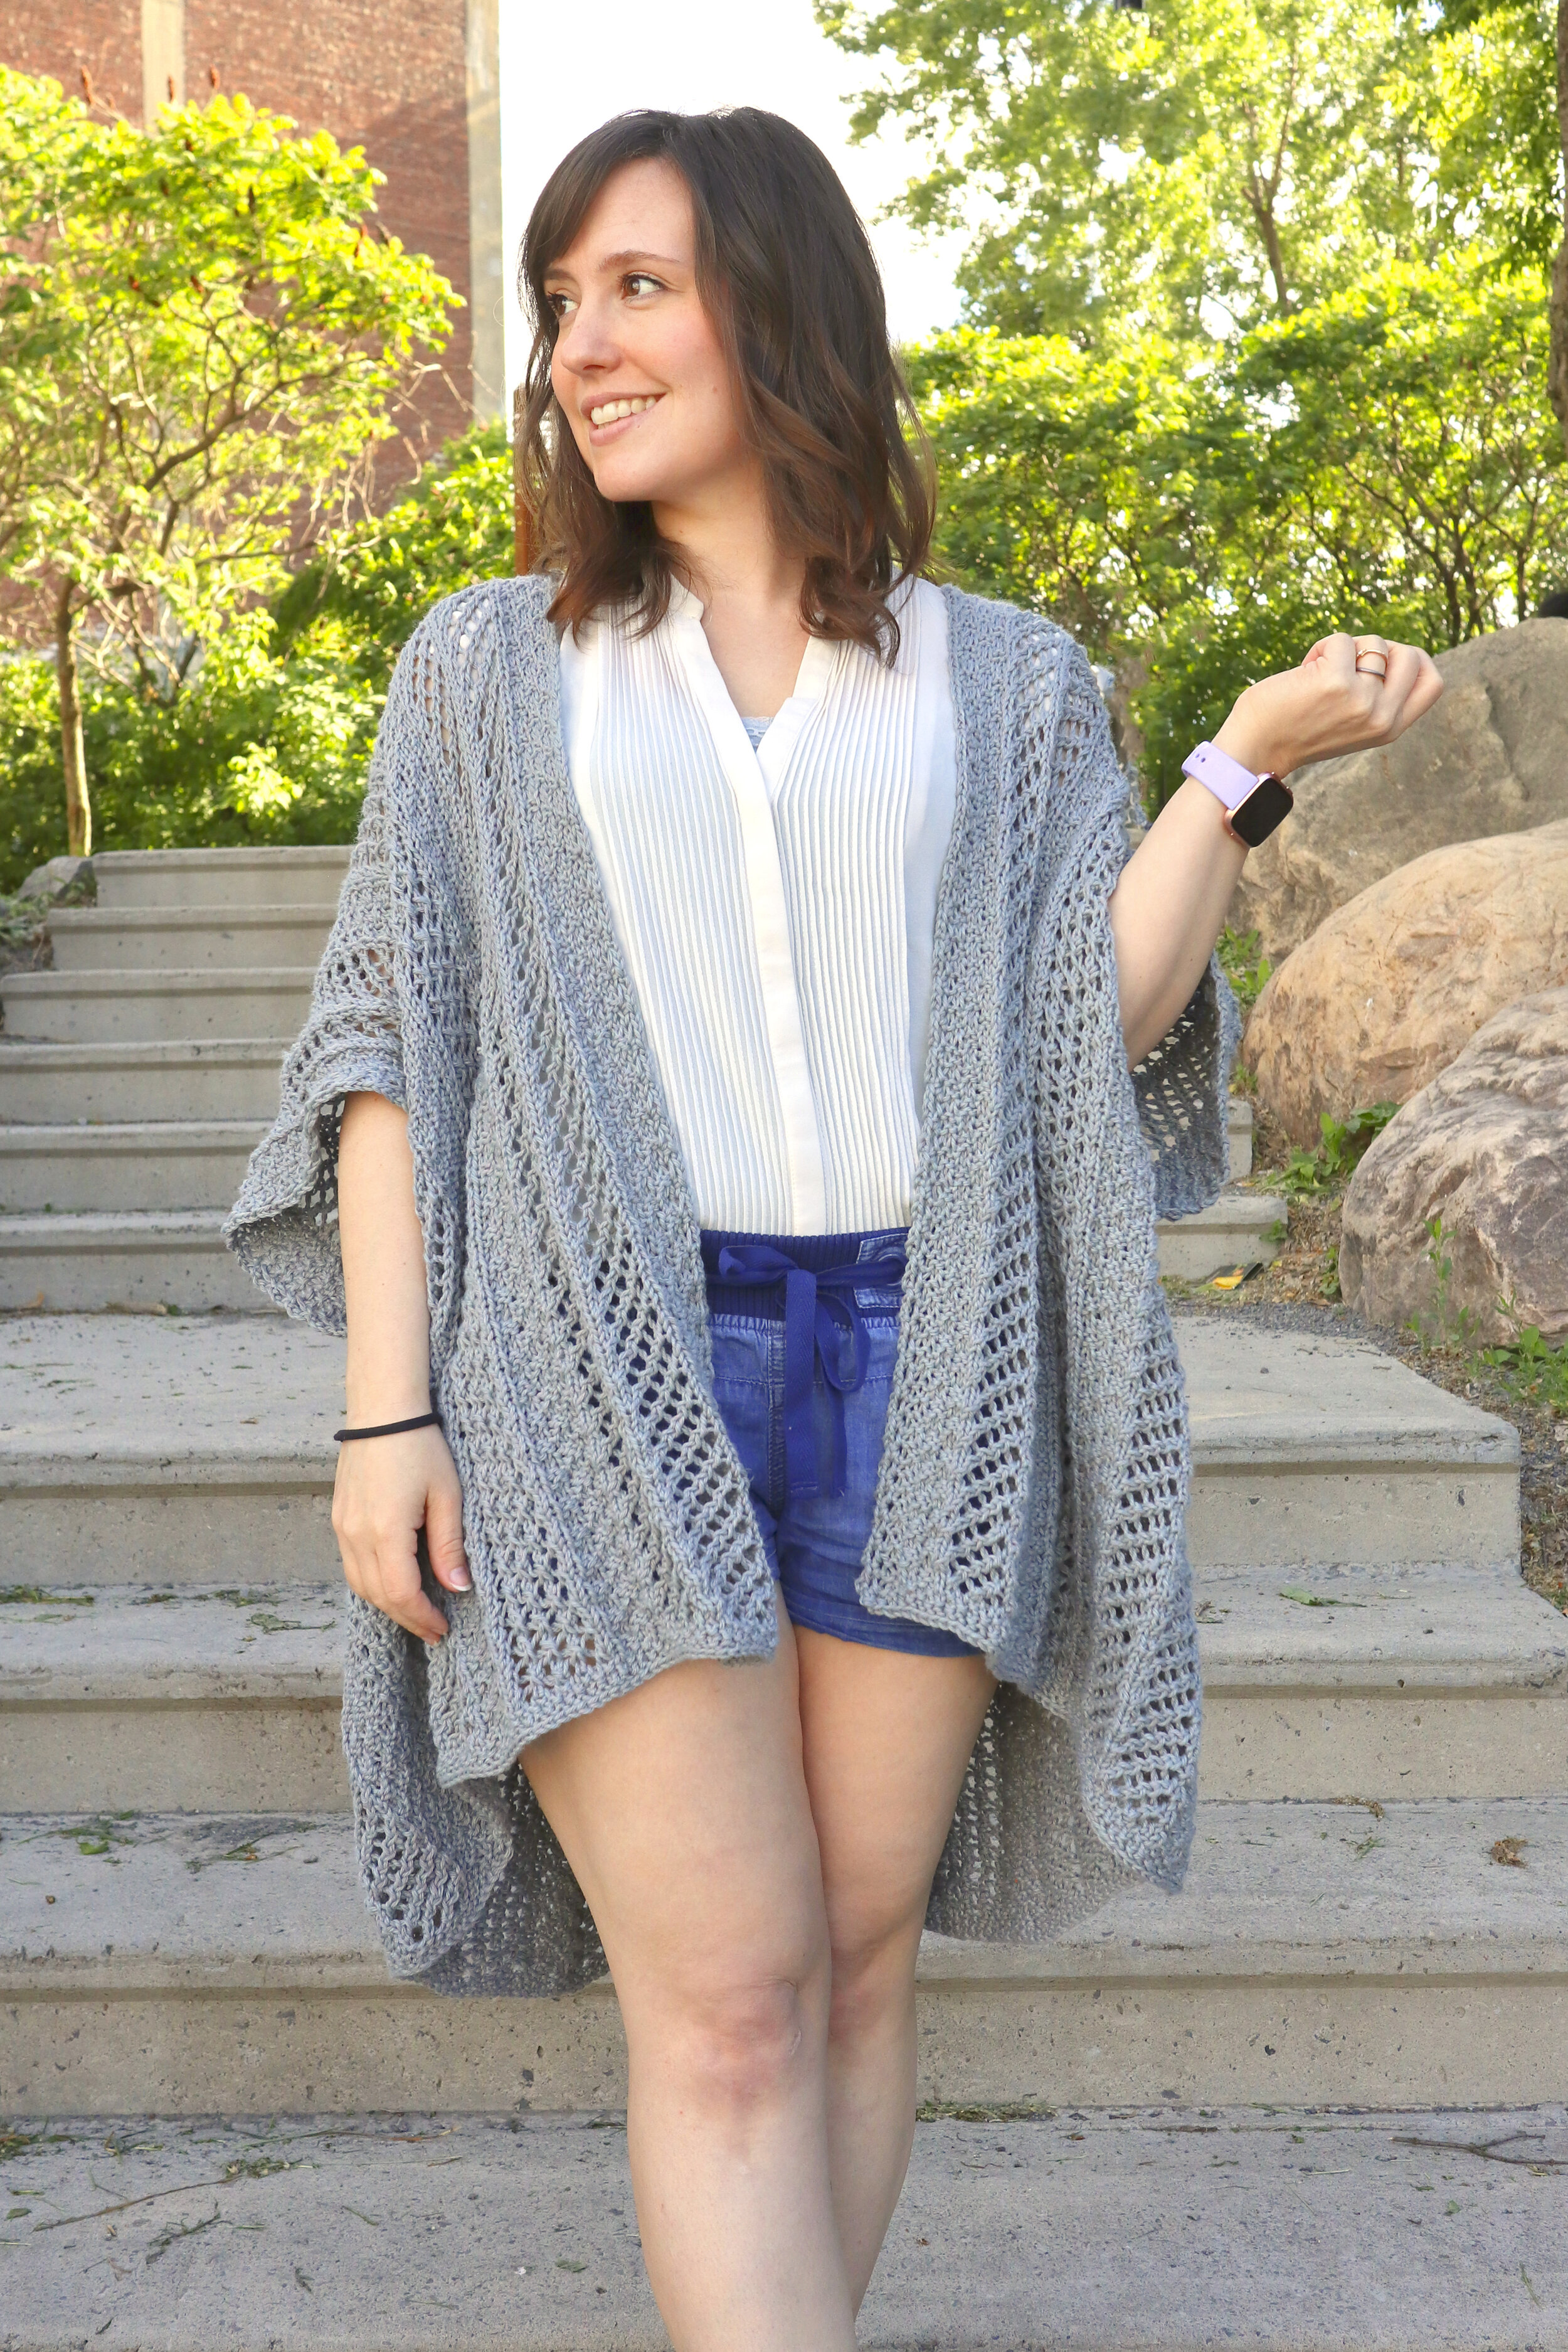
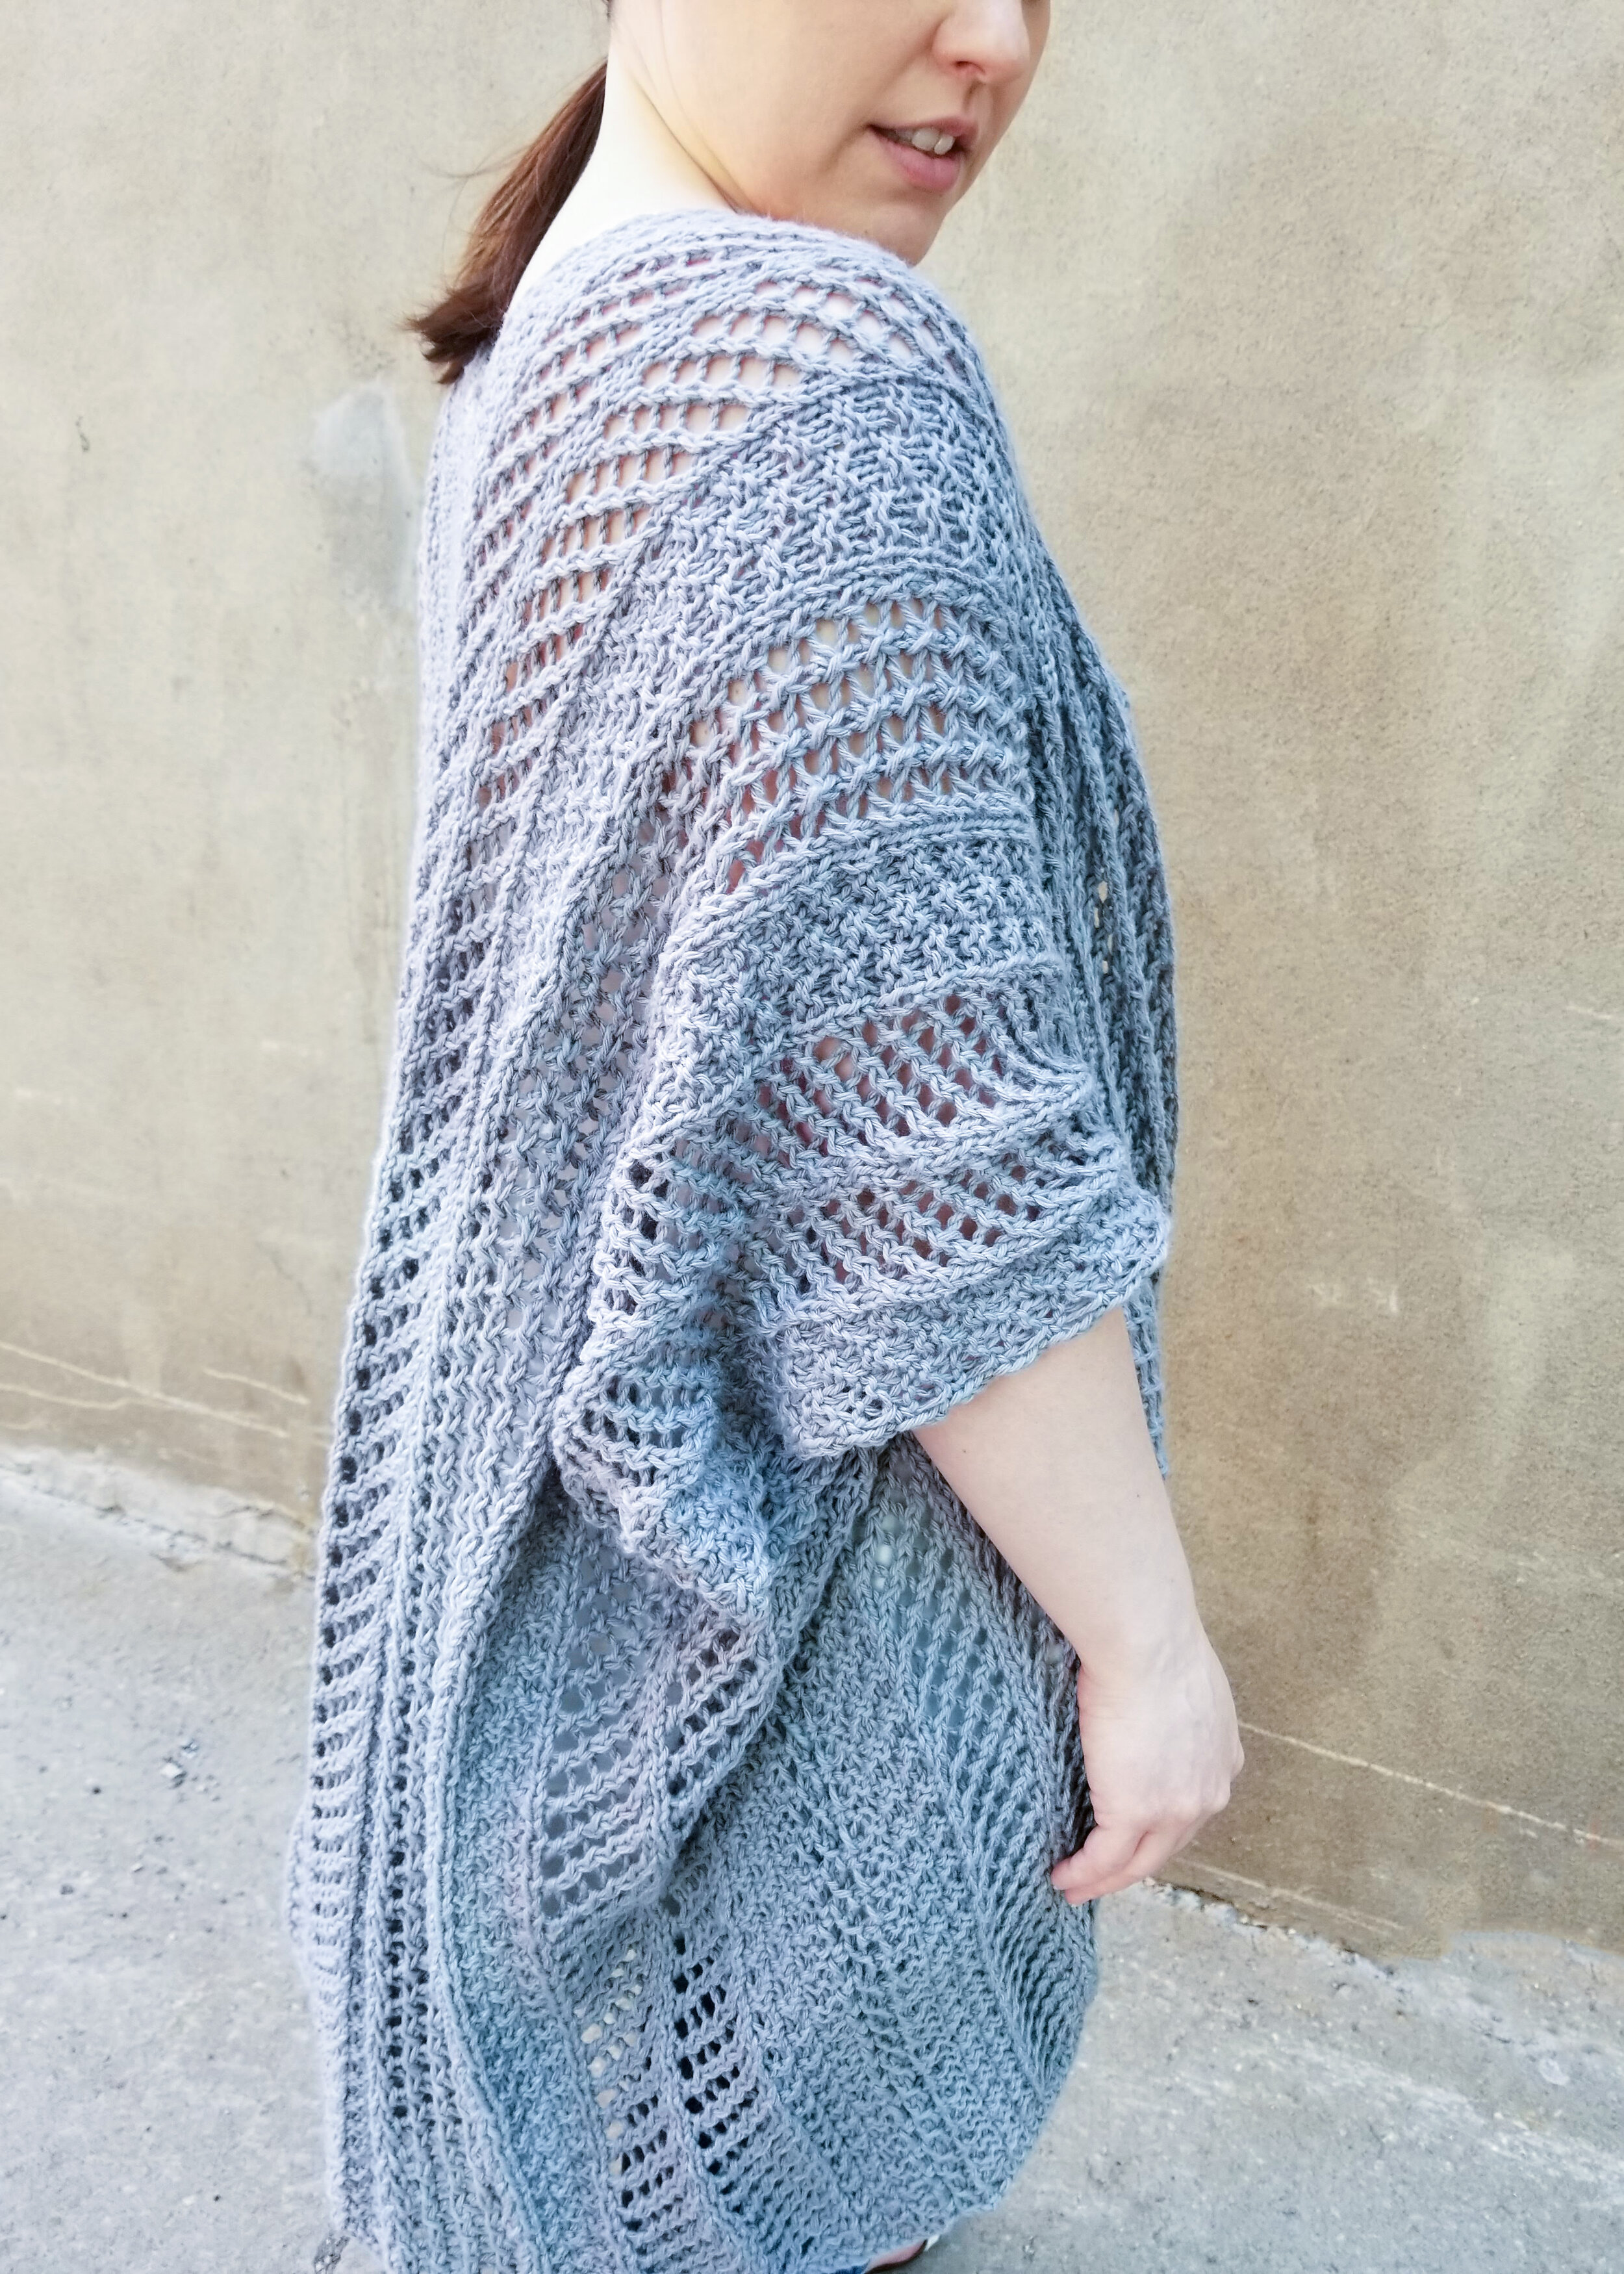
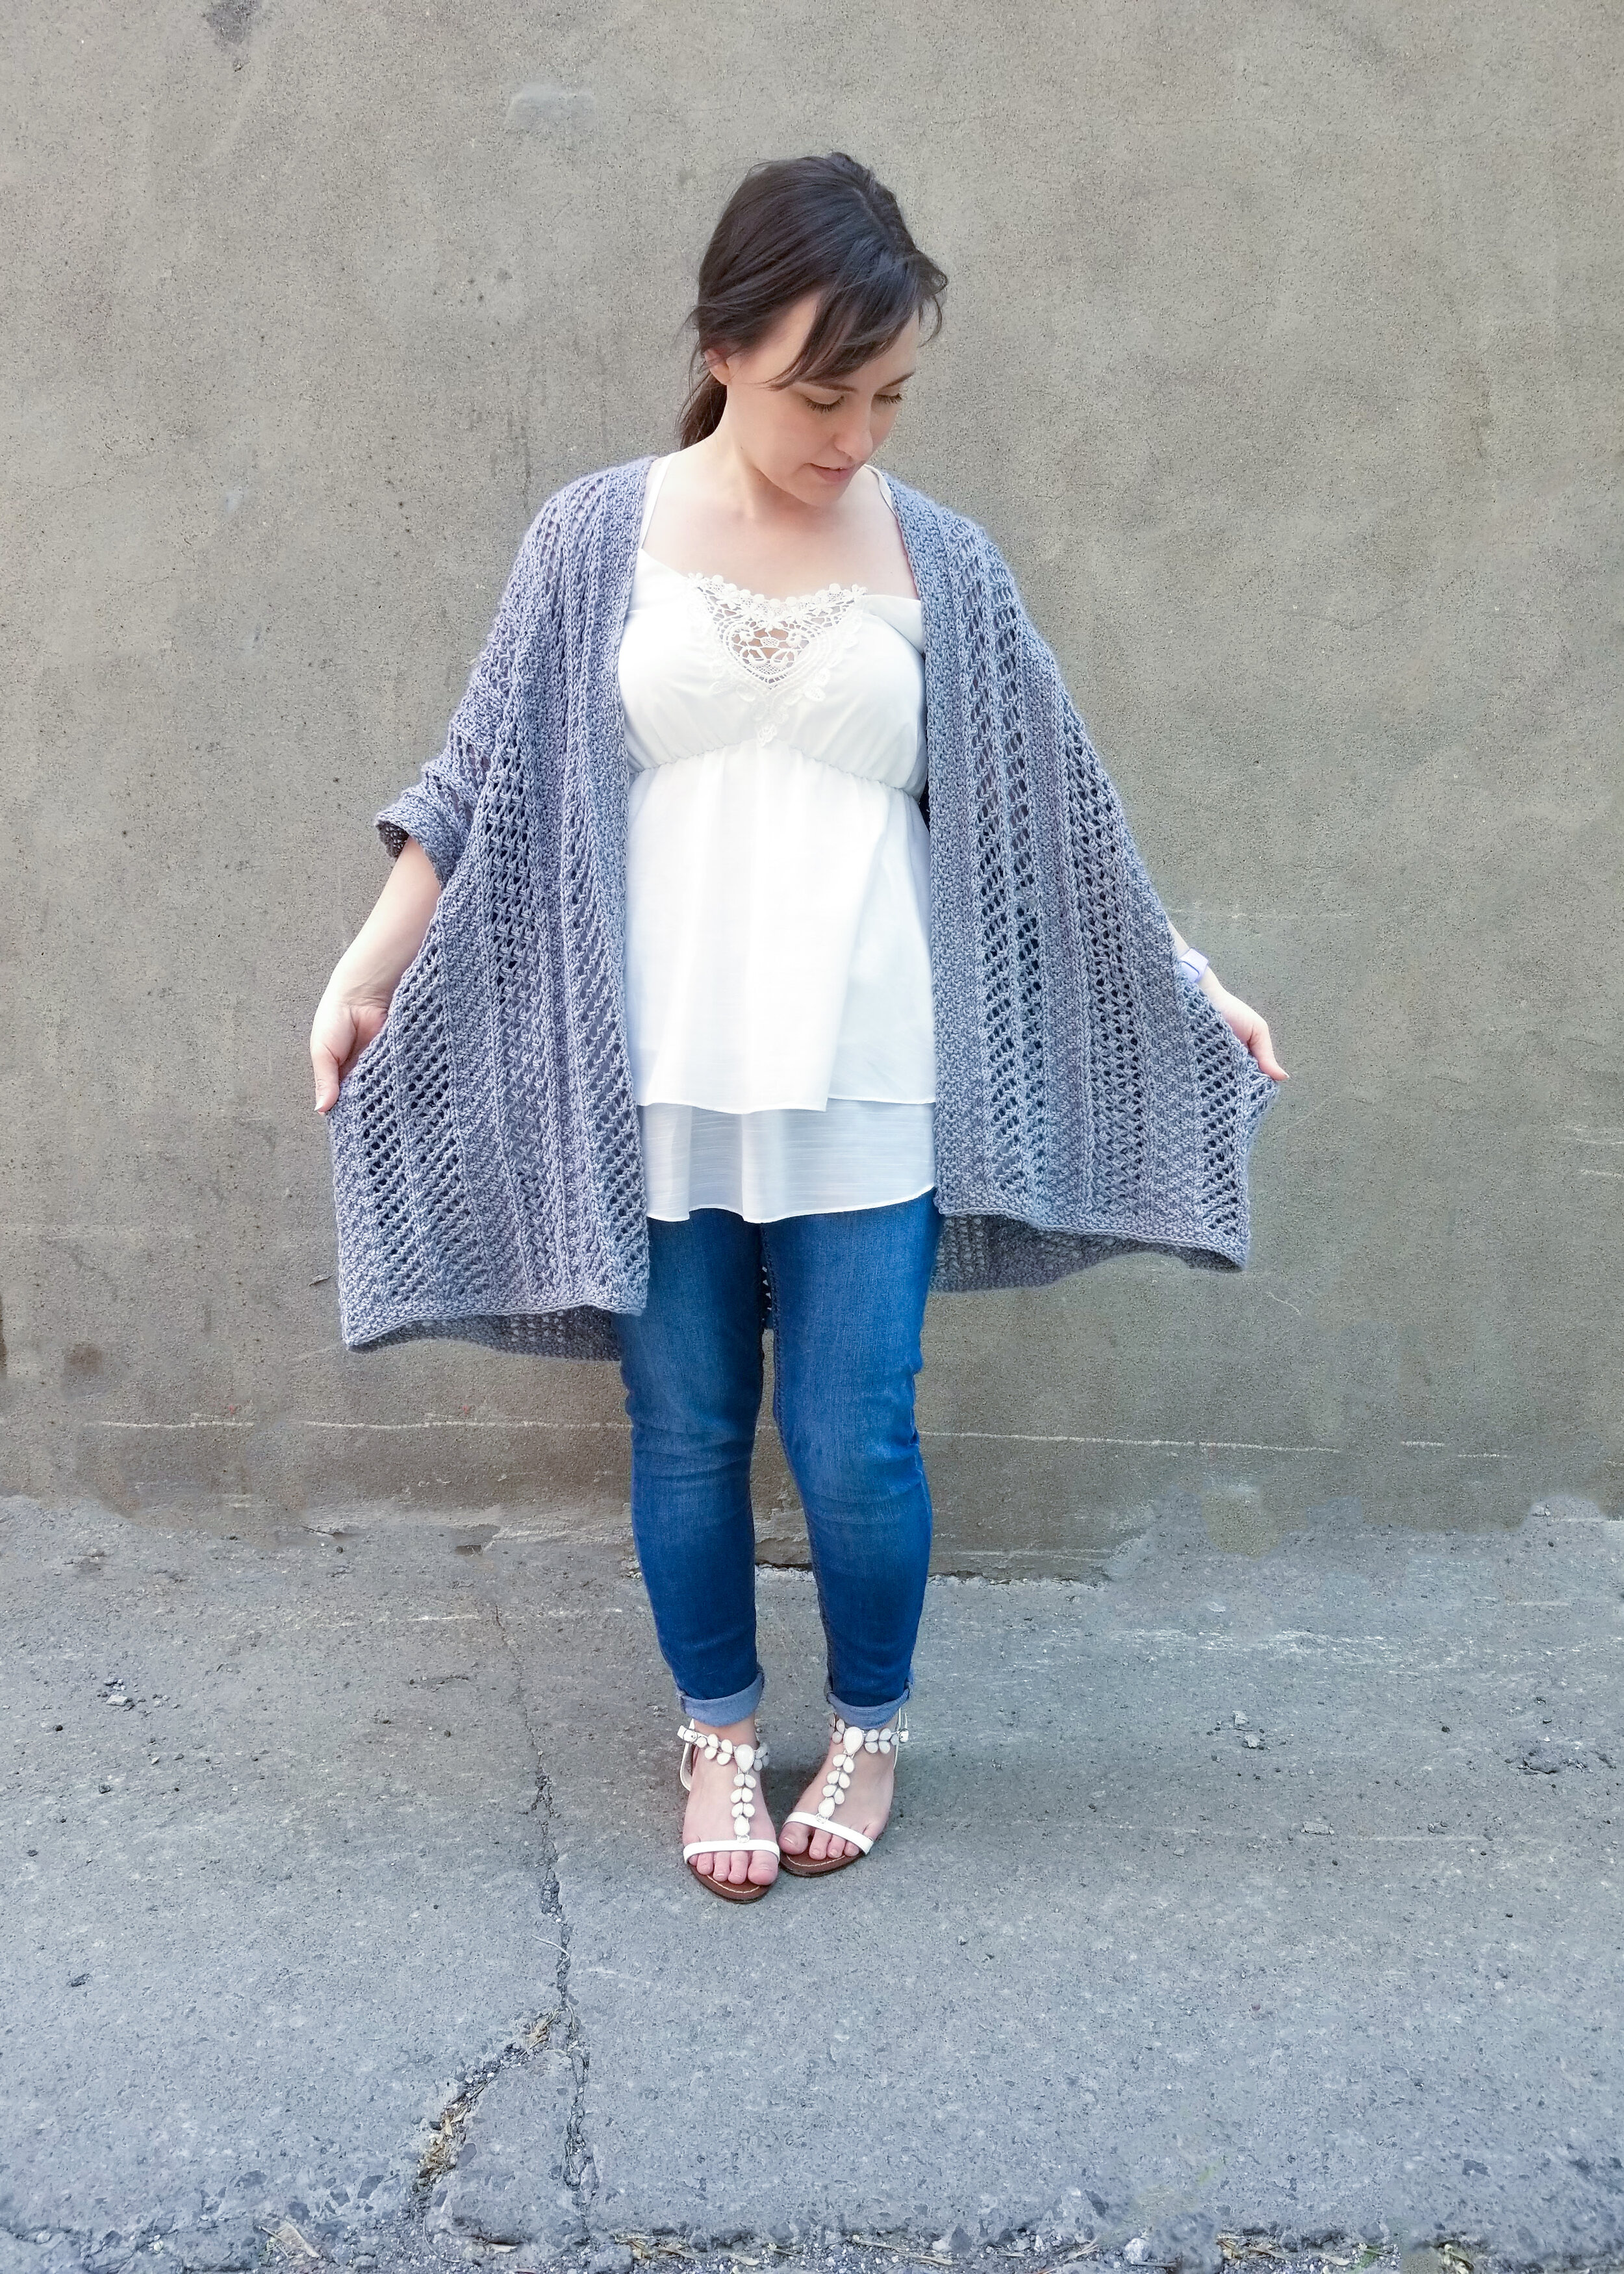
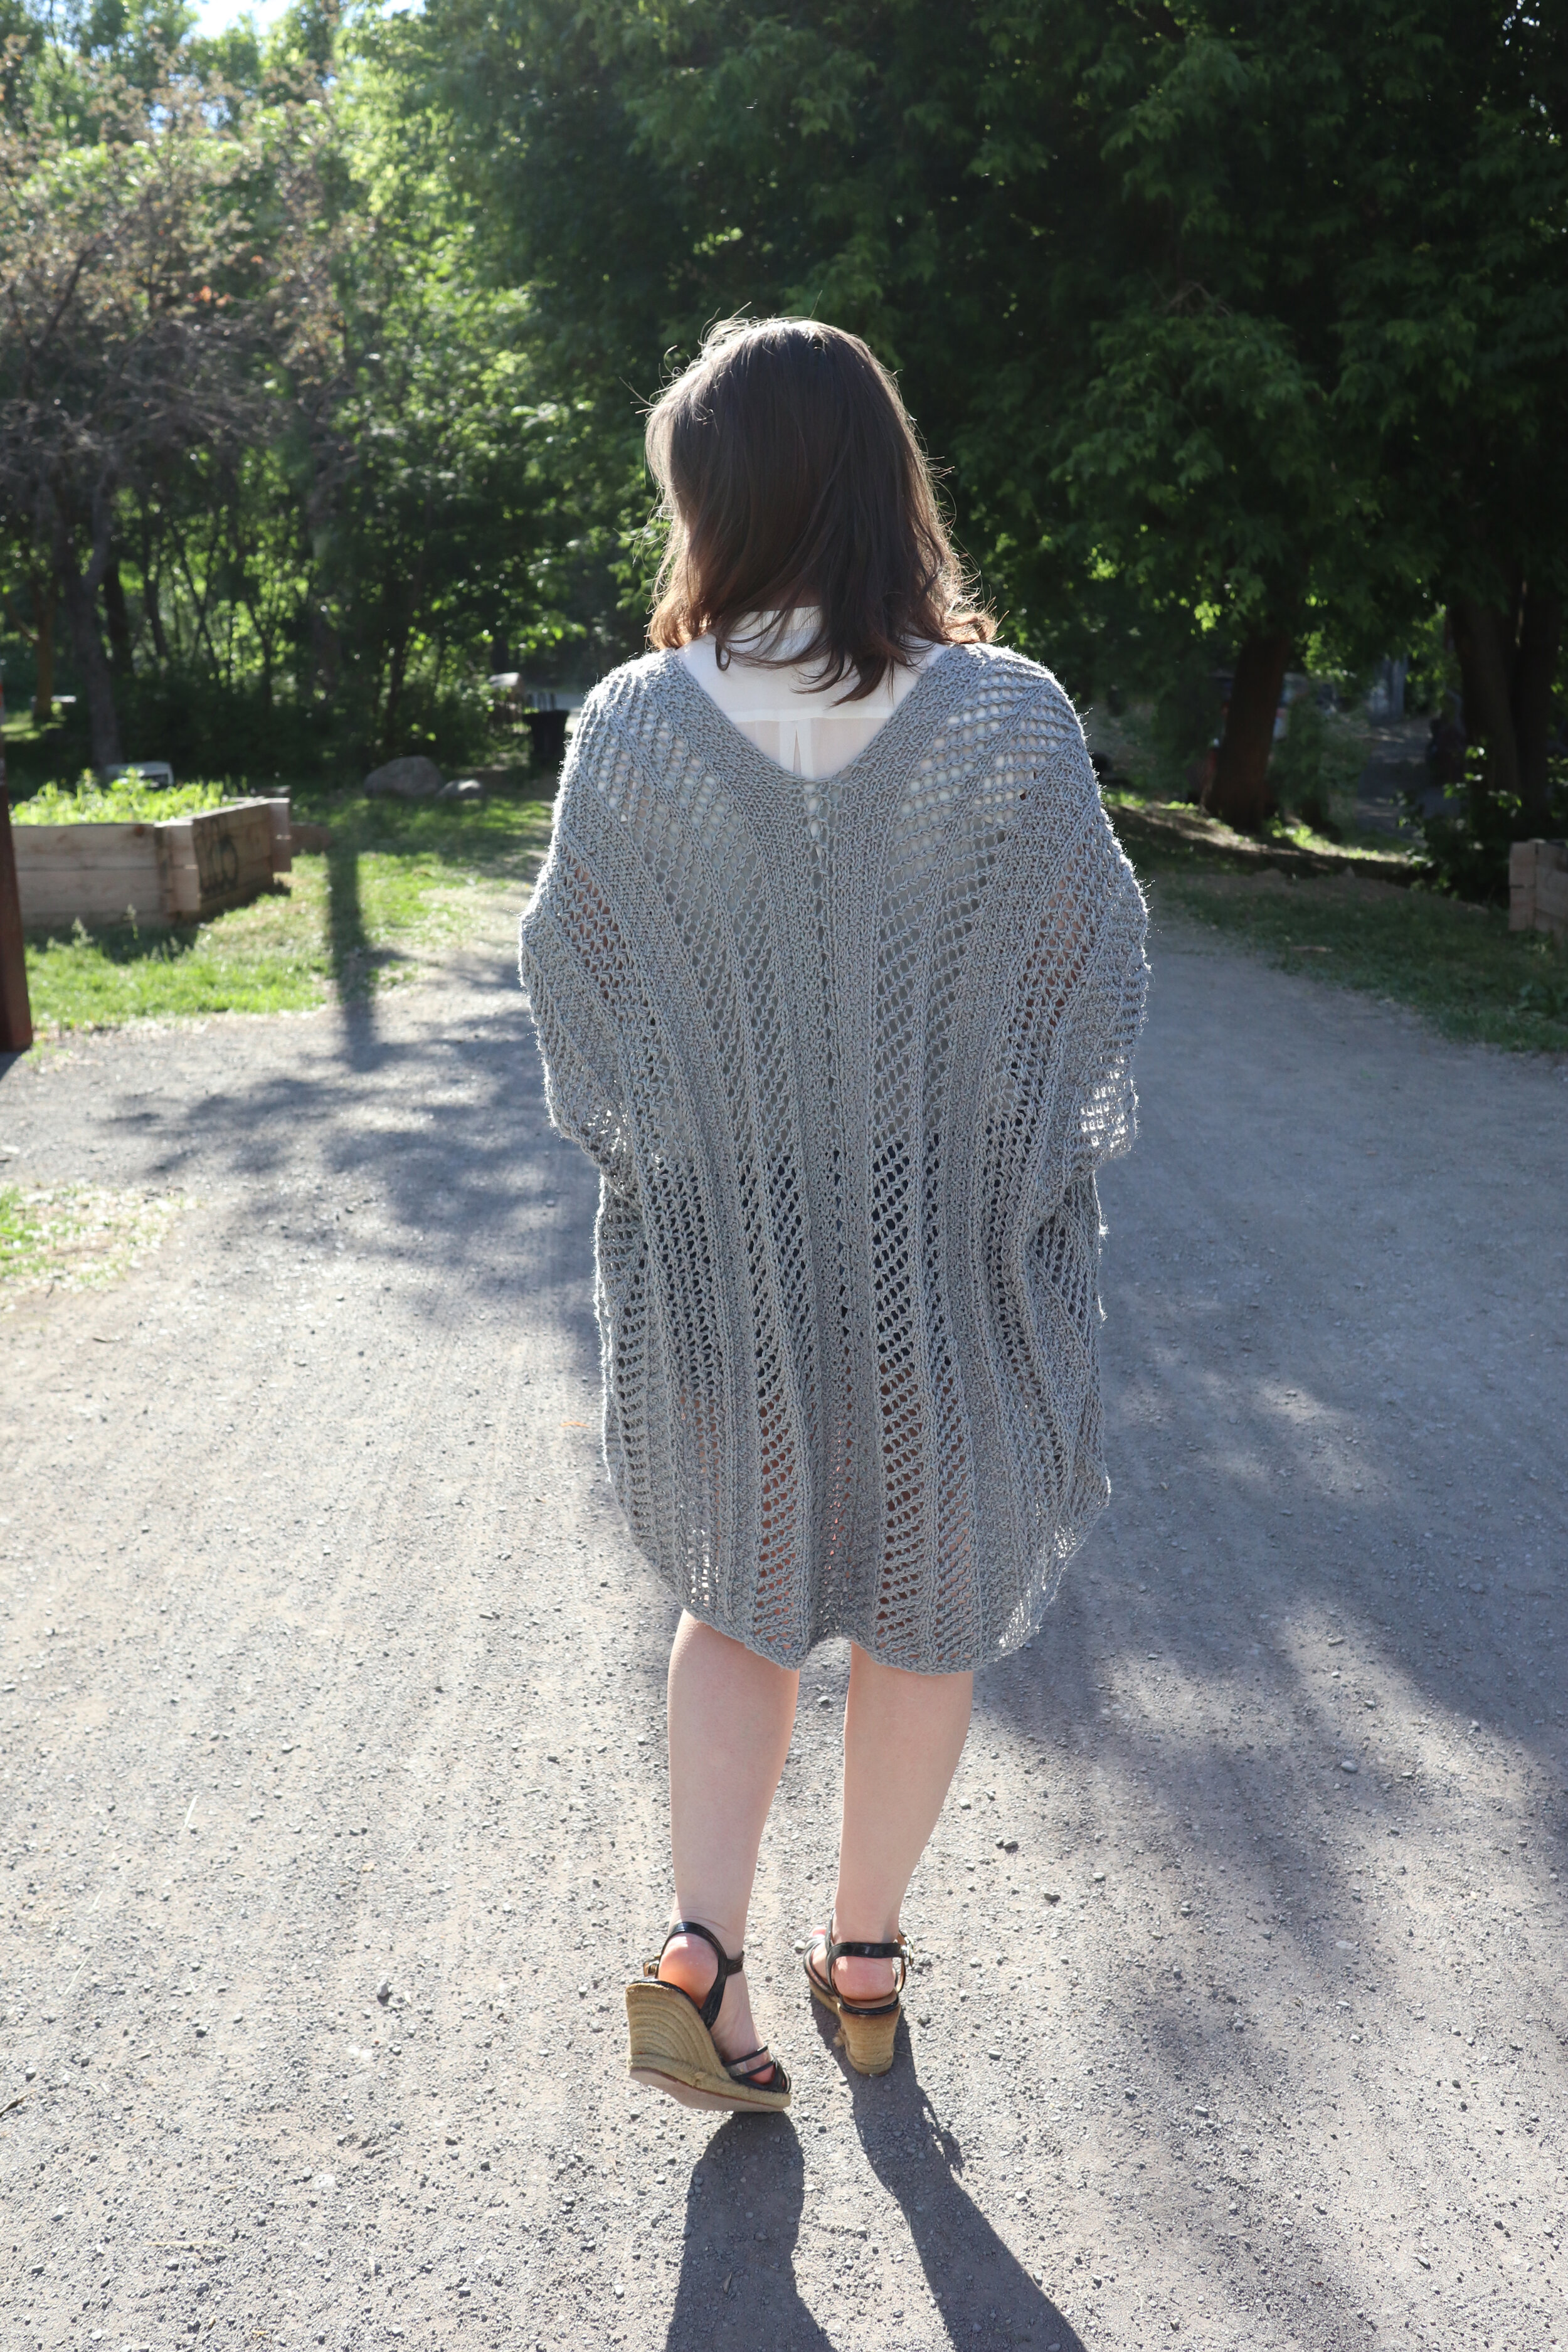
This is the Walkiria Kimono, which is the 2nd instalment in my Walkiria Collection! Do you remember the Walkiria Wrap from last post? Well, this pattern will show you how to take the basic stitches you used in making the wrap and turn them into a gorgeous light weight kimono.
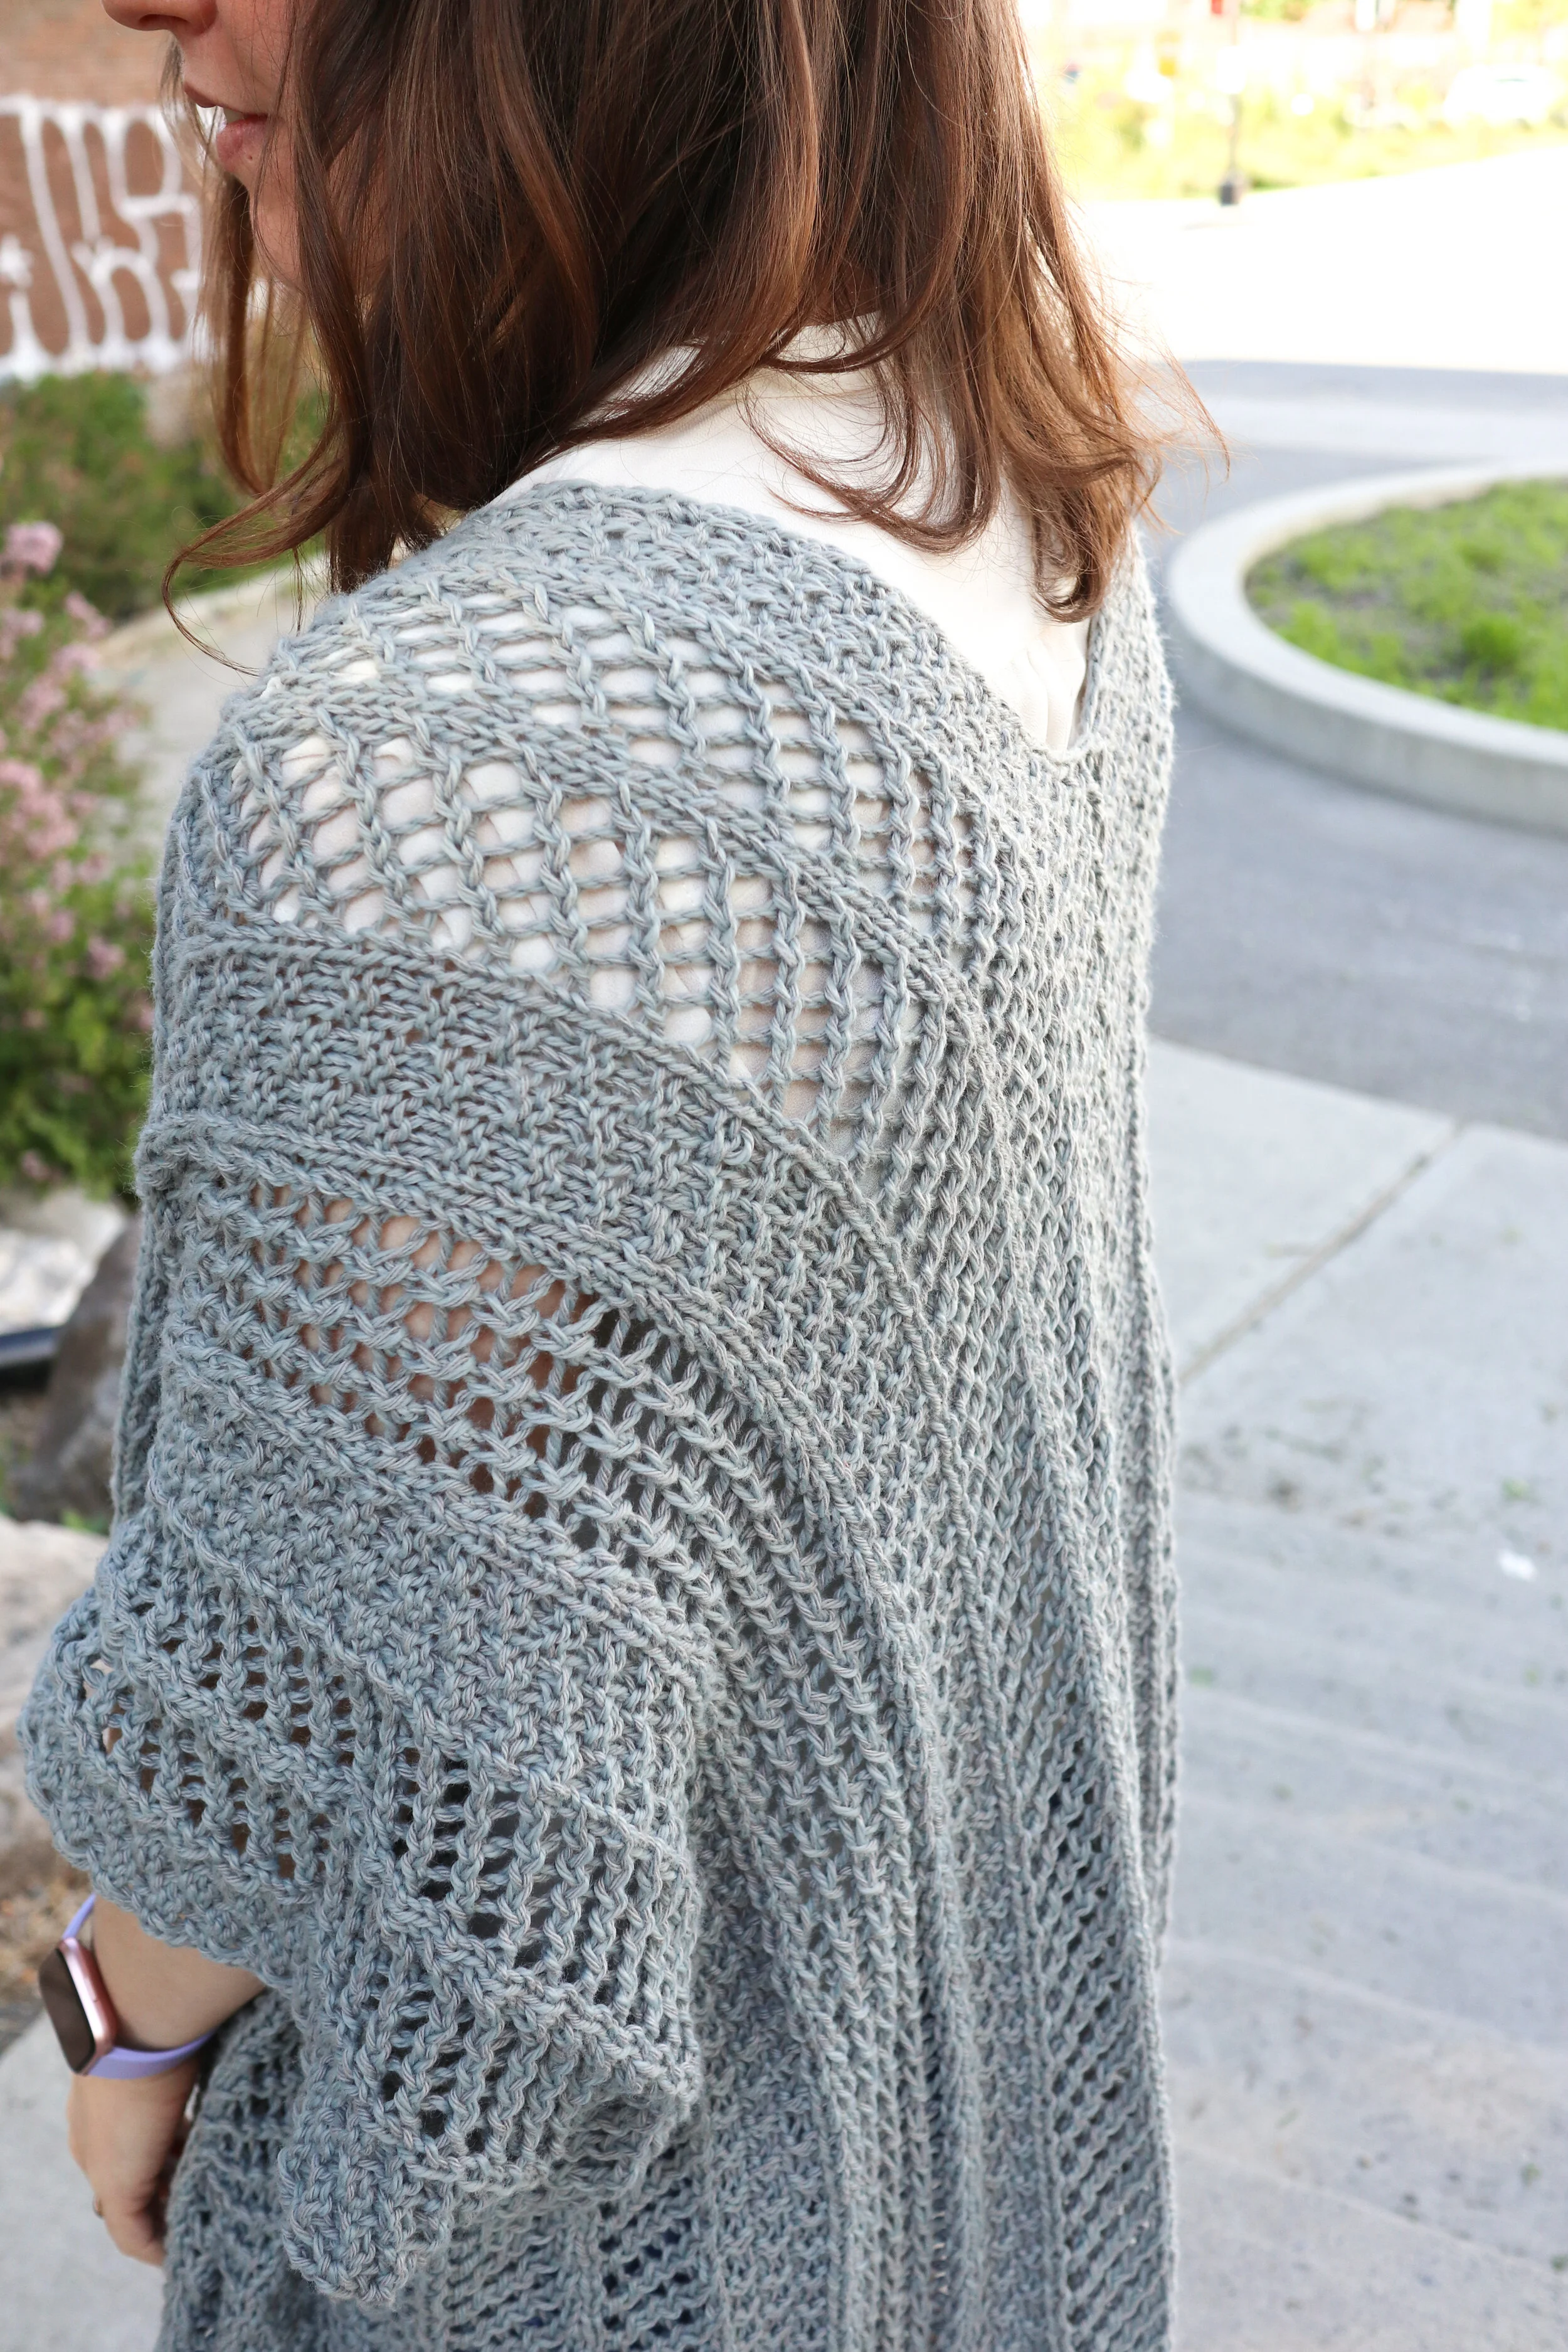
This kimono is really great for Spring, Fall, and early Summer weather. It has a great open weave lace pattern that makes sure there’s a lot of air-flow through the panels to keep you nice and cool on warm days, but also enough fabric to keep you warm when it’s cool! I’ve been wearing it in 32°C weather and haven’t been overly hot with it on, so even in hot weather it could work! (granted, I am used to wearing something over my arms at all times, so take that with a pinch of salt, lol)
The sample is knitted in Lion Brand Comfy Cotton Blend which is a DK weight 3, 50% cotton, 50% polyester blend. I really like this yarn for this kimono because it has a wonderful drape, light weight, and stitch definition! But, this kimono would be gorgeous in 100% cotton, or 100% wool depending on how cool or warm you’d like it to be.
There are instructions for 3 different sizes for this kimono that cover a large range of people. Actual bust measurements for this garment are S/M: 65”, L/XL: 73”, and 2XL/3XL: 81”, which creates a great deal of positive ease for each size to create that awesome drape.
I LOVE TO SEE WHAT YOU CREATE!
Please share your creations with the community on social media tagging @ravinsekaidesigns and hashtag #walkiriakimono
I can’t wait to see the beautiful things you come up with!
FOLLOW ME ON SOCIAL MEDIA
Facebook: Ravin Sekai Designs
Ravelry: RavinSekai
Instagram: @ravinsekaidesigns
Pinterest: Ravin Sekai Designs
Patreon: Ravin Sekai Designs

Pin to pinterest

WHAT YOU NEED:
Needles: 5.5 mm, 24” circular needles, Or size needed to achieve gauge.
Yarn: Weight 3 DK Yarn. Sample knit in Lion Brand Comfy Cotton. Approx. 3(4, 4) cakes. 1020(1220, 1431) yards.
Gauge: 16 st/21 rows = 4” in stockinette stitch. (gauge is after blocking)
Finished Garment Size: laid flat before width: 32.5”(36.5”, 40.5”) Length: 29.5”(31.5”, 33.5”).
Actual Bust Measurement of Garment: S/M: 65”, L/XL: 73”, and 2XL/3XL: 81”
Ideal Bust Measurements for each size to get drape: S/M: 32”-39”, L/XL: 40”-47”, 2XL/3XL: 48”-55”
Model Size: model is 4’11” tall, 35” bust 27.5” waist 38” hips, wearing size S/M
ABBREVIATIONS:
CO: cast on
RS: right side
WS: wrong side
St: stitch
Sl st kw: slip right-hand needle into the 1st stitch on the left-hand needle like you are going to knit it. Without knitting it, slip it to the right-hand needle. Continue knitting as usual.
Yo: yarn over
Cont: continue
K: knit
P: purl
K2tog: knit 2 stitches together
Ssk: slip, slip, knit. slip the first stitch as if to knit onto right-hand needles, slip the second stitch as if to knit, then slide the left-hand needle into the front part of both stitches and knit them together.
Sl1-k2tog-psso: slip one stitch to the right-hand needle knitwise, knit the next 2 stitches together, pass the previously slipped stitch over the k2tog and off the right-hand needle
Rep: repeat
BO: bind off
SM: stitch marker

THE PATTERN:
For the free pattern of this kimono please continue on this page. Please consider supporting me by purchasing the 100% ad-free PDF with full charts for this pattern on my Ravelry or ETSY pages. Or consider joining my Patreon for member perks.
S/M size (Make 2)
CO 65 st
Row 1: sl st kw, *k1, p1* to last 2 st, k1, sl st kw
Row 2: *p1, k1* to last st, p1
Row 3 - Row 4: rep Row 1 and Row 2
Row 5: sl st kw, k2, p2, k2, *k2tog, yo, k2tog, yo, k2tog, yo, k1* rep * * once more, k2, p2, k4, yo, Sl1-k2tog-psso, yo, k1, yo, Sl1-k2tog-psso, yo, k4, p2, k2, *k2tog, yo, k2tog, yo, k2tog, yo, k1* rep * * once more, k2, p2, k2, sl st kw
Row 6: p3, k2, p18, k2, p15, k2, p18, k2, p3
Row 7: sl st kw, p2, k2, p2, *k1, k2tog, yo, k2tog, yo, k2* rep * * once more, p2, k2, p2, k1, k2tog, yo, k1, yo, Sl1-k2tog-psso, yo, k1, yo, ssk, k1, p2, k2, p2, *k1, k2tog, yo, k2tog, yo, k2* rep * * once more, p2, k2, p2, sl st kw
Row 8: p1, k2, p2, k2, p14, k2, p2, k2, p11, k2, p2, k2, p14, k2, p2, k2, p1
Rep Row 5 - Row 8 until 324 rows have been knitted.
Row 325 - Row 328: rep Row 1 - Row 4
BO (go to assembly)
L/XL size (Make 2)
CO 73 st
Row 1: sl st kw, *k1, p1* to last 2 st, k1, sl st kw
Row 2: *p1, k1* to last st, p1
Row 3 - Row 4: rep Row 1 and Row 2
Row 5: sl st kw, k2, p2, k2, p2, *k2tog, yo, k2tog, yo, k2tog, yo, k1* rep * * once more, k2, p2, k2, p2, k2, yo, Sl1-k2tog-psso, yo, k1, yo, Sl1-k2tog-psso, yo, k4, p2, k2, p2 *k2tog, yo, k2tog, yo, k2tog, yo, k1* rep * * once more, k2, p2, k2, p2, sl st kw
Row 6: p1, k2, p2, k2, p16, k2, p2, k2, p13, k2, p2, k2, p16, k2, p2, k2, p3
Row 7: sl st kw, p2, k2, p2, k2 *k1, k2tog, yo, k2tog, yo, k2* rep * * once more, p2, k2, p2, k3, k2tog, yo, k1, yo, Sl1-k2tog-psso, yo, k1, yo, ssk, k1, p2, k2, p2, k2, *k1, k2tog, yo, k2tog, yo, k2* rep * * once more, p2, k2, p2, k2, sl st kw
Row 8: p3, k2, p2, k2, p16, k2, p2, k2, p13, k2, p2, k2, p16, k2, p2, k2, p1
Rep Row 5 - Row 8 until 348 rows have been knitted.
Row 349 - Row 352: rep Row 1 - Row 4
BO (go to assembly)
2XL/3XL size (make 2)
CO 81 st
Row 1: sl st kw, *k1, p1* to last 2 st, k1, sl st kw
Row 2: *p1, k1* to last st, p1
Row 3 - Row 4: rep Row 1 and Row 2
Row 5: sl st kw, k2, p2, k2, p2, *[k2tog, yo] 4 times, k1* rep * * once more, k2, p2, k2, p2, k2, yo, Sl1-k2tog-psso, yo, k1, yo, Sl1-k2tog-psso, yo, k4, p2, k2, p2 *[k2tog, yo] 4 times, k1* rep * * once more, k2, p2, k2, p2, sl st kw
Row 6: p1, k2, p2, k2, p20, k2, p2, k2, p13, k2, p2, k2, p20, k2, p2, k2, p3
Row 7: sl st kw, p2, k2, p2, k2 *k1, k2tog, yo, k2tog, yo, k2tog, yo, k2* rep * * once more, p2, k2, p2, k3, k2tog, yo, k1, yo, Sl1-k2tog-psso, yo, k1, yo, ssk, k1, p2, k2, p2, k2, *k1, k2tog, yo, k2tog, yo, k2tog, yo, k2* rep * * once more, p2, k2, p2, k2, sl st kw
Row 8: p3, k2, p2, k2, p20, k2, p2, k2, p13, k2, p2, k2, p20, k2, p2, k2, p1
Rep Row 5 - Row 8 until 368 rows have been knitted.
Row 369 - Row 372: rep Row 1 - Row 4
BO (go to assembly)
Assembly
Block panels to stated measurement. After blacking, lay 2 panels out with RS up. Place a SM approx. 29.5”(31.5”, 33.5”) from one side. Using your preferred seaming method, seam to SM. (Note: I used a crochet technique called the continuous flat braid join to join my panels. If you also crochet, you can take a look at this method as an alternative way to join. You can find a complete picture tutorial for this join here).
Fold Kimono in half with front panels in front. Seam sides leaving a 8.5”(9.5”, 10.5”) opening for your arms.
See Schematic Below
Weave in in ends and ENJOY!
IF YOU LIKED THIS PATTERN, PLEASE SUPPORT ME ON PATREON OR BUY ME A COFFEE!

BUY ME A COFFEE
Support me on Patreon