
Fairy Rings Cardigan
I guess I shouldn’t have been talking about how much I was enjoying the mild weather! This week has been kinda brutal. But, we’ll get through it somehow. I’ve gotten too used to the mild Canadian weather and now even a little bit of 90s (32-35*C) weather and I’m a mess.
My thumbs have healed up nicely. They still give me a couple twinges here and there, but for the most part, they healed up well. I’m still going to baby them a little for awhile to make sure they stay ready to work! I’ve been working on knit projects just to make sure. So, that’s what you can look forward to coming up after this pattern!
In other news, my husband and I are both fully vaccinated, so we’ll be out and about more often here soon! Which could be good, or could be bad. haha! We’ll see. Anyway, the pattern!
ABOUT THIS Cardigan:
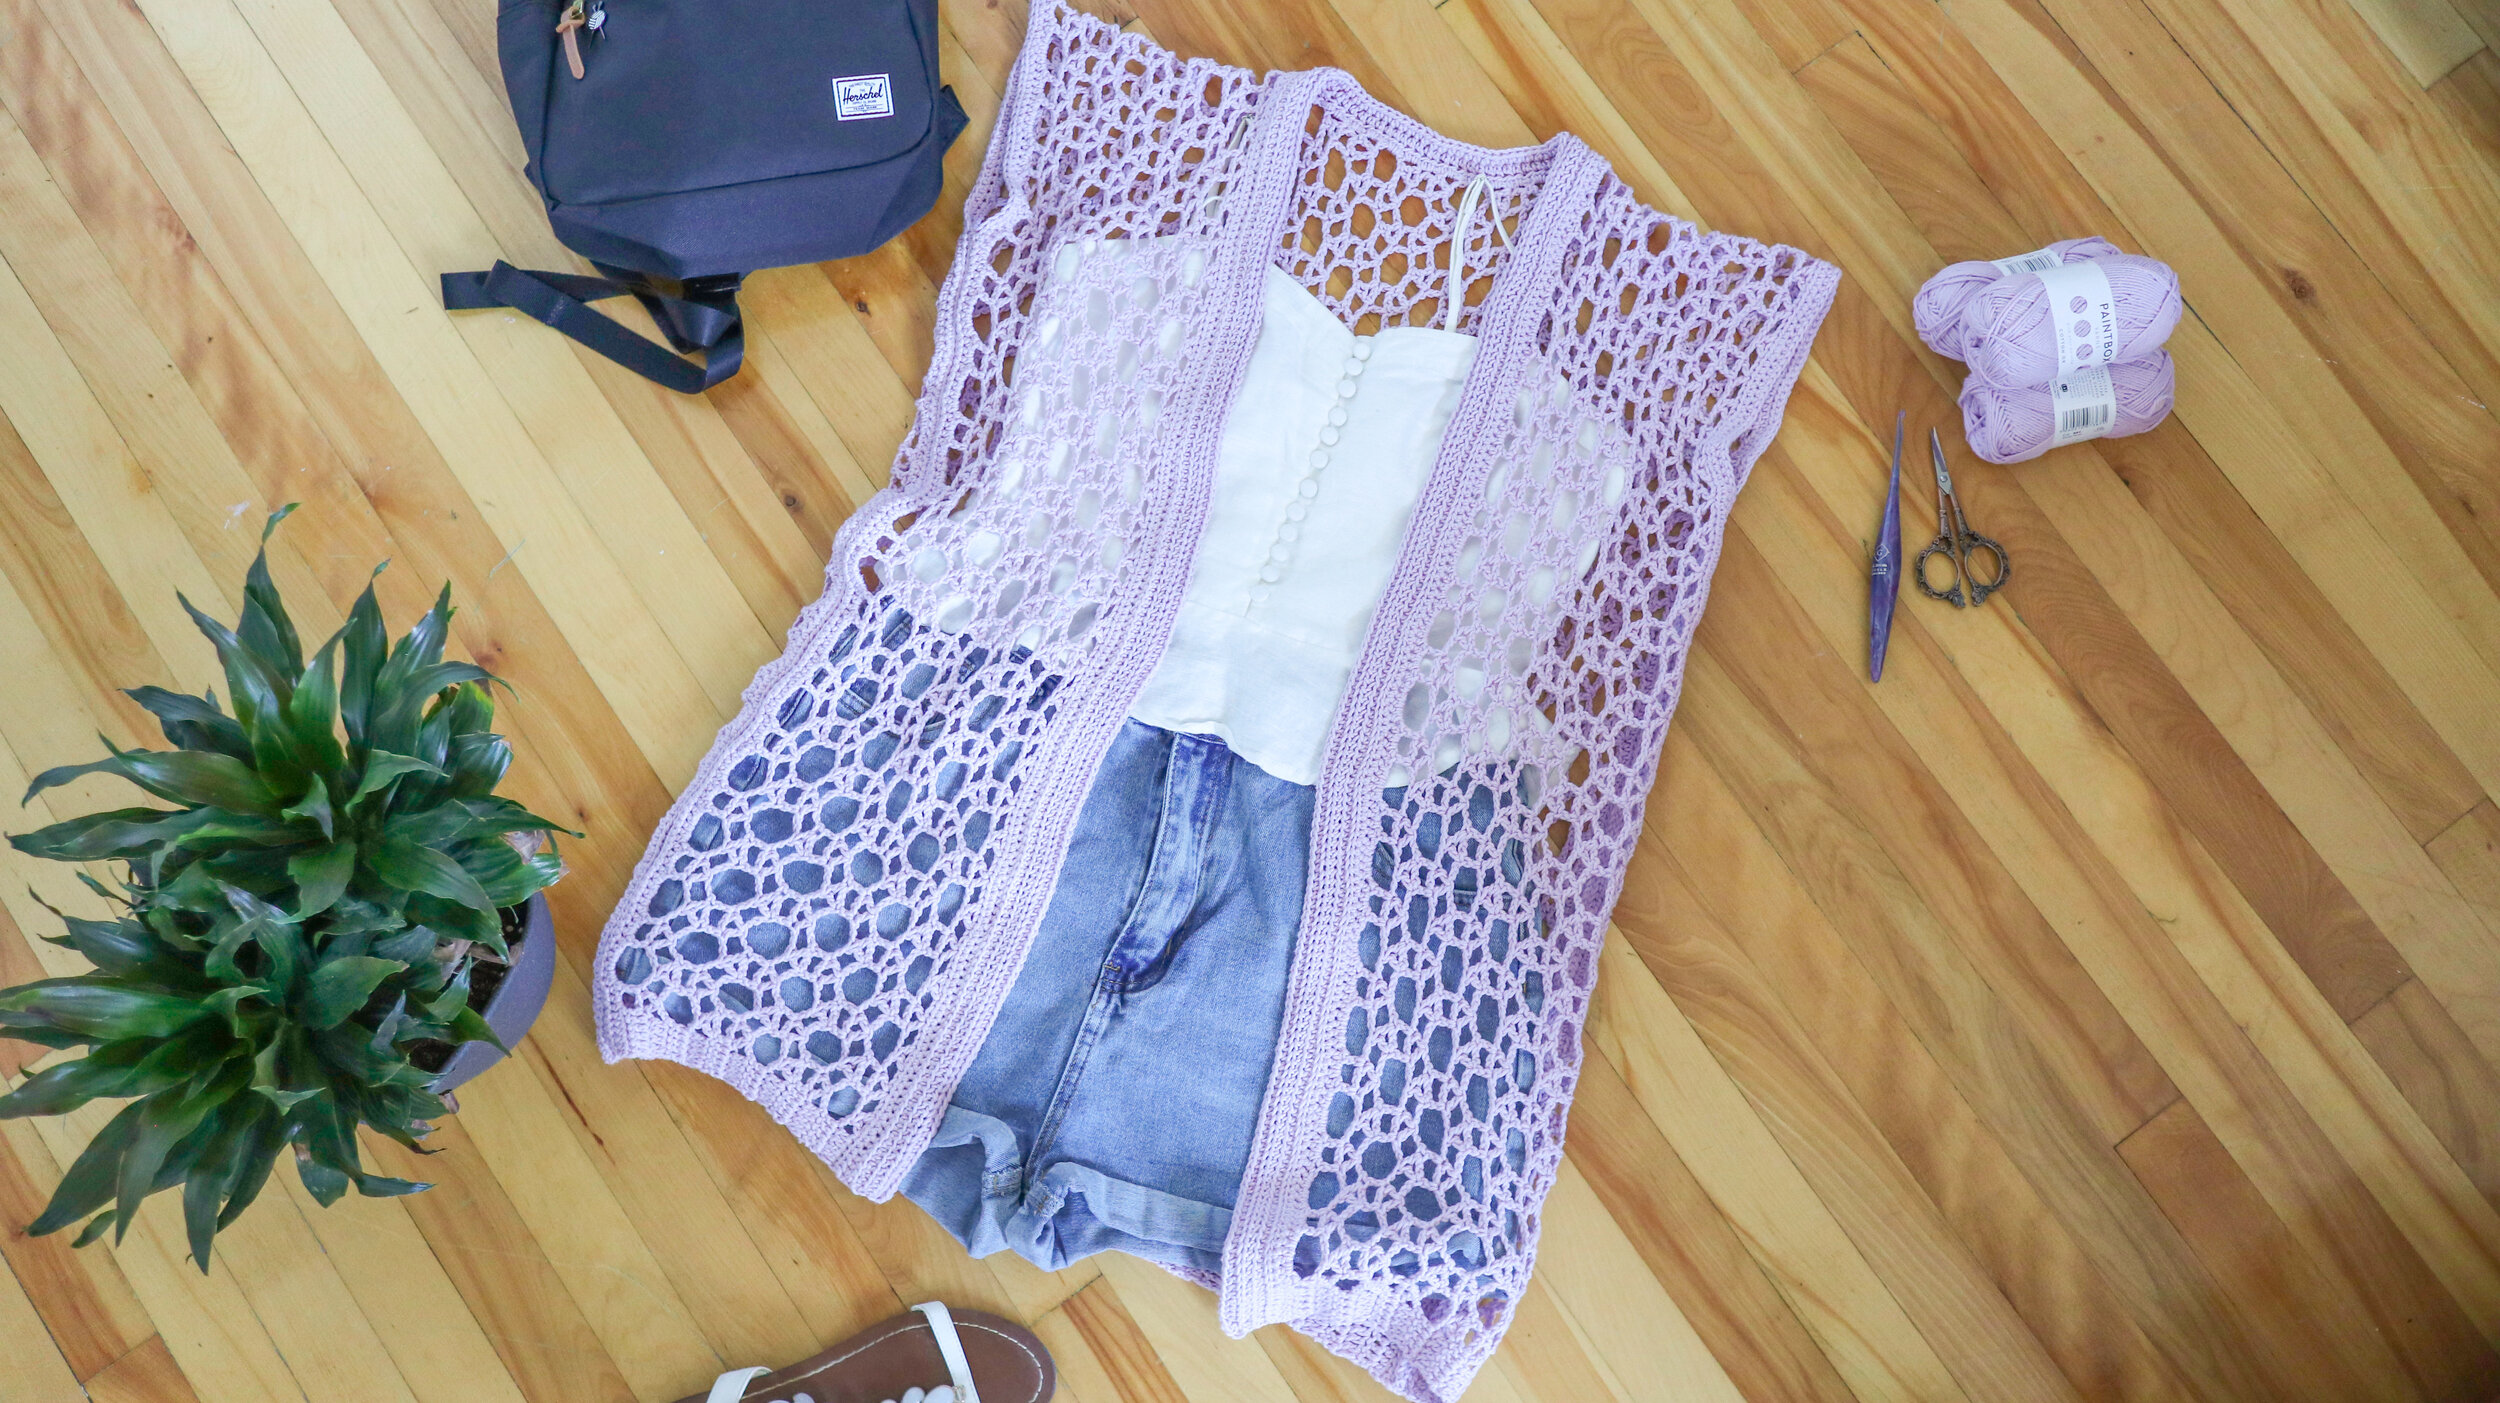
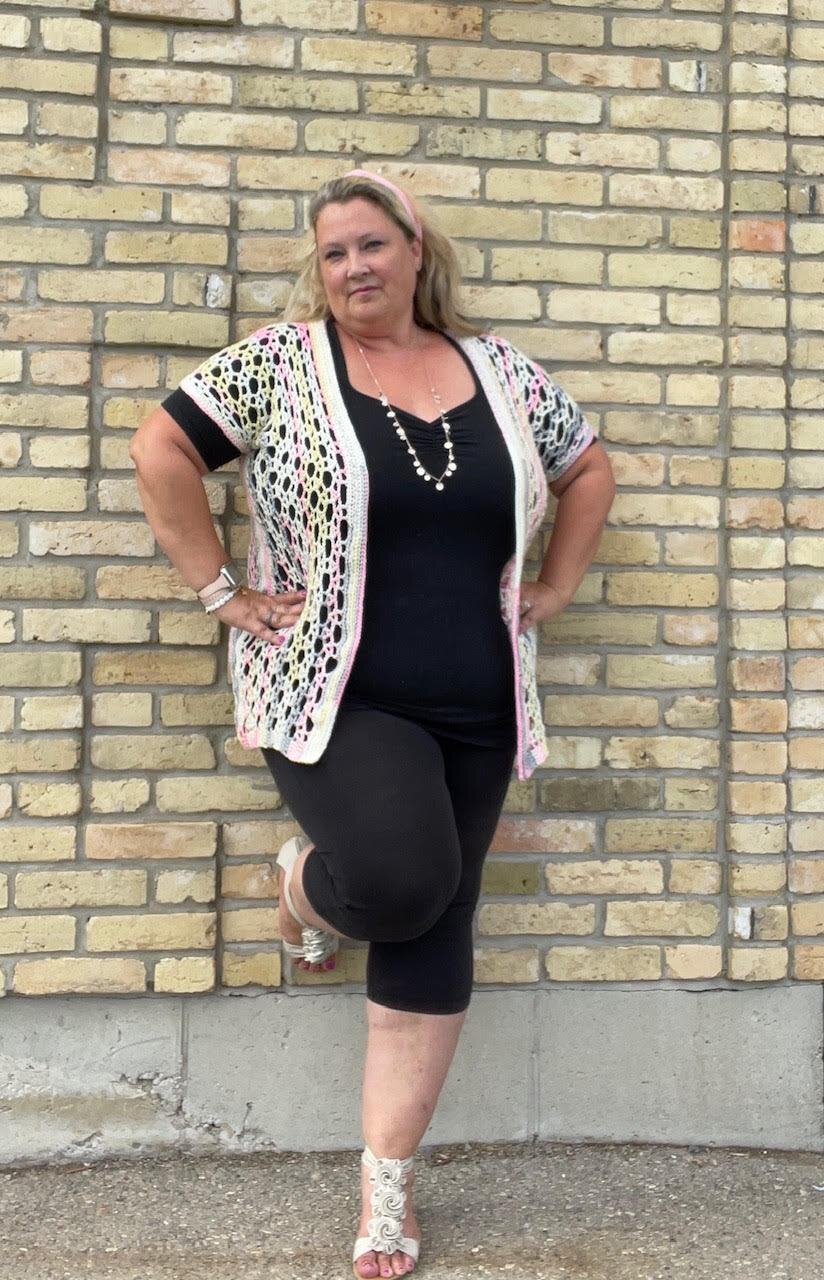
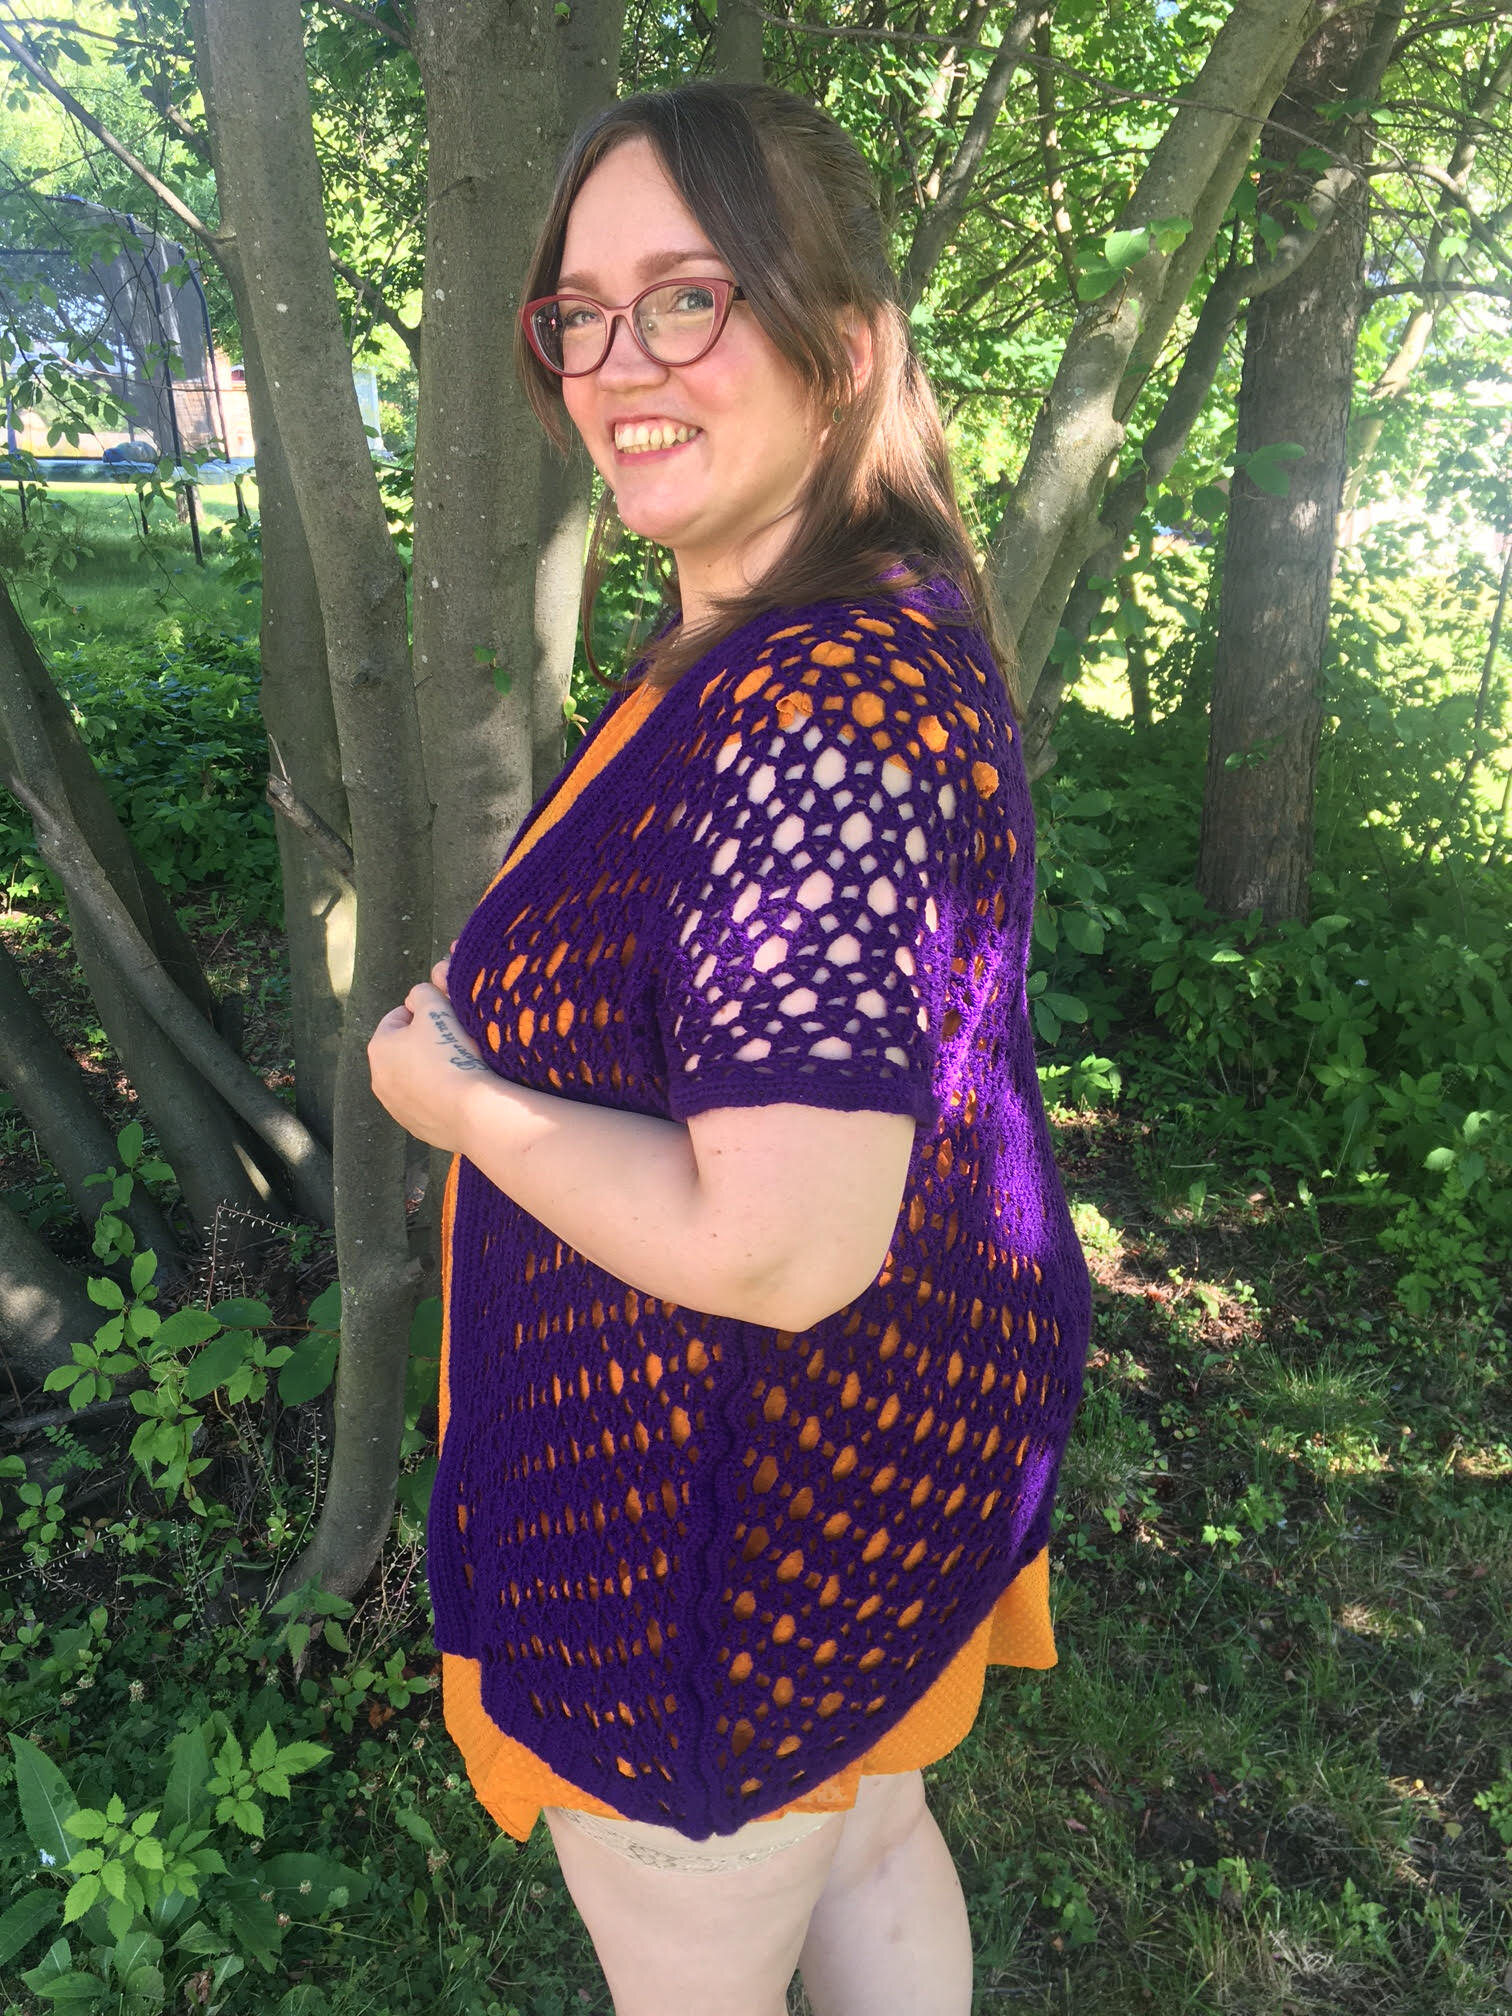
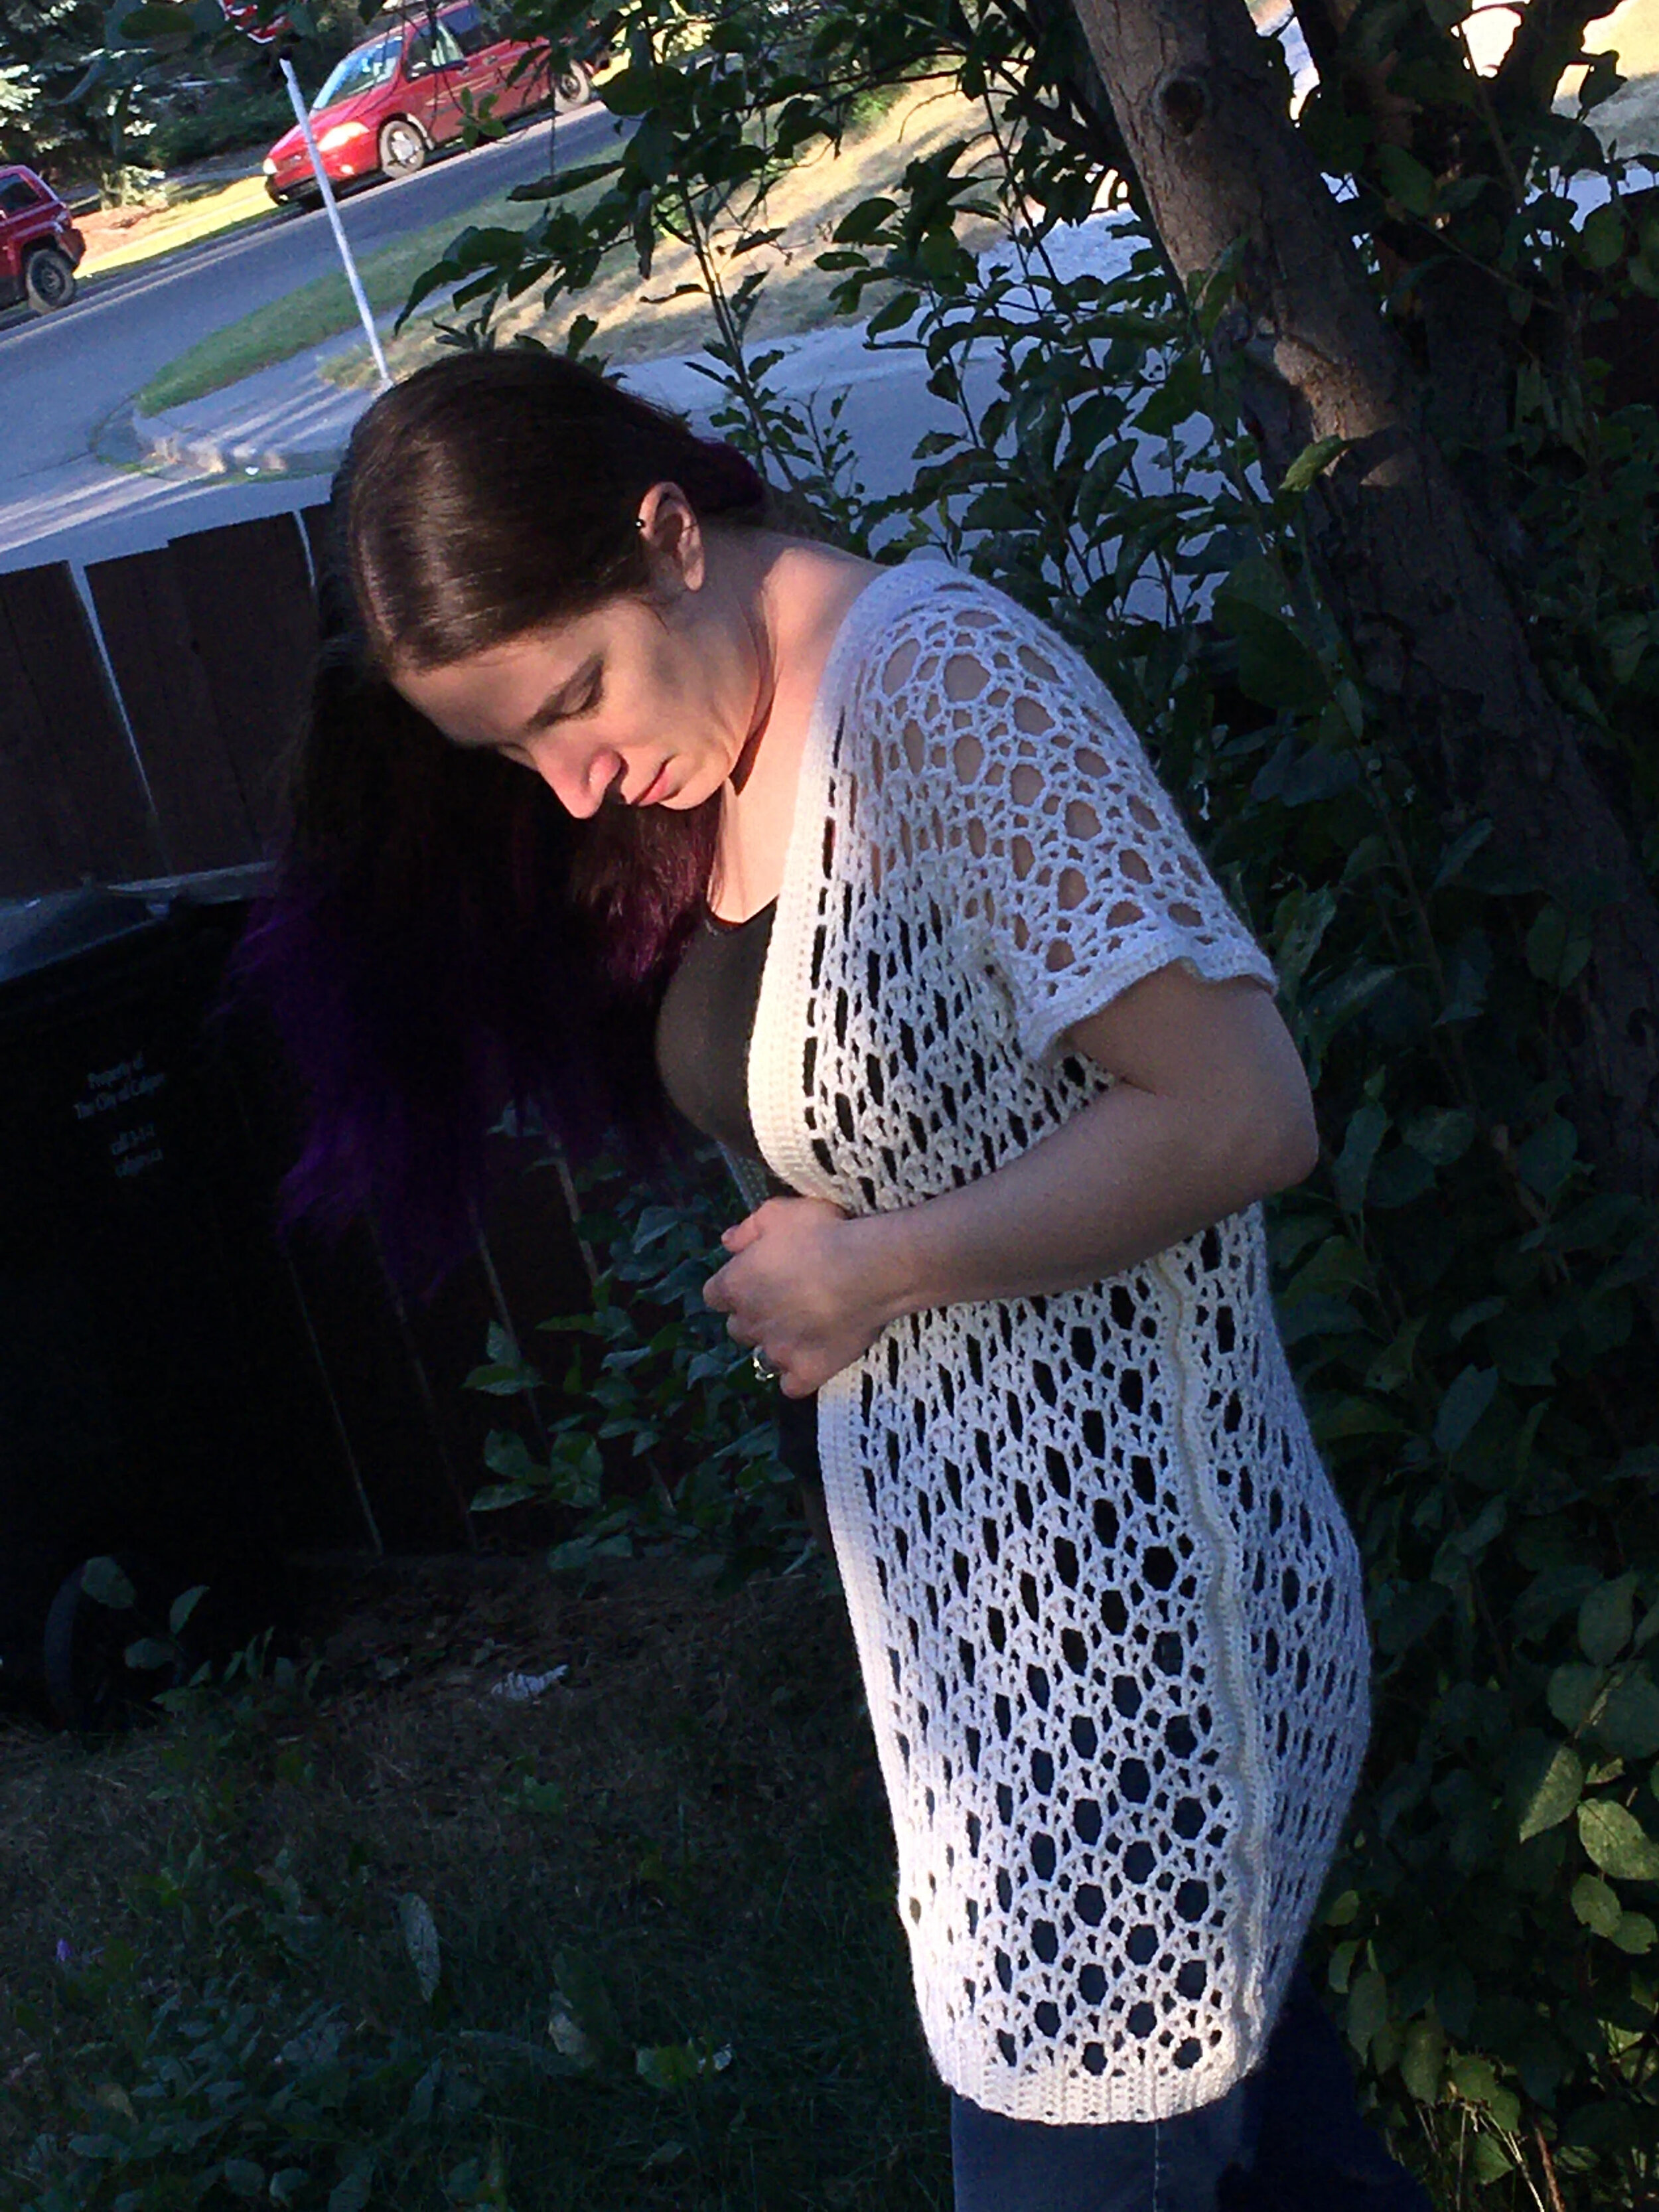
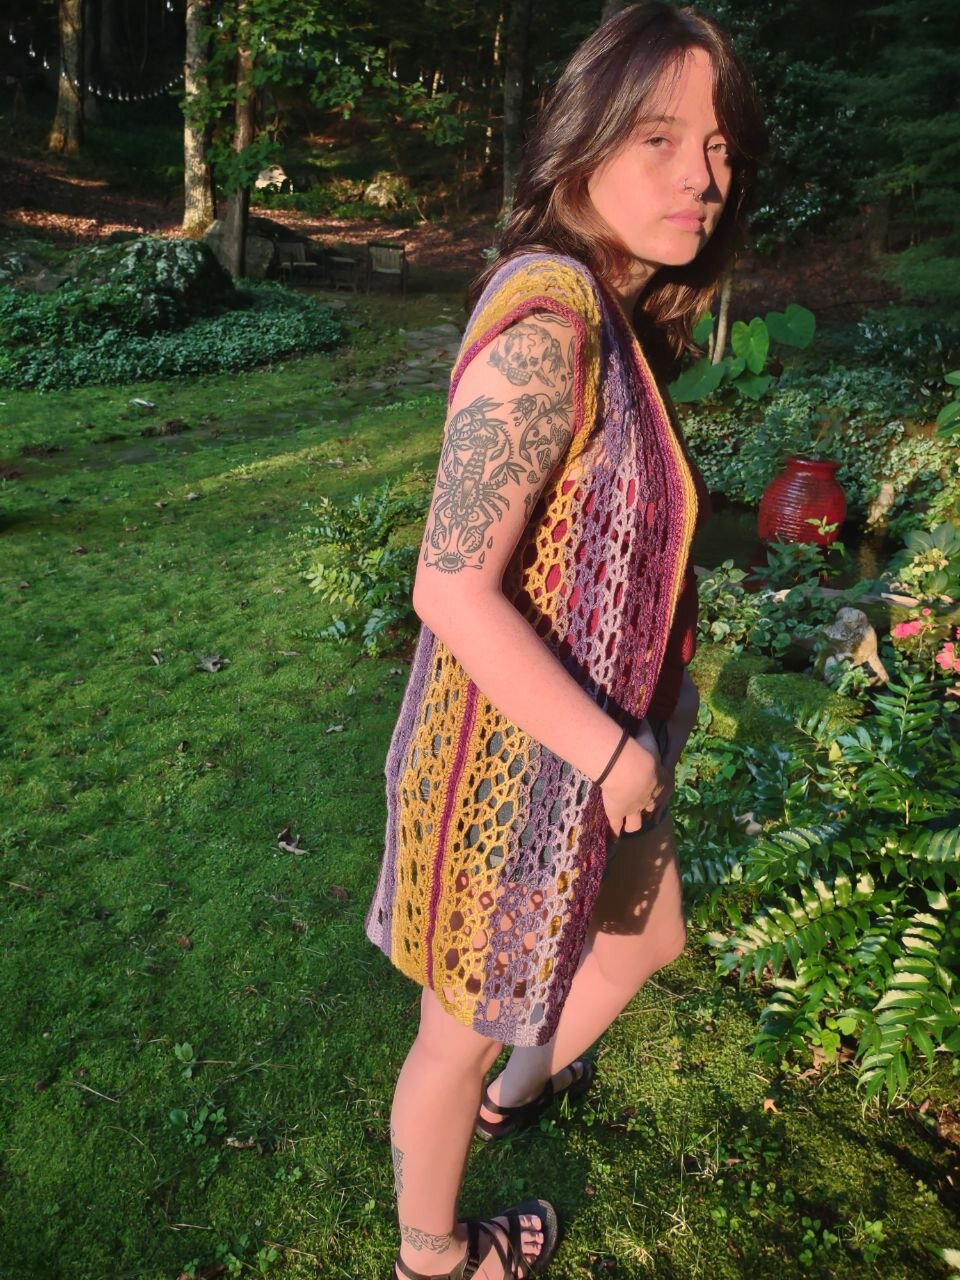
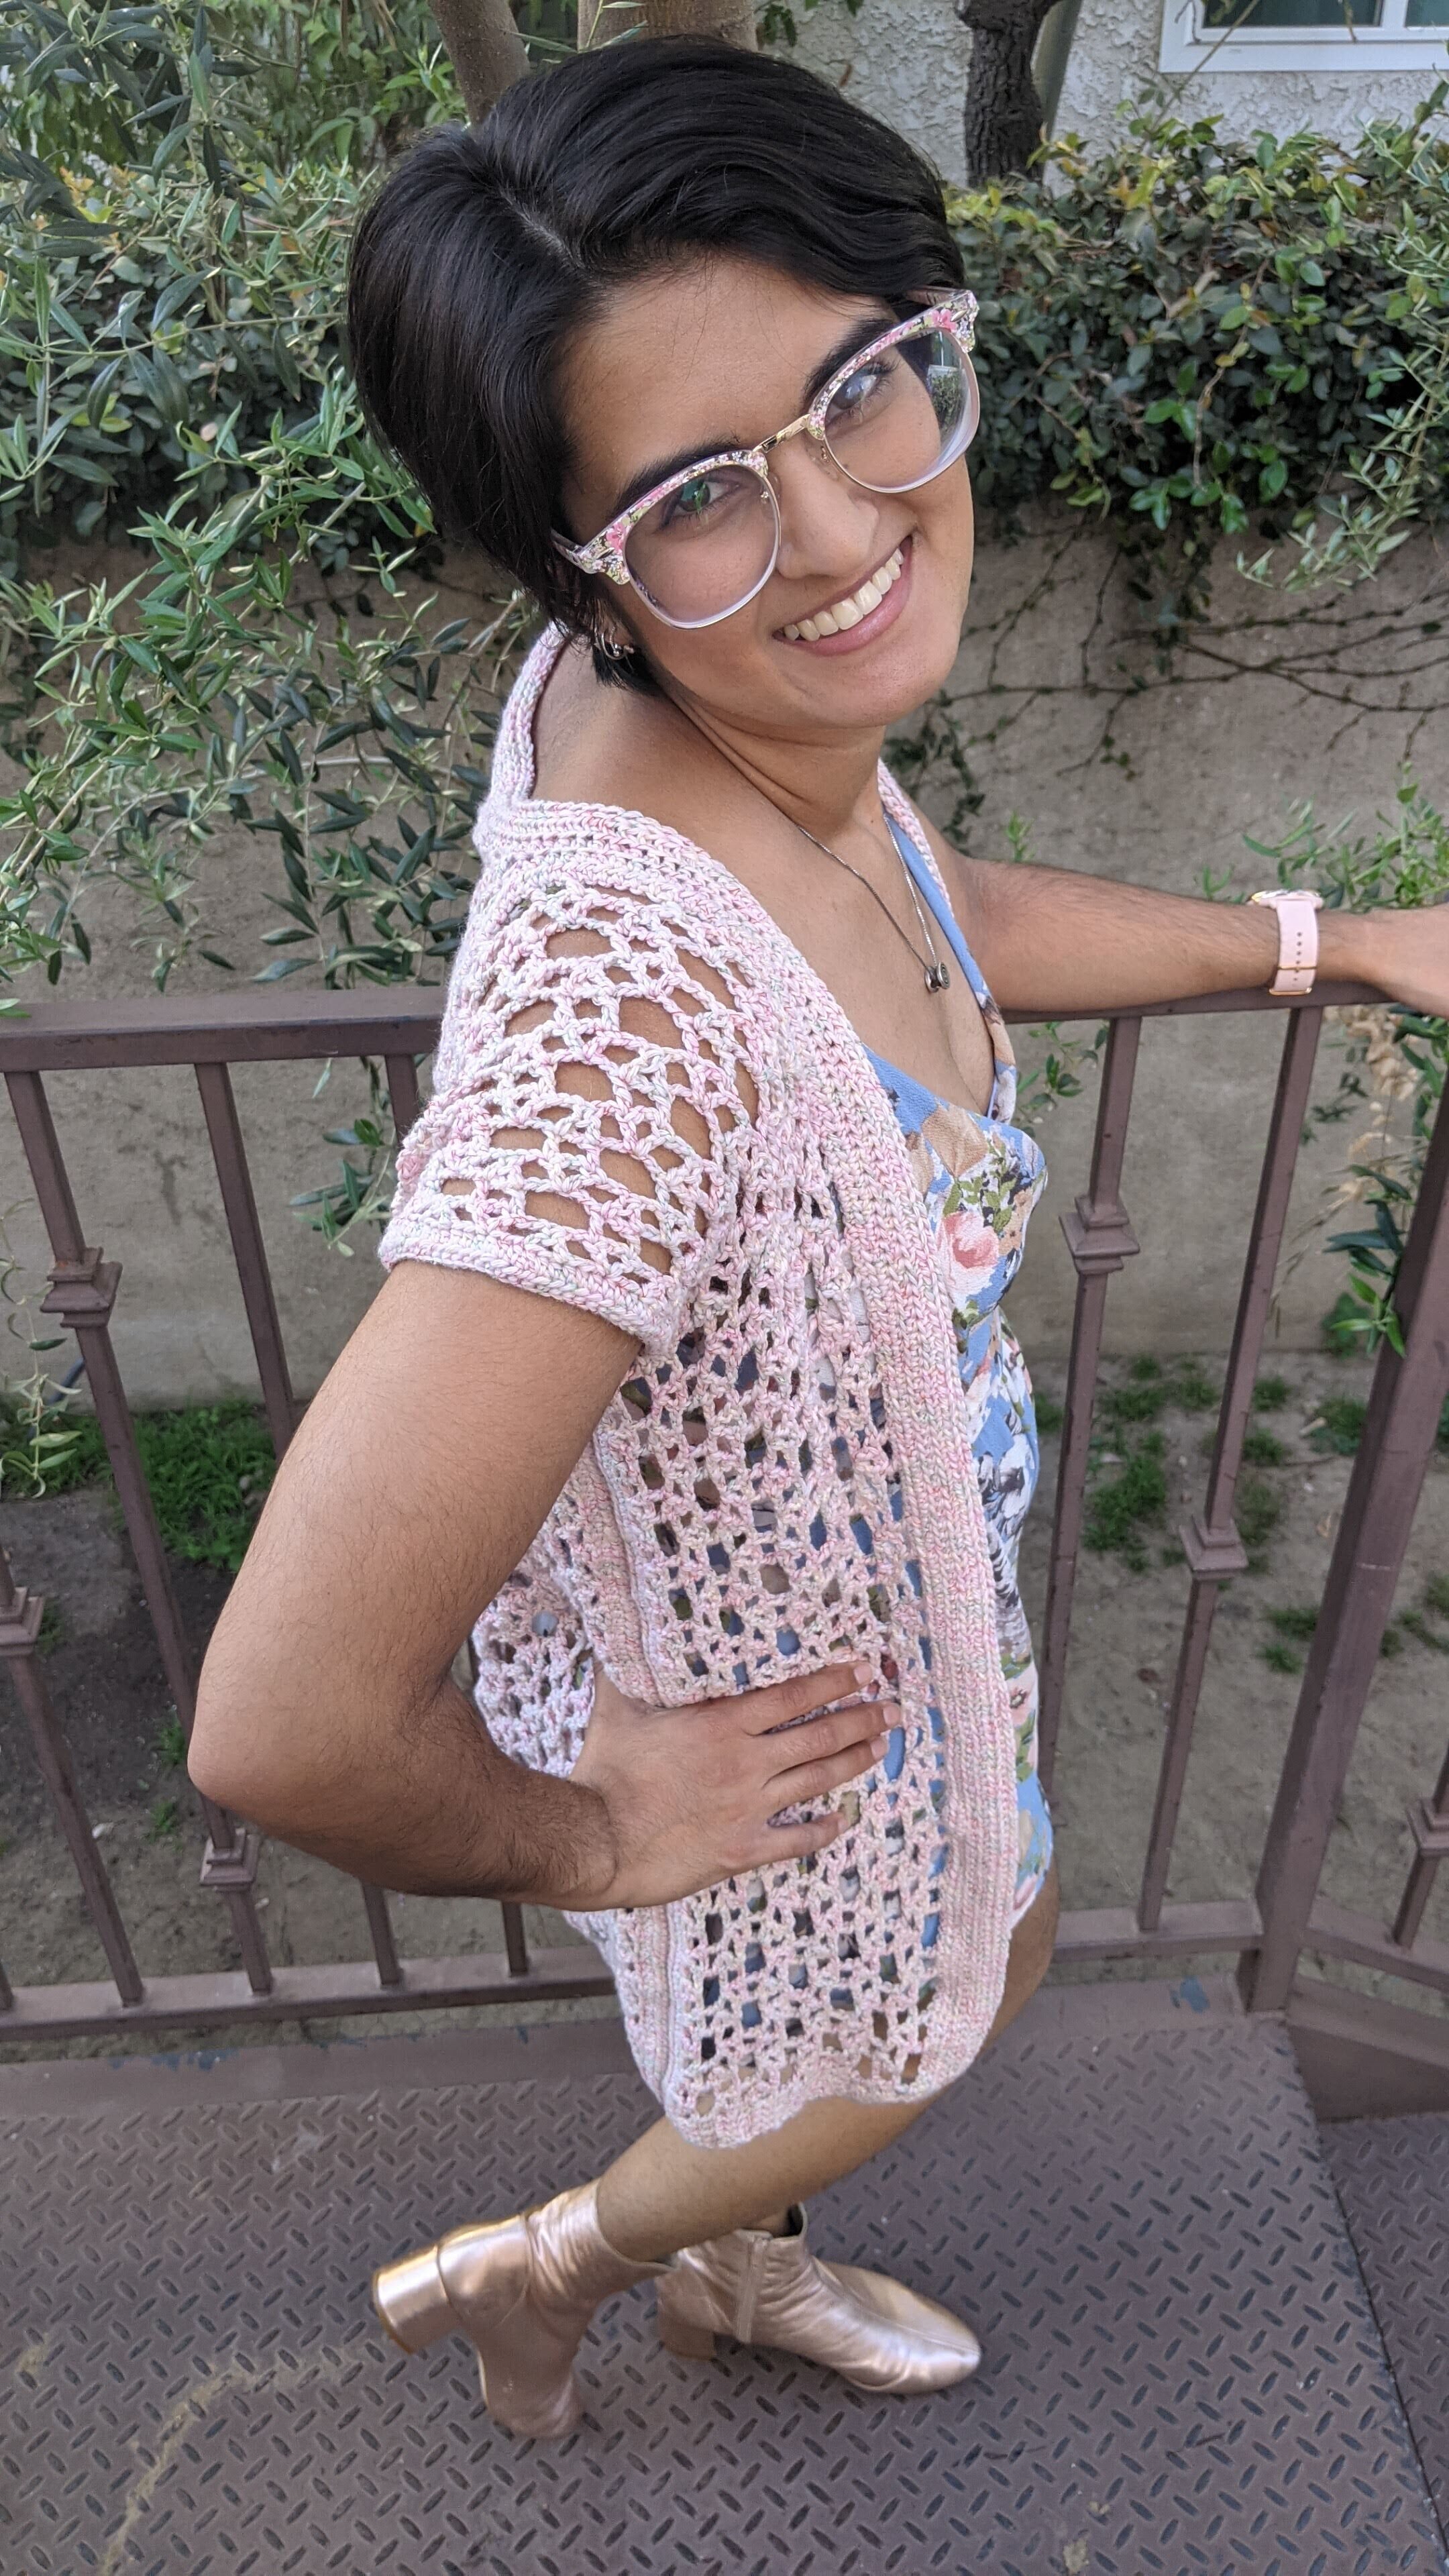
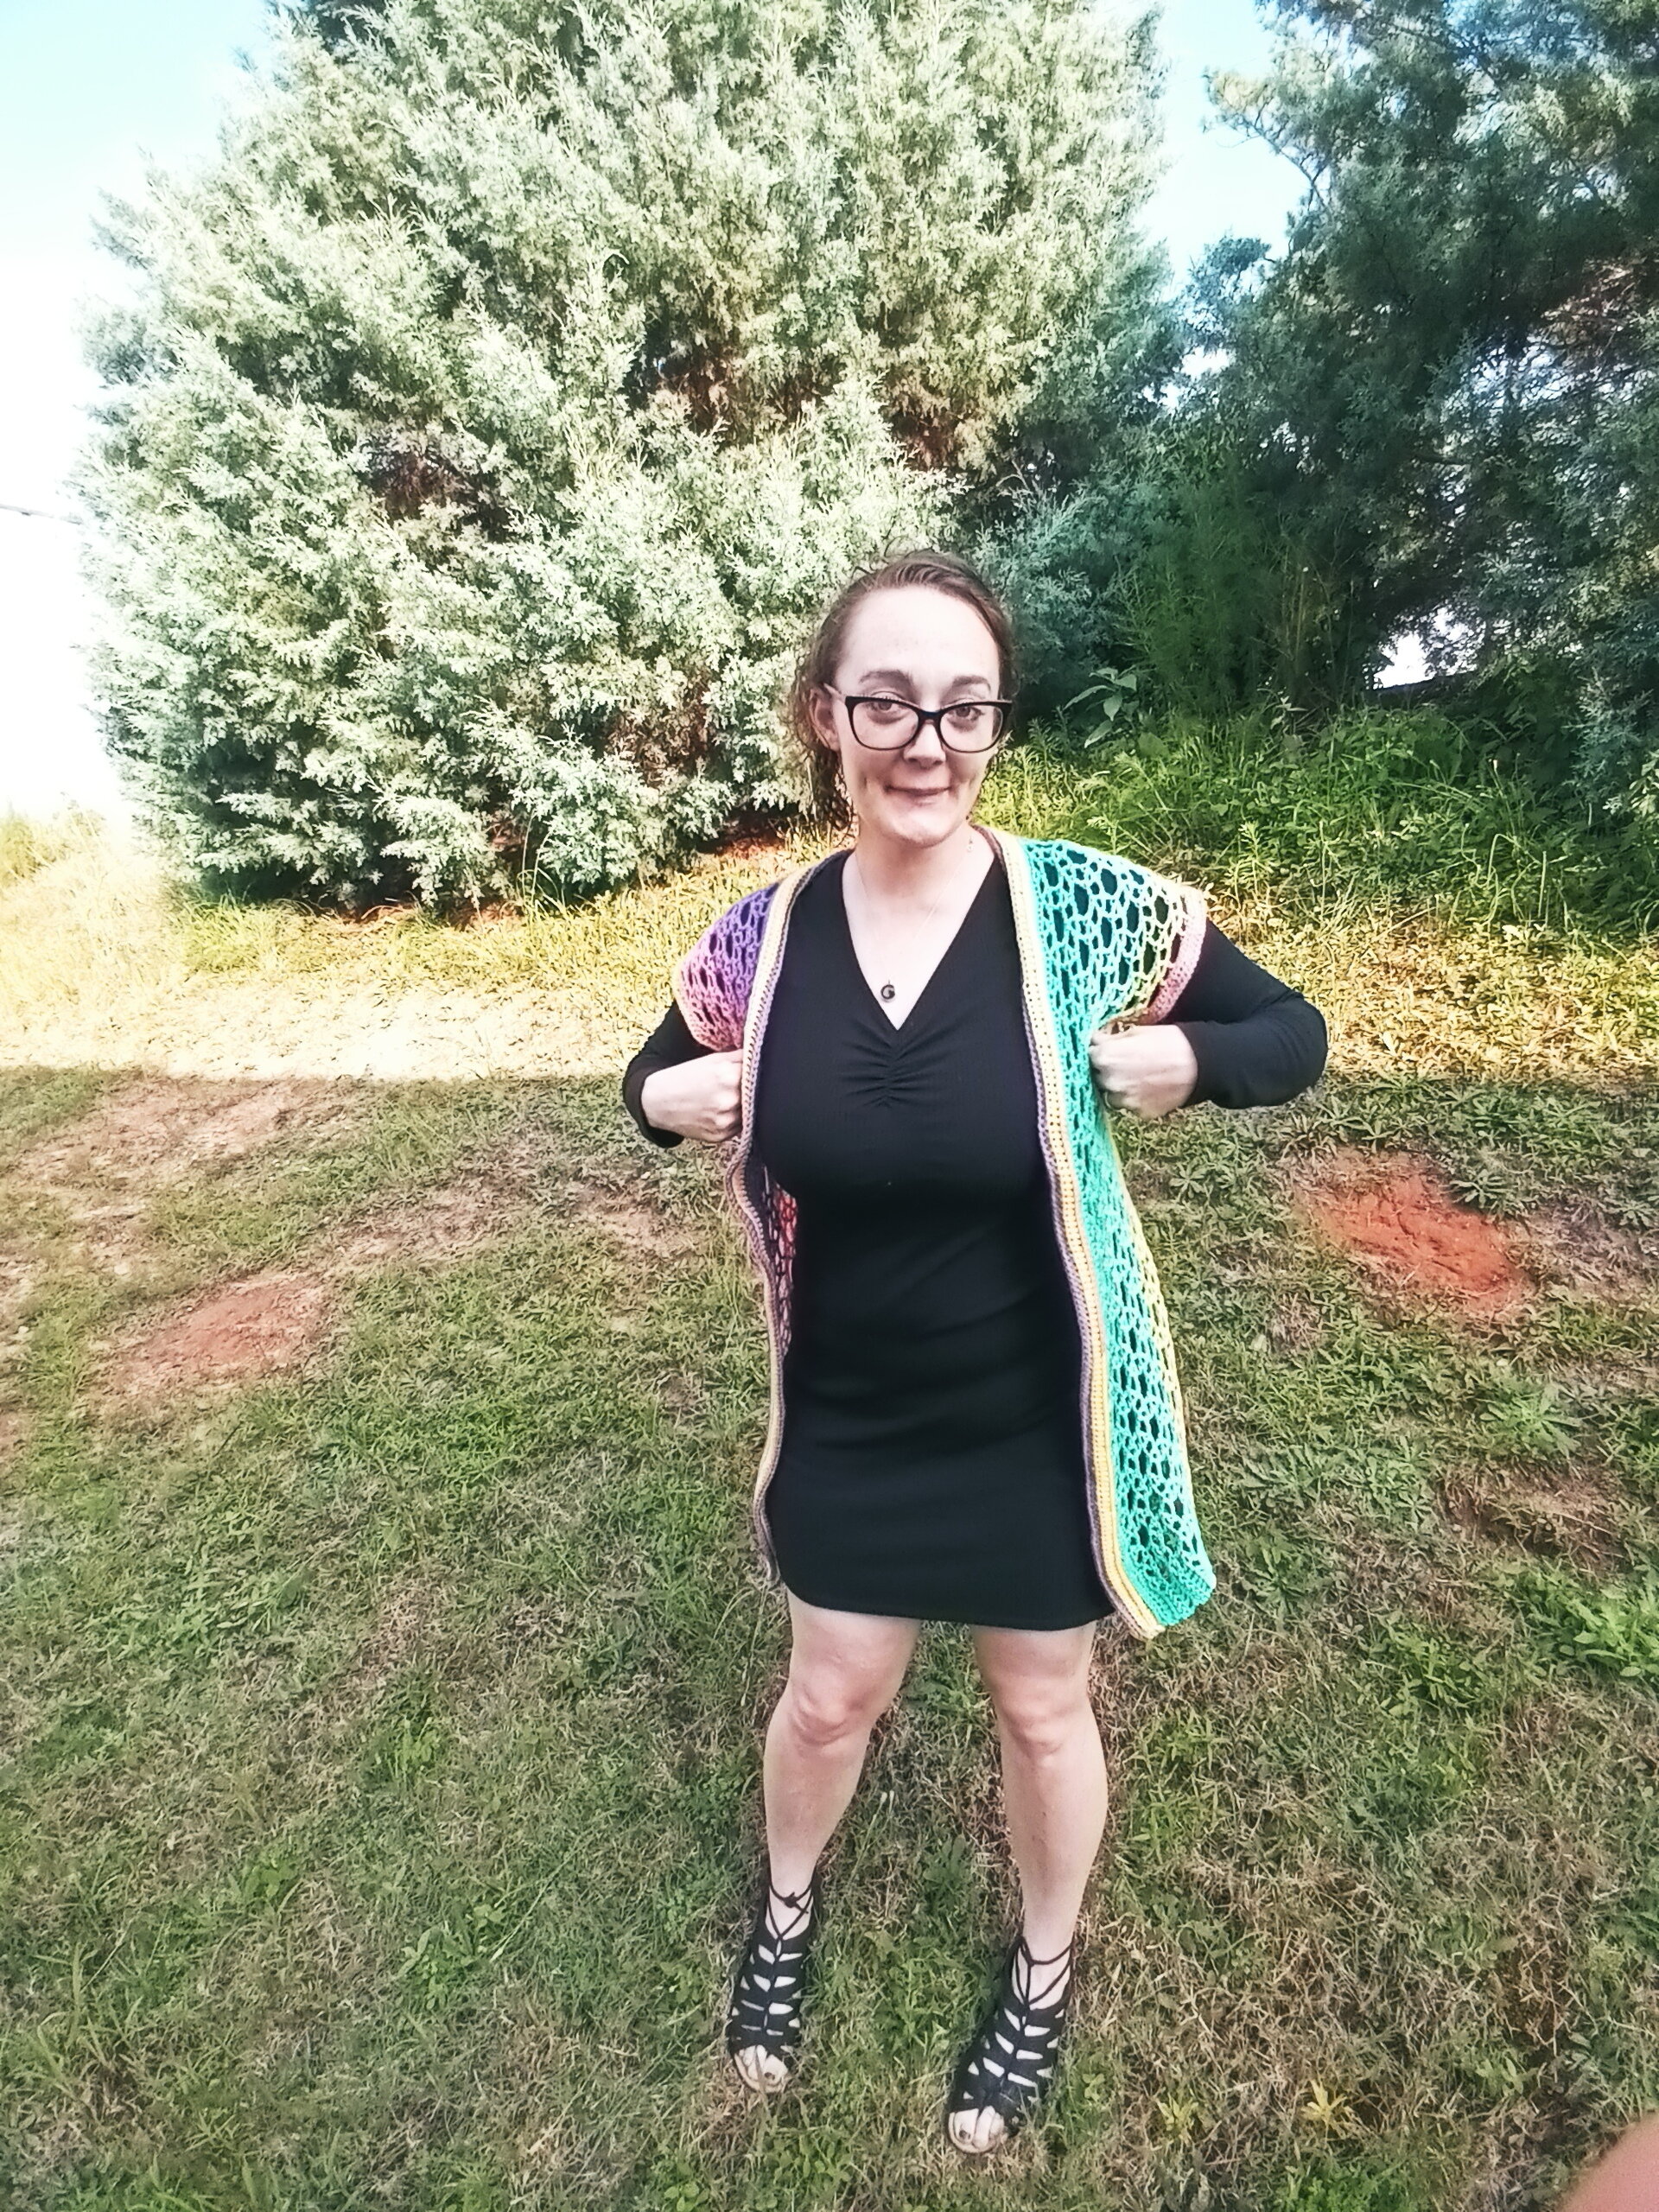
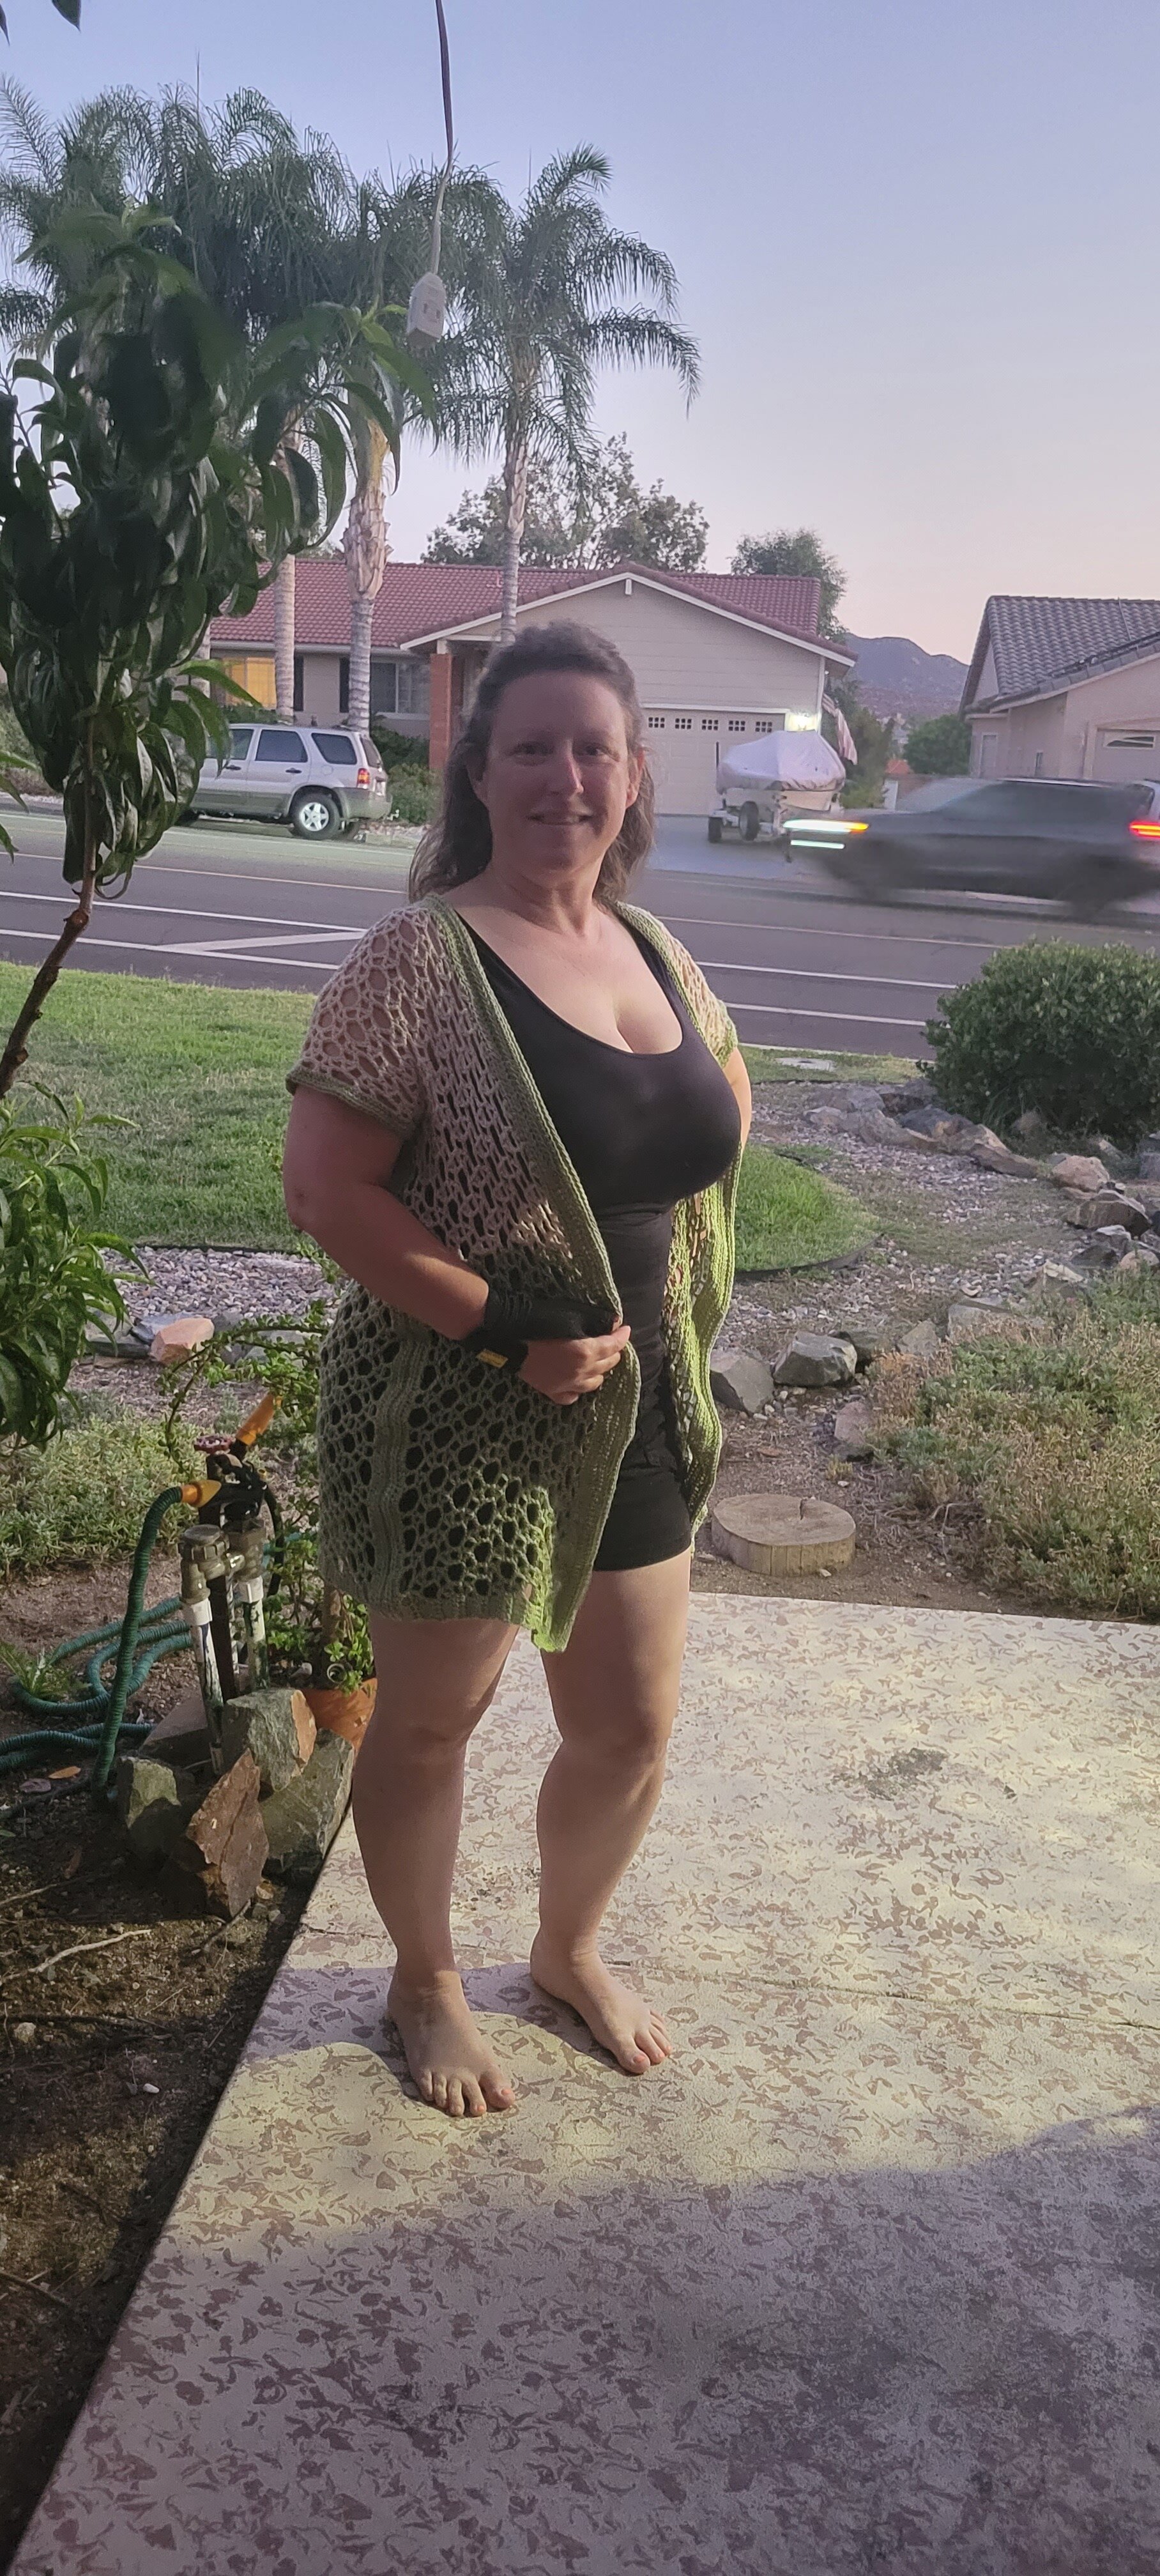
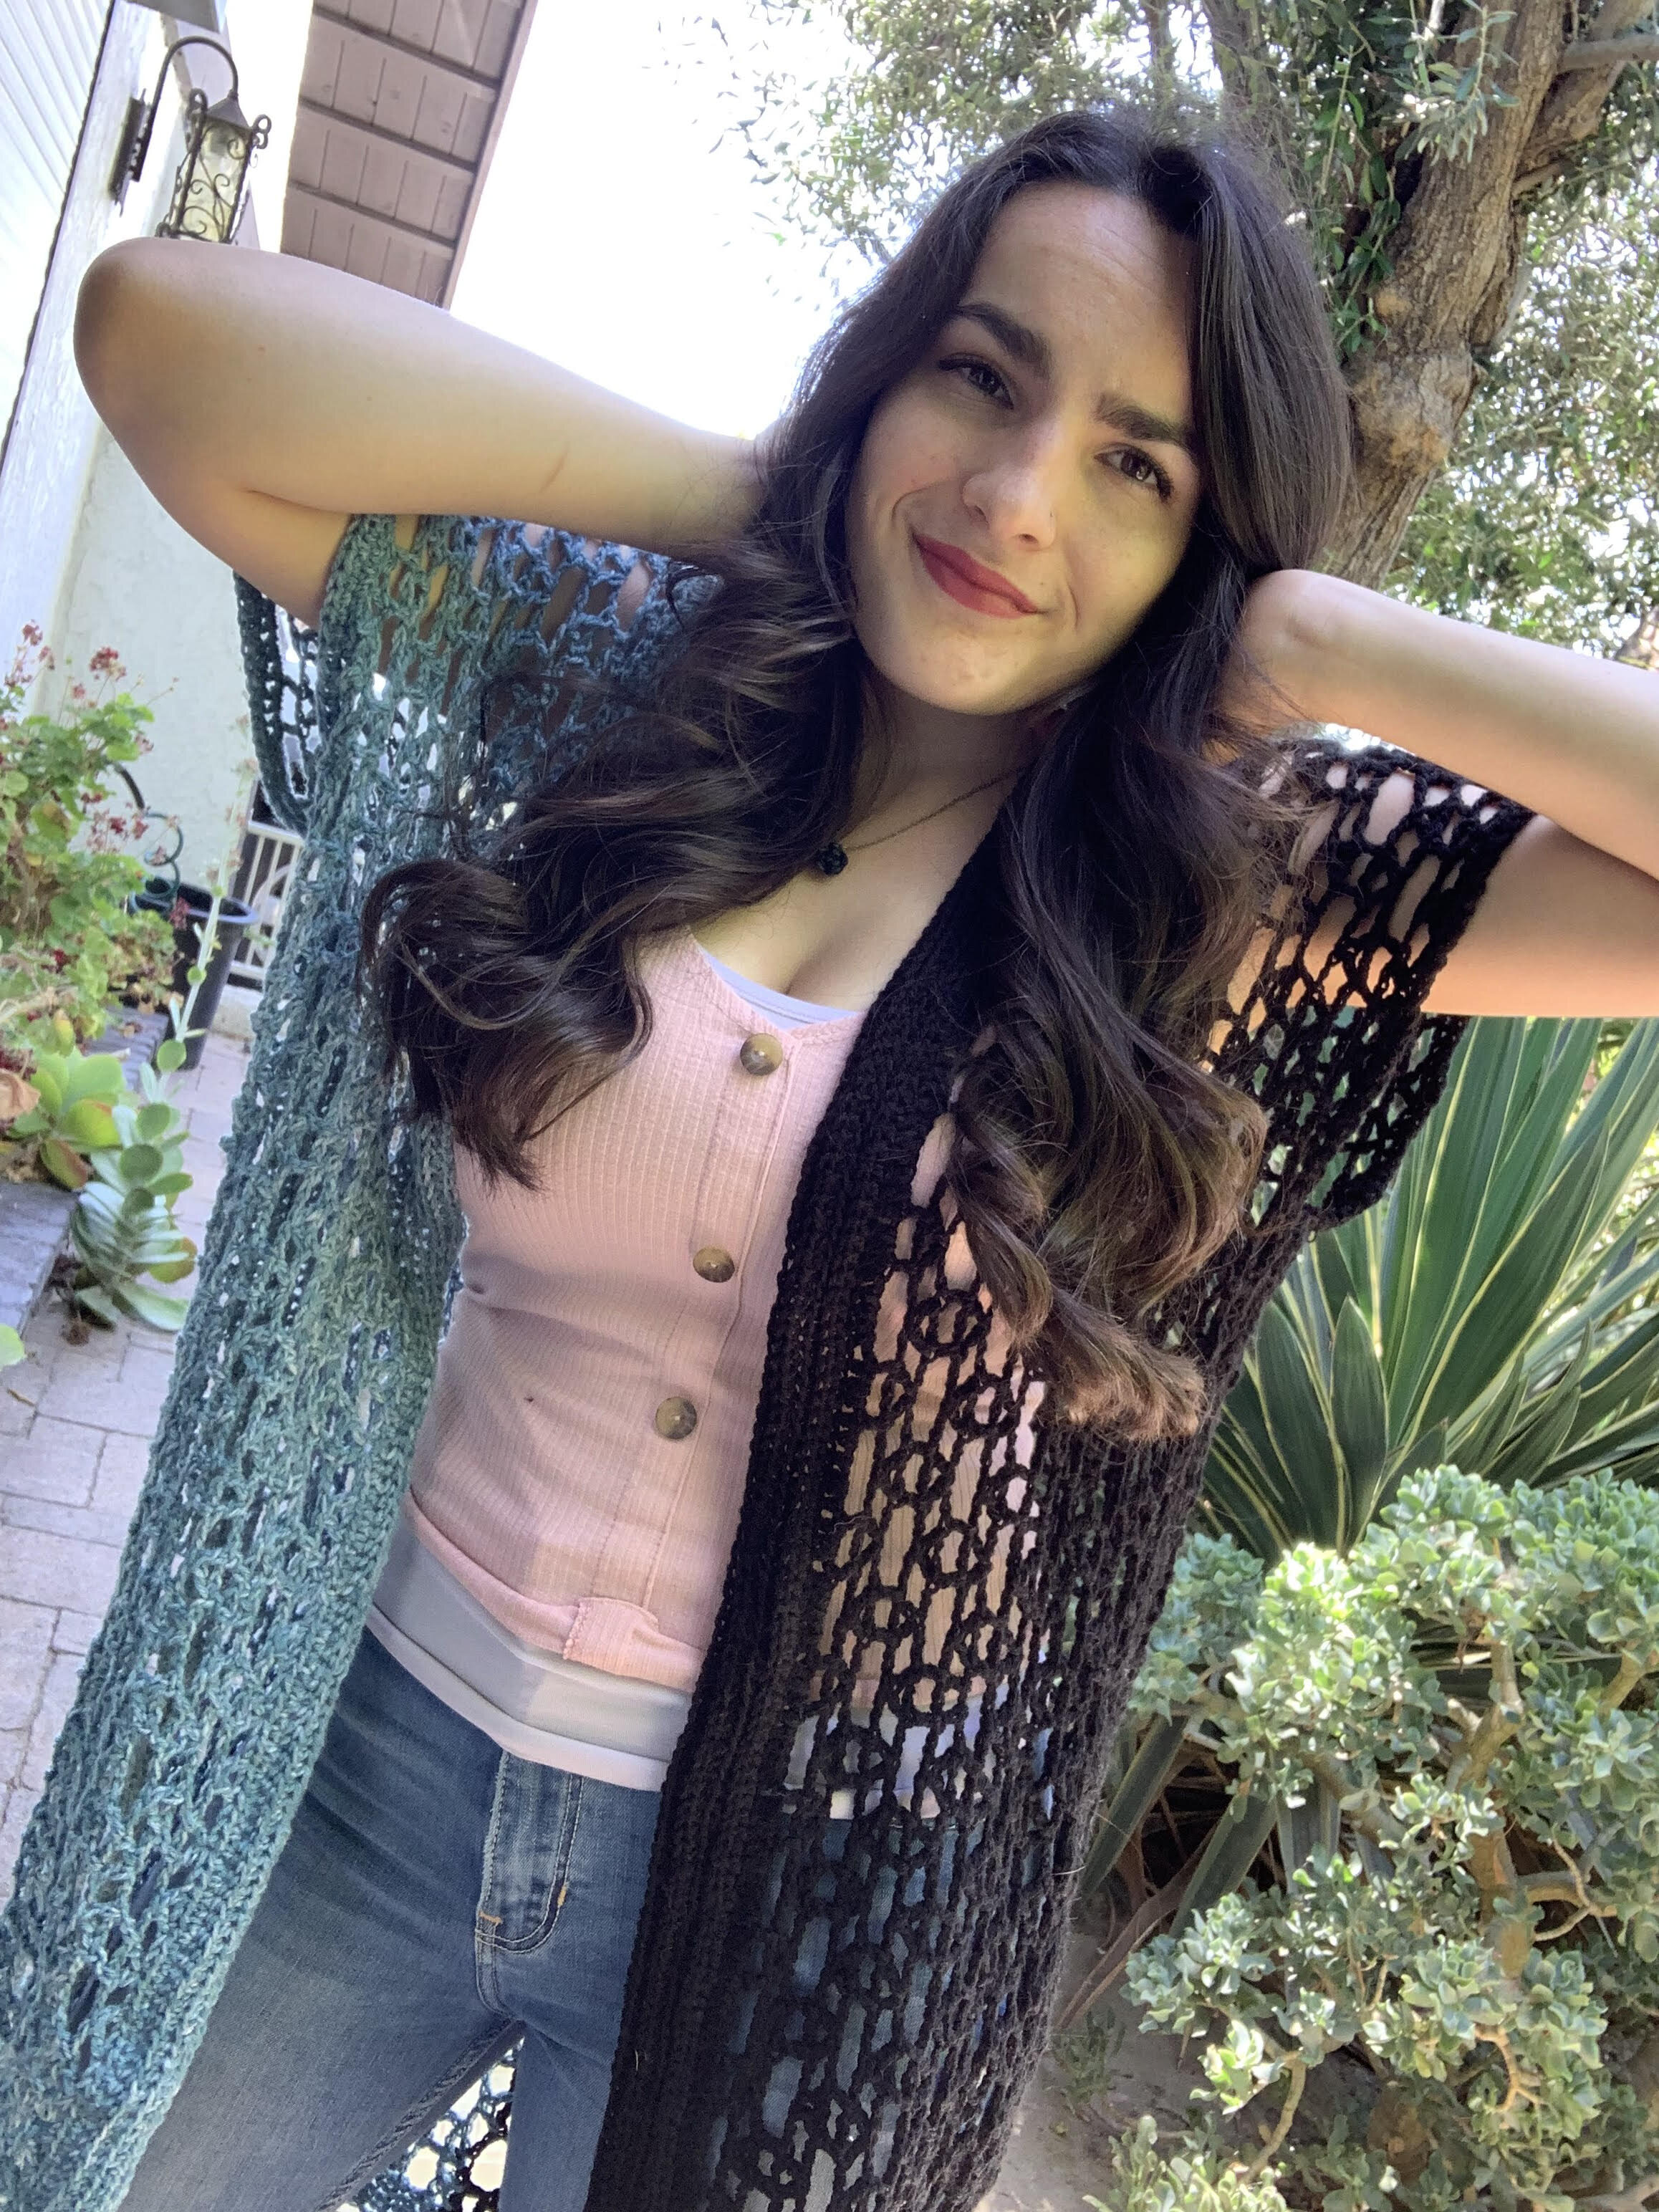
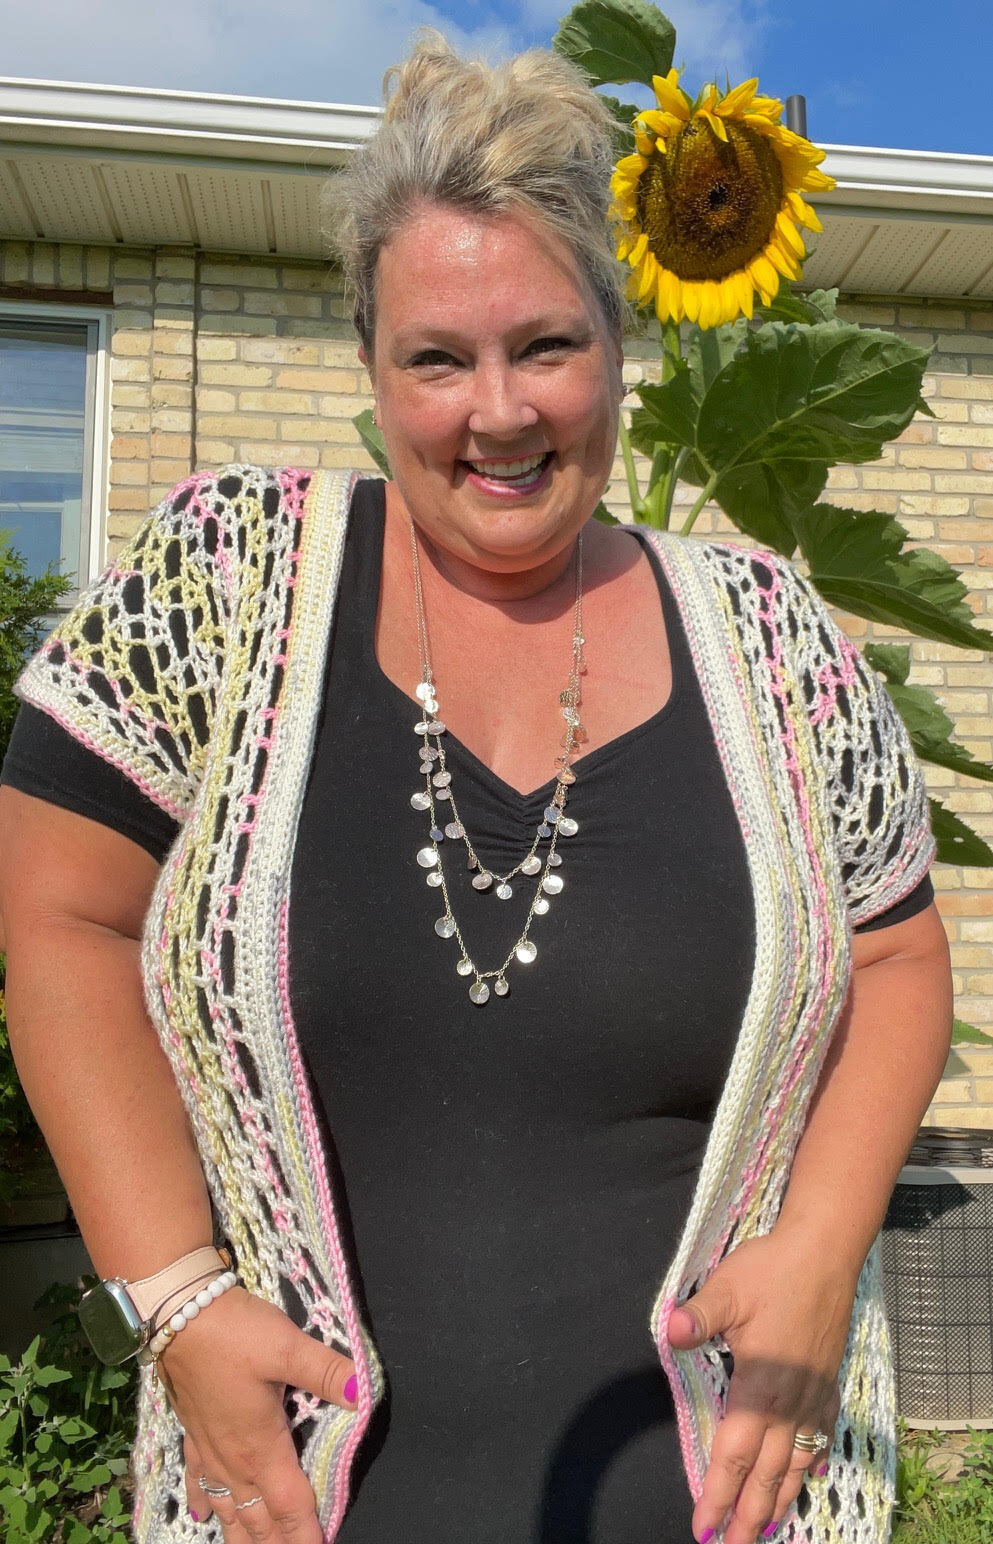
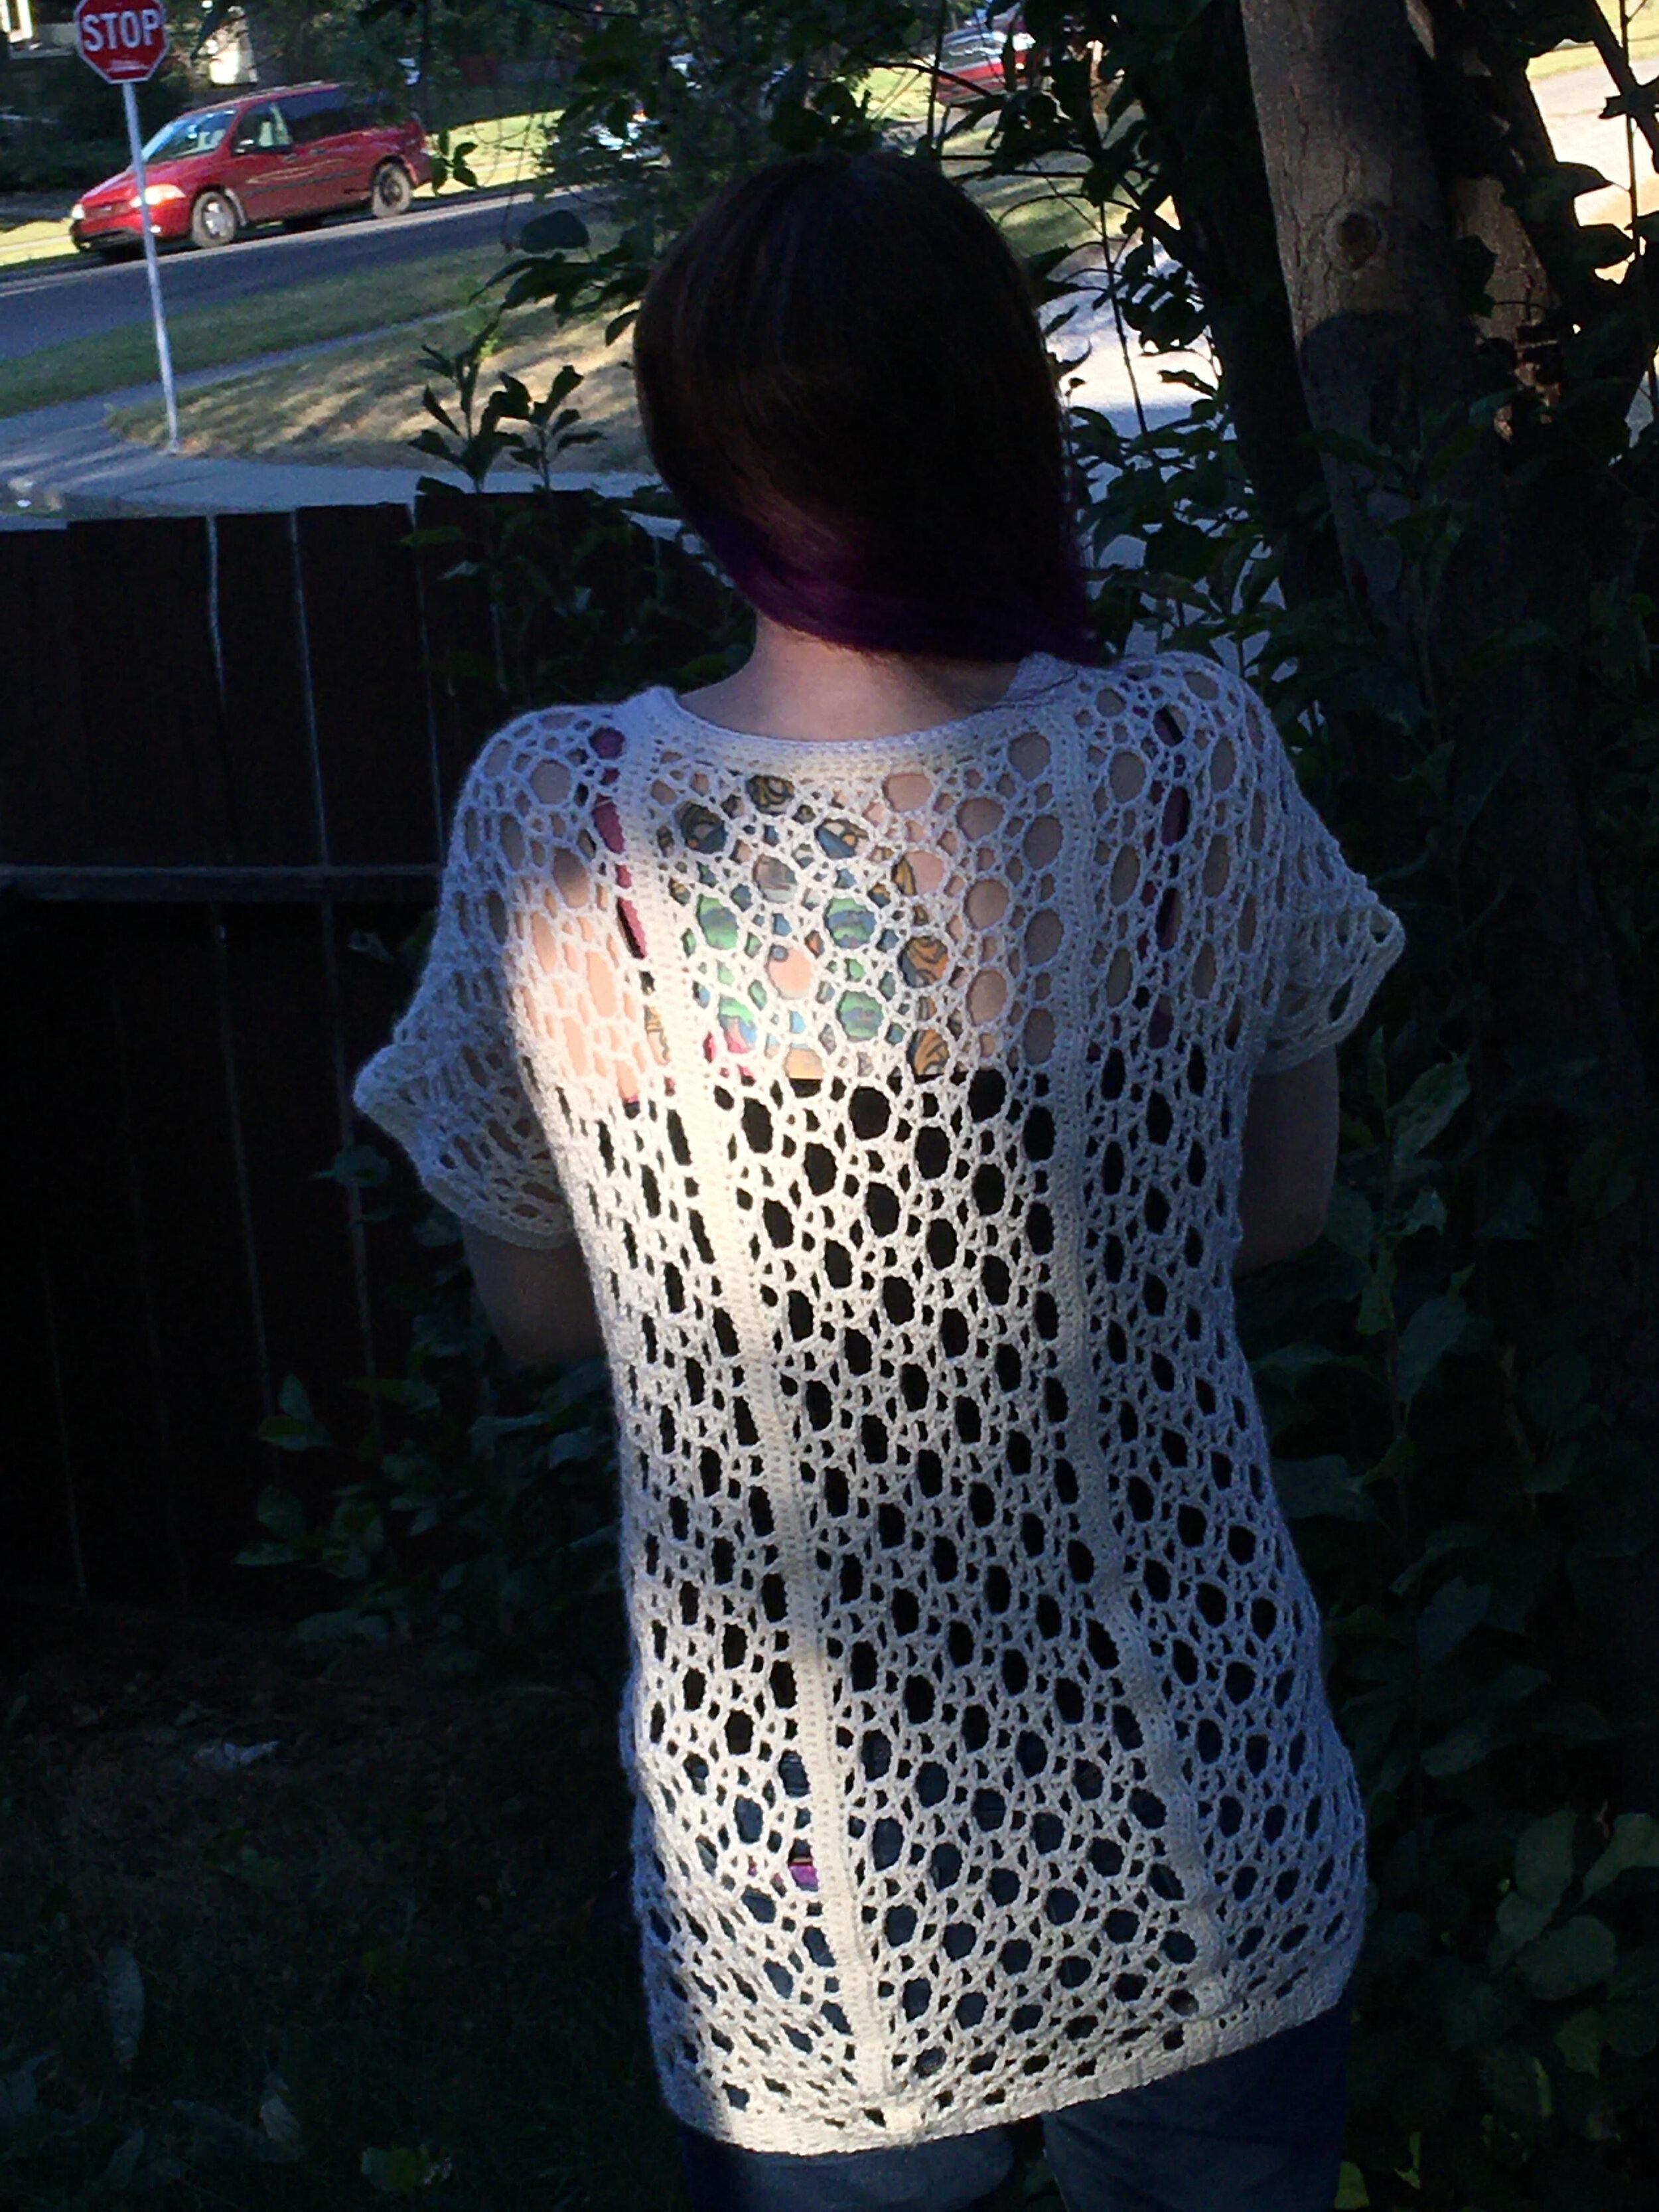
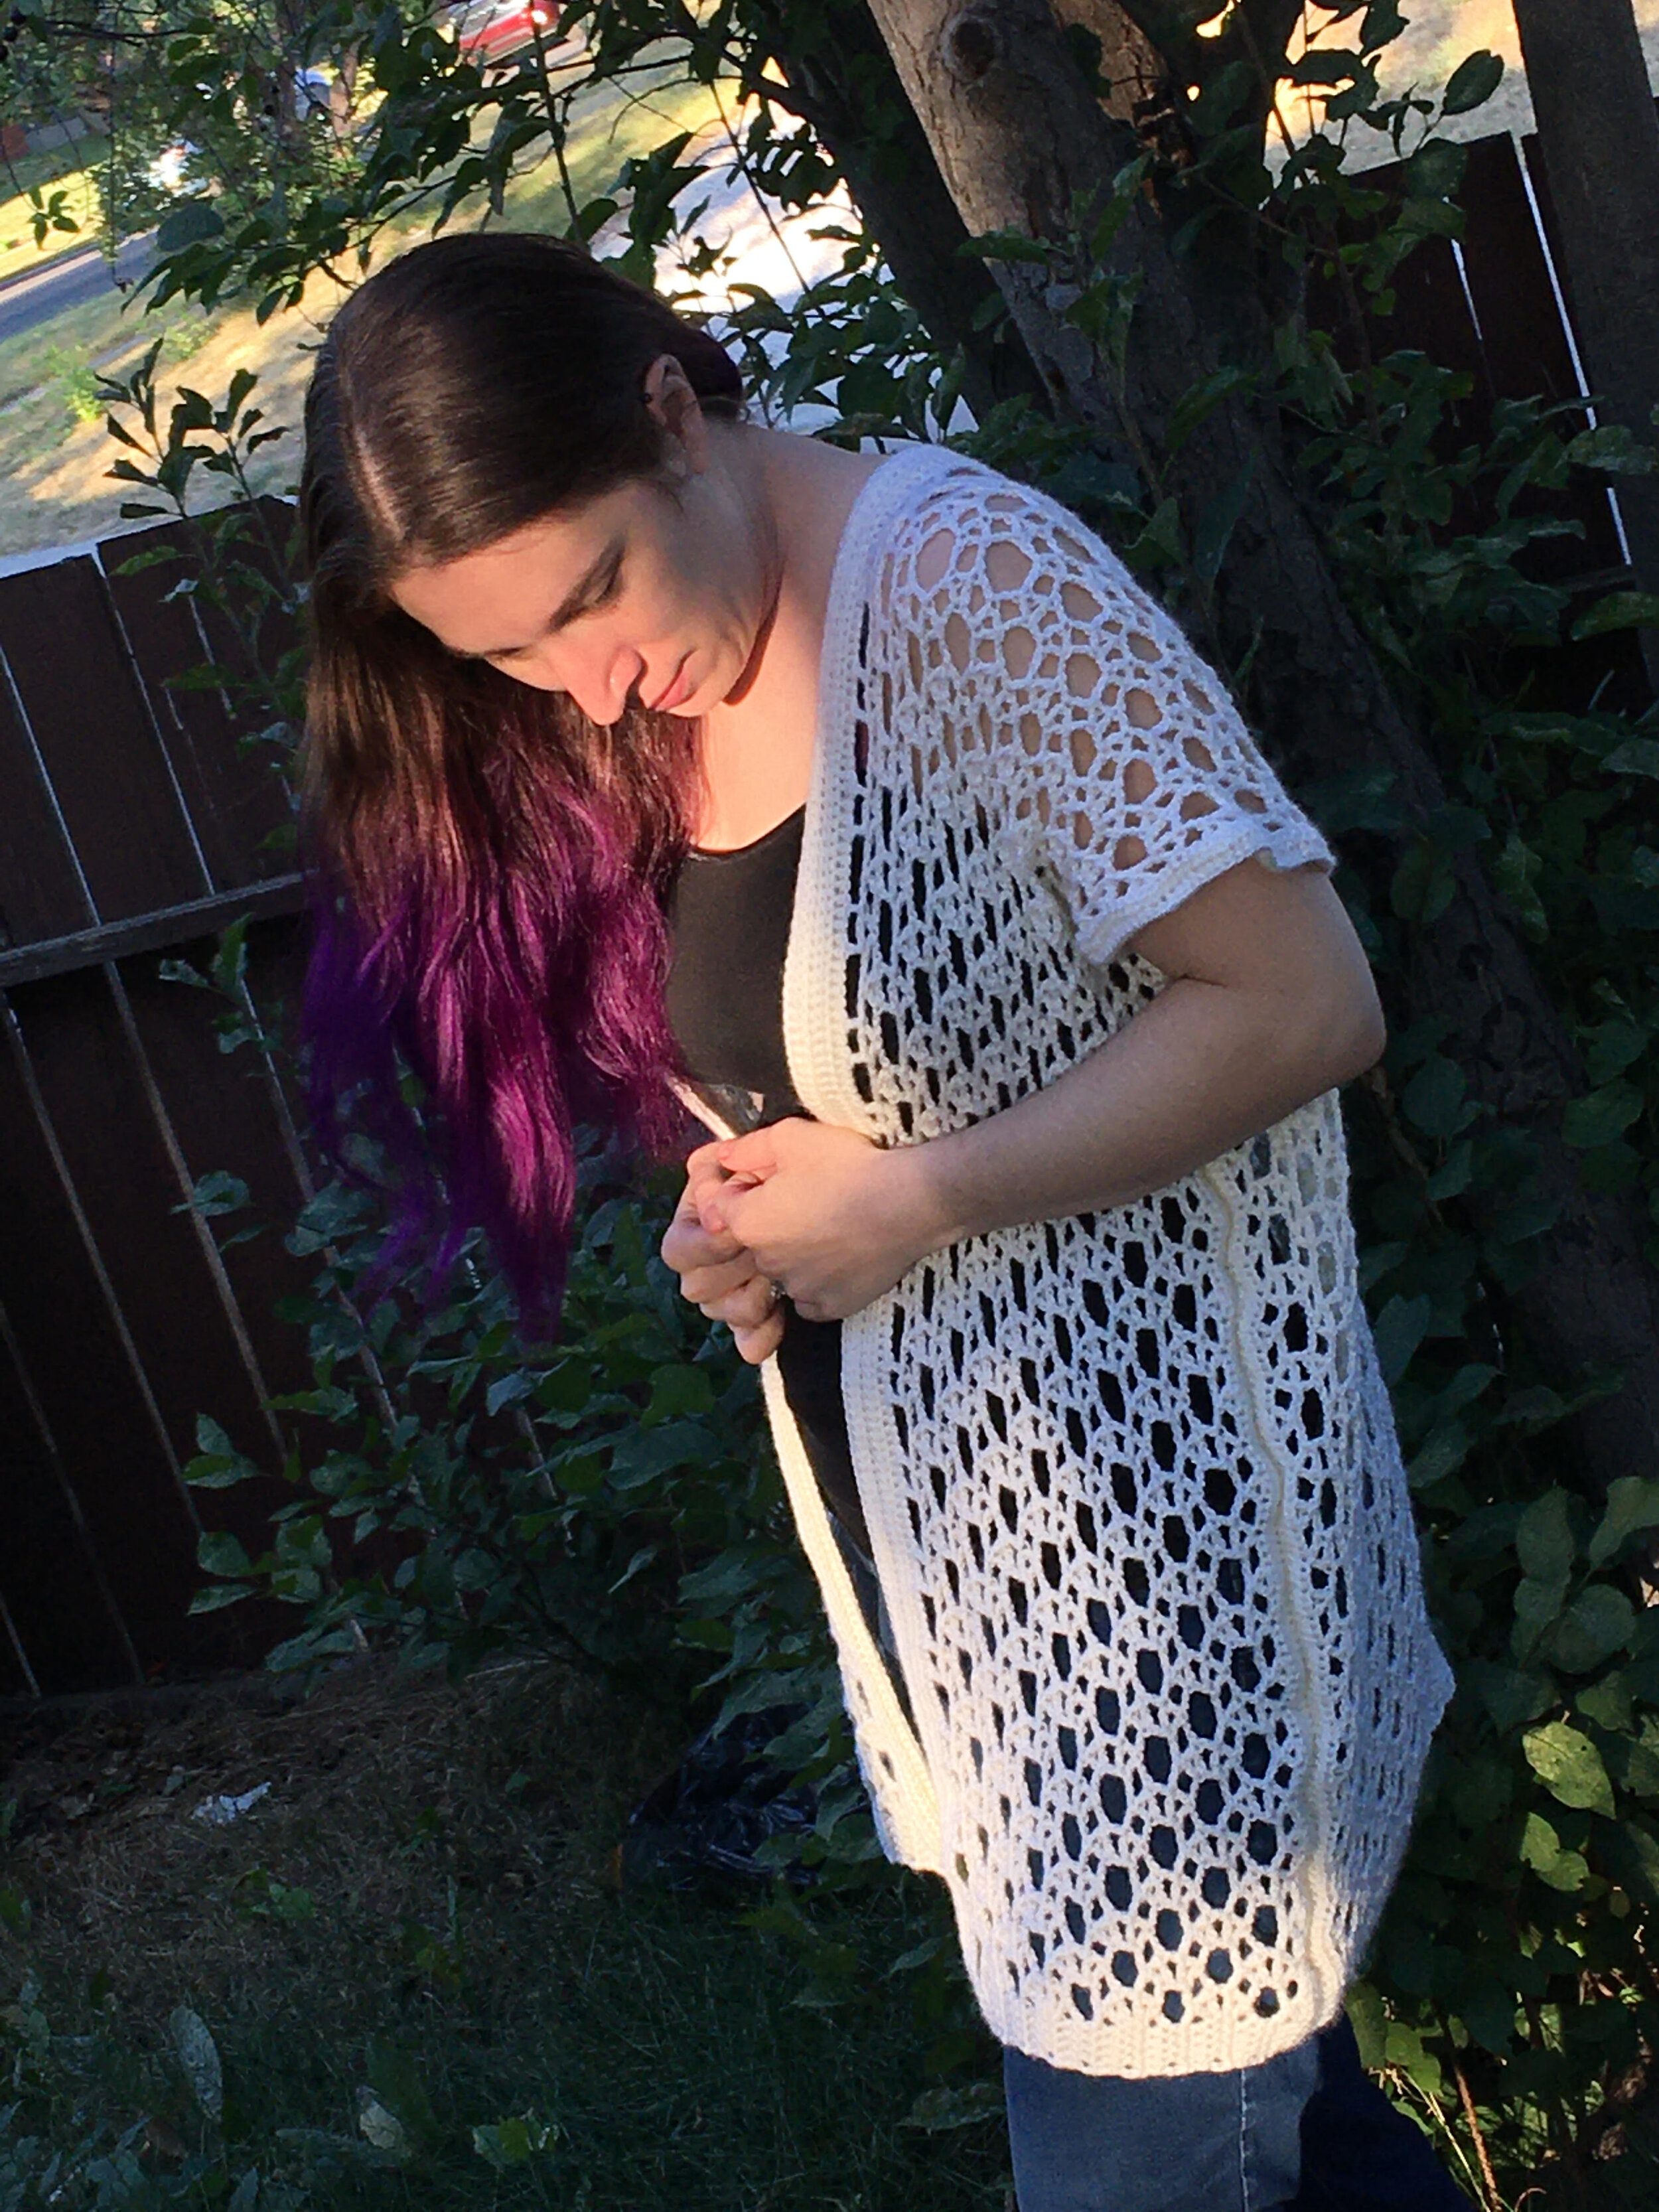
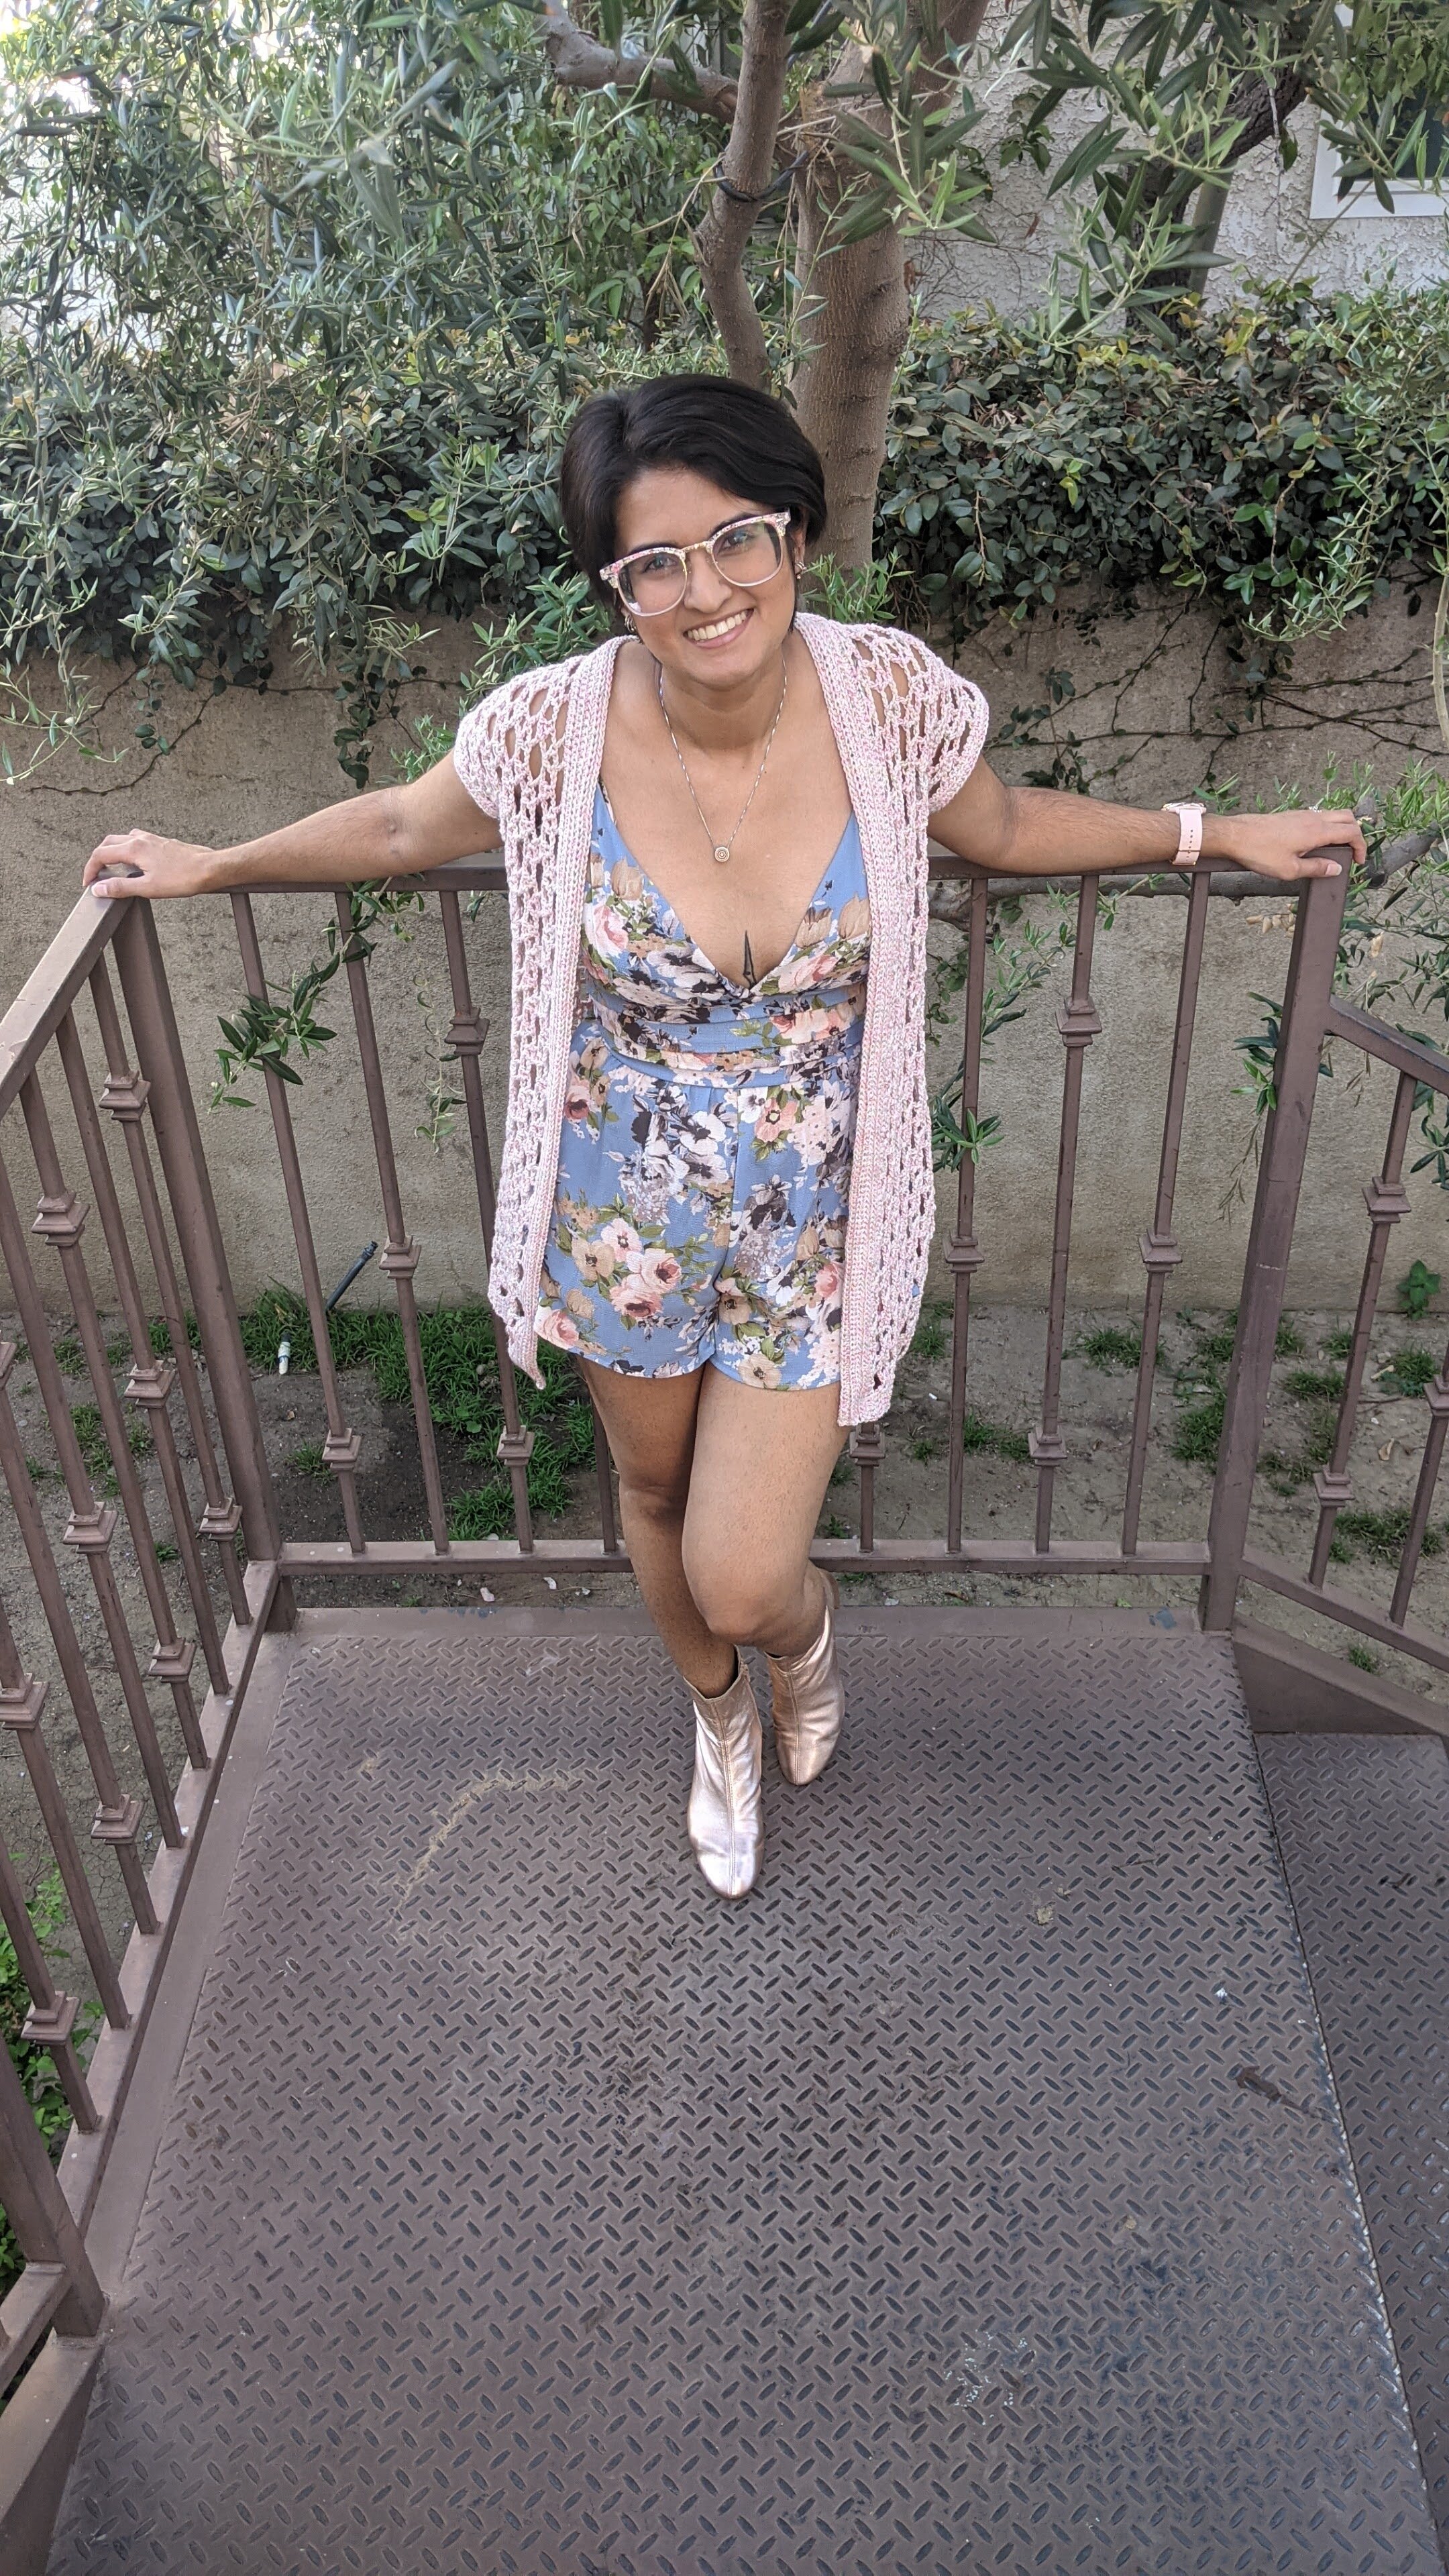
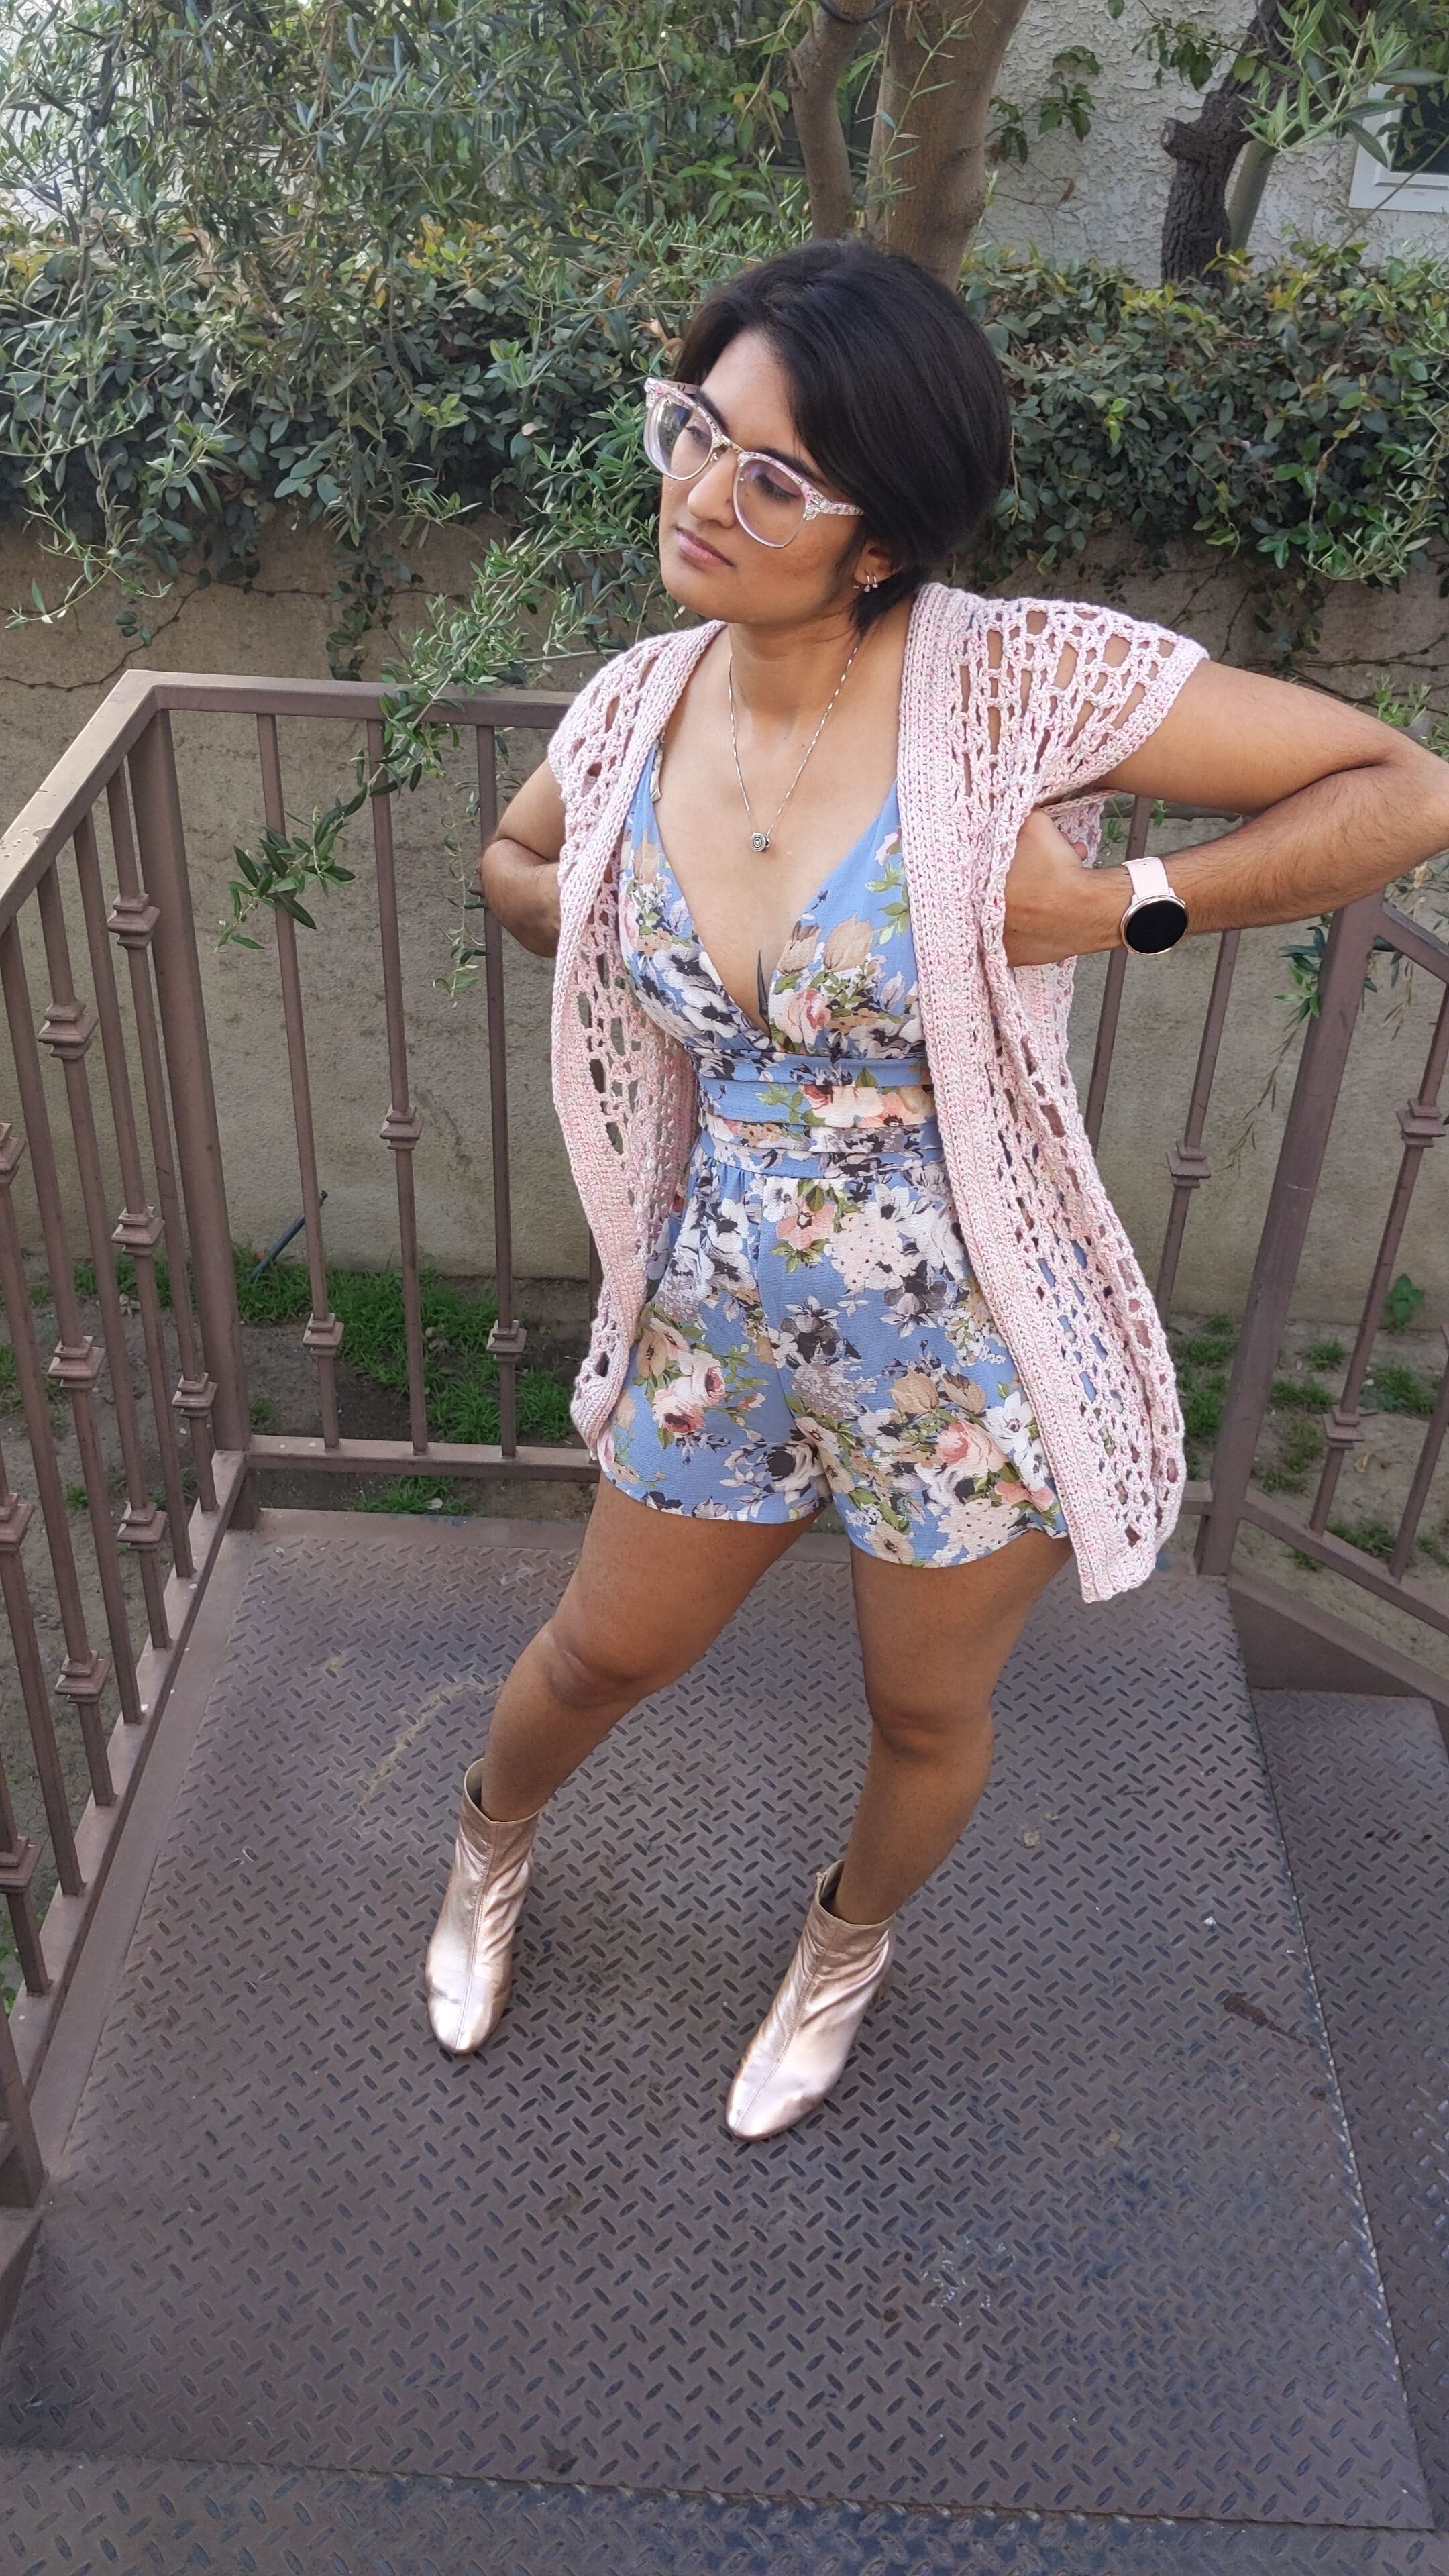
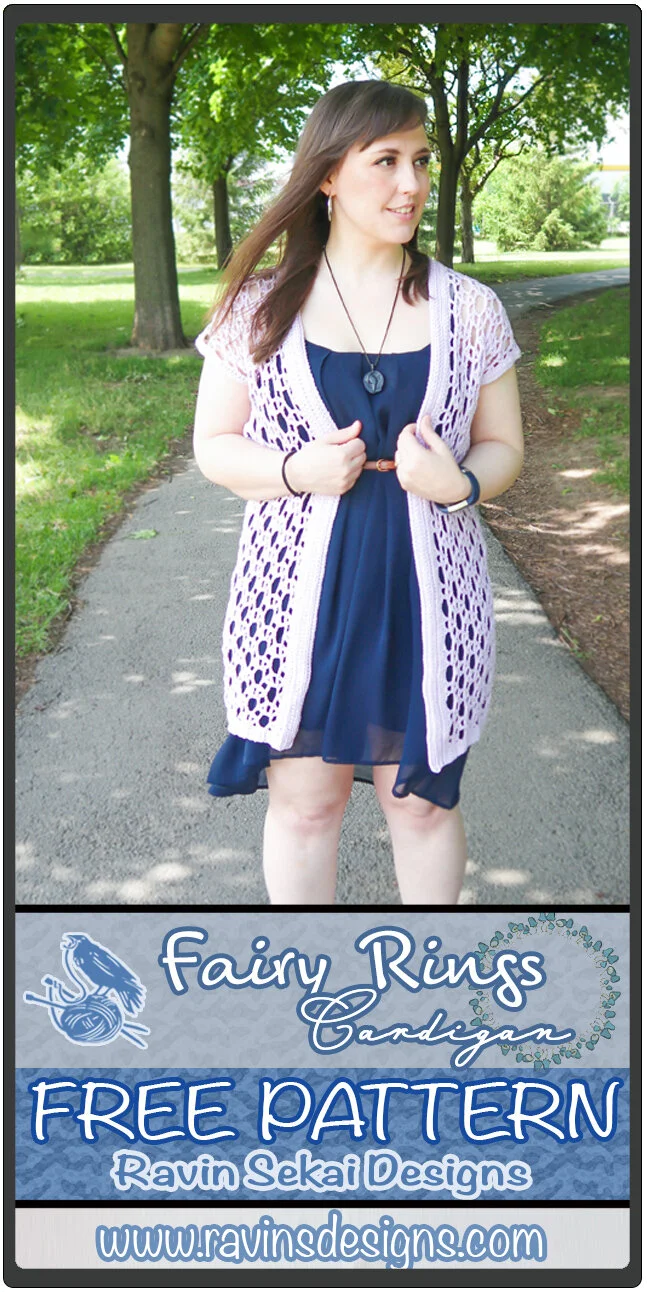
This is the Fairy Rings Cardigan. Have you heard of Fairy Rings? They are rings of mushrooms that randomly show up that people have no real explanation of why they grow that way. They’re said to be created by the Fae and be portals to their realm! So, the interlocking circles of this cardigan just really reminded me of those rings of mushrooms.
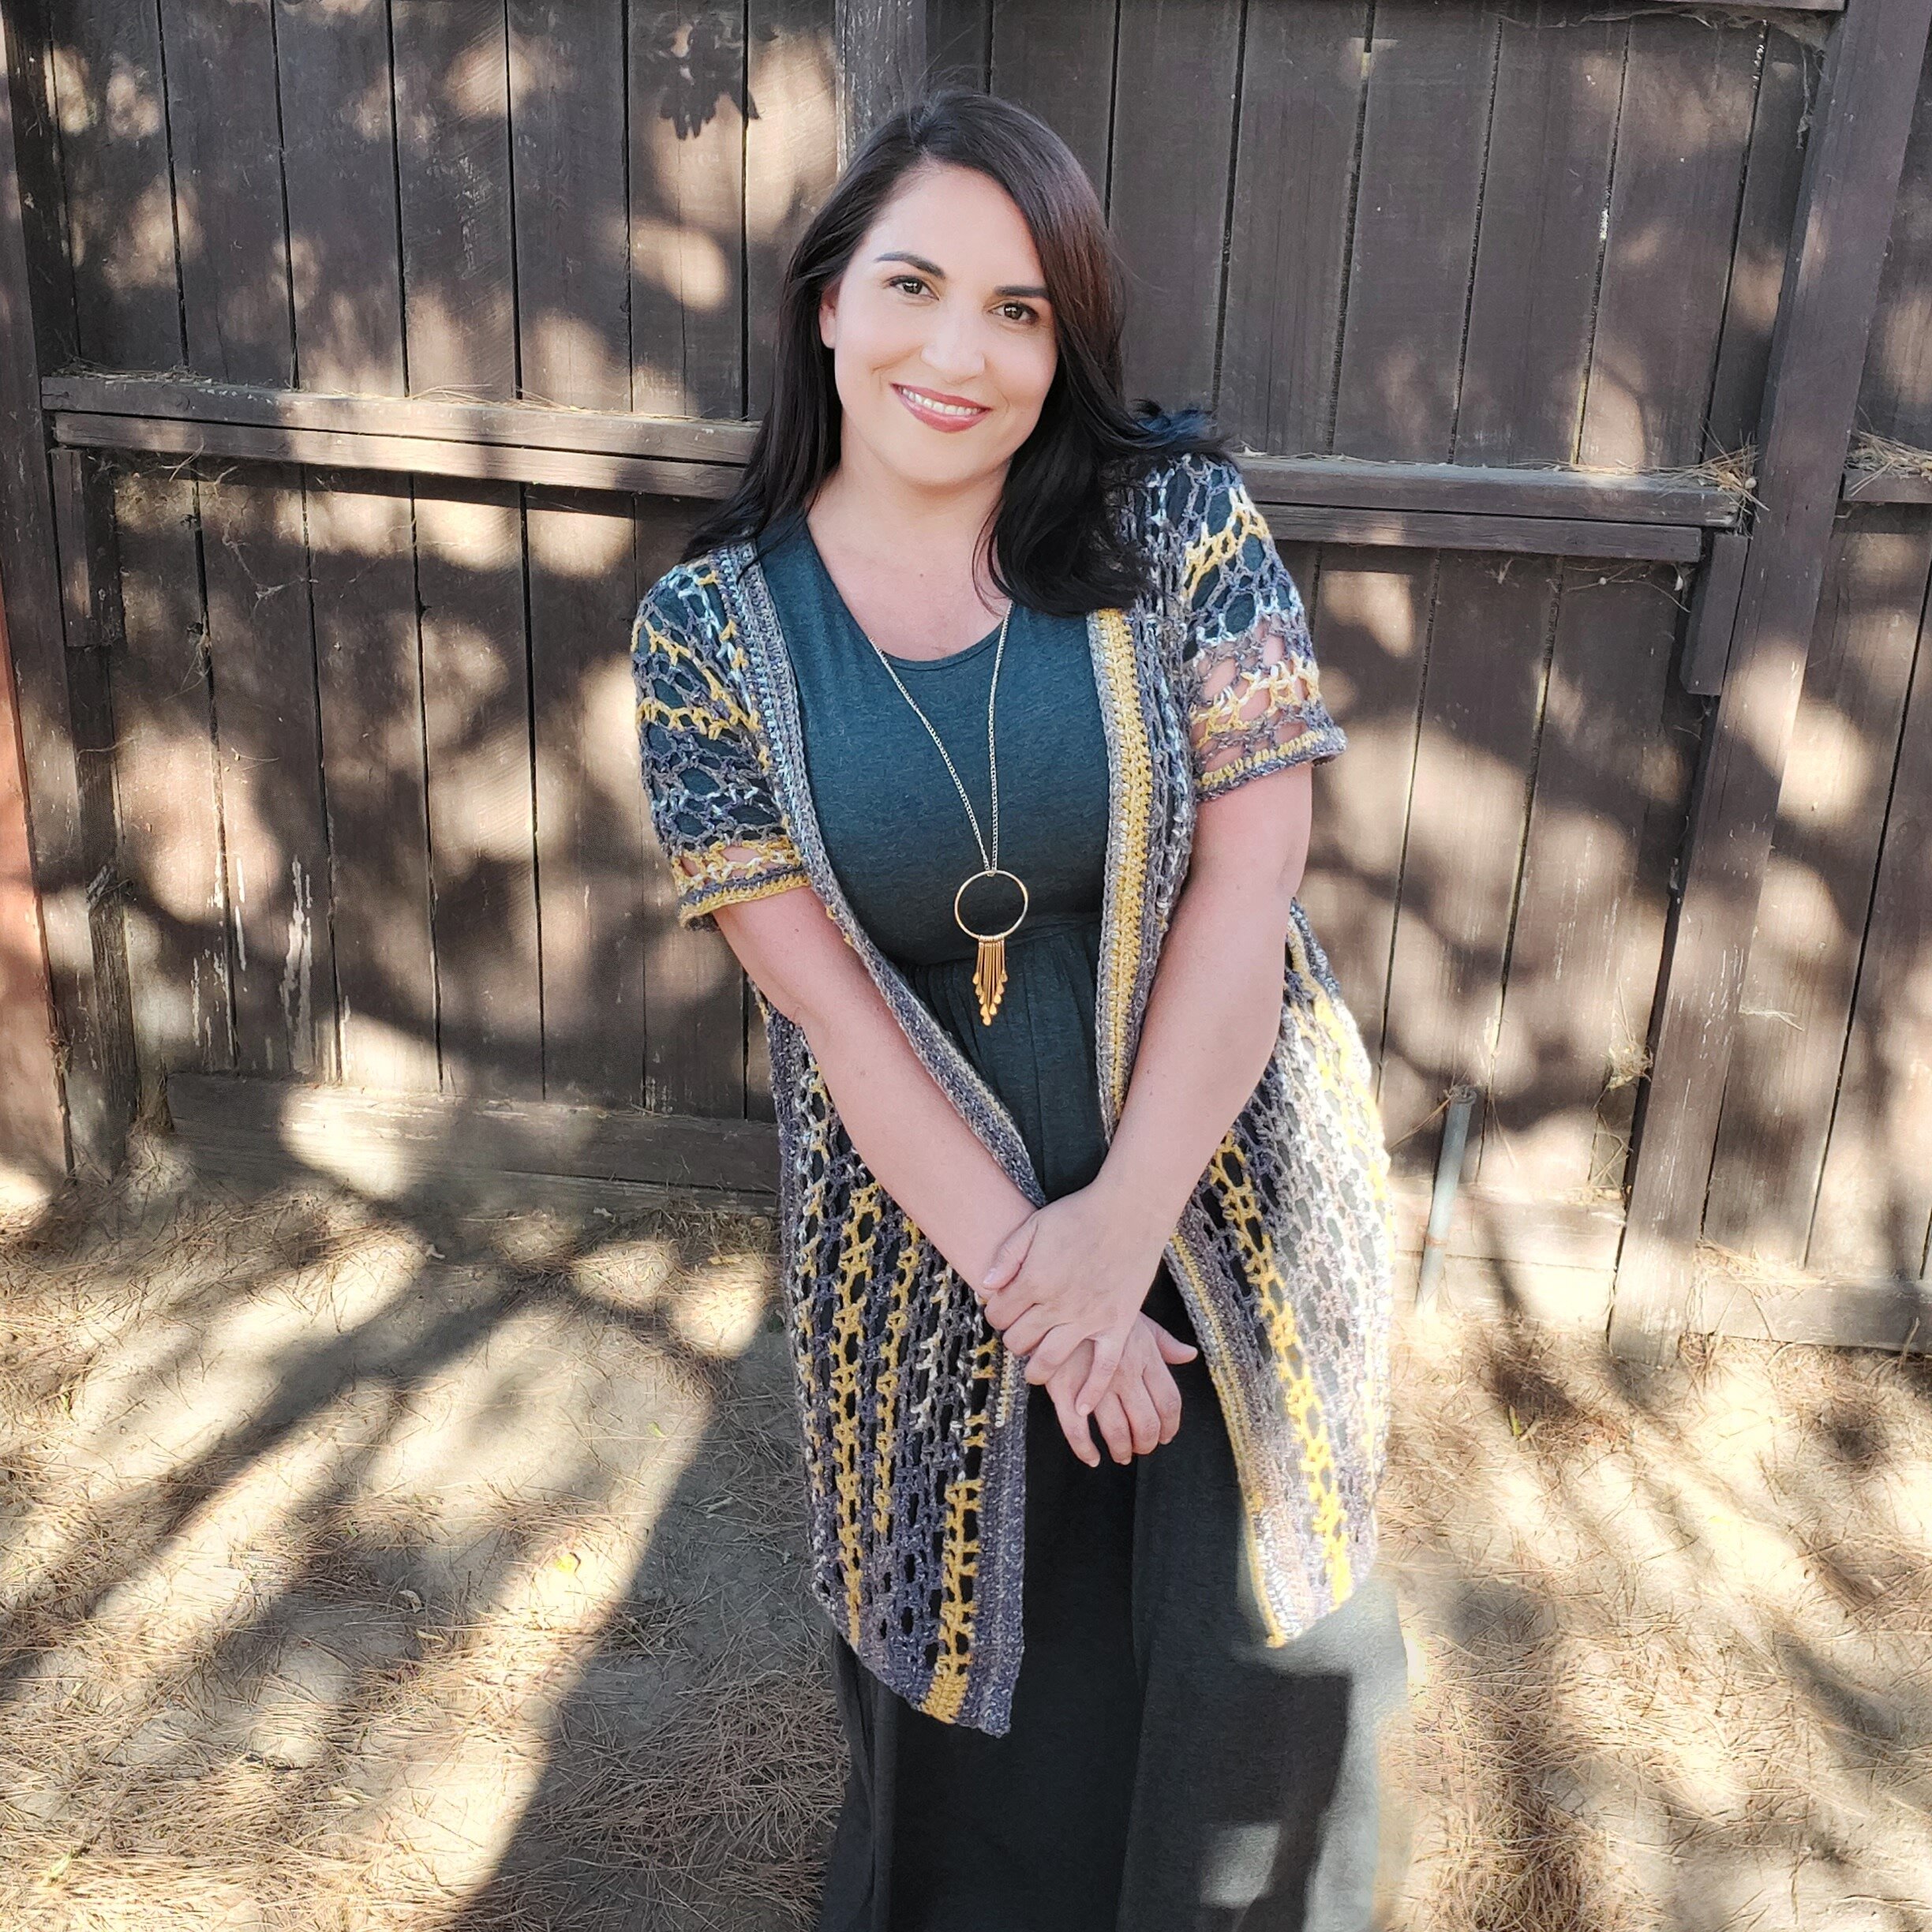
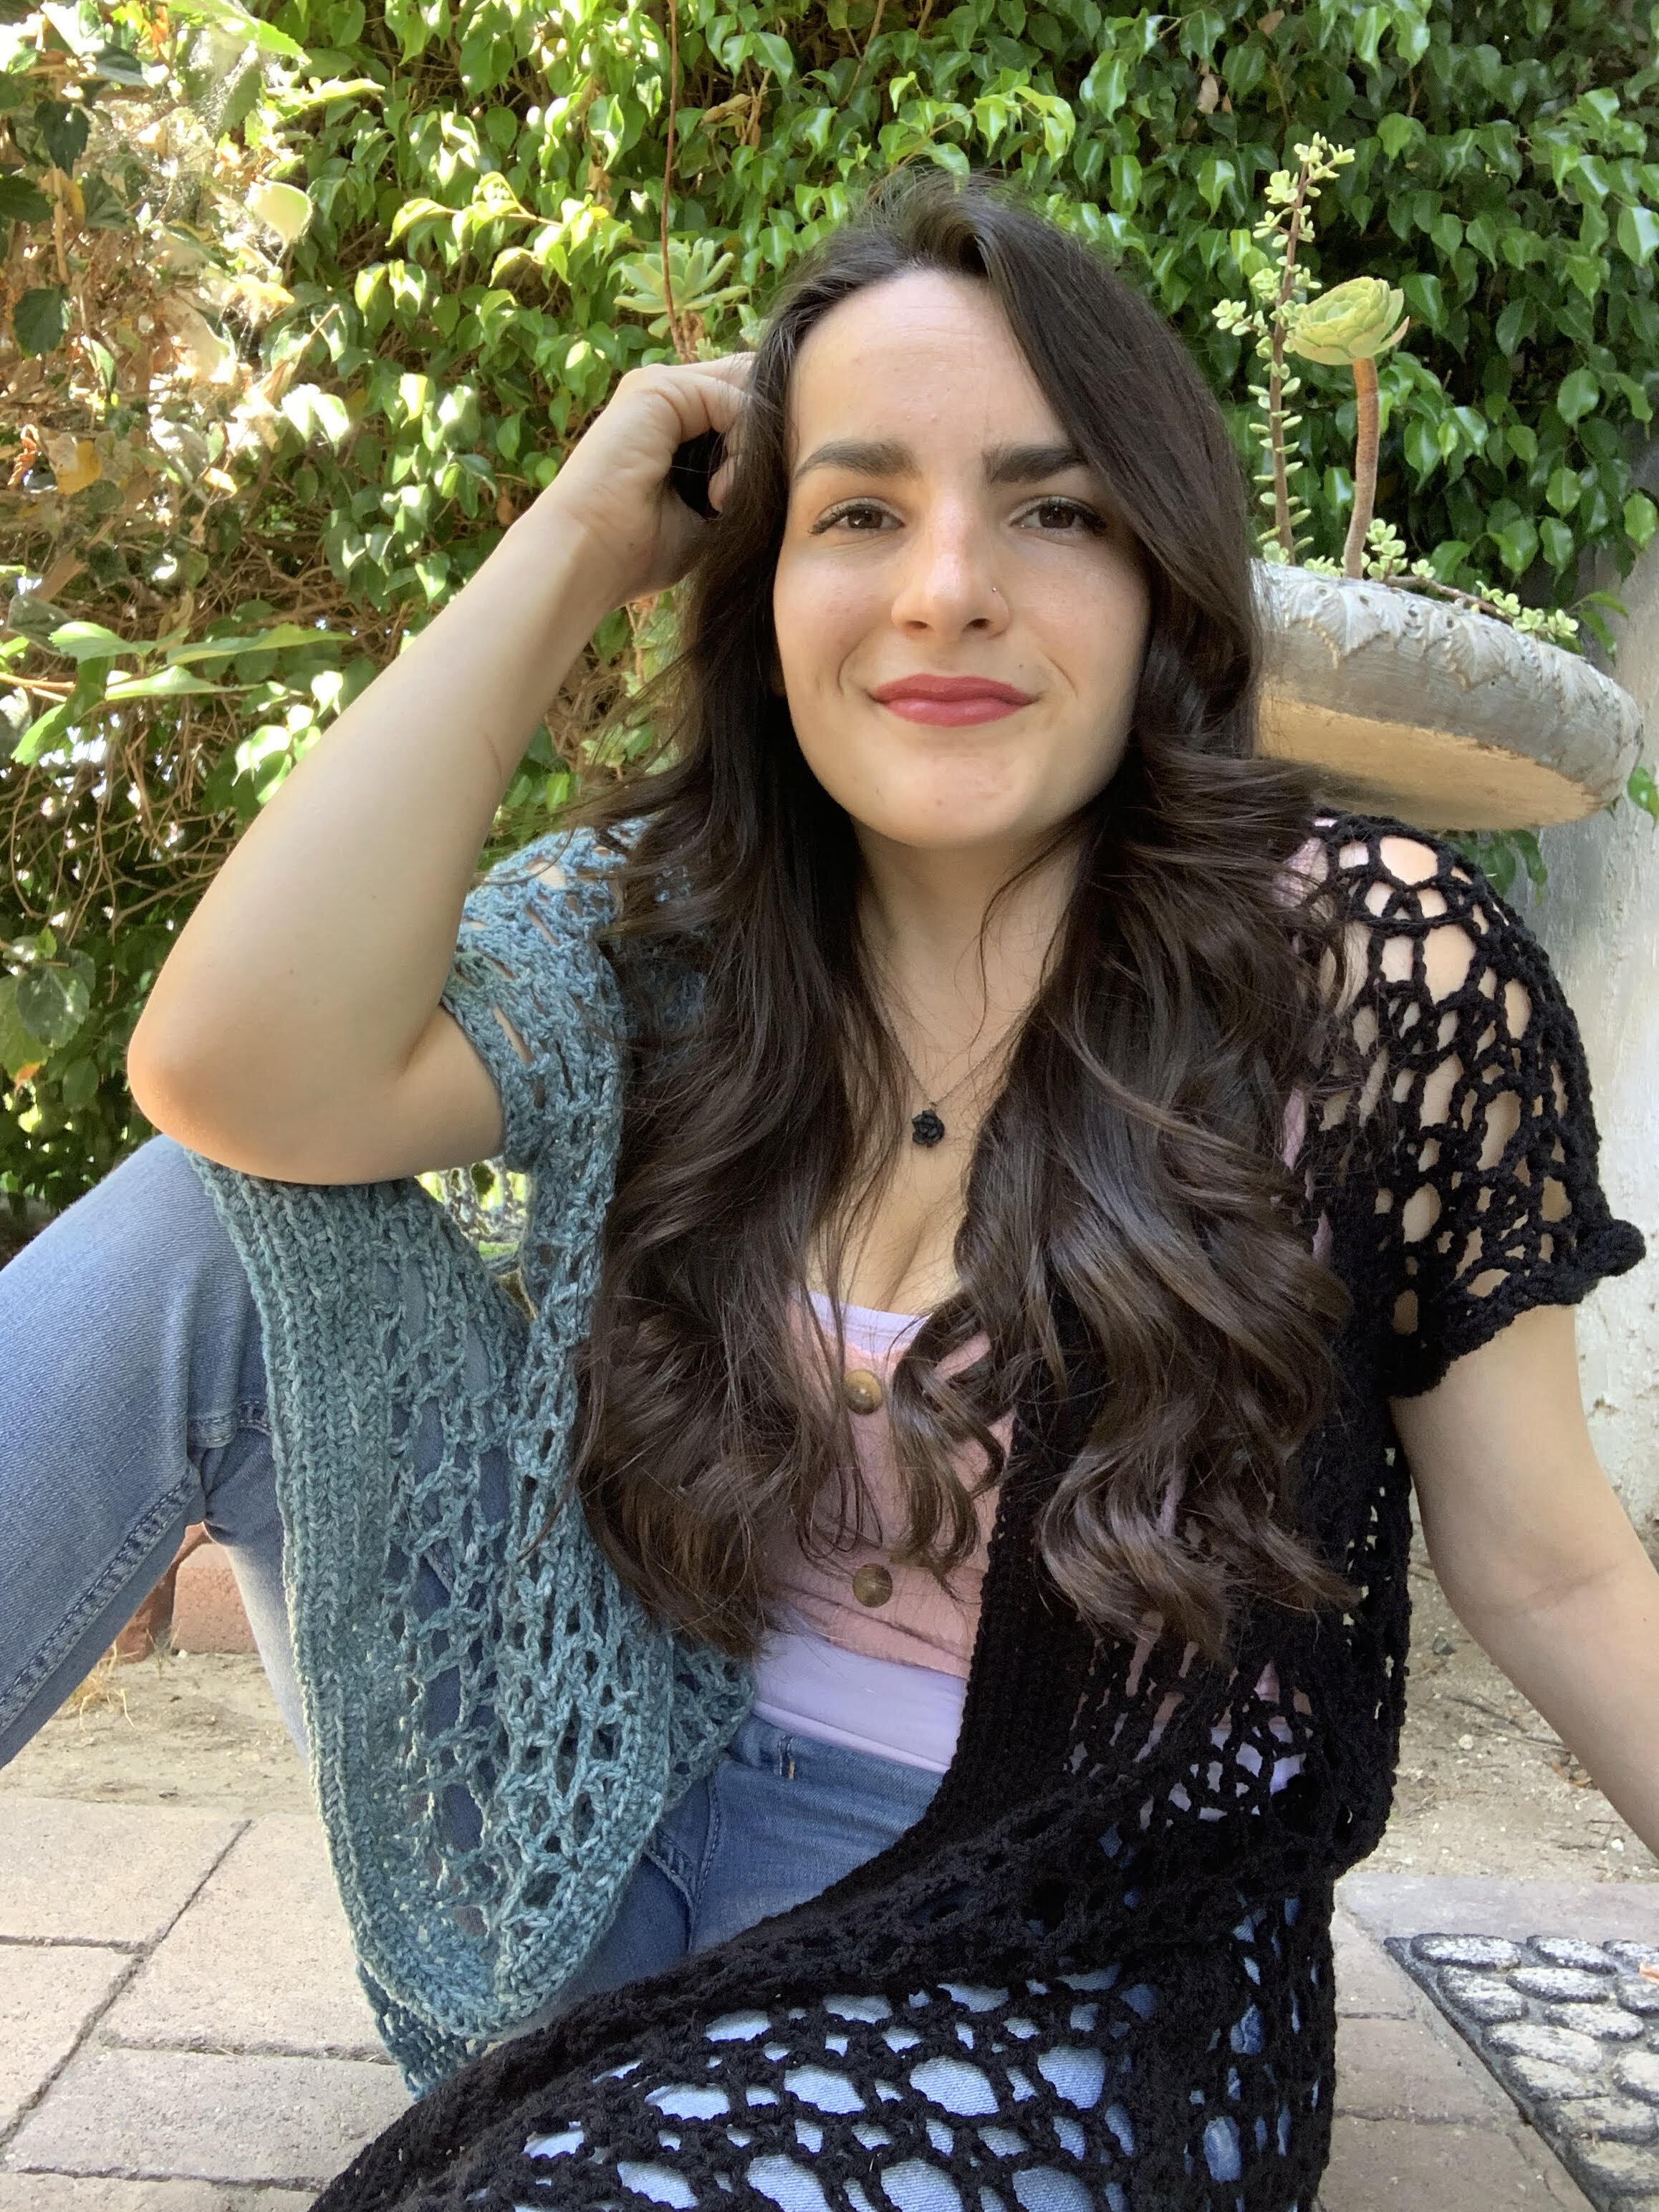
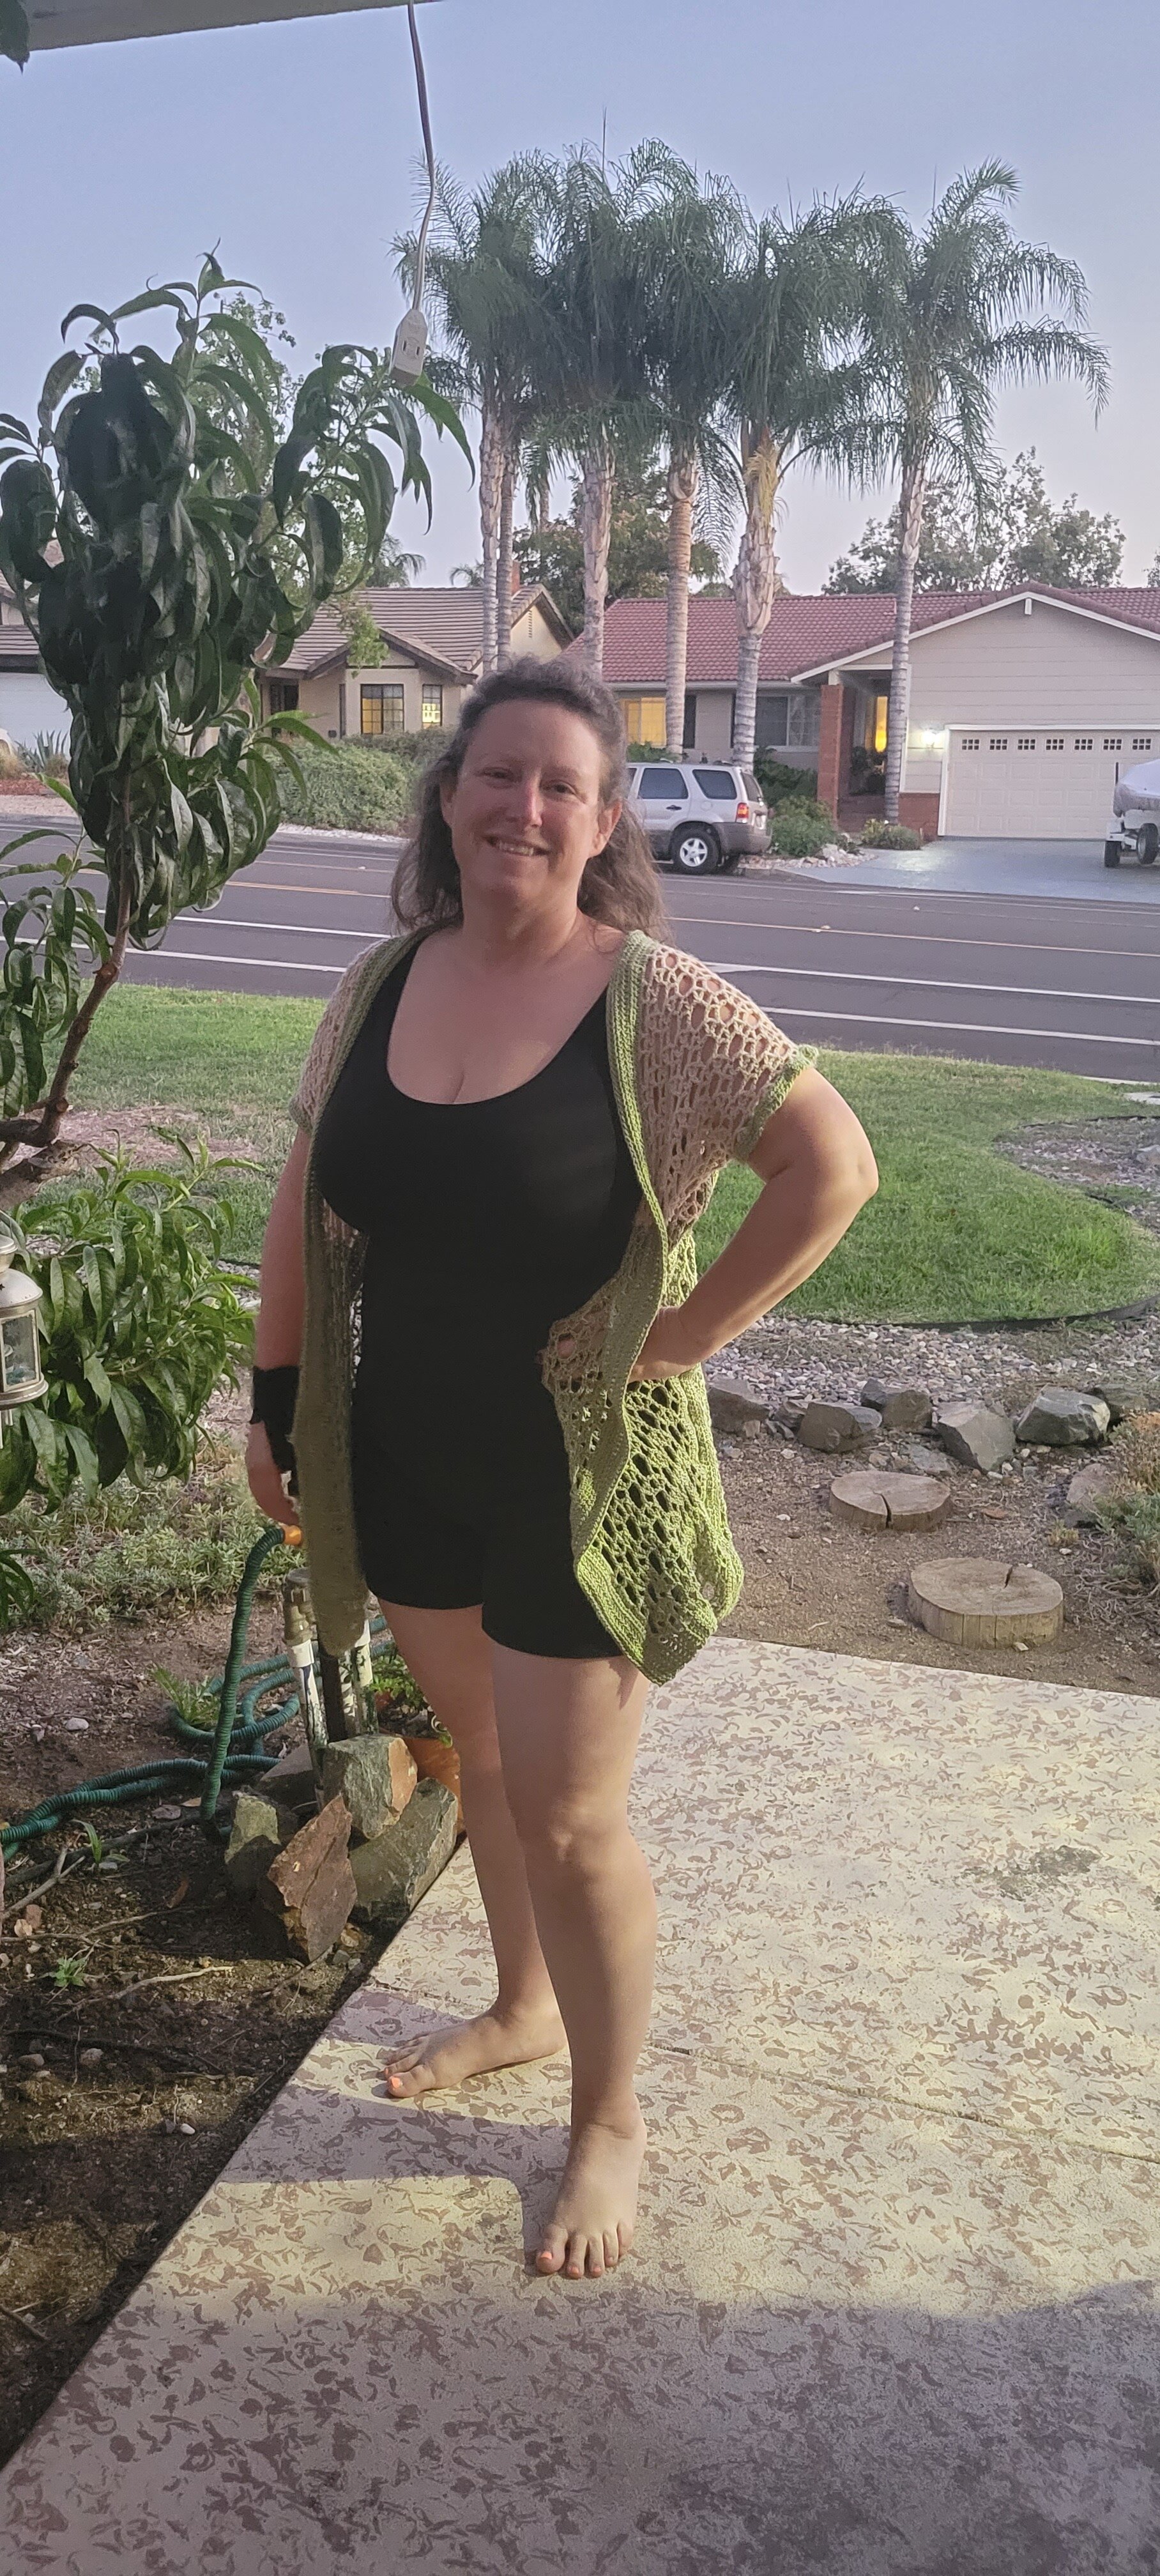
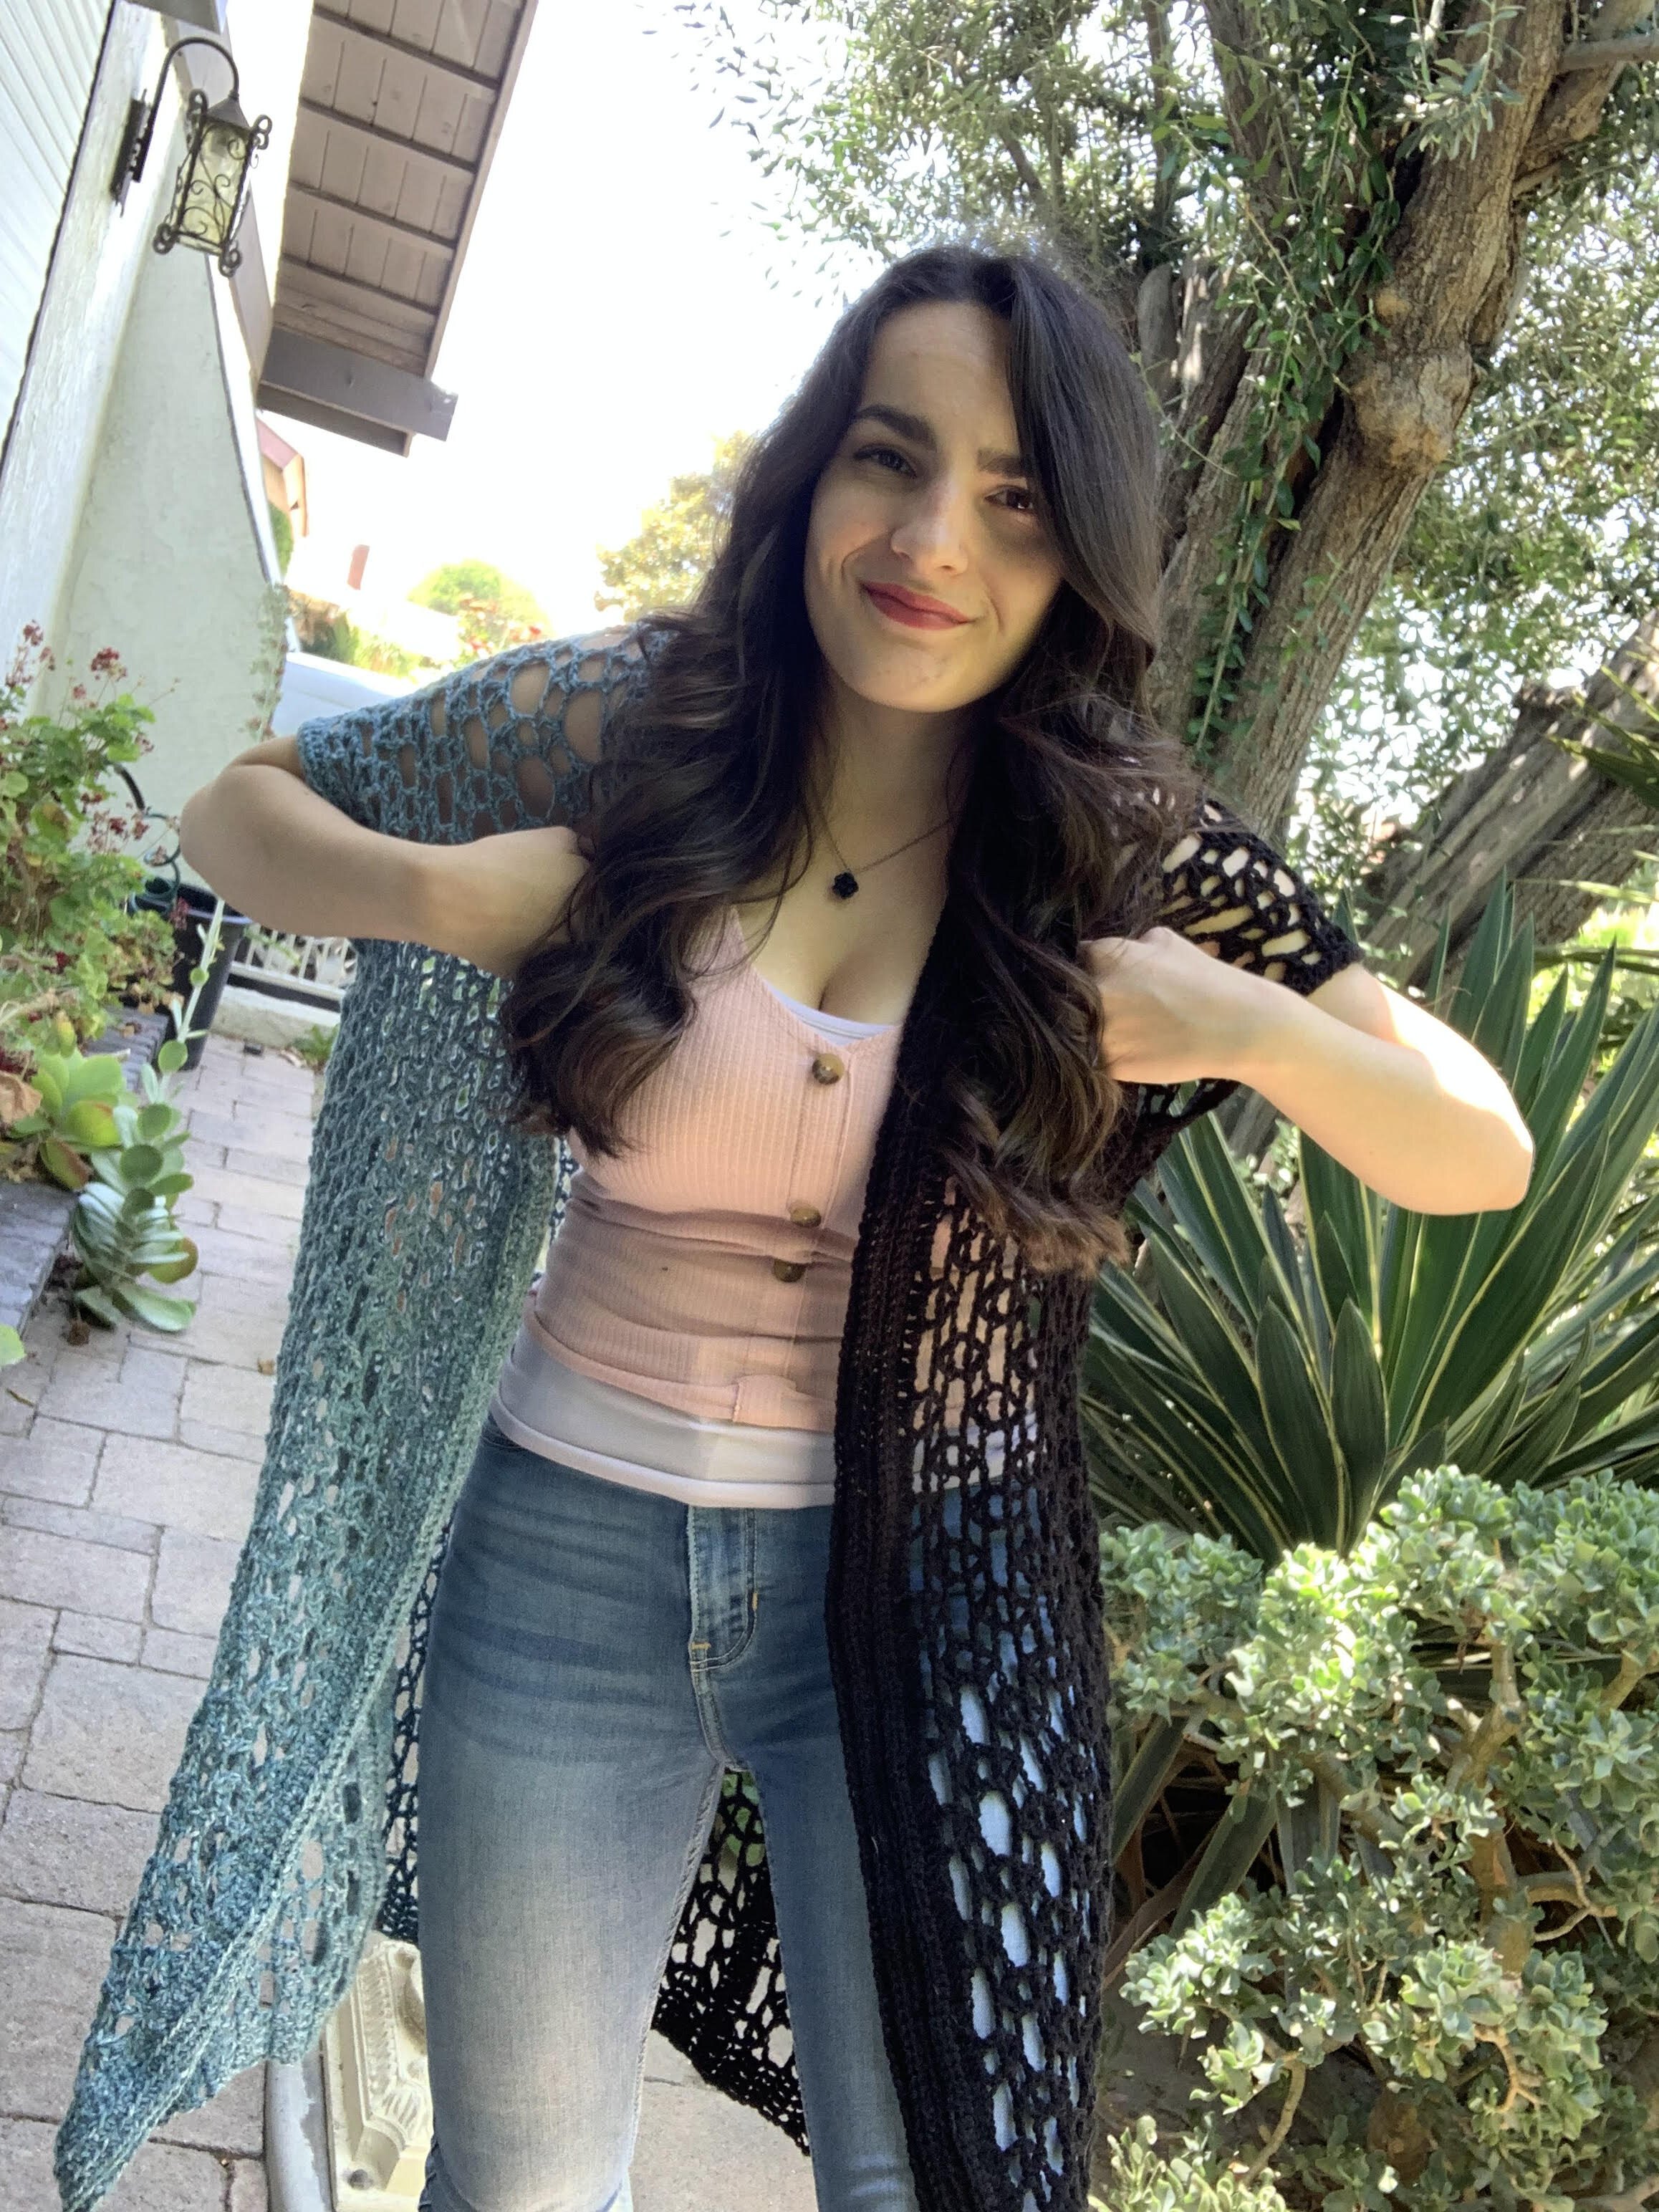
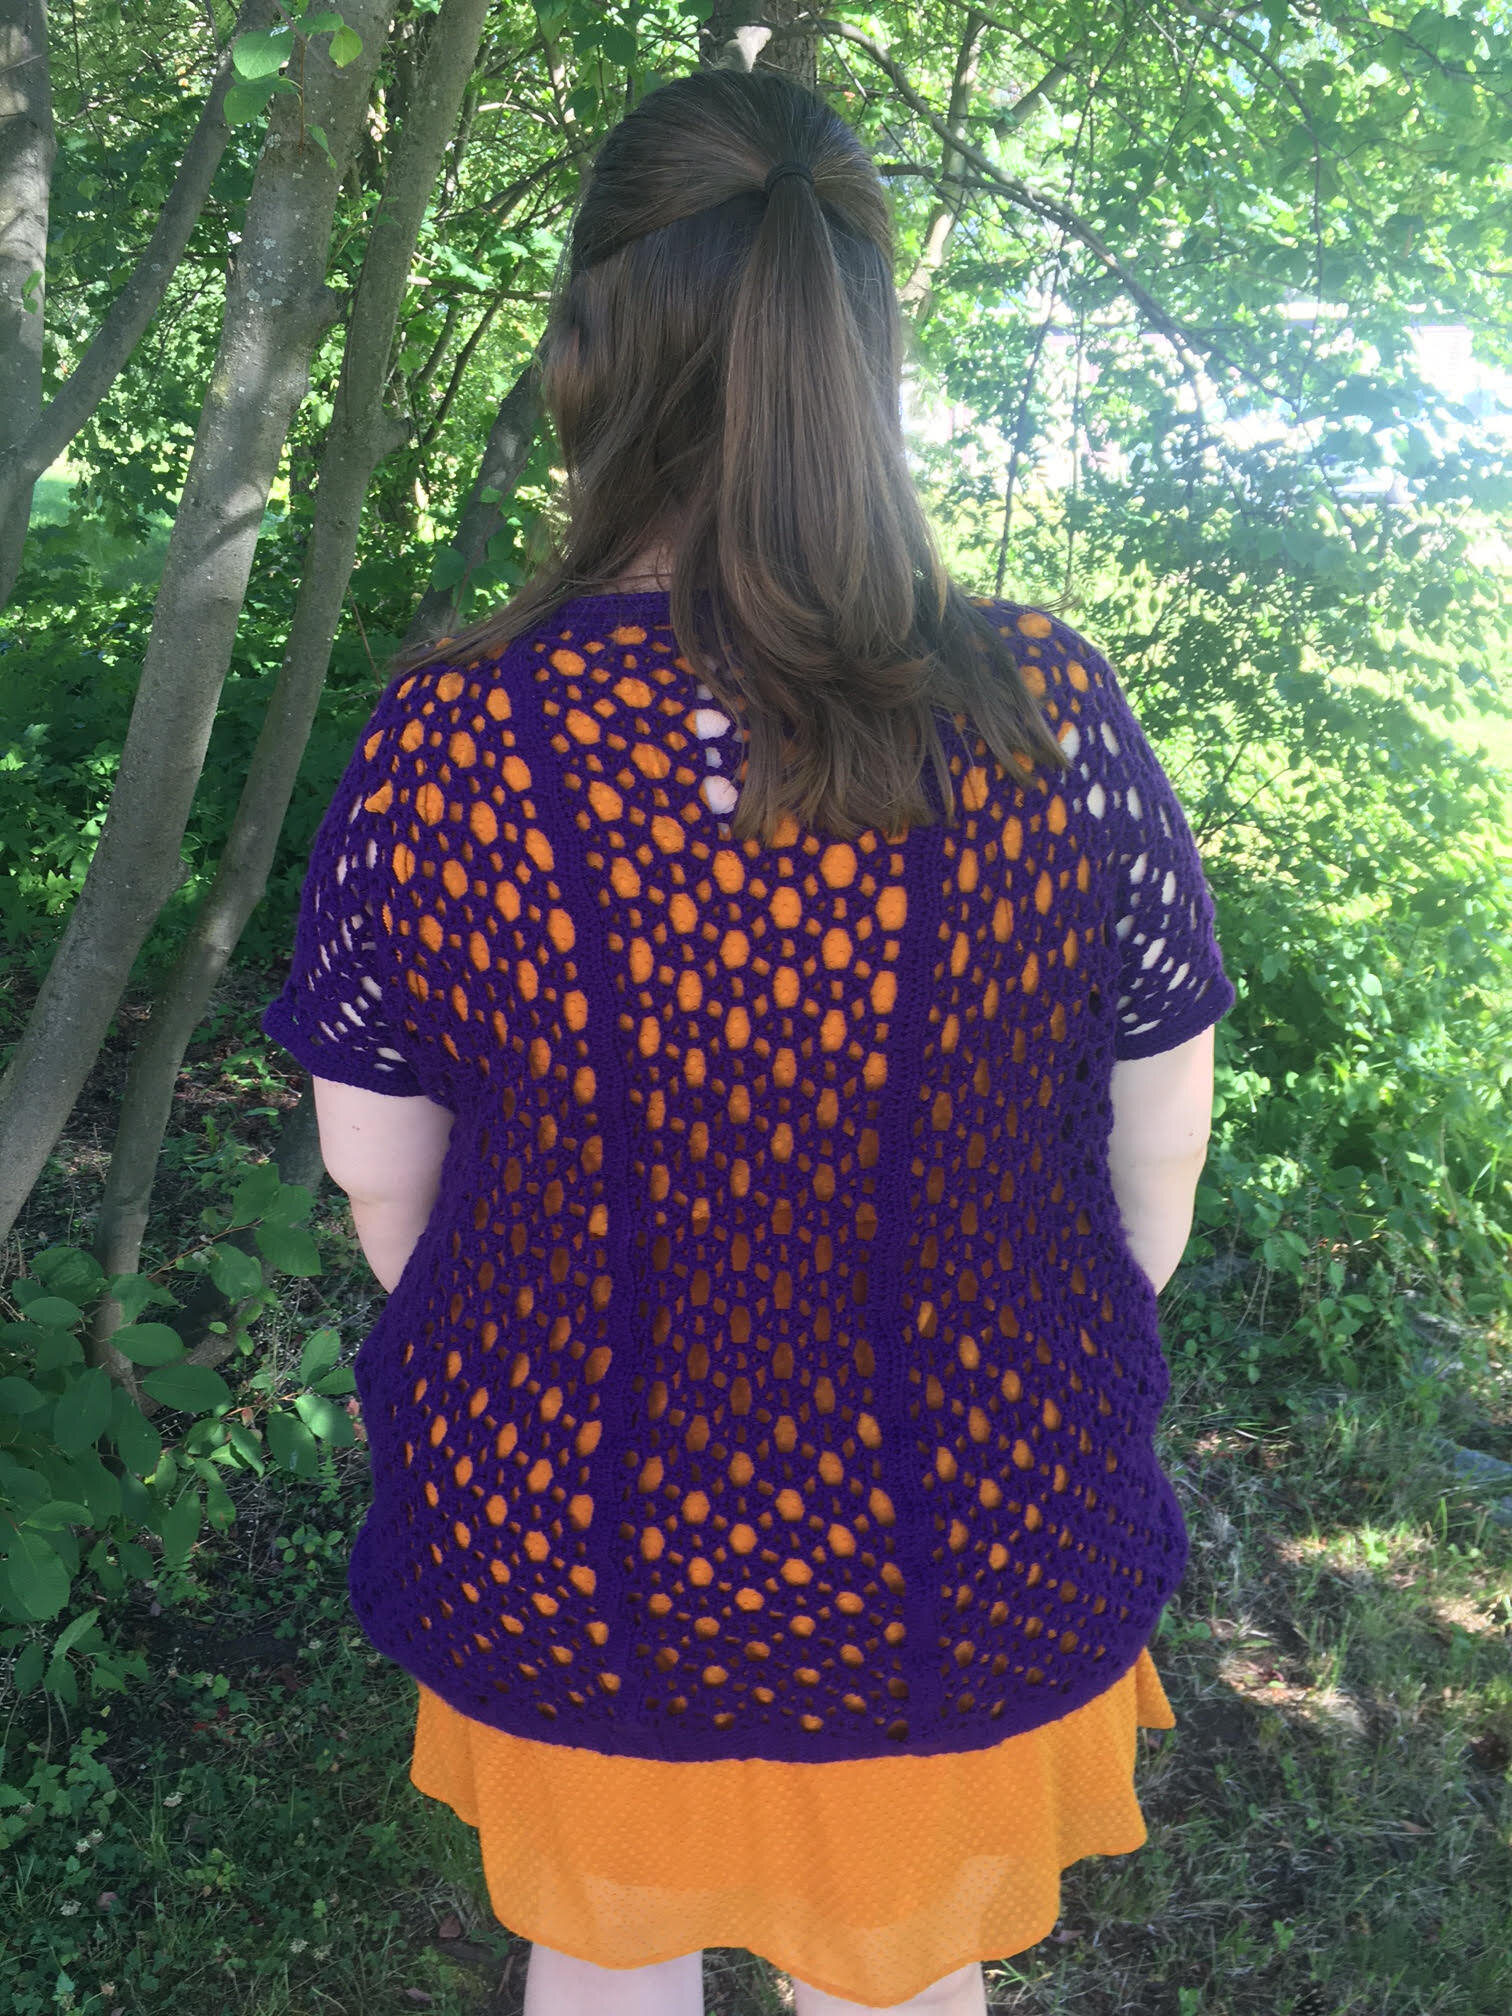
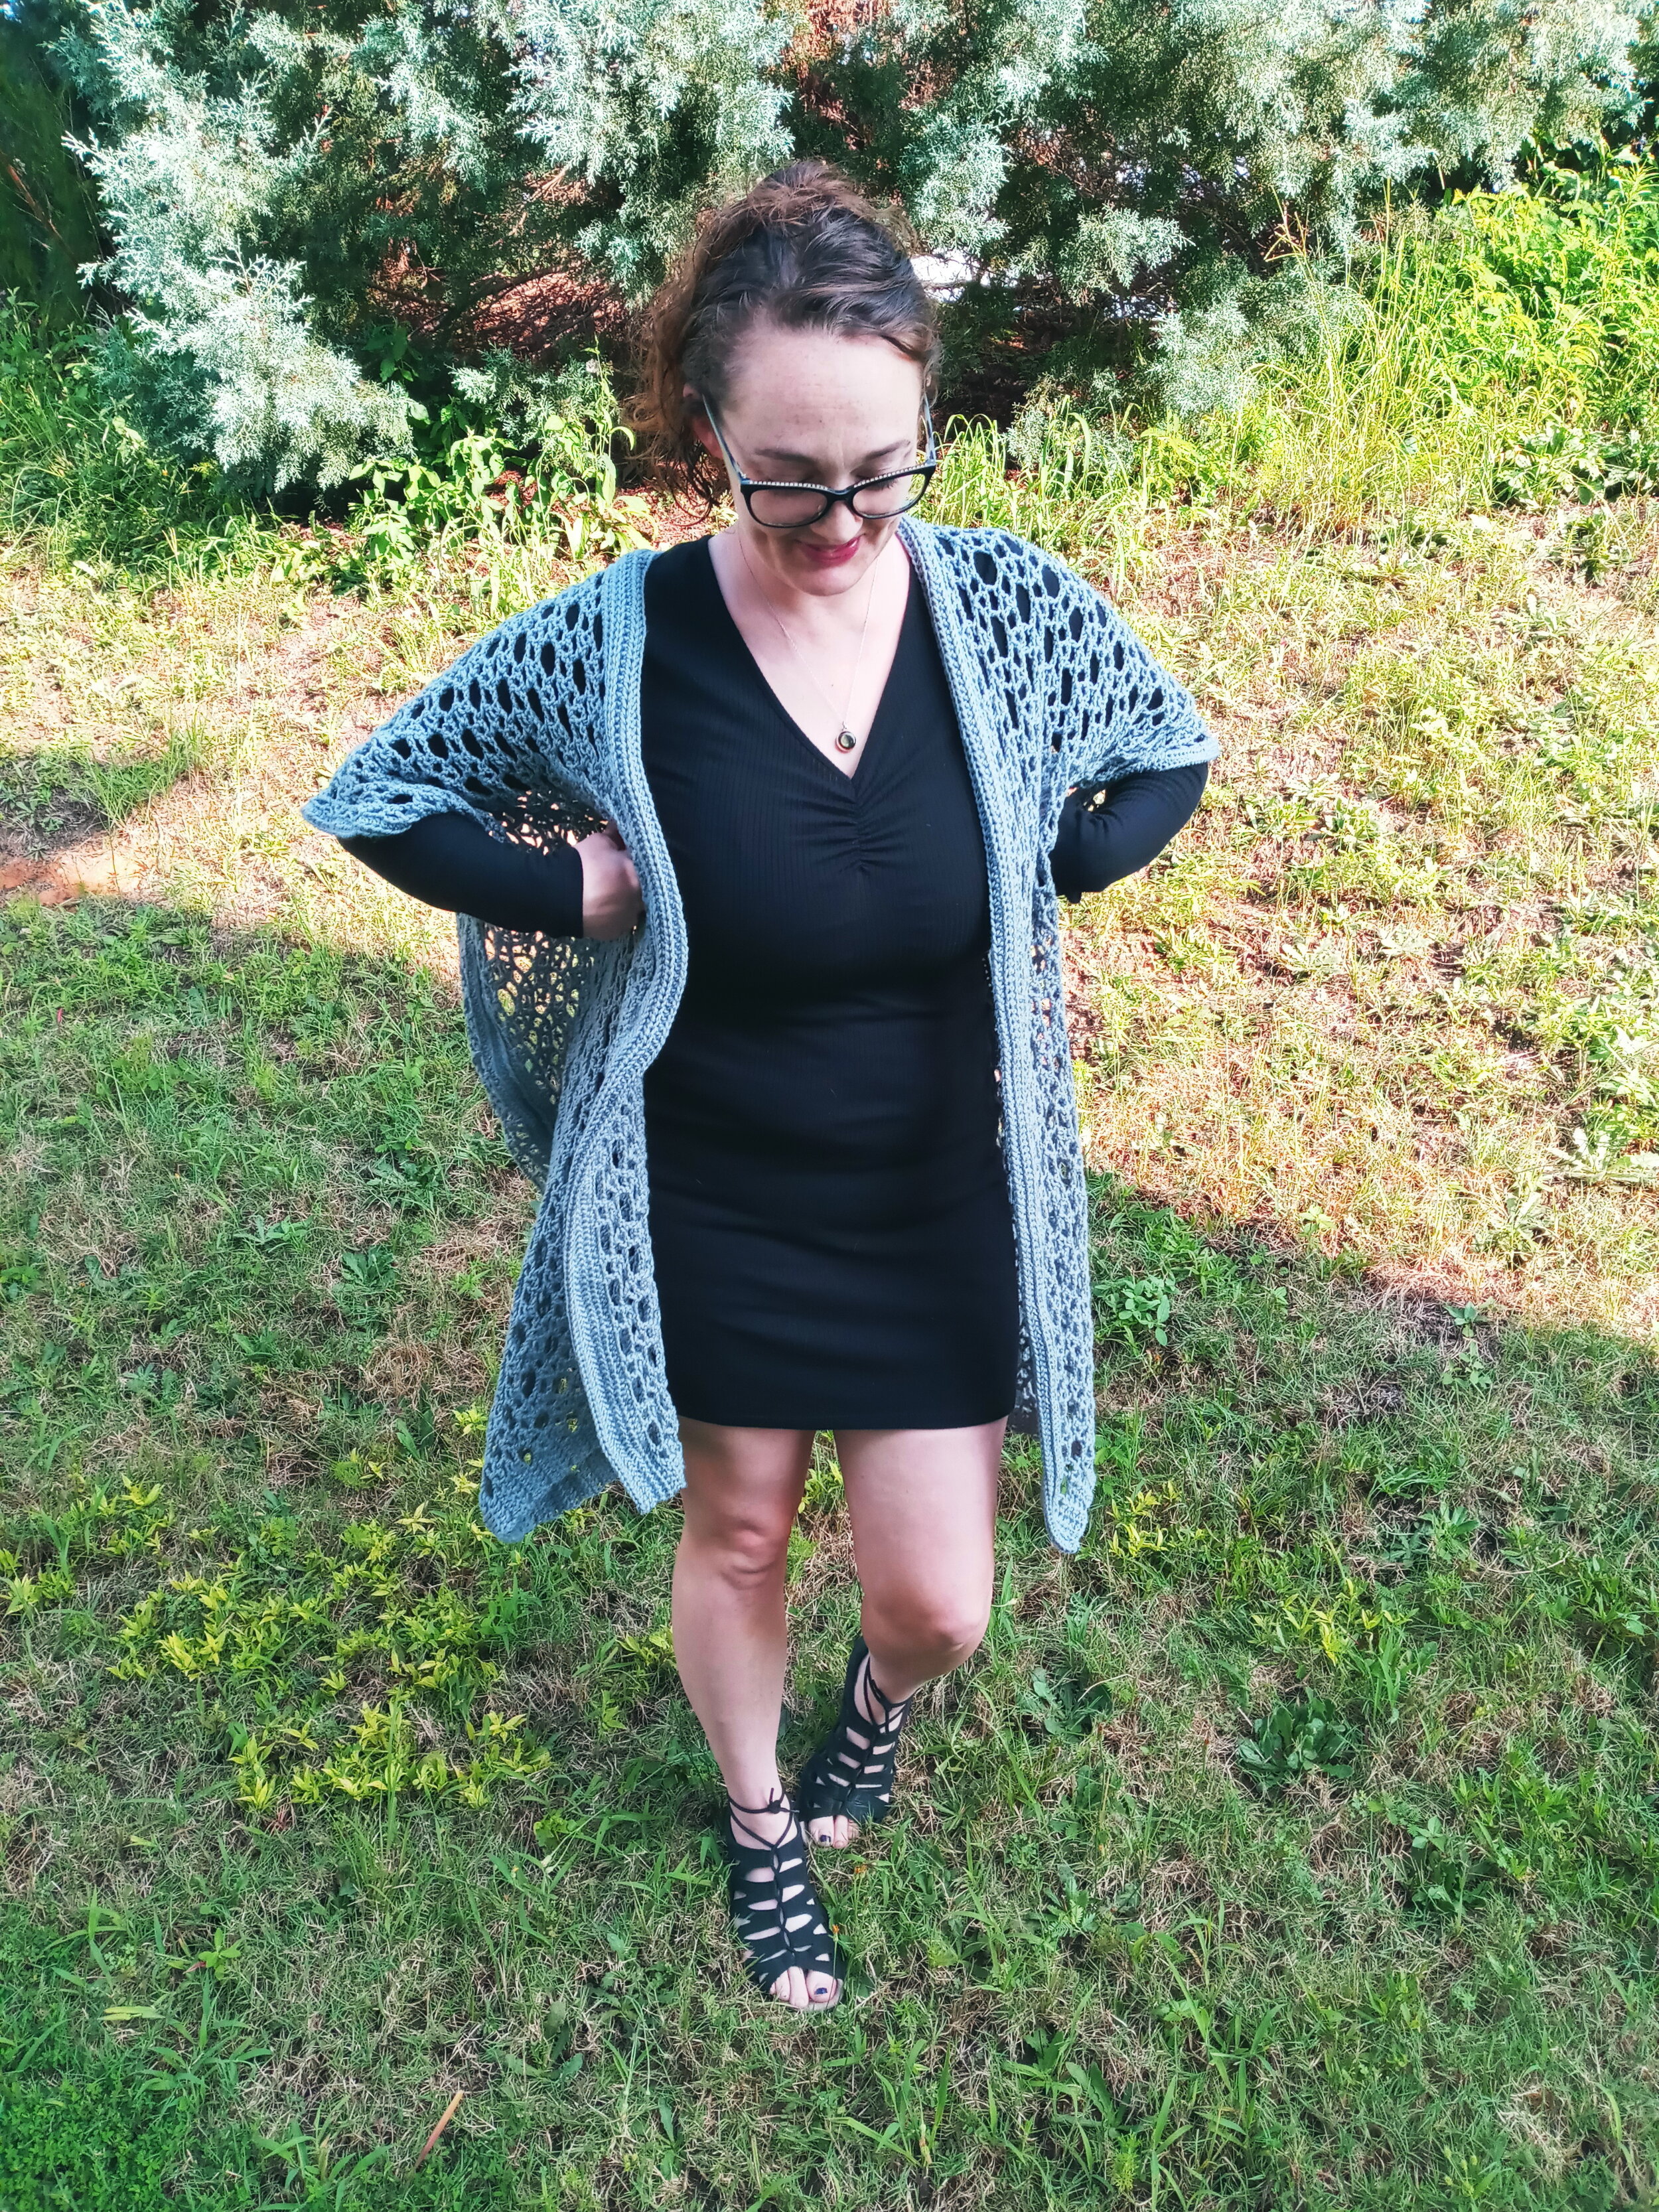
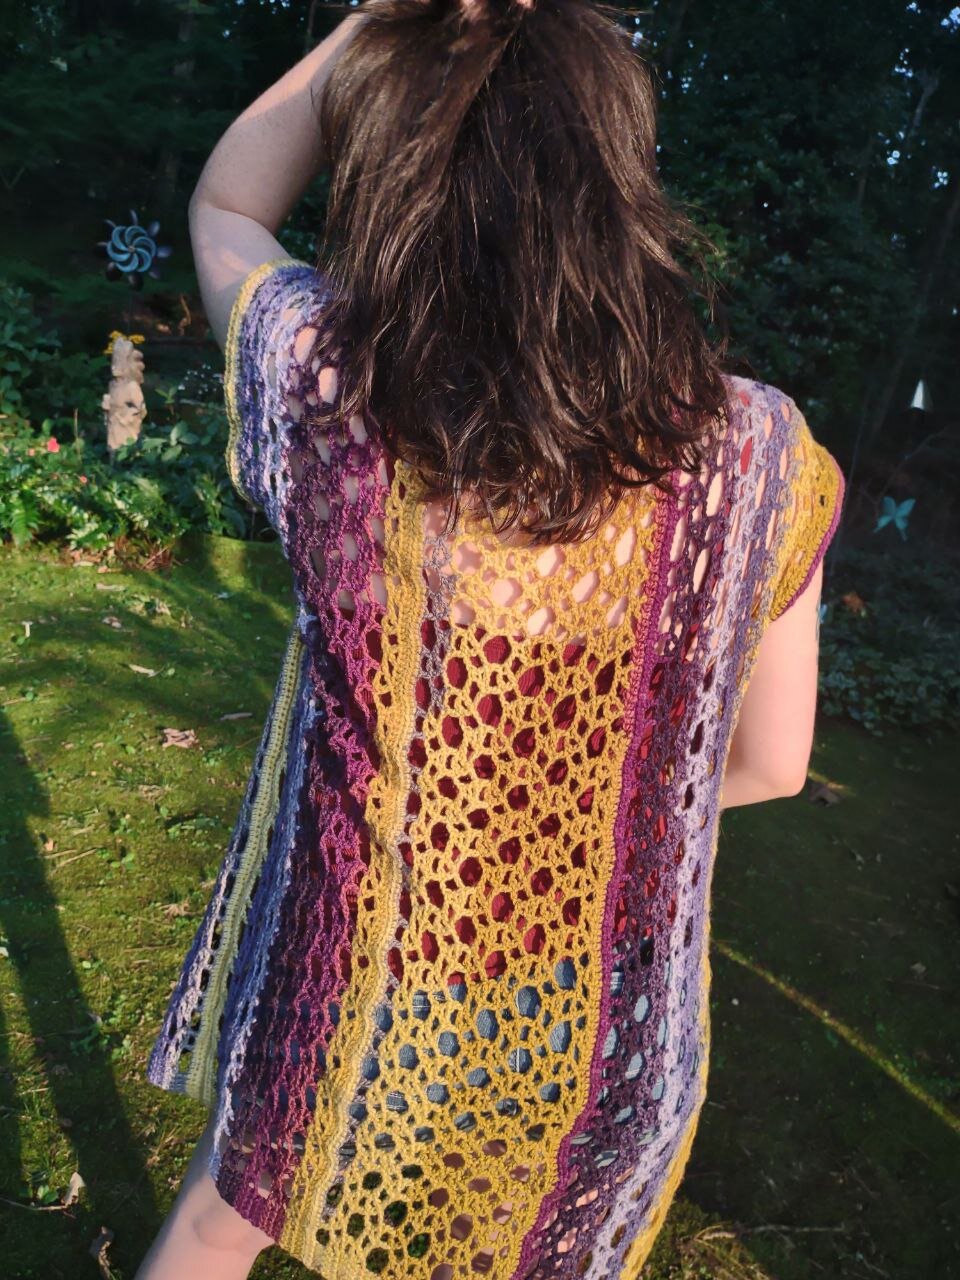
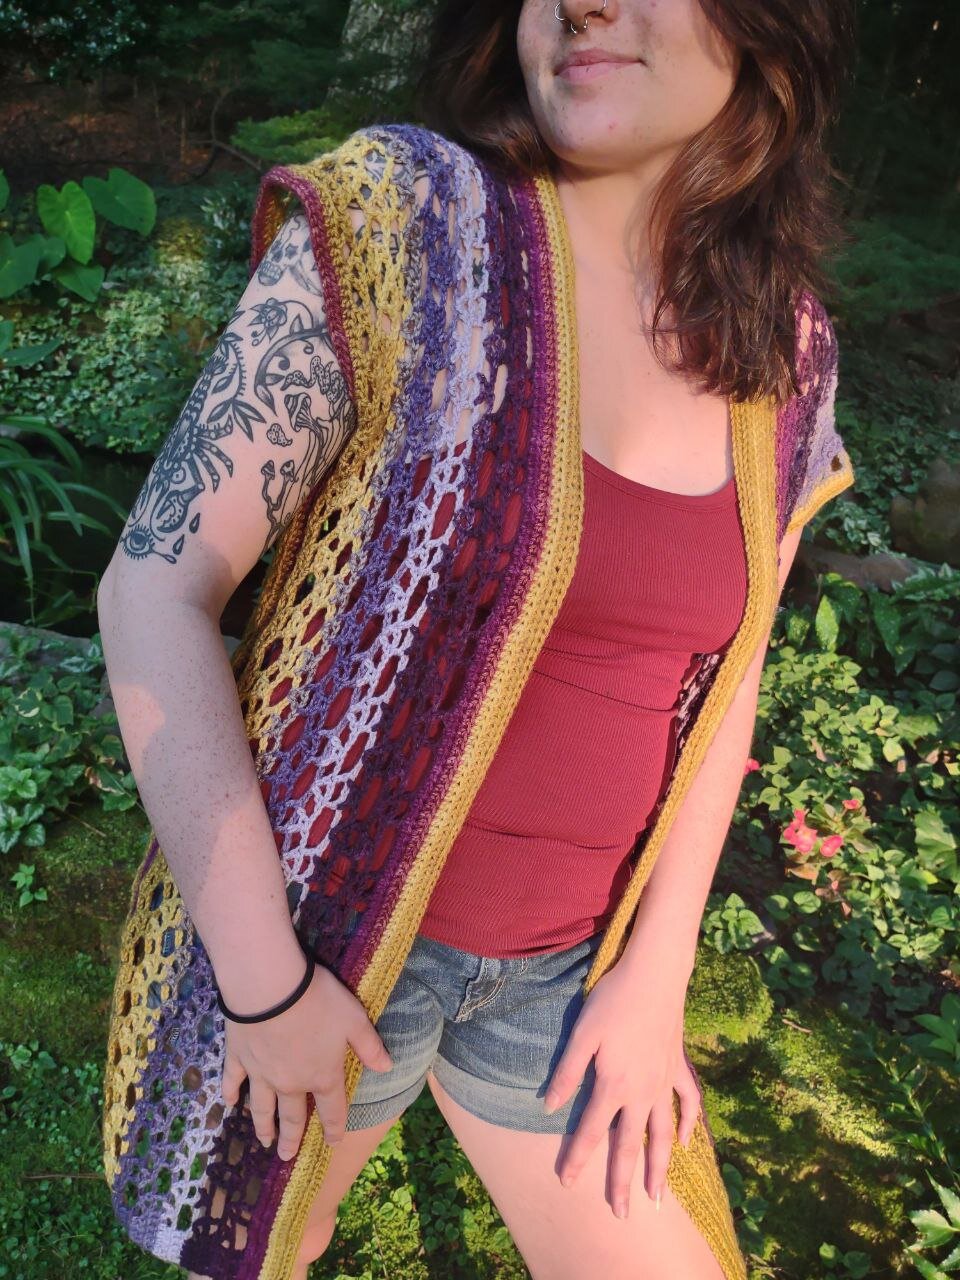
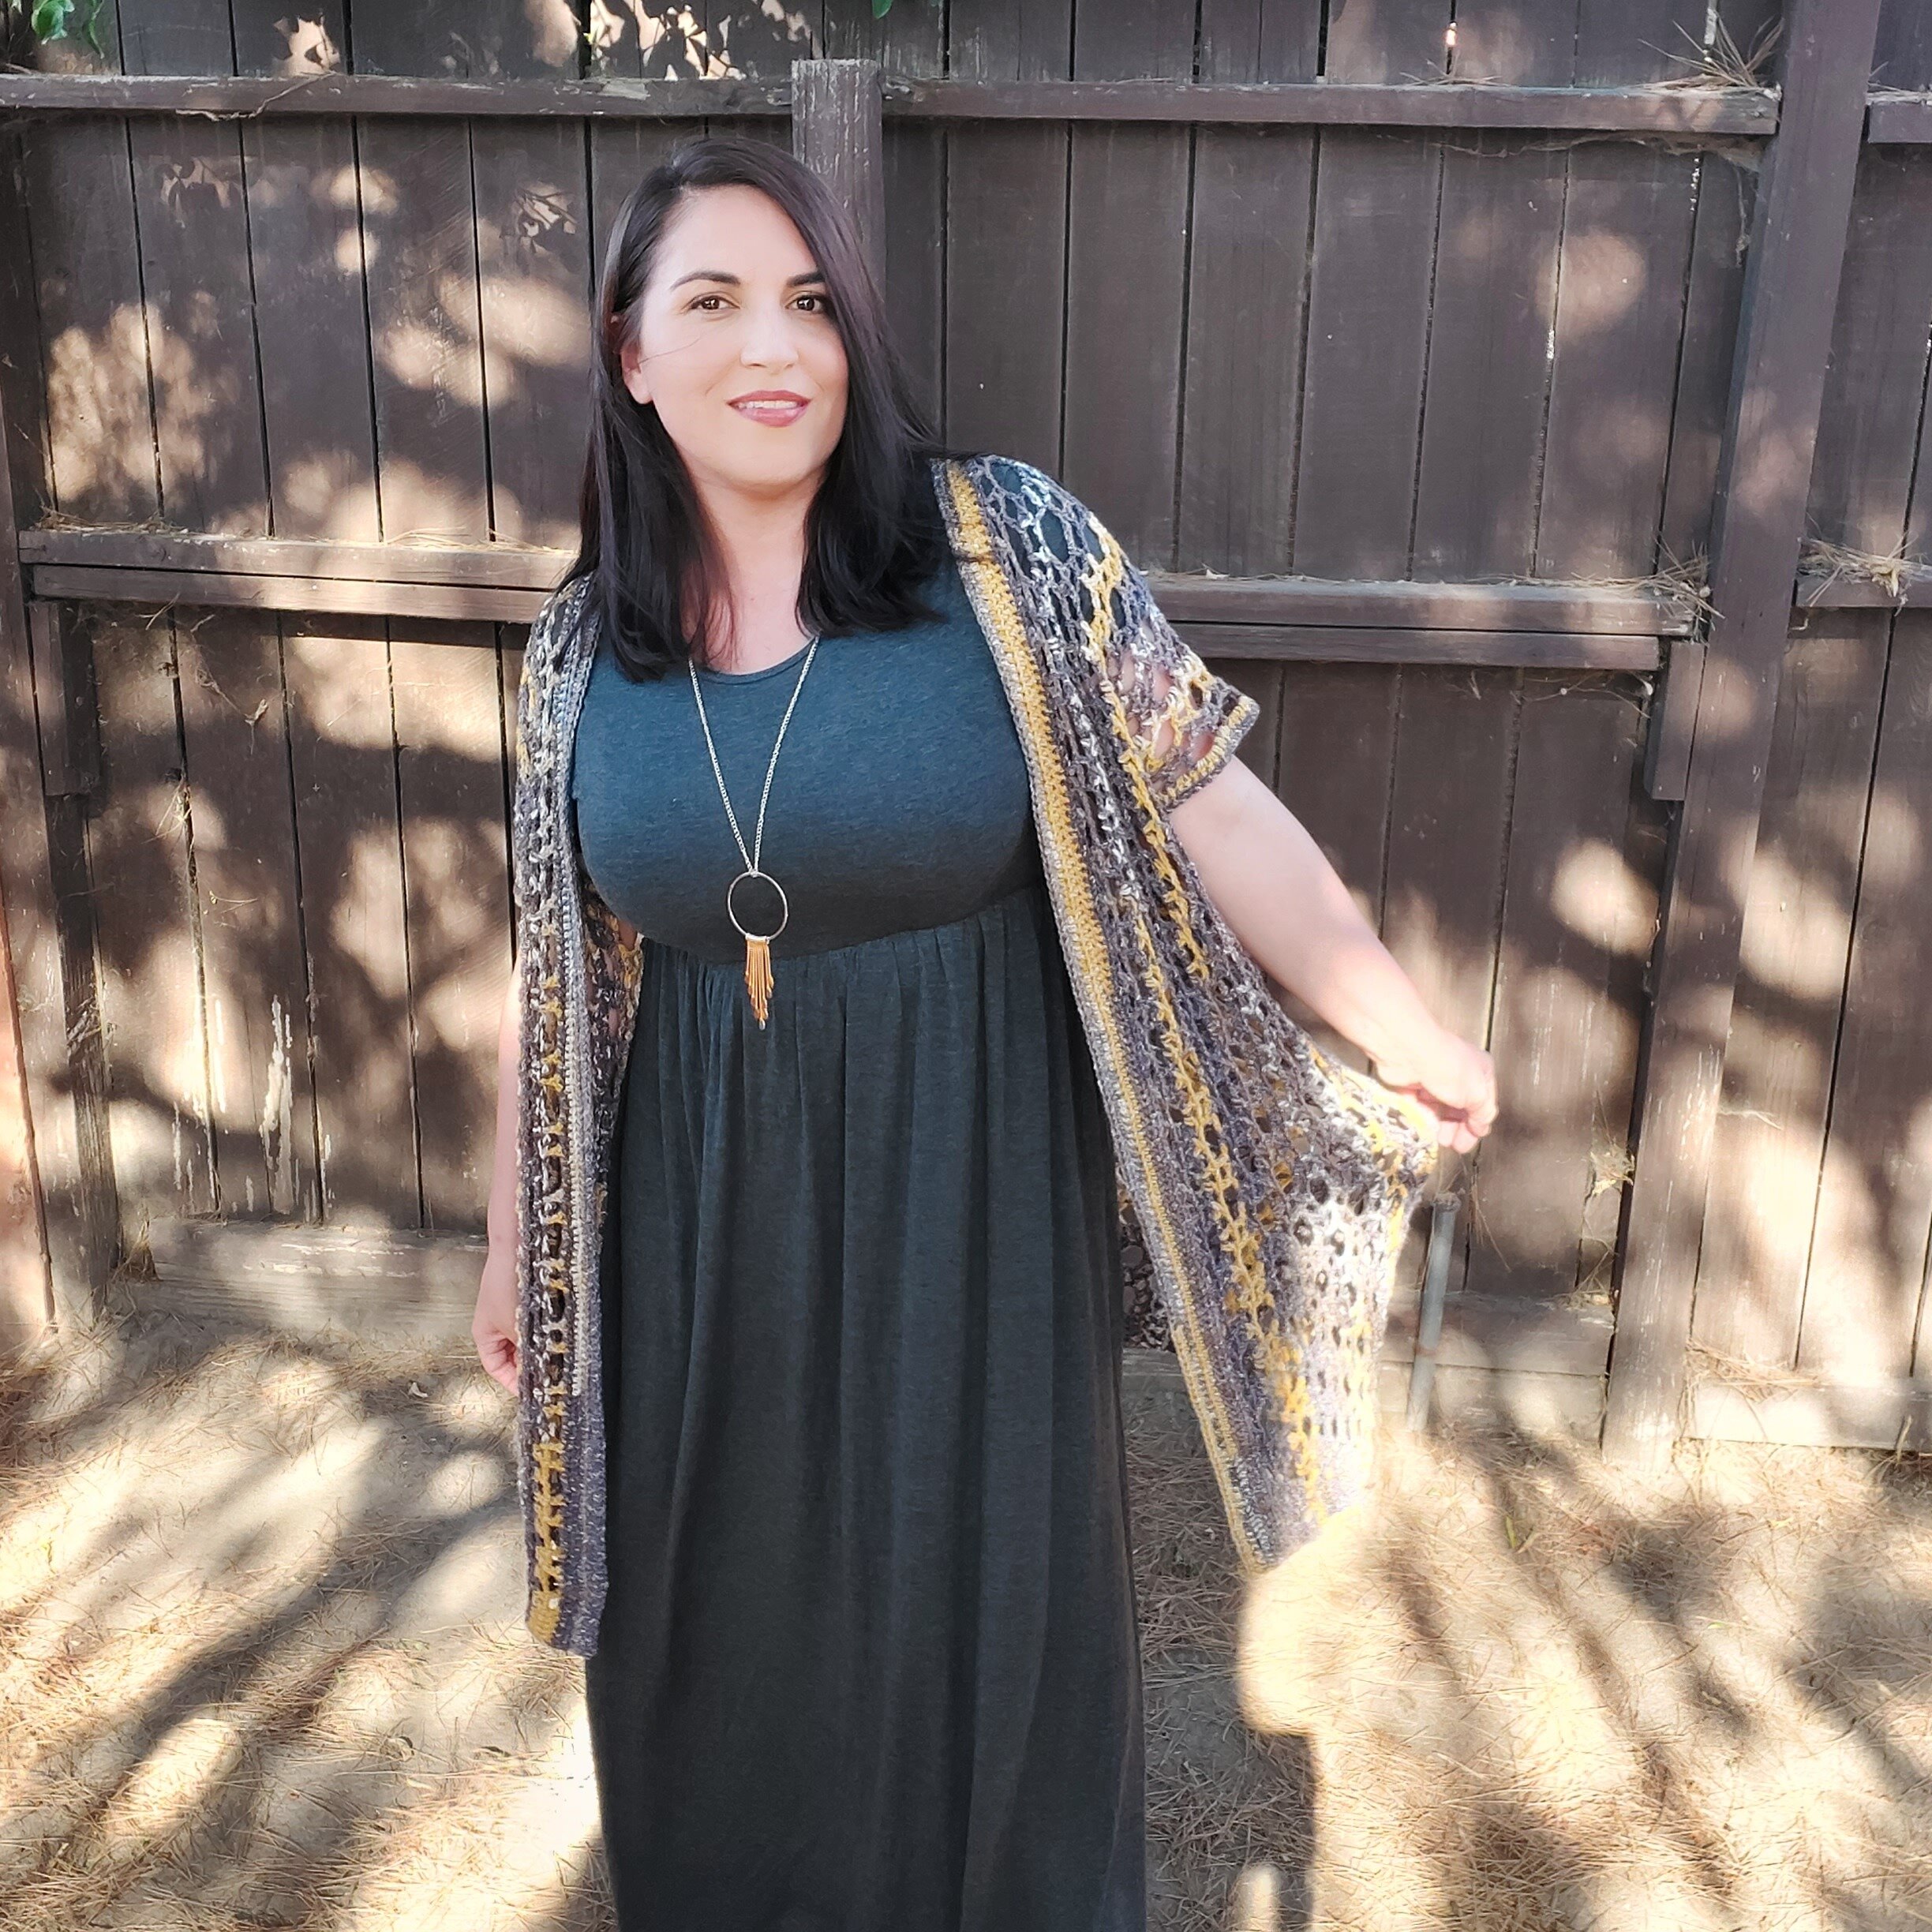
Whimsical and light, this cardigan is amazing to wear during the summer months. The interlocking circular motif of the lace creates a beautiful mesh fabric. This fabric, while not only being pretty, is guaranteed to keep you cool while it heats up outside.
This cardigan is created with weight 3 DK cotton yarn. DK cotton is a perfect light weight yarn for a summer project as cotton is great for keeping cool. The sample cardigan I made is crocheted with Paintbox Yarns Cotton DK. However, any weight 3 yarn would work for this cardigan.
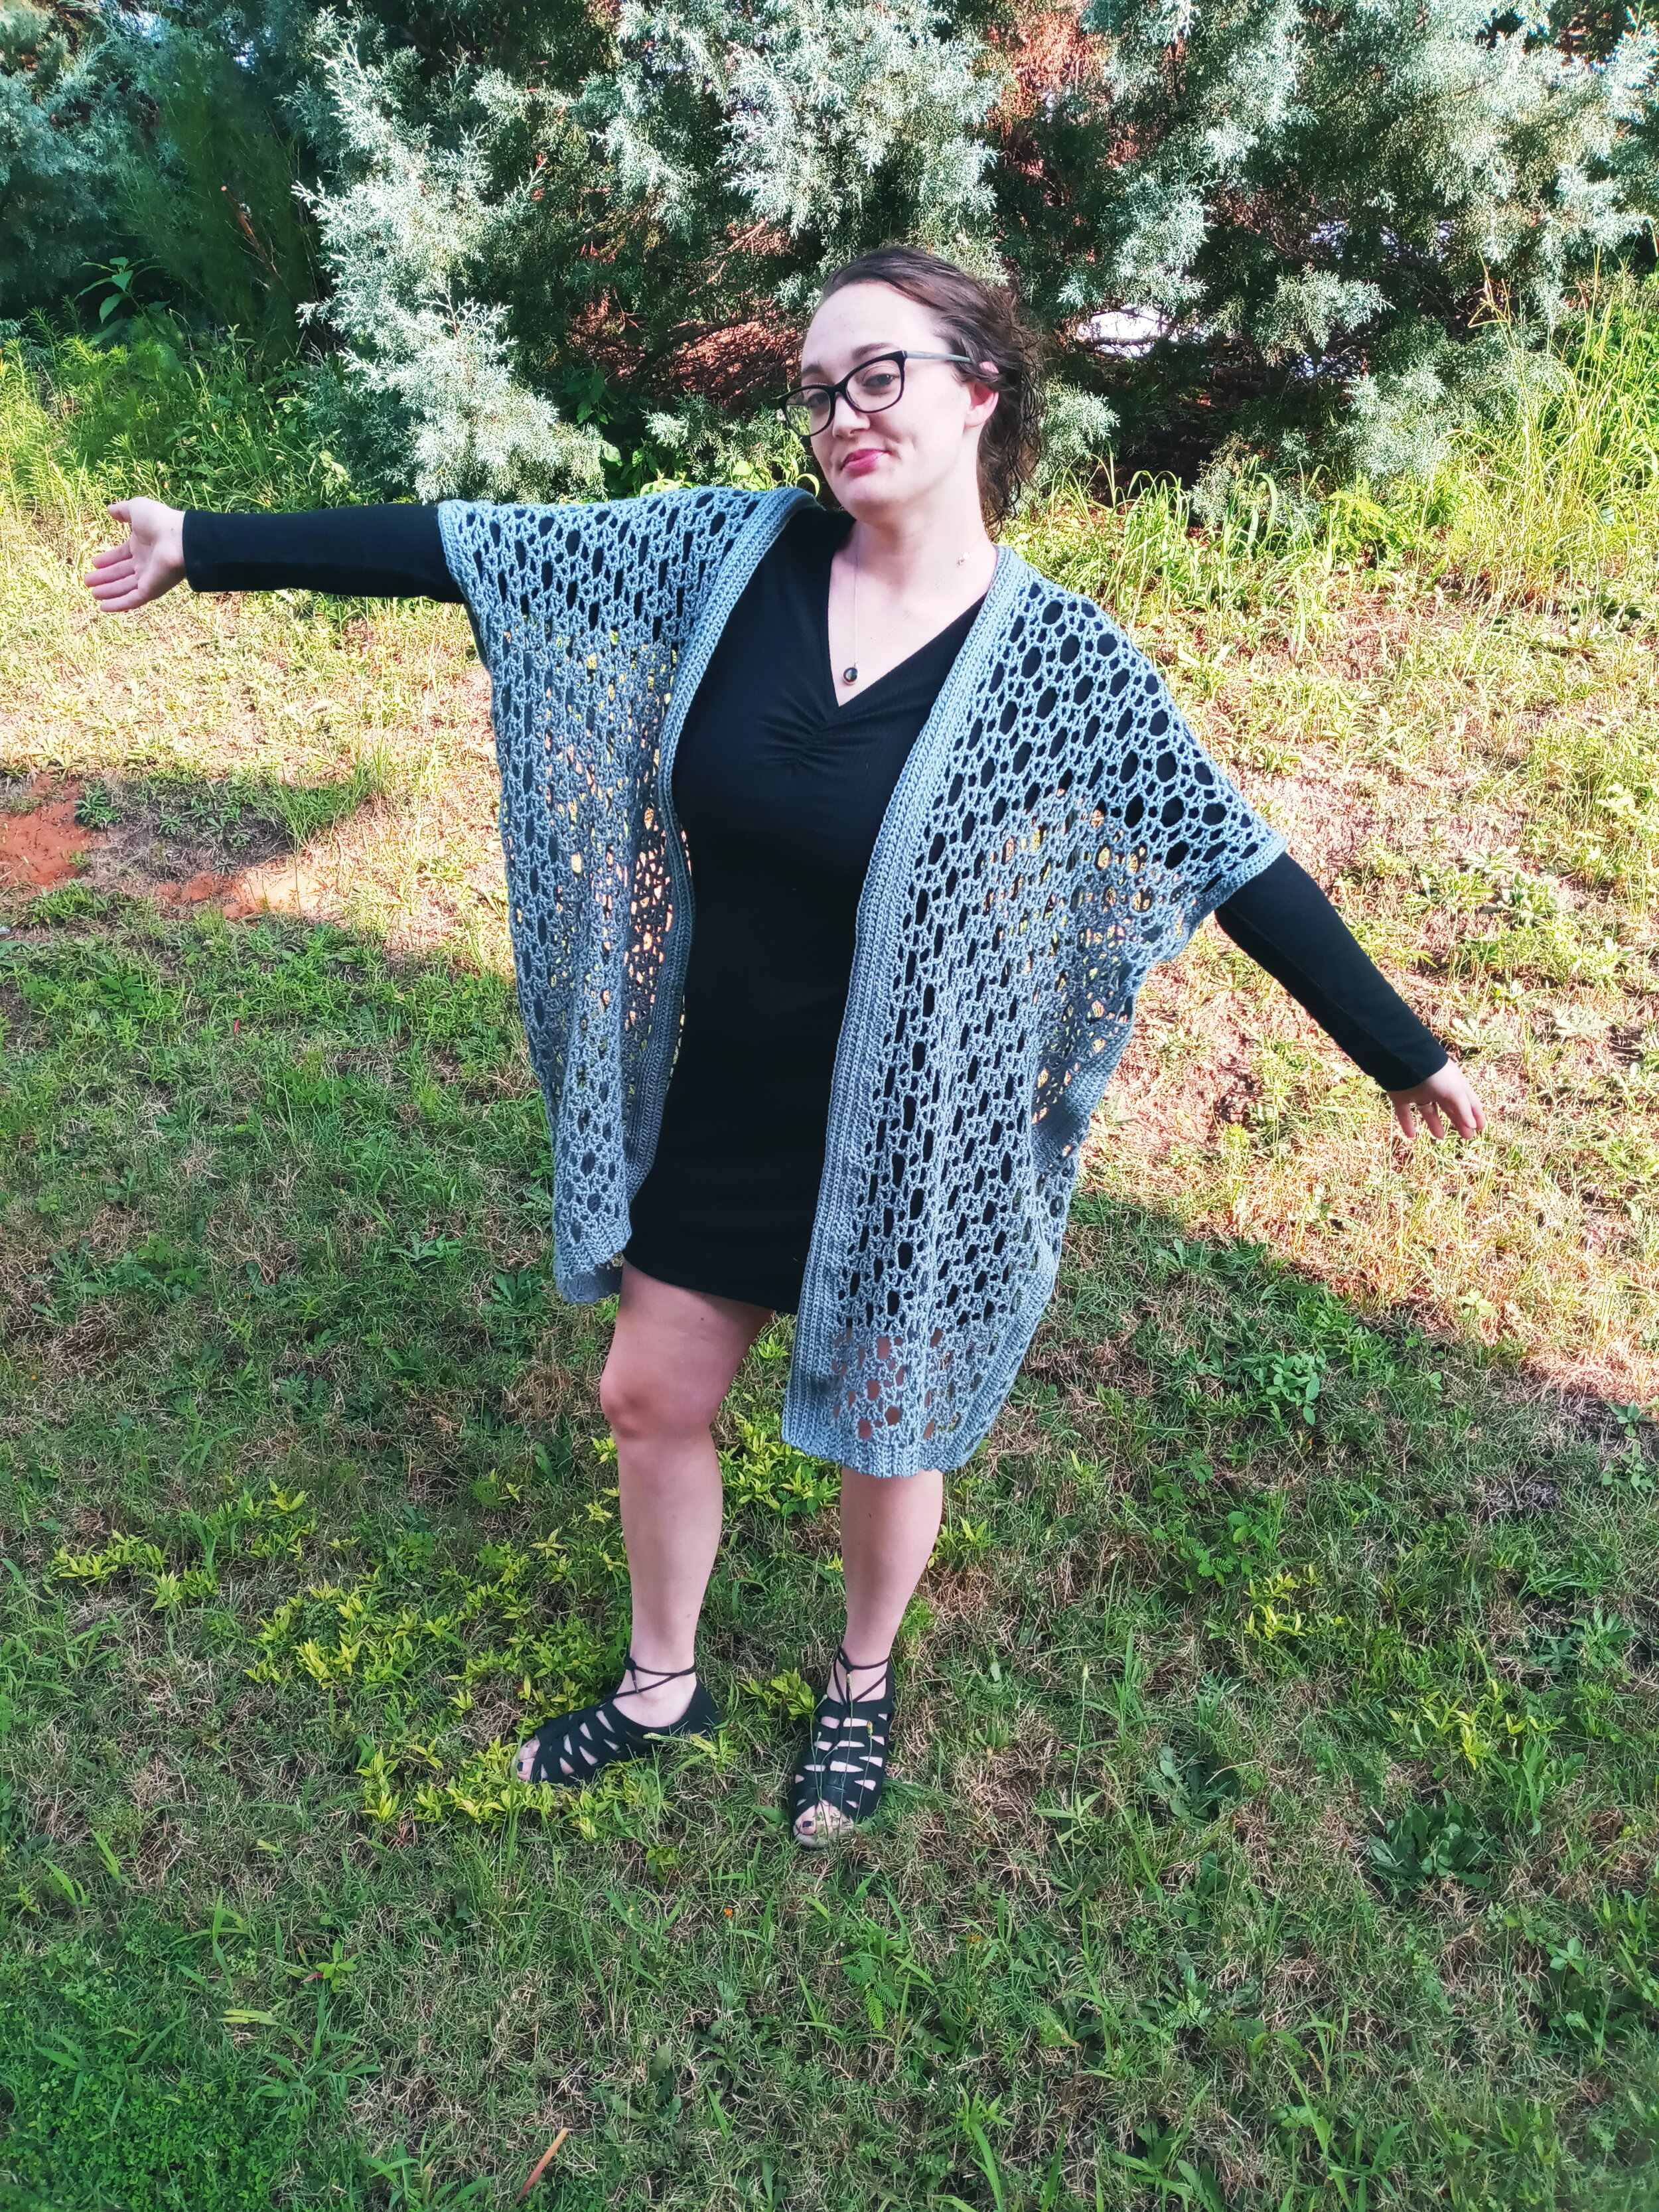
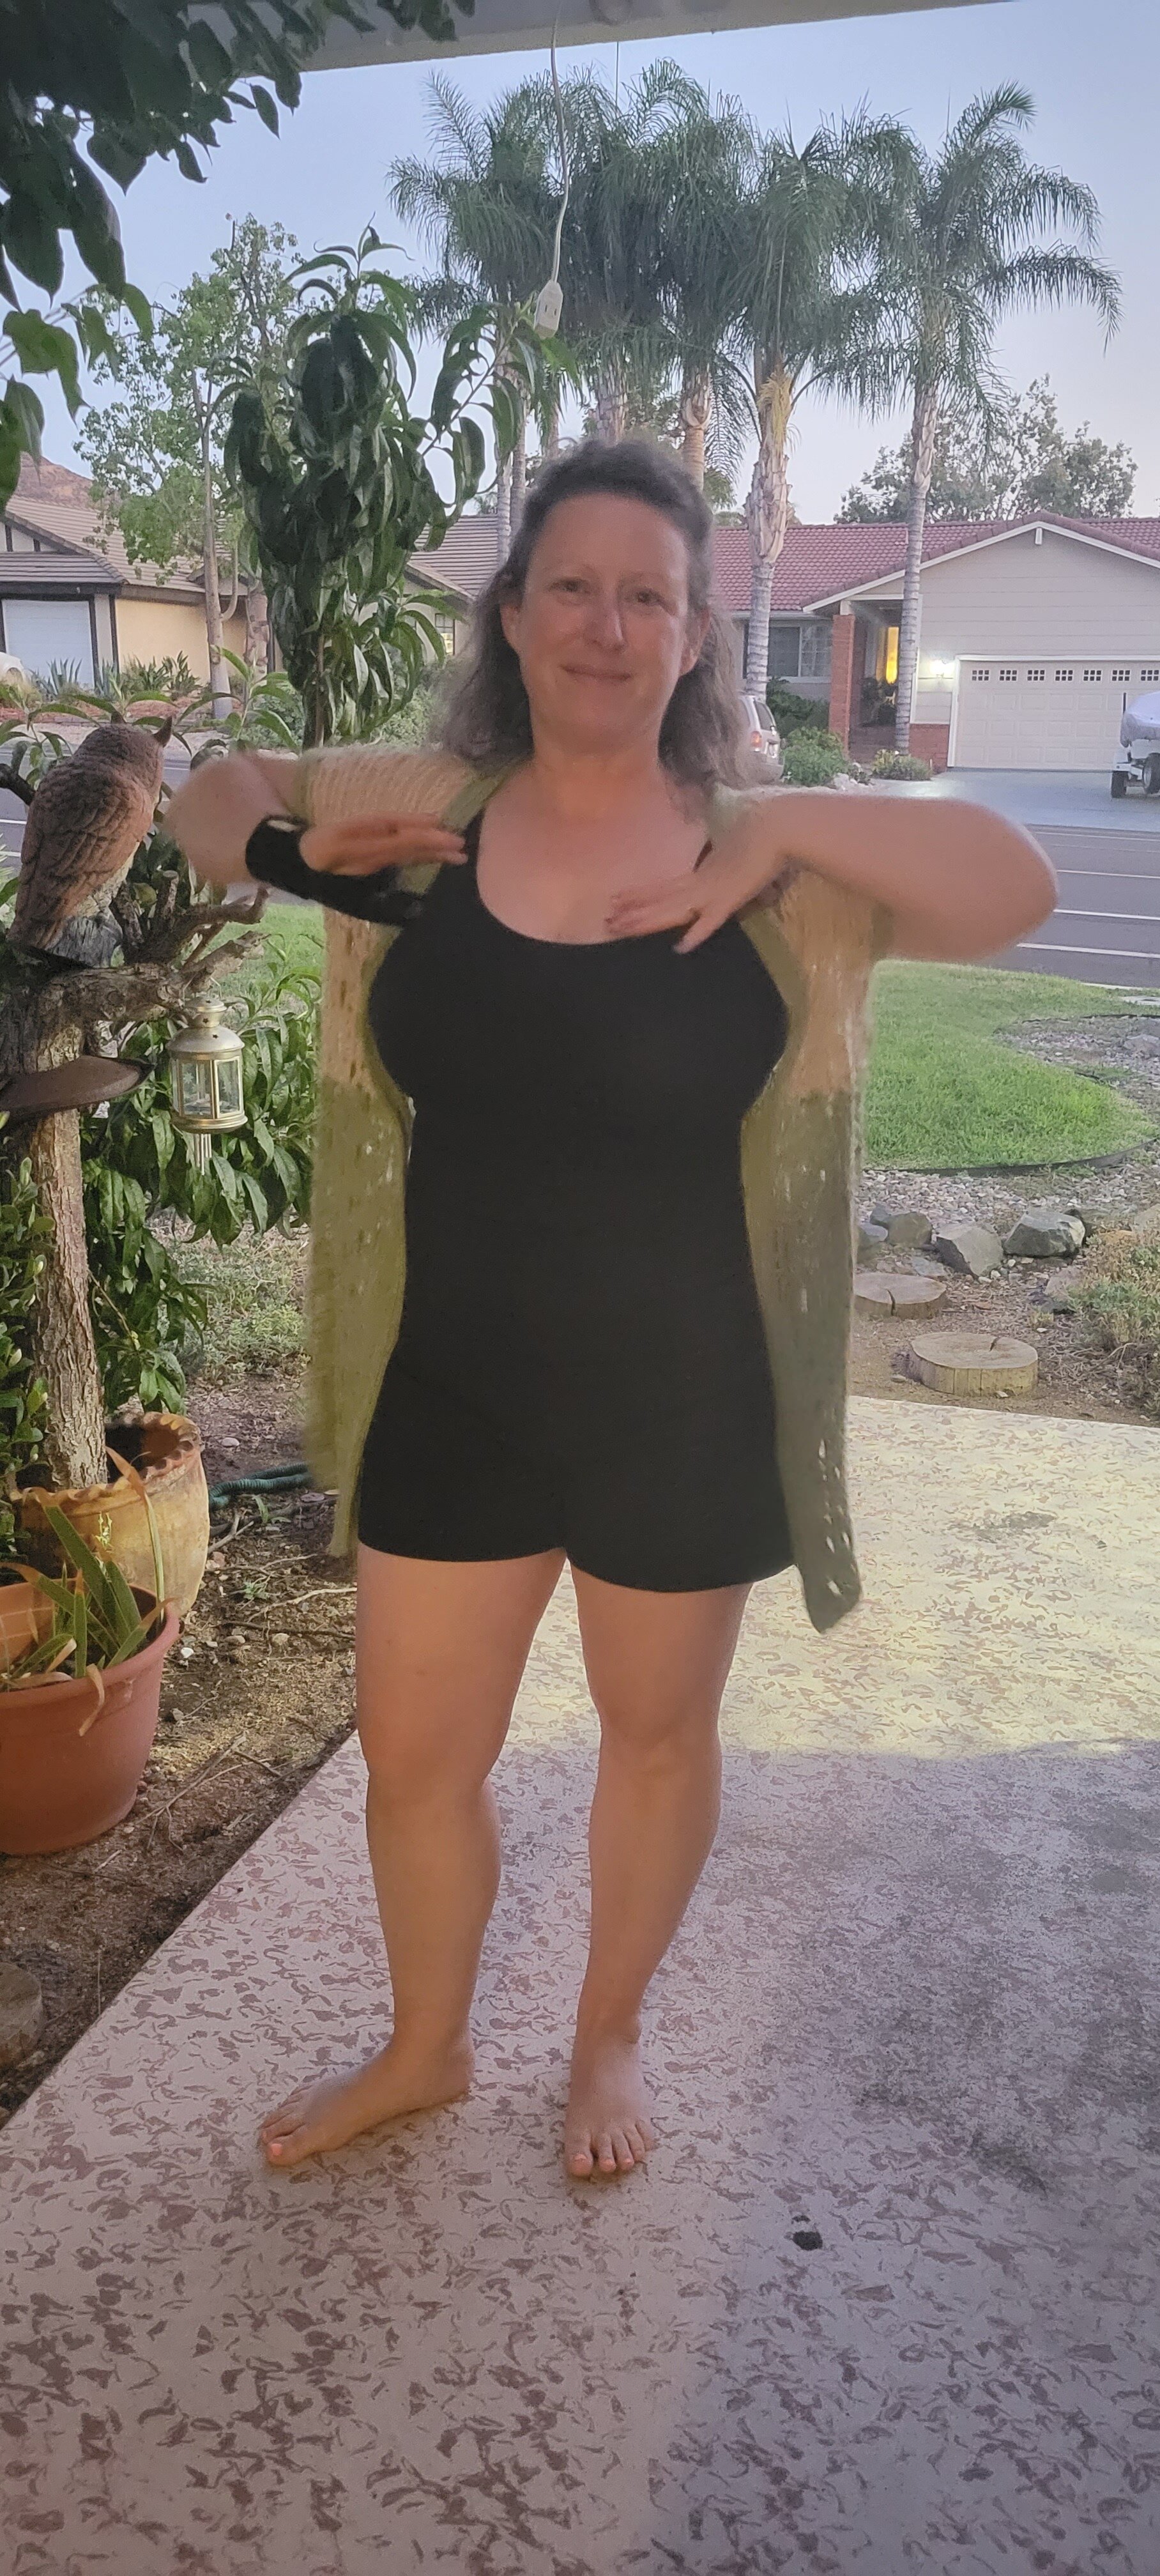
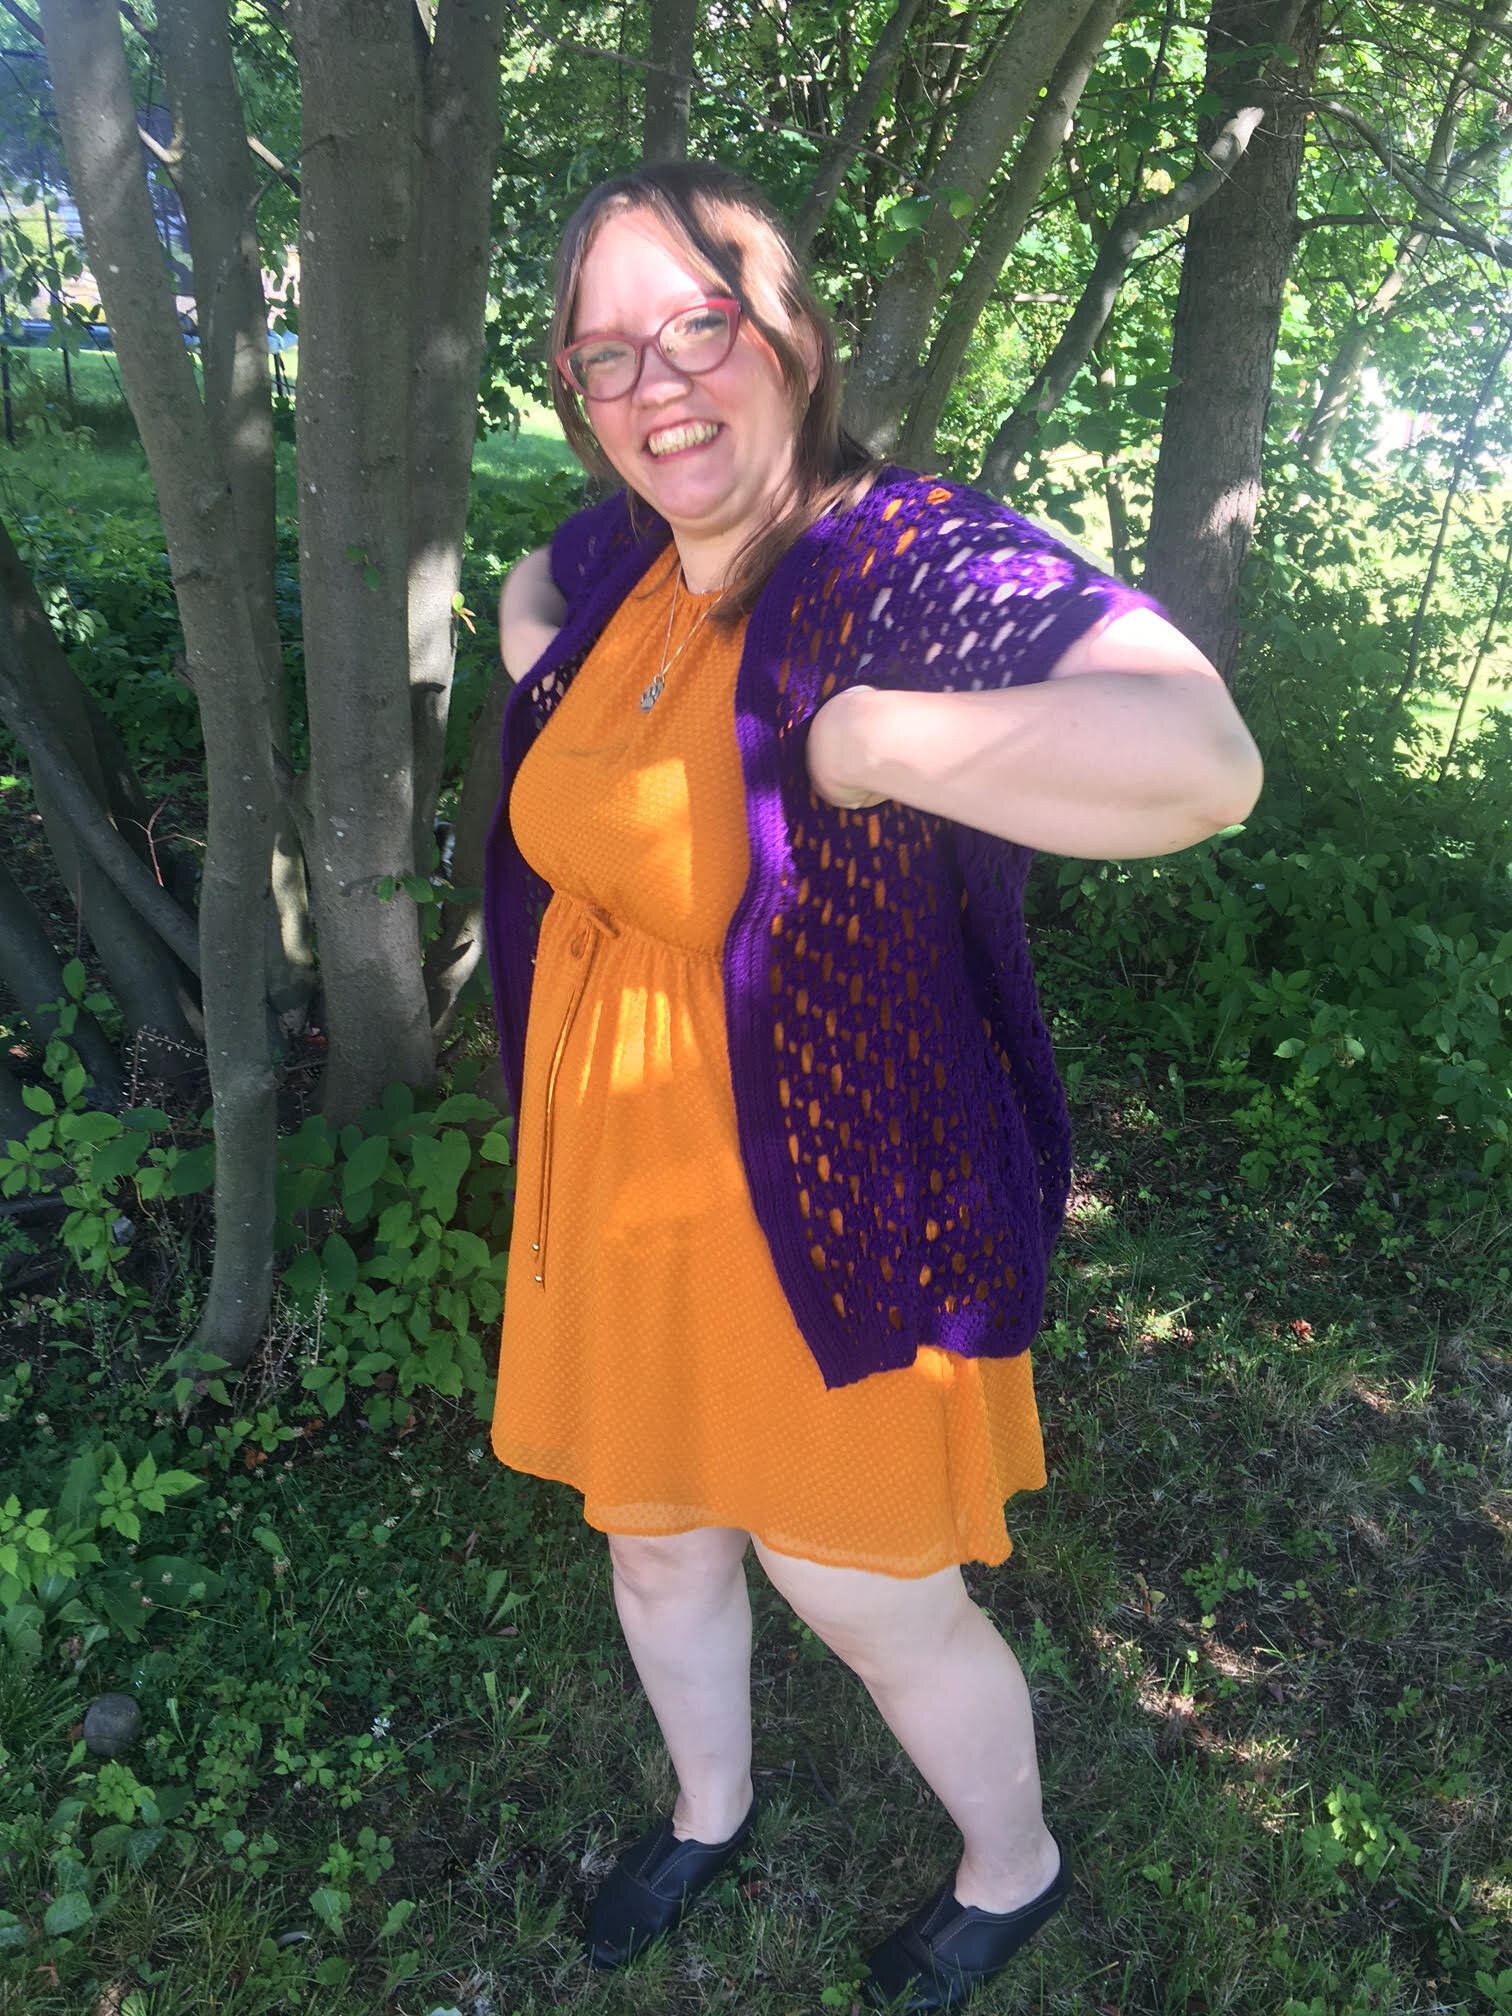
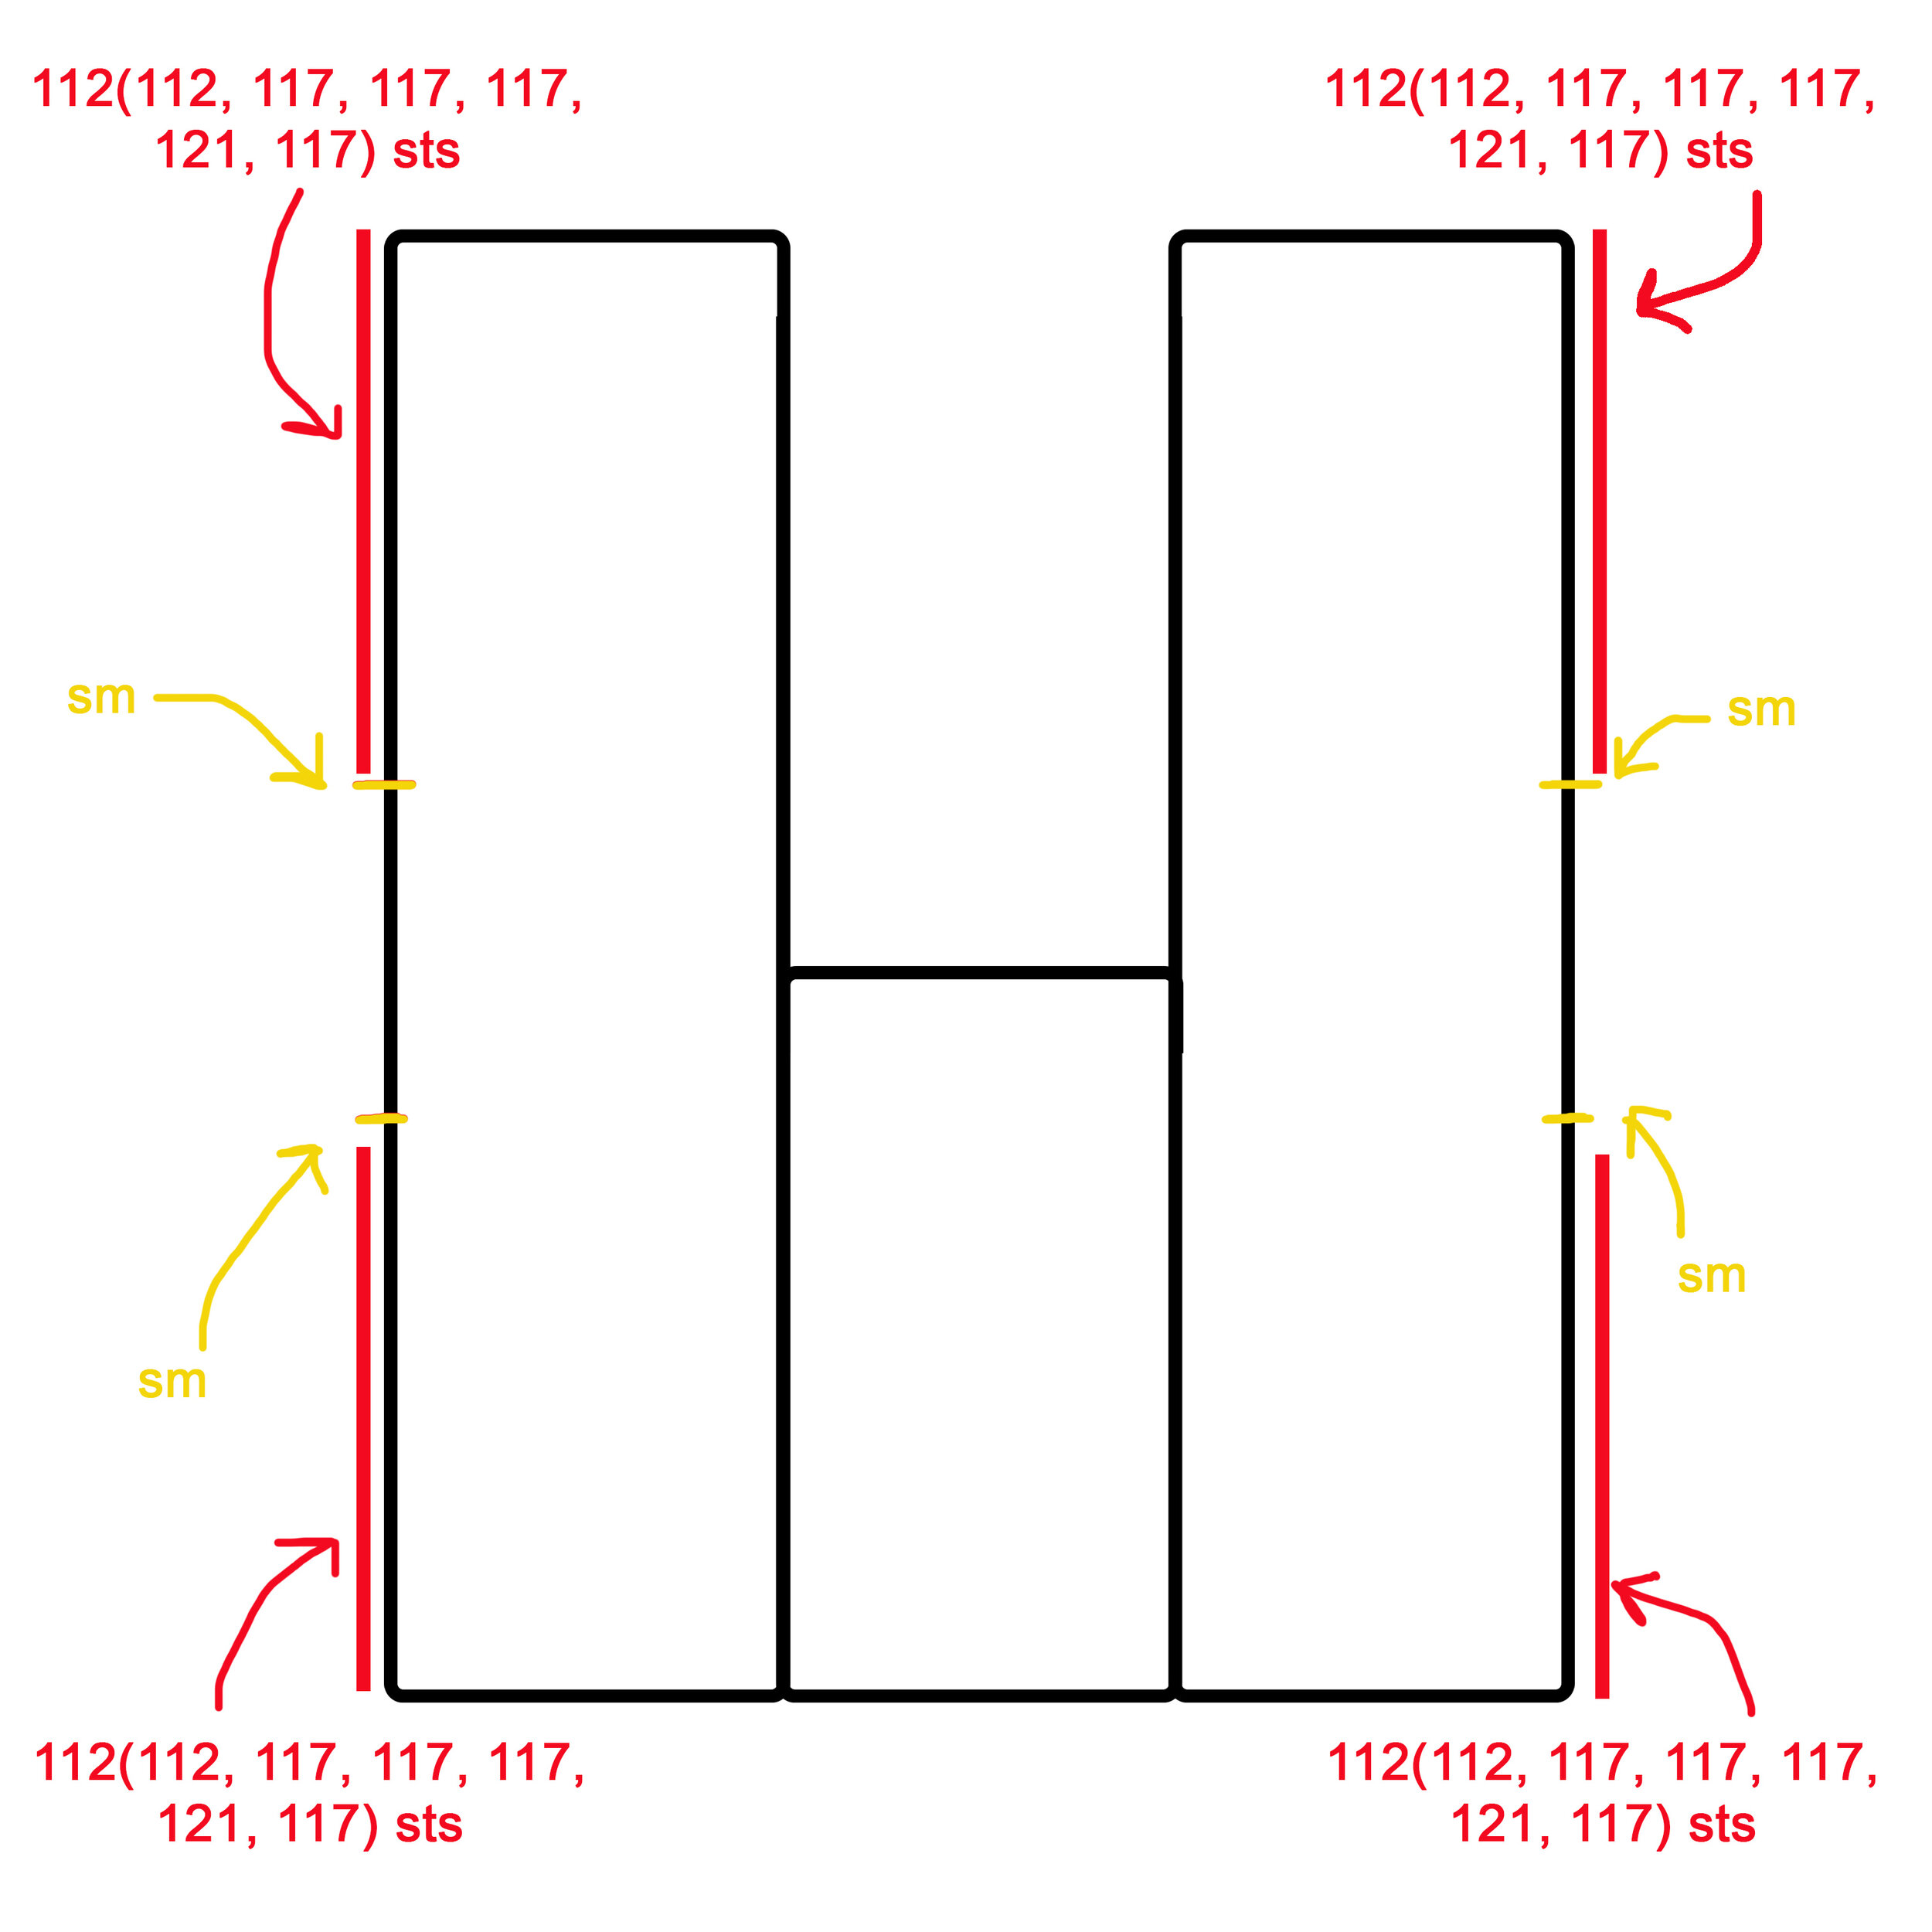
Crocheted from side to side, this cardigan is made with 3 continuous panels, then folded over to seam the sides like in a kimono style cardigan.
The pattern has directions for 7 sizes, S - 4XL, and is meant to be worn with -1” to +4” of ease, depending on your preference. Also, it is easily adjusted to the perfect size. For example, if you want a longer cardigan, you can add sts in multiples of 9 (about 2”) to increase the length, or if you want a wider cardigan, choose a size up.
THANK YOU! to all my wonderful testers!
Chantel, Lisa, Lizzy, Robyn, Sandra, Shannon, Suzanne, Tori, and Zahra


I LOVE TO SEE WHAT YOU CREATE!
Please share your creations with the community on social media tagging @ravinsekaidesigns and hashtag #fairyringscardigan
I can’t wait to see the beautiful things you come up with!
FOLLOW ME ON SOCIAL MEDIA
Facebook: Ravin Sekai Designs
Ravelry: RavinSekai
Etsy: Ravin Sekai Designs
Instagram: @ravinsekaidesigns
Pinterest: Ravin Sekai Designs
Patreon: Ravin Sekai Designs

Pin to Pinterest

WHAT YOU NEED:
Hook Size: 4mm or size needed to obtain gauge
Yarn: Light/DK weight 3 yarn. Sample crocheted in Paintbox Yarns Cotton DK. Approx. 750(850,1000, 1150, 1300, 1500, 1650) yards total.
Gauge: Gauge is after blocking. 18 sts/15 rows = 4” in hdc. 1 repeat of the lace pattern = 2” wide x 2” tall
Suggested Bust Measurements: S: 32”-35”, M: 36”-39”, L: 40”-43”, XL: 44”-47”, 2XL: 48”-51”, 3XL: 52”-55”, 4XL: 56”-59”
Finished Garment Sizing: Cardigan has -1” to +4” positive ease. Bust: 36(40, 43, 47, 50, 54, 58)”, Length: 32(32, 33, 34, 34, 35, 35)”
Model Size: model is 4’11” tall, 36” bust, 27.5” waist, 40” hips wearing size small, with 0” ease. Refer to notes.
ABBREVIATIONS:
Abbreviations in US terms
FHDC: foundation half double crochet. This is a method of creating an even chainless foundation. You can find this method here in a youtube video from Hooked by Robin - https://youtu.be/MHo70BNBIzw
Ch: chain
Pm: place marker
Sm: stitch marker
Sl st: slip stitch
Sc: single crochet
Hdc: half double crochet
Hdcblo: half double crochet in the back loop only.
Hdcflo: half double crochet in the front loop only.
Dc: double crochet
Dc2tog: double crochet 2 together.
V st: [dc, ch2, dc] all in one st: double crochet in indicated st, ch2, then place a second dc in the same st.
Rep: repeat
FO: fasten off
Notes:
Making a gauge swatch is very important for this cardigan. I would suggest making a larger than usual swatch (at least 2 repeats of the lace) to see how your lace tension and hdc tension match.
Make sure you have a consistent tension throughout the cardigan. Variations in tension can cause size discrepancies and also
make your hdc rows ‘wavy’ or ‘scrunched’. If you’re having a hard time with your hdc being too large/small in comparison to your lace, try going up or down a size in crochet hook to match your lace tension. You should be able to figure this out with your gauge swatch.Sizes through-out the pattern are written as follows S(M, L, XL, 2XL, 3XL, 4XL). If it is a section that only applies to a few of the sizes, such as the M/XL/3XL sections, the sizes are written M(XL, 3XL).
The body of the cardigan is worked from side to side.
Ch1 at the beginning of a hdc row does not count as a st.
Ch3 at the beginning of the lace pattern counts as 1 dc.
Sizing: The cardigan is not meant to close in the front. The model has a 36” bust and is wearing an S with 0” of ease. If you’d like more positive ease in your bust, choose a larger size. The lace stitch has a lot of stretch, so keep that in mind when you choose your size.
If you’d like a longer cardigan, add stitches in multiples of 9 (2”, 1 lace repeat) to maintain the correct stitch count for the lace stitches. Remember how many stitches you add to the first panel as you will have to half that for panel 2 in order for the length to be correct throughout. For example: If you add 18 sts (4”, 2 lace repeats) to panel 1, you will then add 9 sts (2”, 1 lace repeat) to panel 2 to maintain length.
Refer to the size chart and schematic to choose your size and/or decide on your alterations.


Panel 1:
All Sizes:
FHDC 289(289, 298, 307, 307, 316, 316)
Row 1: ch1, hdc to end [289(289, 298, 307, 307, 316, 316) sts]
Row 2: ch3 (counts as 1dc throughout), 4dc, *sk2, V st in next st, ch2, sk2, dc2tog the next st with the st 3 away (sk2 sts between the dc, refer to chart), ch2* rep * * 30(30, 31, 32, 32, 33, 33) times, dc in next st, 4dc. Turn. [31(31, 32, 33, 34, 34) repeats total]
Row 3: ch3, 4dc, *ch5, sk5, dc in the 1st dc of the V st, ch2, dc in the 2nd dc of the V st* rep * * 30(30, 31, 32, 32, 33, 33) times, 5dc. Turn.
Row 4: ch3, 4dc, *ch2, dc2tog the next 2 dc (sk the 2 chs), ch2, V st into the center of the ch5 of the previous row* rep * * 30(30, 31, 32, 32, 33, 33) times, 5dc. Turn.
Row 5: ch3, 4dc, *dc in the 1st dc of the V st, ch2, dc in the 2nd dc of the V st, ch5, sk5* rep * * 30(30, 31, 32, 32, 33, 33) times, 5dc. Turn.
Row 6 - Row 13(13, 17, 17, 21, 21, 25): Rep Row 2 - Row 5 2(2, 3, 3, 4, 4, 5) more times.

M/XL/3XL Only:
Row 14(18, 22) - Row 15(19, 23): Rep Row 2 and Row 3 once more
All Sizes:
Row 14(16, 18, 20, 22, 24, 26): ch1, hdc across placing 1 hdc in each dc and 1 hdc in each ch. Turn. [289(289, 298, 307, 307, 316, 316) sts]
Row 15(17, 19, 21, 23, 25, 27): ch1, hdc across. Turn. [289(289, 298, 307, 307, 316, 316) sts]
Panel 2:
S/M/XL/2XL Only:
Row 16(18, 22, 24): ch3, 4dc, *sk2, V st in next st, ch2, sk2, dc2tog the next st with the st 2 away (sk2 sts between the dc, refer to picture), ch2* rep * * 14(14, 15, 15) more times, sk2, V st in next st, sk2, dc. Turn. [15(15, 16, 16) repeats total]
Row 17(19, 23, 25): ch3, dc in the 1st dc of the V st, ch2, dc in the 2nd dc of the V st, *ch5, sk5, dc in the 1st dc of the V st, ch2, dc in the 2nd dc of the V st* rep * * 14(14, 15, 15) more times, 5dc. Turn.
Row 18(20, 24, 26): ch3, 4dc, *ch2, dc2tog the next 2 dc (sk the 2 chs), ch2, V st into the center of the ch5 of the previous row* rep * * 14(14, 15, 15) more times, ch2, dc2tog the next 2 dc (sk the 2 chs), ch1, 1dc. Turn.
Row 19(21, 25, 27): ch7, **dc in the 1st dc of the V st, ch2, dc in the 2nd dc of the V st, ch5, sk5* rep * * 14(14, 15, 15) more times, 5dc. Turn.
Row 20(22, 26, 28) - Row 27(29, 33, 35): Rep Row 16(18, 22, 24) - Row 19(21, 25, 27) 2 more times.
L/3XL/4XL Only:
Row 20(26, 28): ch3, 4dc, *sk2, V st in next st, ch2, sk2, dc2tog the next st with the st 3 away (sk2 sts between the dc, refer to chart), ch2* rep * * 15(16, 16) more times, 1dc. Turn. [16(17, 17) repeats total]
Row 21(27, 29): ch3, *ch5, sk5, dc in the 1st dc of the V st, ch2, dc in the 2nd dc of the V st* rep * * 15(16, 16) more times, 5dc. Turn.
Row 22(28, 30): ch3, 4dc, *ch2, dc2tog the next 2 dc (sk the 2 chs), ch2, V st into the center of the ch5 of the previous row* rep * * 15(16, 16) more times, 1dc. Turn.
Row 23(29, 31): ch3, *dc in the 1st dc of the V st, ch2, dc in the 2nd dc of the V st, ch5, sk5* rep * * 15(16, 16) more times, 5dc. Turn.
Row 24(30, 32) - Row 31(37, 39): Rep Row 20(26, 28) - 23(29, 31) 2 more times.
Panel 3:
All Sizes:

Row 28(30, 32, 34, 36, 38, 40): ch1, 145(145, 149, 154, 154, 158, 158) hdc across placing 1 hdc in each dc and 1 hdc in each ch, FHDC 144(144, 149, 153, 153, 158, 158). Turn. [289(289, 298, 307, 307, 316, 316) sts]
Row 29(31, 33, 35, 37, 39, 41): ch1, hdc across. Turn. [289(289, 298, 307, 307, 316, 316) sts]
Row 30(32, 34, 36, 38, 40, 42): ch3 (counts as 1dc throughout), 4dc, *sk2, V st in next st, ch2, sk2, dc2tog the next st with the st 3 away (sk2 sts between the dc, refer to chart), ch2* rep * * 30(30, 31, 32, 32, 33, 33) times, dc in next st, 4dc. Turn. [31(31, 32, 33, 34, 34) repeats total]
Row 31(33, 35, 37, 39, 41, 43): ch3, 4dc, *ch5, sk5, dc in the 1st dc of the V st, ch2, dc in the 2nd dc of the V st* rep * * 30(30, 31, 32, 32, 33, 33) times, 5dc. Turn.
Row 32(34, 36, 38, 40, 42, 44): ch3, 4dc, *ch2, dc2tog the next 2 dc (sk the 2 chs), ch2, V st into the center of the ch5 of the previous row* rep * * 30(30, 31, 32, 32, 33, 33) times, 5dc. Turn.
Row 33(35, 37, 39, 41, 43, 45): ch3, 4dc, *dc in the 1st dc of the V st, ch2, dc in the 2nd dc of the V st, ch5, sk5* rep * * 30(30, 31, 32, 32, 33, 33) times, 5dc. Turn.
Row 34(36, 38, 40, 42, 44, 46) - Row 41(43, 49, 51, 57, 59, 65): Rep Row 30(32, 34, 36, 38, 40, 42) - Row 33(35, 37, 39, 41, 43, 45) 2(2, 3, 3, 4, 4, 5) more times.
M/XL/3XL Only:
Row 44(52, 60) - Row 45(53, 61): Rep Row 32(36, 40) and Row 33(37, 41) once more
All Sizes:
Row 42(46, 50, 54, 58, 62, 66): ch1, hdc across placing 1 hdc in each dc and 1 hdc in each ch. Turn. [289(289, 298, 307, 307, 316, 316) sts]
Row 43(47, 51, 55, 59, 63, 67): ch1, hdc across. [289(289, 298, 307, 307, 316, 316) sts]
FO
Block to size (refer to size chart above)
Seaming:
First off, decide which side will be your RS and which is your WS. Both are basically the same, you it’s your choice.
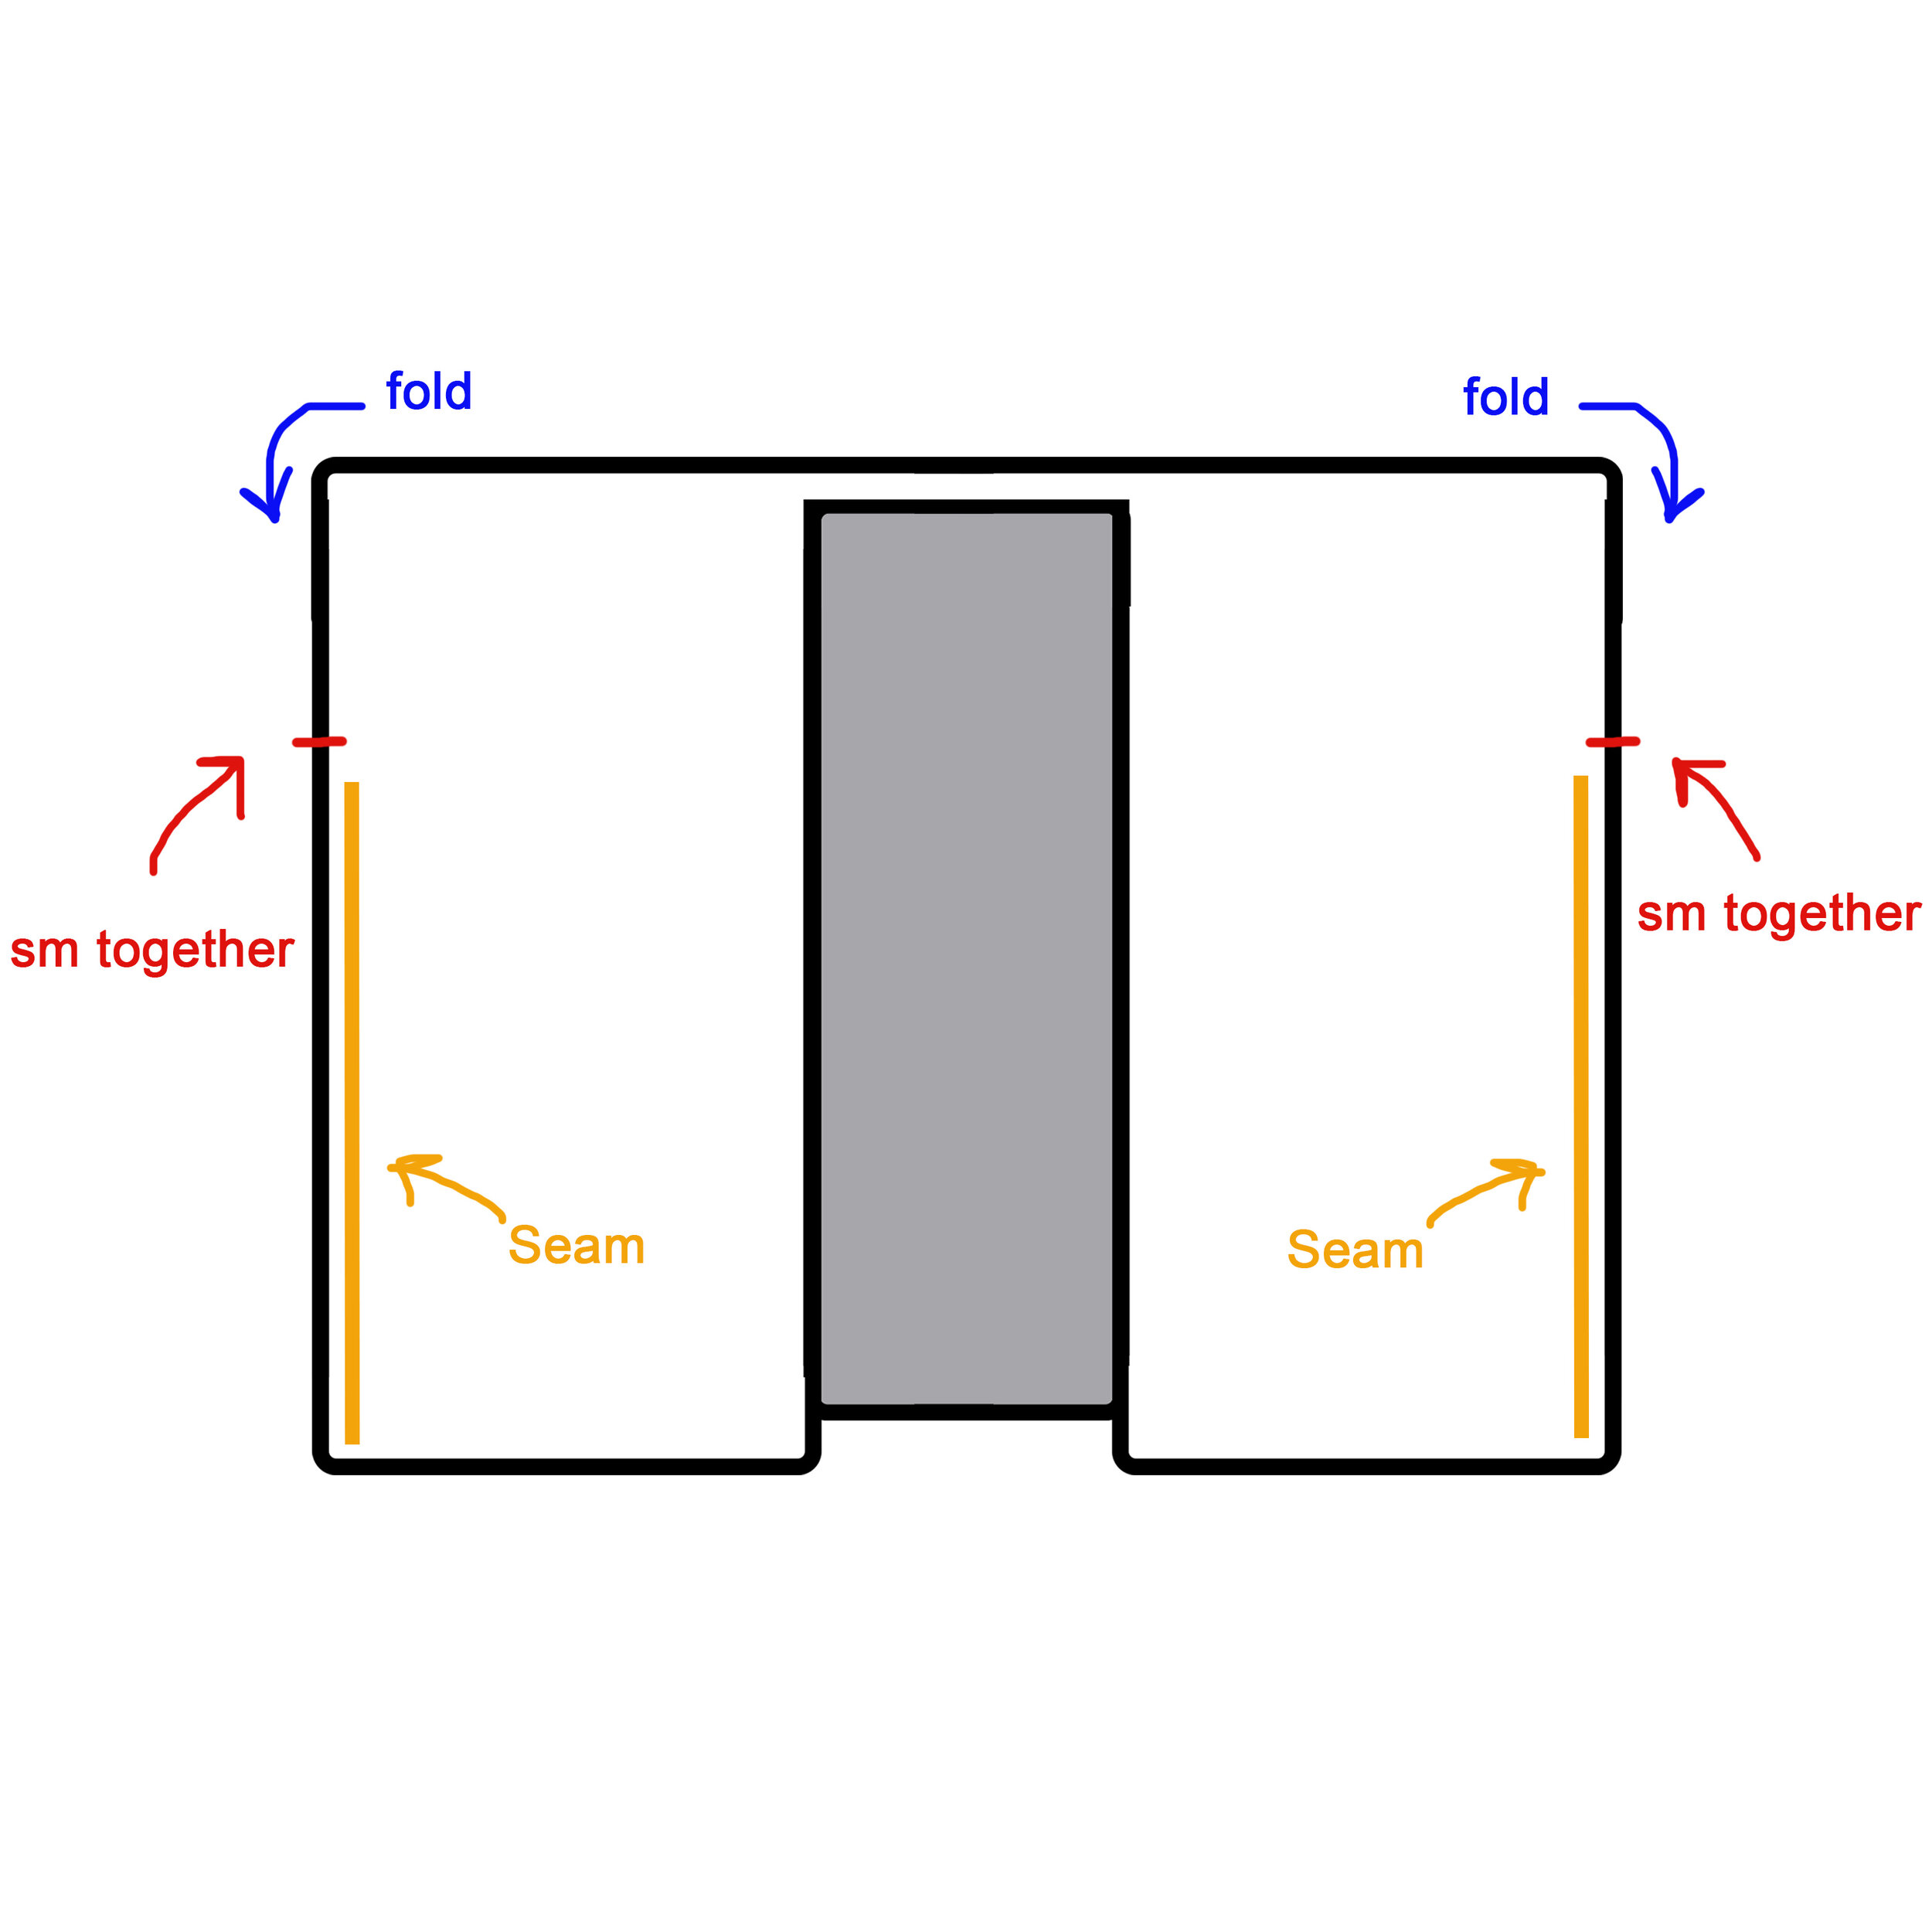
With the cardigan laid out flat (depending on your preferred seaming method, you will lay it either RS up or RS down. For example, if you seam with sl st crochet, you will want to lay it out with RS up. If you are using mattress stitch, you will want to lay it RS down), counting from each end, pm into st # 112(112, 117, 117, 117, 121, 117) on both sides. Refer to the picture. (Refer to schematic above. If you need a larger sleeve opening, adjust accordingly. Just make sure your sm are both put in the same place).
Fold the front panels of the cardigan down, placing the sm together, and seam up the sides to the sm using your preferred seaming method. (I used sl st crochet to get the look I wanted, but you can use any method).
Collar:
With RS facing (seams on the inside), attach yarn with a sl st to the bottom left side (when looking at it) of the front of the cardigan. (right front when wearing it).
Row 1: ch1, starting in the same st you attached your yarn, 144(144, 148, 153, 153, 157, 157) hdcblo up the right front, 26hdc across the back of the neck, then 144(144, 148, 153, 153, 157, 157) hdcblo down the left front. Turn. [314(314, 322, 332, 332, 240, 340) sts total]
Row 2: ch1, hdcflo around the collar.
Row 3: ch1, hdcblo around the collar
FO
If you’d like a wider collar, simply continue rep Row 2 and 3.
Weave in all of your ends and enjoy!

Pin to Pinterst
Happy knitting!
IF YOU LIKED THIS PATTERN, PLEASE SUPPORT ME ON PATREON OR BUY ME A COFFEE!

BUY ME A COFFEE
SUPPORT ME ON PATREON
I LOVE TO SEE WHAT YOU CREATE!
Please share your creations with the community on social media tagging @ravinsekaidesigns and hashtag #fairyringscardigan
I can’t wait to see the beautiful things you come up with!
FOLLOW ME ON SOCIAL MEDIA
Facebook: Ravin Sekai Designs
Ravelry: RavinSekai
Instagram: @ravinsekaidesigns
Pinterest: Ravin Sekai Designs
Patreon: Ravin Sekai Designs

Archive
- LGBTQ+
- PRIDE
- accessories
- accessory
- asymmetrical
- autumn
- backpack
- bag
- beach
- beanie
- bias shawl
- blanket
- blog hop
- blue
- bobble
- bookbag
- boyfriend
- cardigan
- case
- celtic weave stitch
- clutch
- clutch bag
- collaboration
- color block
- color work
- cover
- cover-up
- cowl
- crochet
- crochet pattern
- crochetpattern
- crop top
- croptop
- decor
- diy
- dress
- ds case
- duster
- earwarmer
- easy
- fall
- festivaltop
- free pattern
- gauge
- ghost
- granny squares
- halloween
- handbag
- hat
- headband


