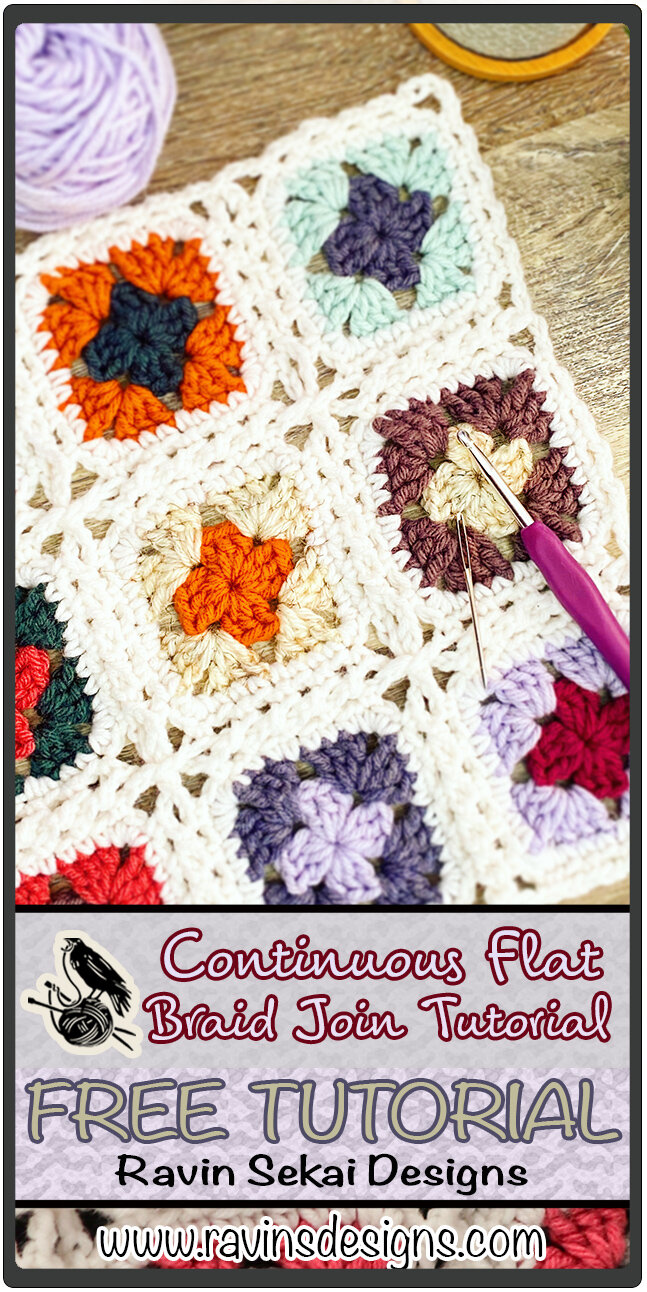
Continuous Flat Braid Join
The picture tutorial for this join is also available in my Adding Up Memories Temperature Blanket pattern pdf. Please consider supporting me by purchasing the 100% ad-free PDF with full picture tutorial for this pattern on my Ravelry or ETSY pages. Or consider joining my Patreon for member perks.
ABOUT THIS join:
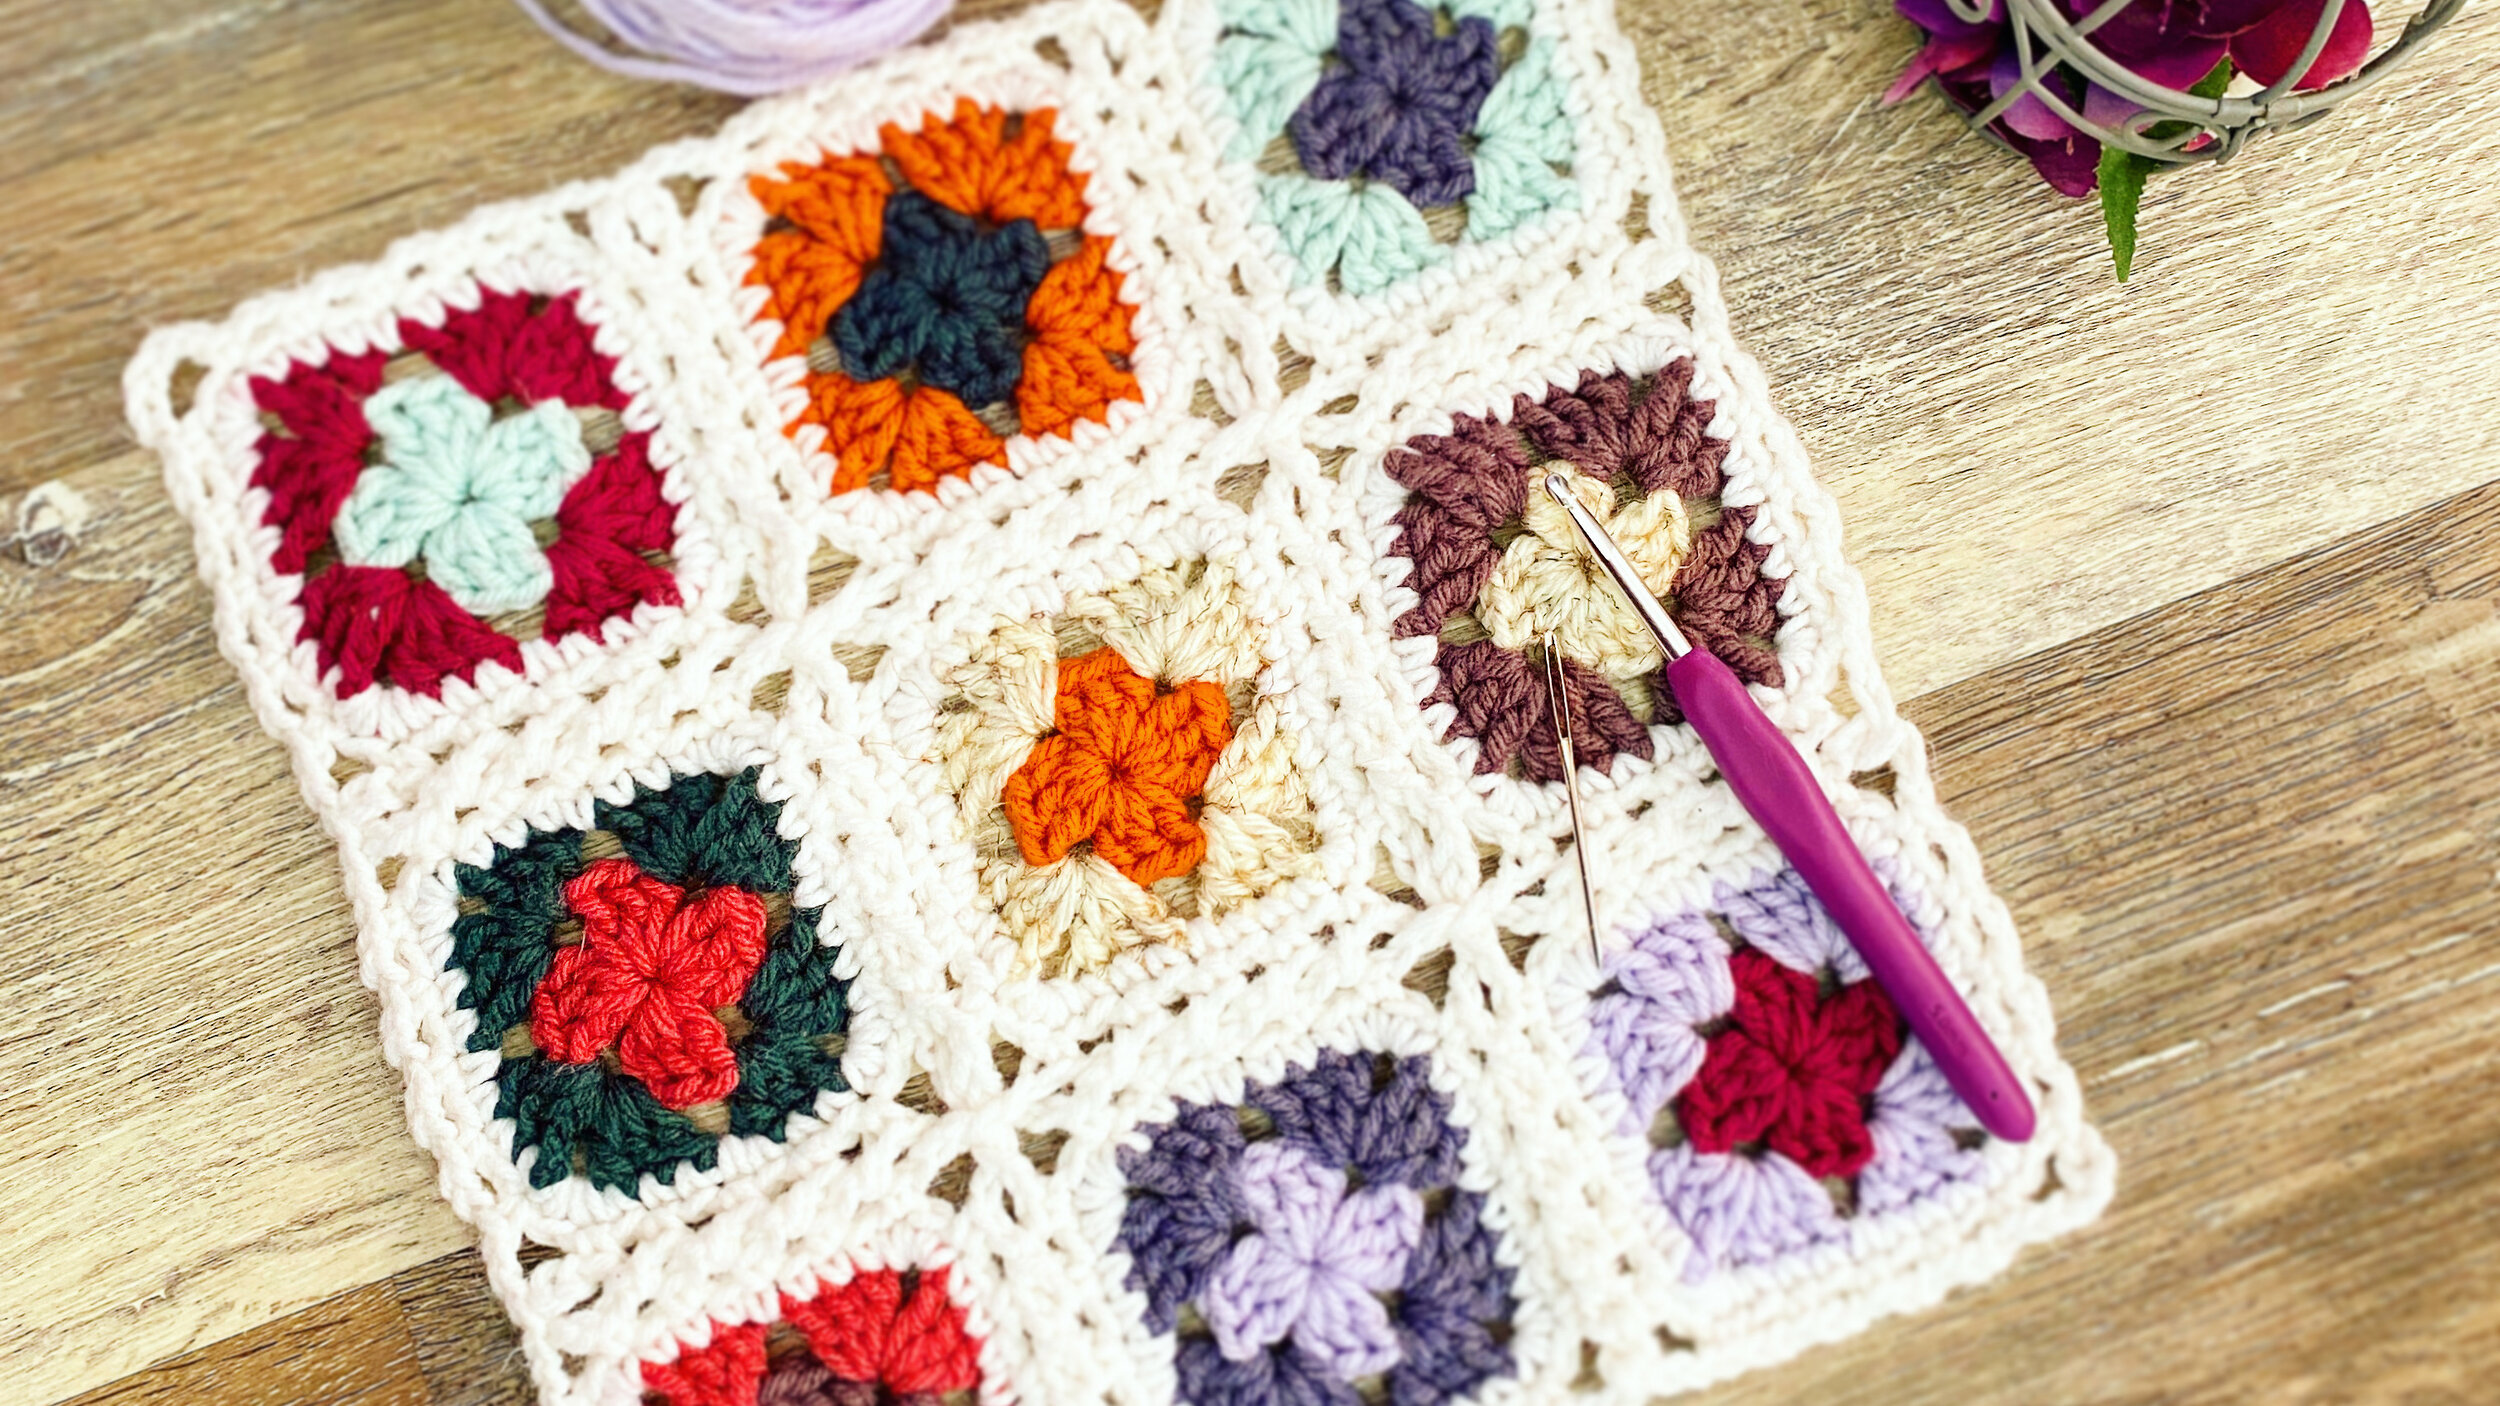
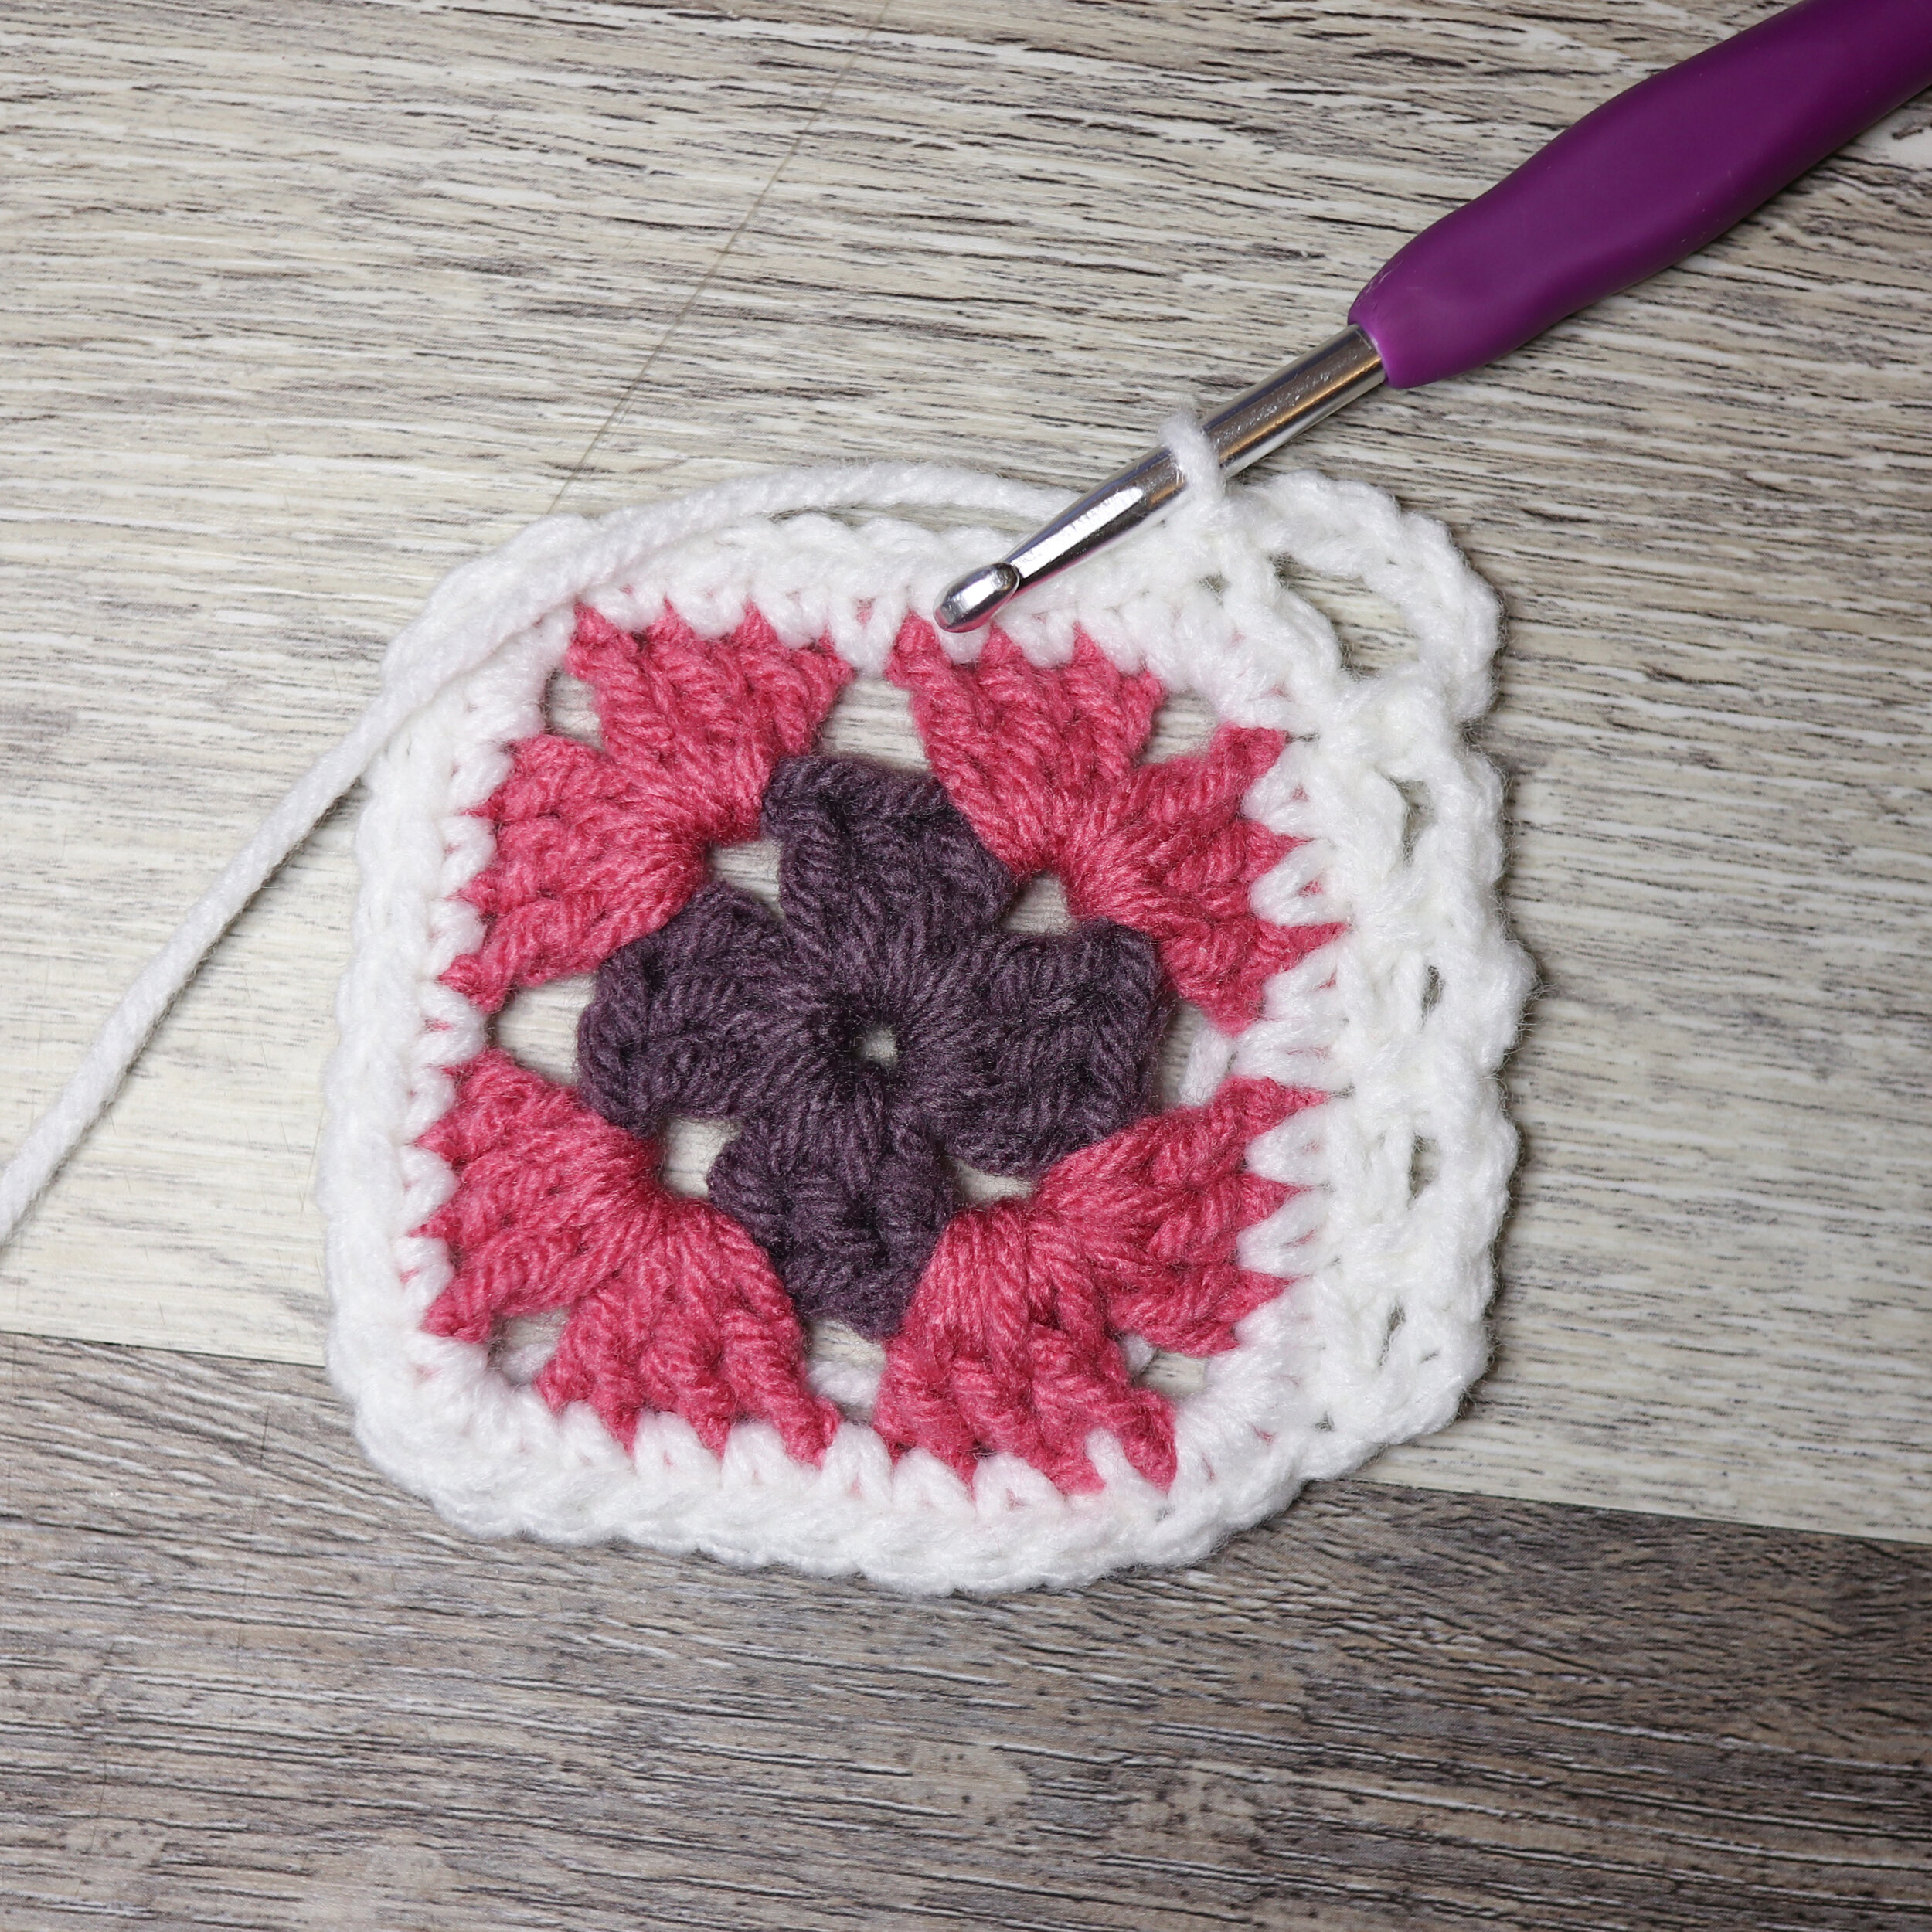
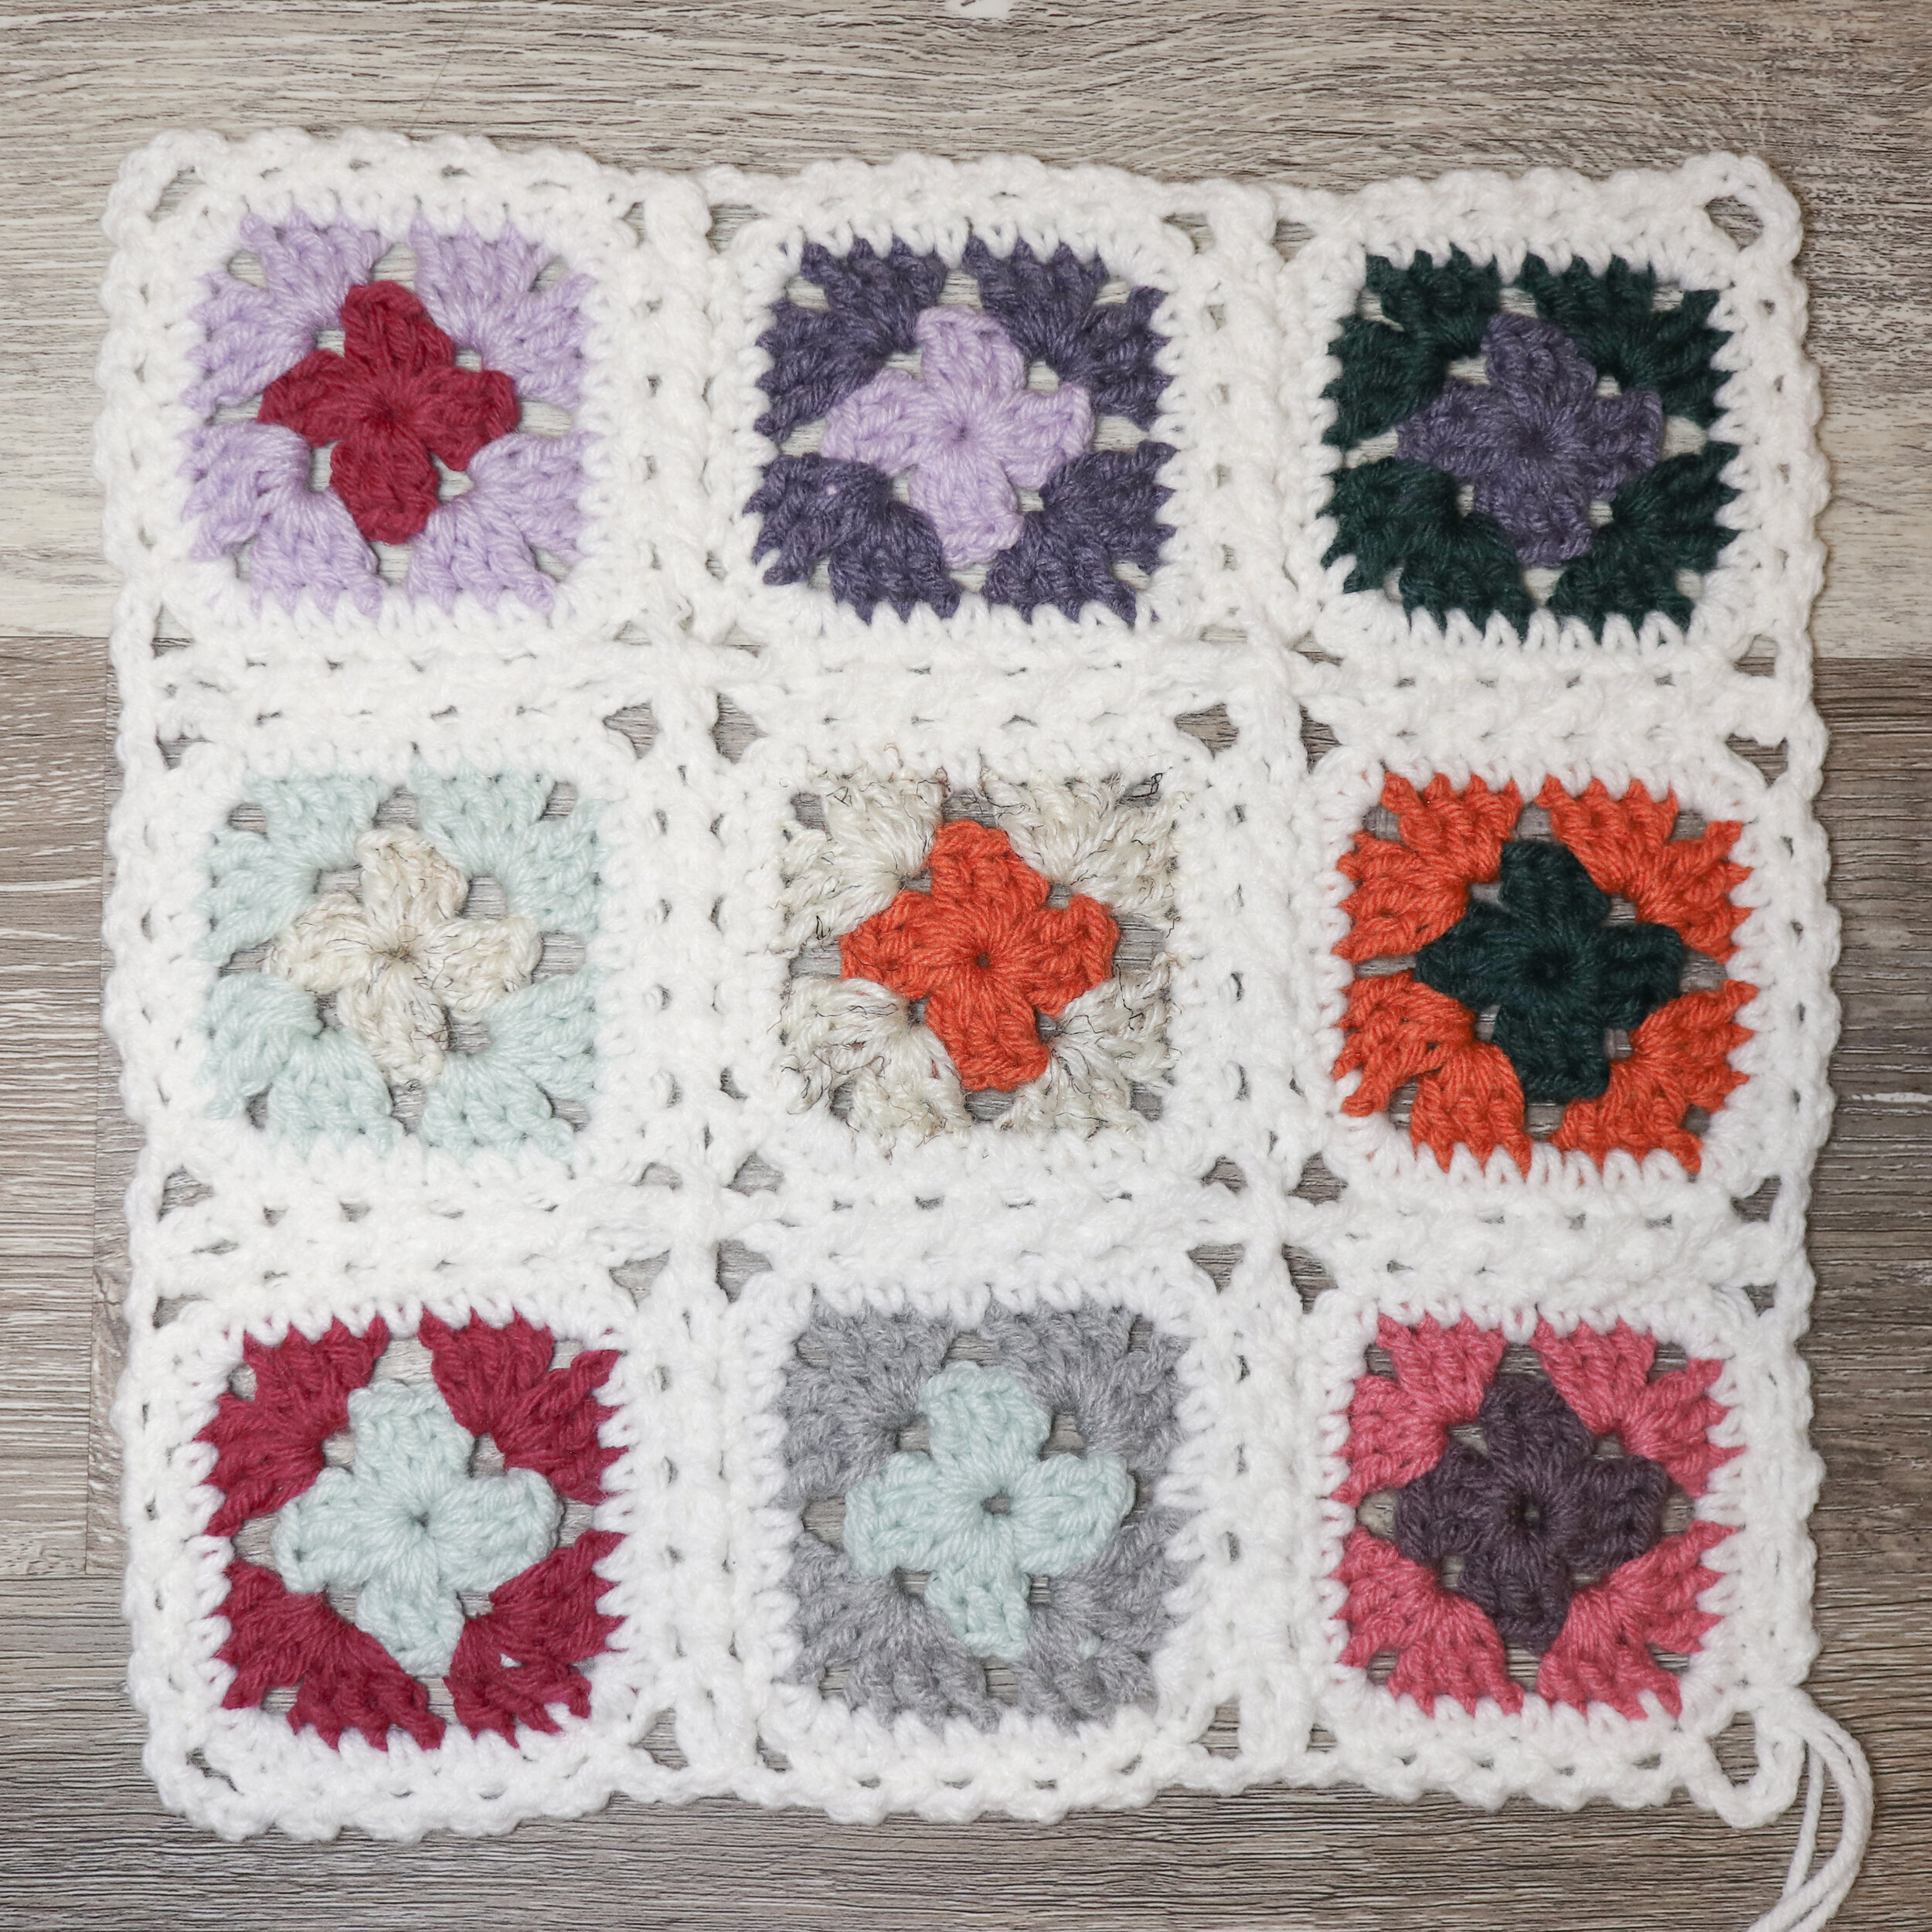
There are so many different ways to seem your crochet projects together! They range from the very simple sc join, to much more complicated lacy designs. The Continuous Flat Braid Join is one of those more complicated joins that really make your granny squares POP! And, you can use it to make joins in other places too! I have used it to seam together side and shoulder seams like in my crochet Ravenous Poncho and my knit Walkiria Kimono. It just creates such a gorgeous lace seam that really works with a lot of different projects!
It might be a little confusing and daunting at first, but once you get the basics down, it just flies off your hooks! And, with this step by step tutorial, you should be making this join in no time!
THANK YOU! to all my wonderful checkers!
I LOVE TO SEE WHAT YOU CREATE!
FOLLOW ME ON SOCIAL MEDIA
Facebook: Ravin Sekai Designs
Ravelry: RavinSekai
Instagram: @ravinsekaidesigns
Pinterest: Ravin Sekai Designs
Patreon: Ravin Sekai Designs
ABBREVIATIONS:
Abbreviations in US terms
Ch: chain
St: stitch
Sl st: slip stitch
Sc: single crochet
Rep: repeat
Sk: skip
Cont: continue
FO: fasten off
THE PATTERN:
The picture tutorial for this join is also available in my Adding Up Memories Temperature Blanket pattern pdf. Please consider supporting me by purchasing the 100% ad-free PDF with full picture tutorial for this pattern on my Ravelry or ETSY pages. Or consider joining my Patreon for member perks.
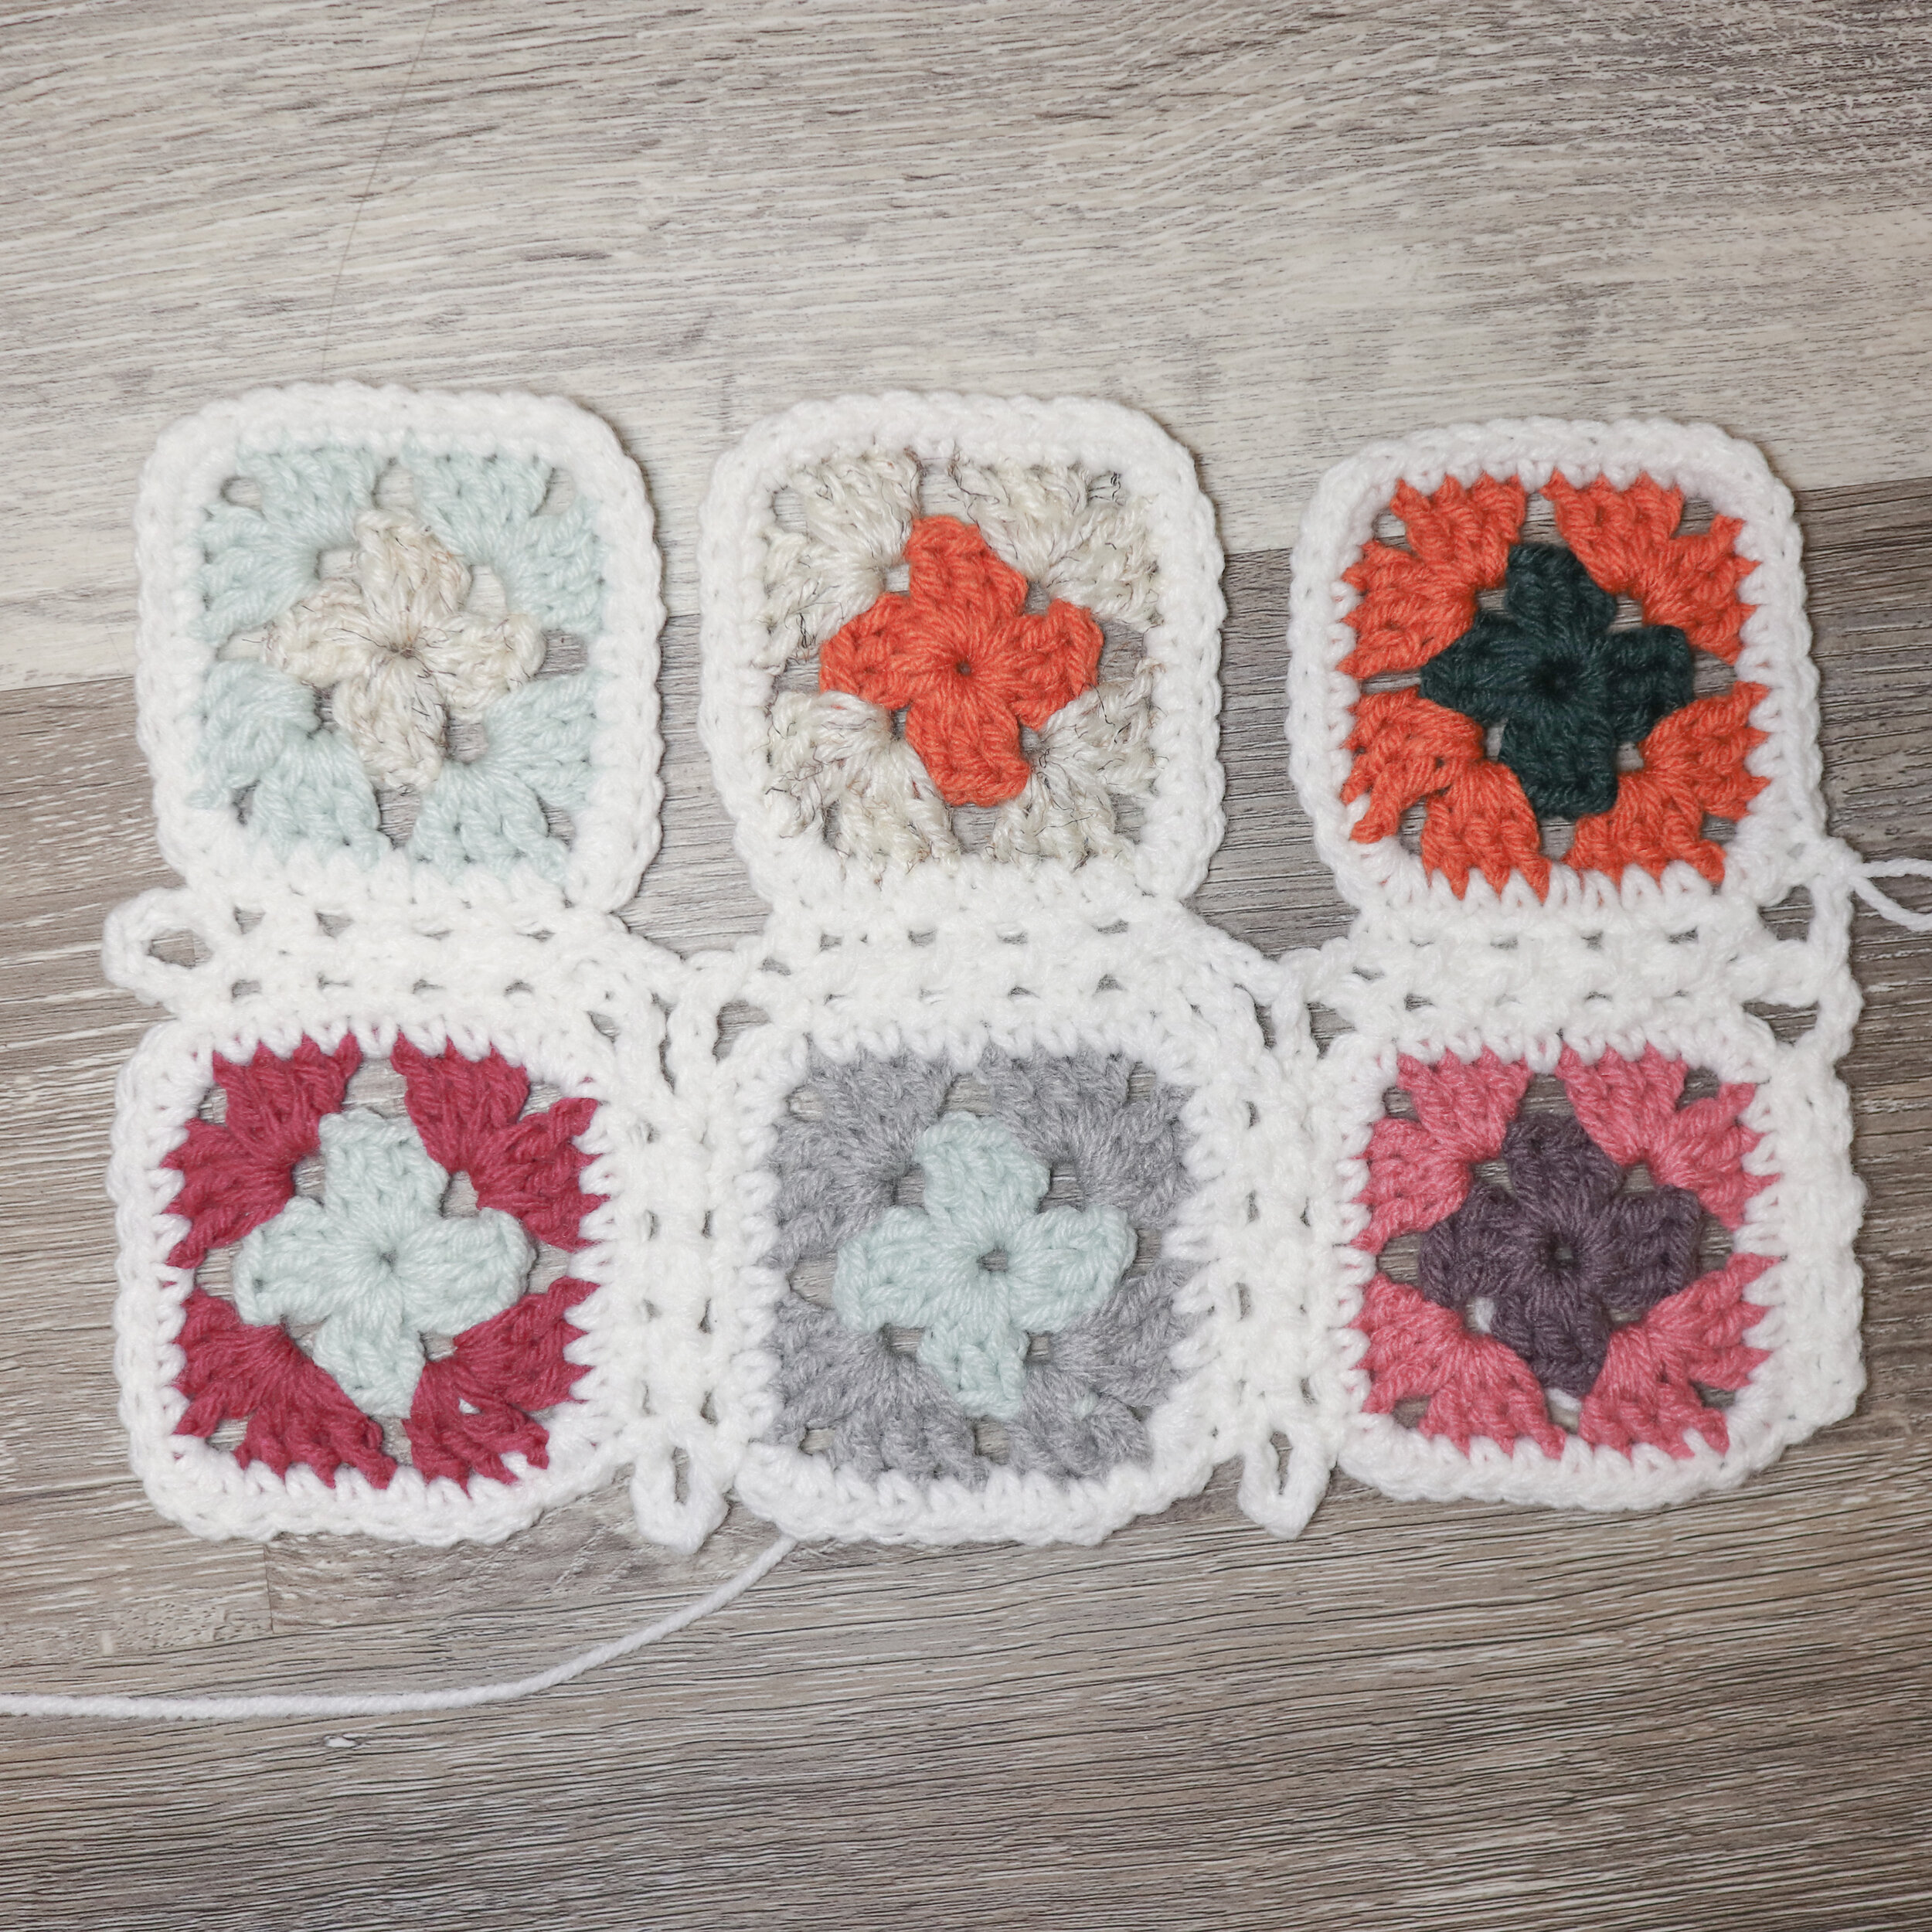
First off, this join as you go seam is a gorgeous way of connecting your squares and gives the blanket a beautiful heirloom quality. The diagram below shows you the direction you will be working as you connect your squares. It might seem a little confusing looking at it at first, but I promise as you start using the picture tutorial on the next page, it will all start making sense!
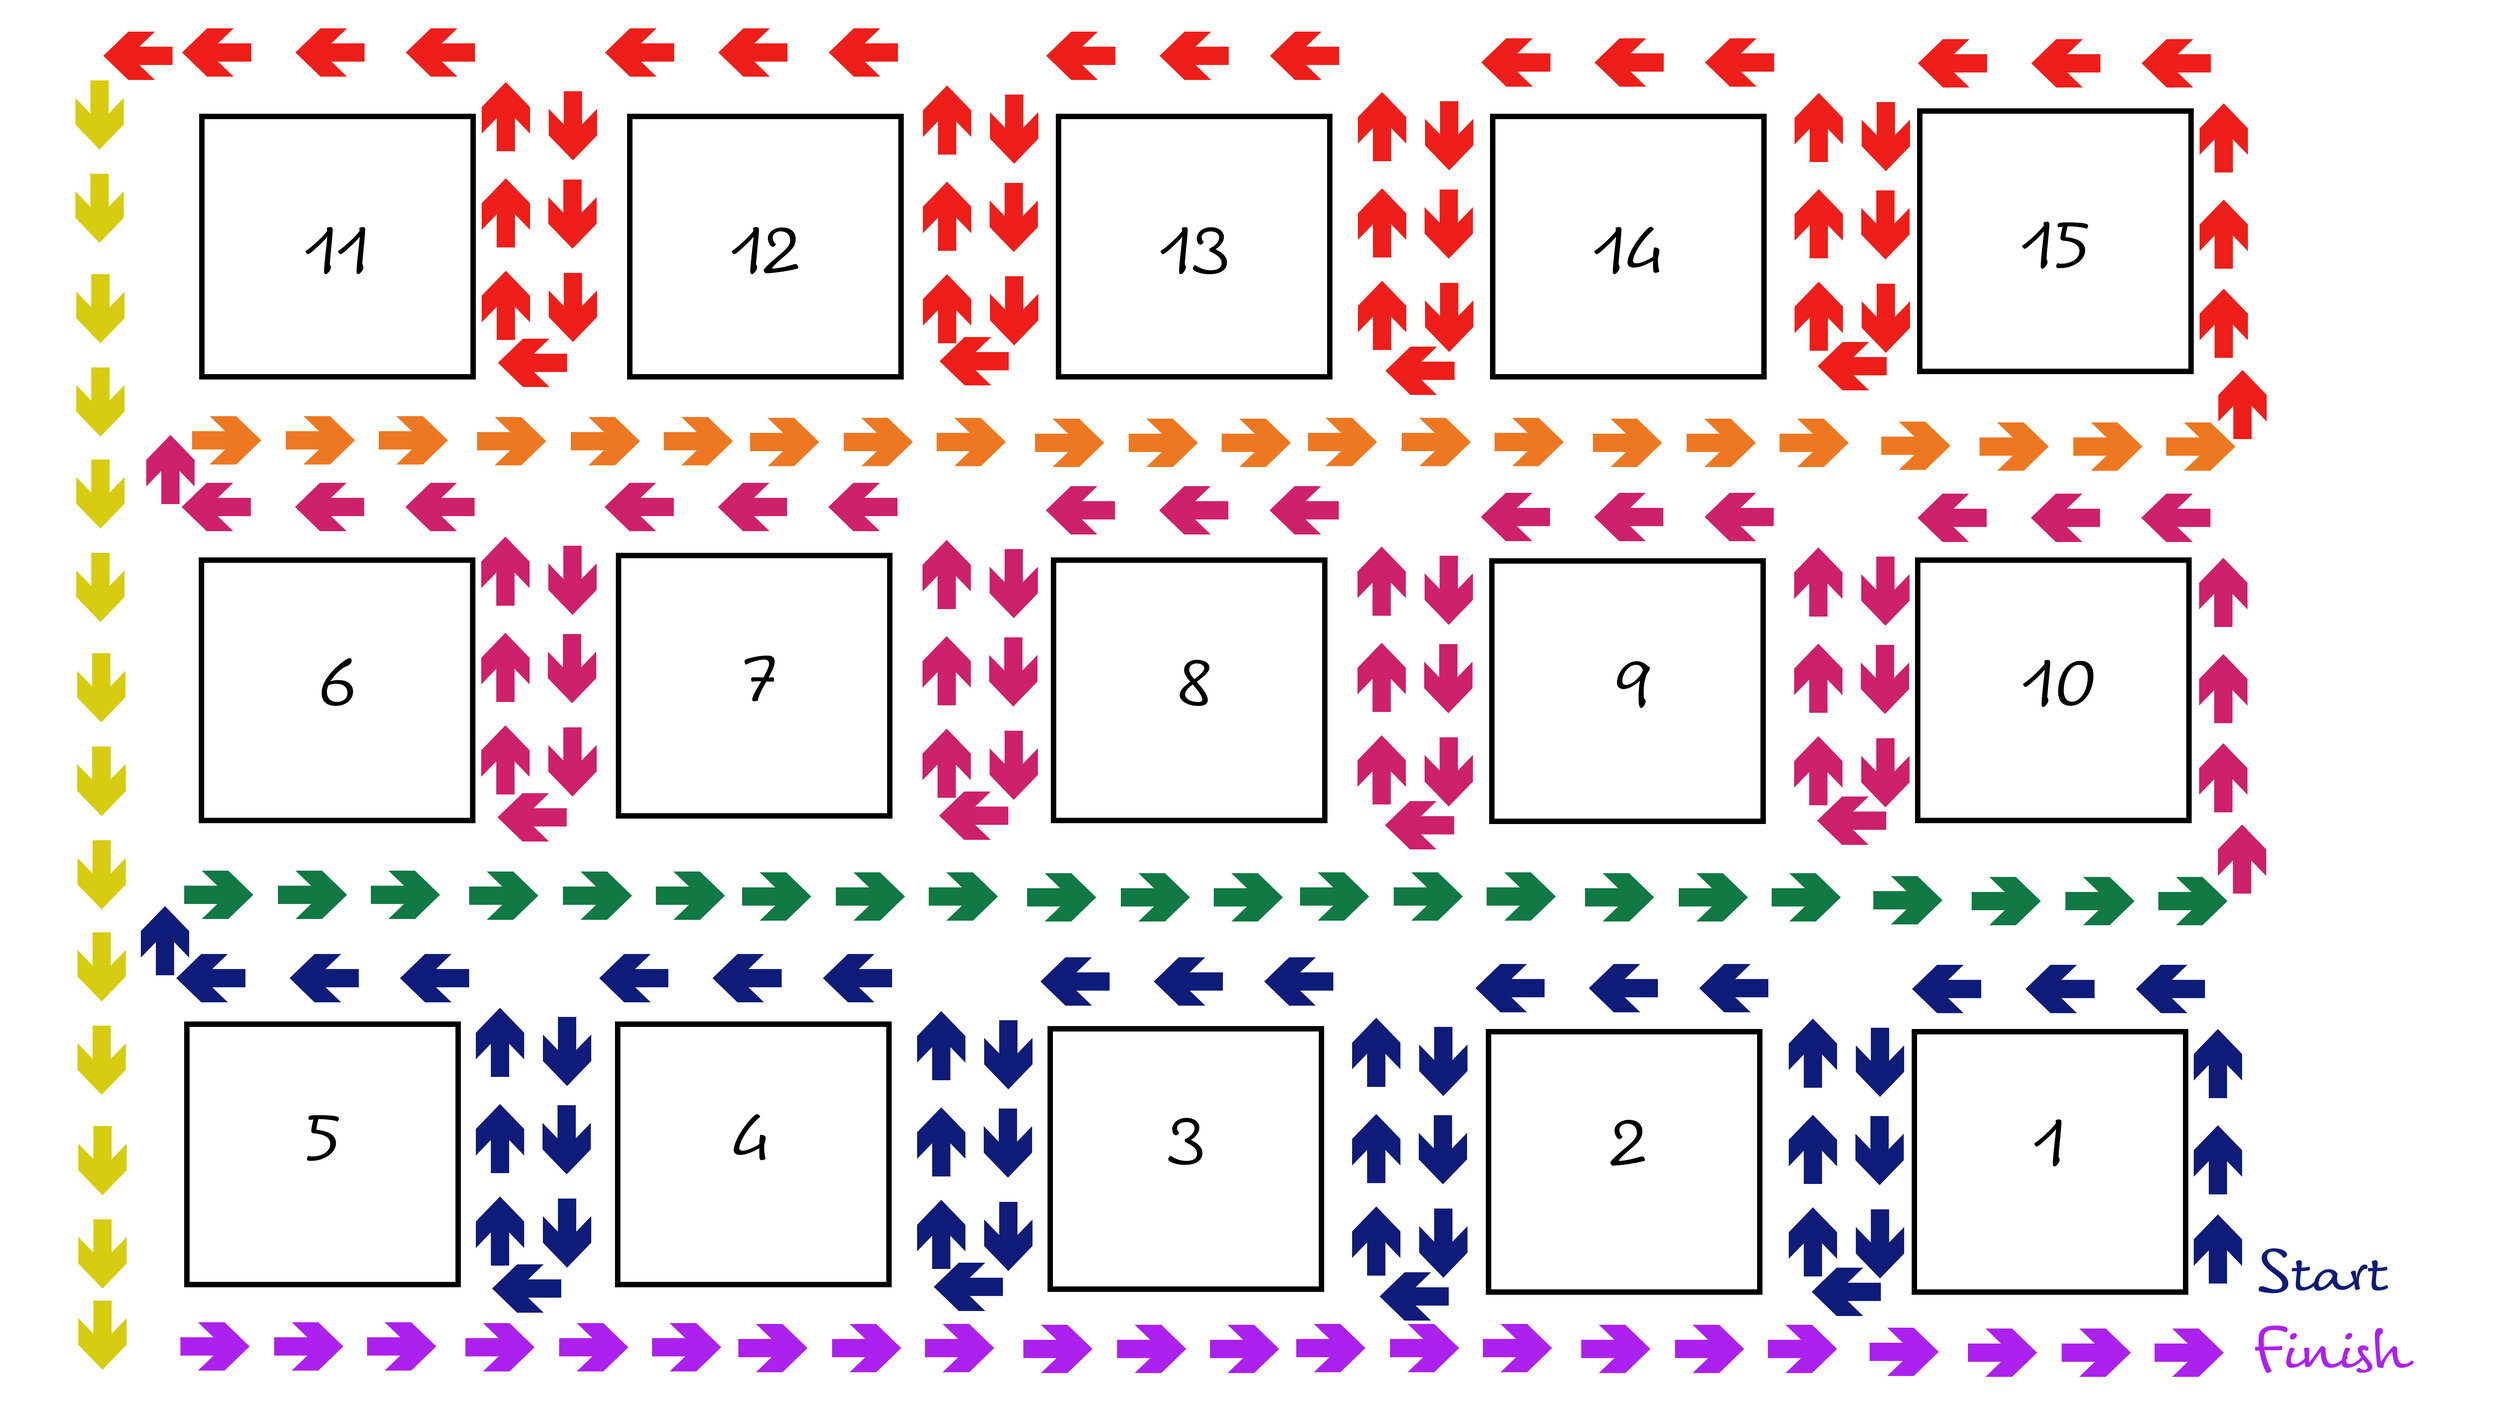
ROW 1
STEP 1:
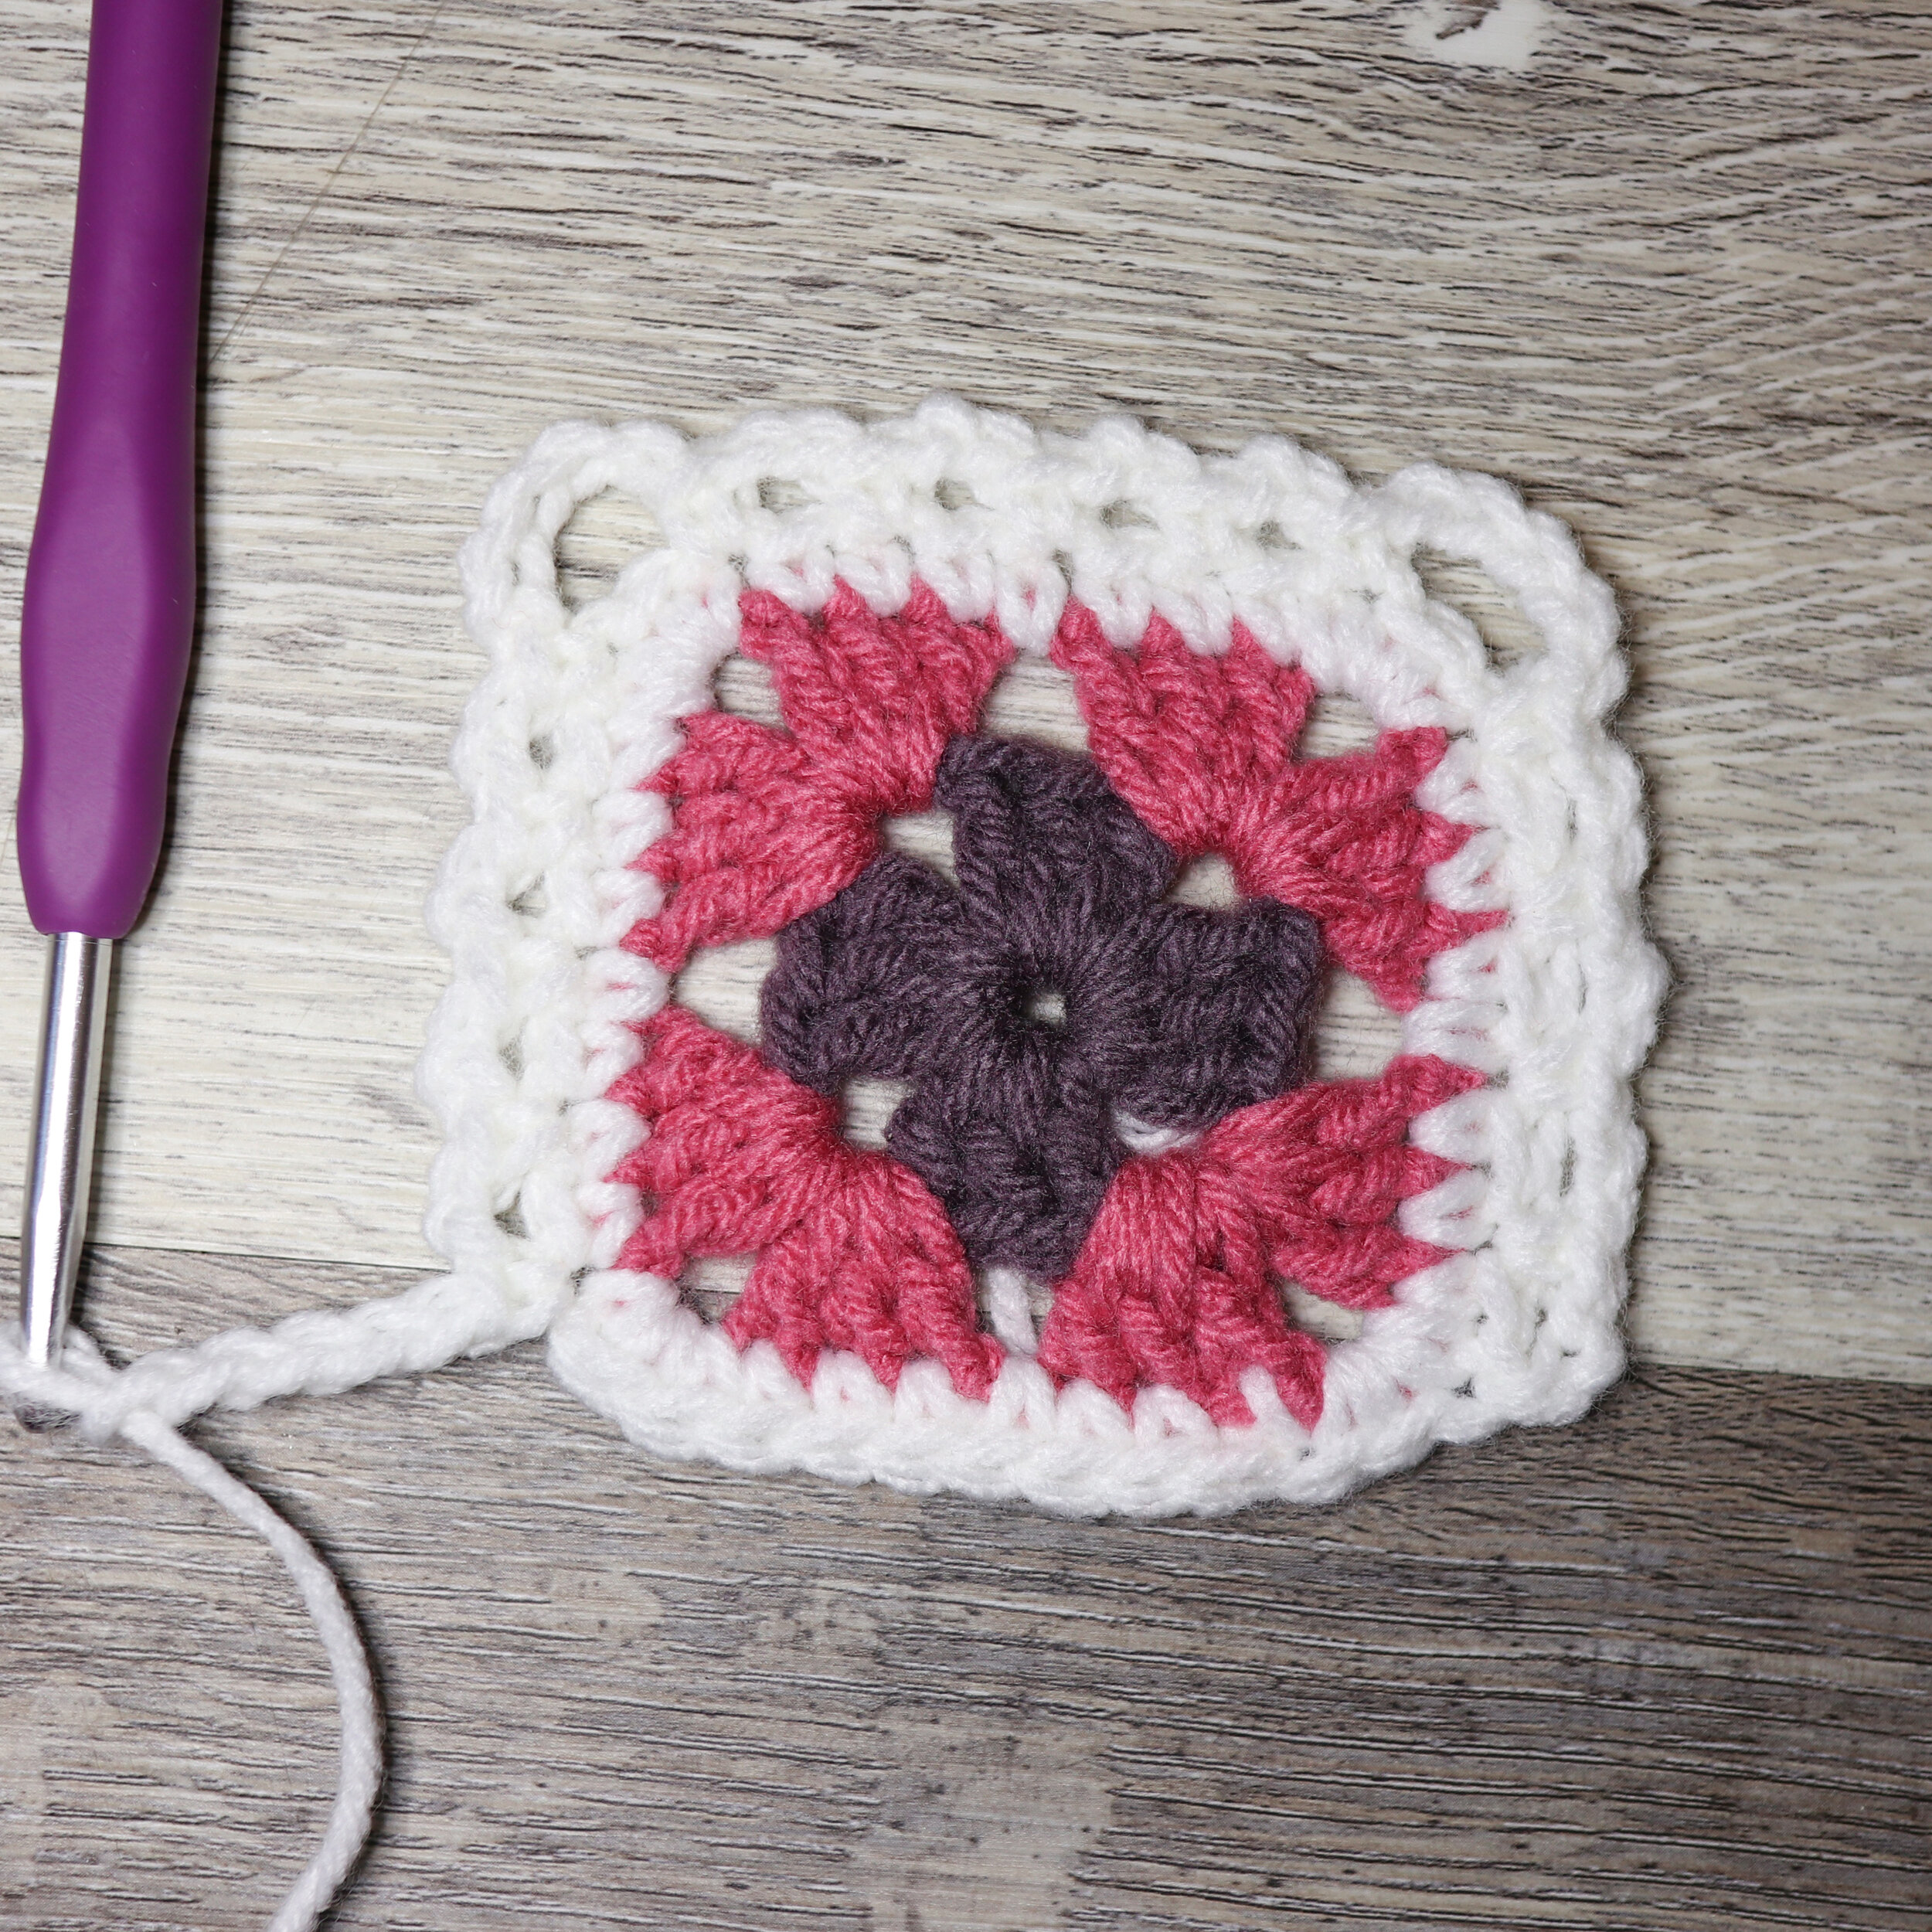
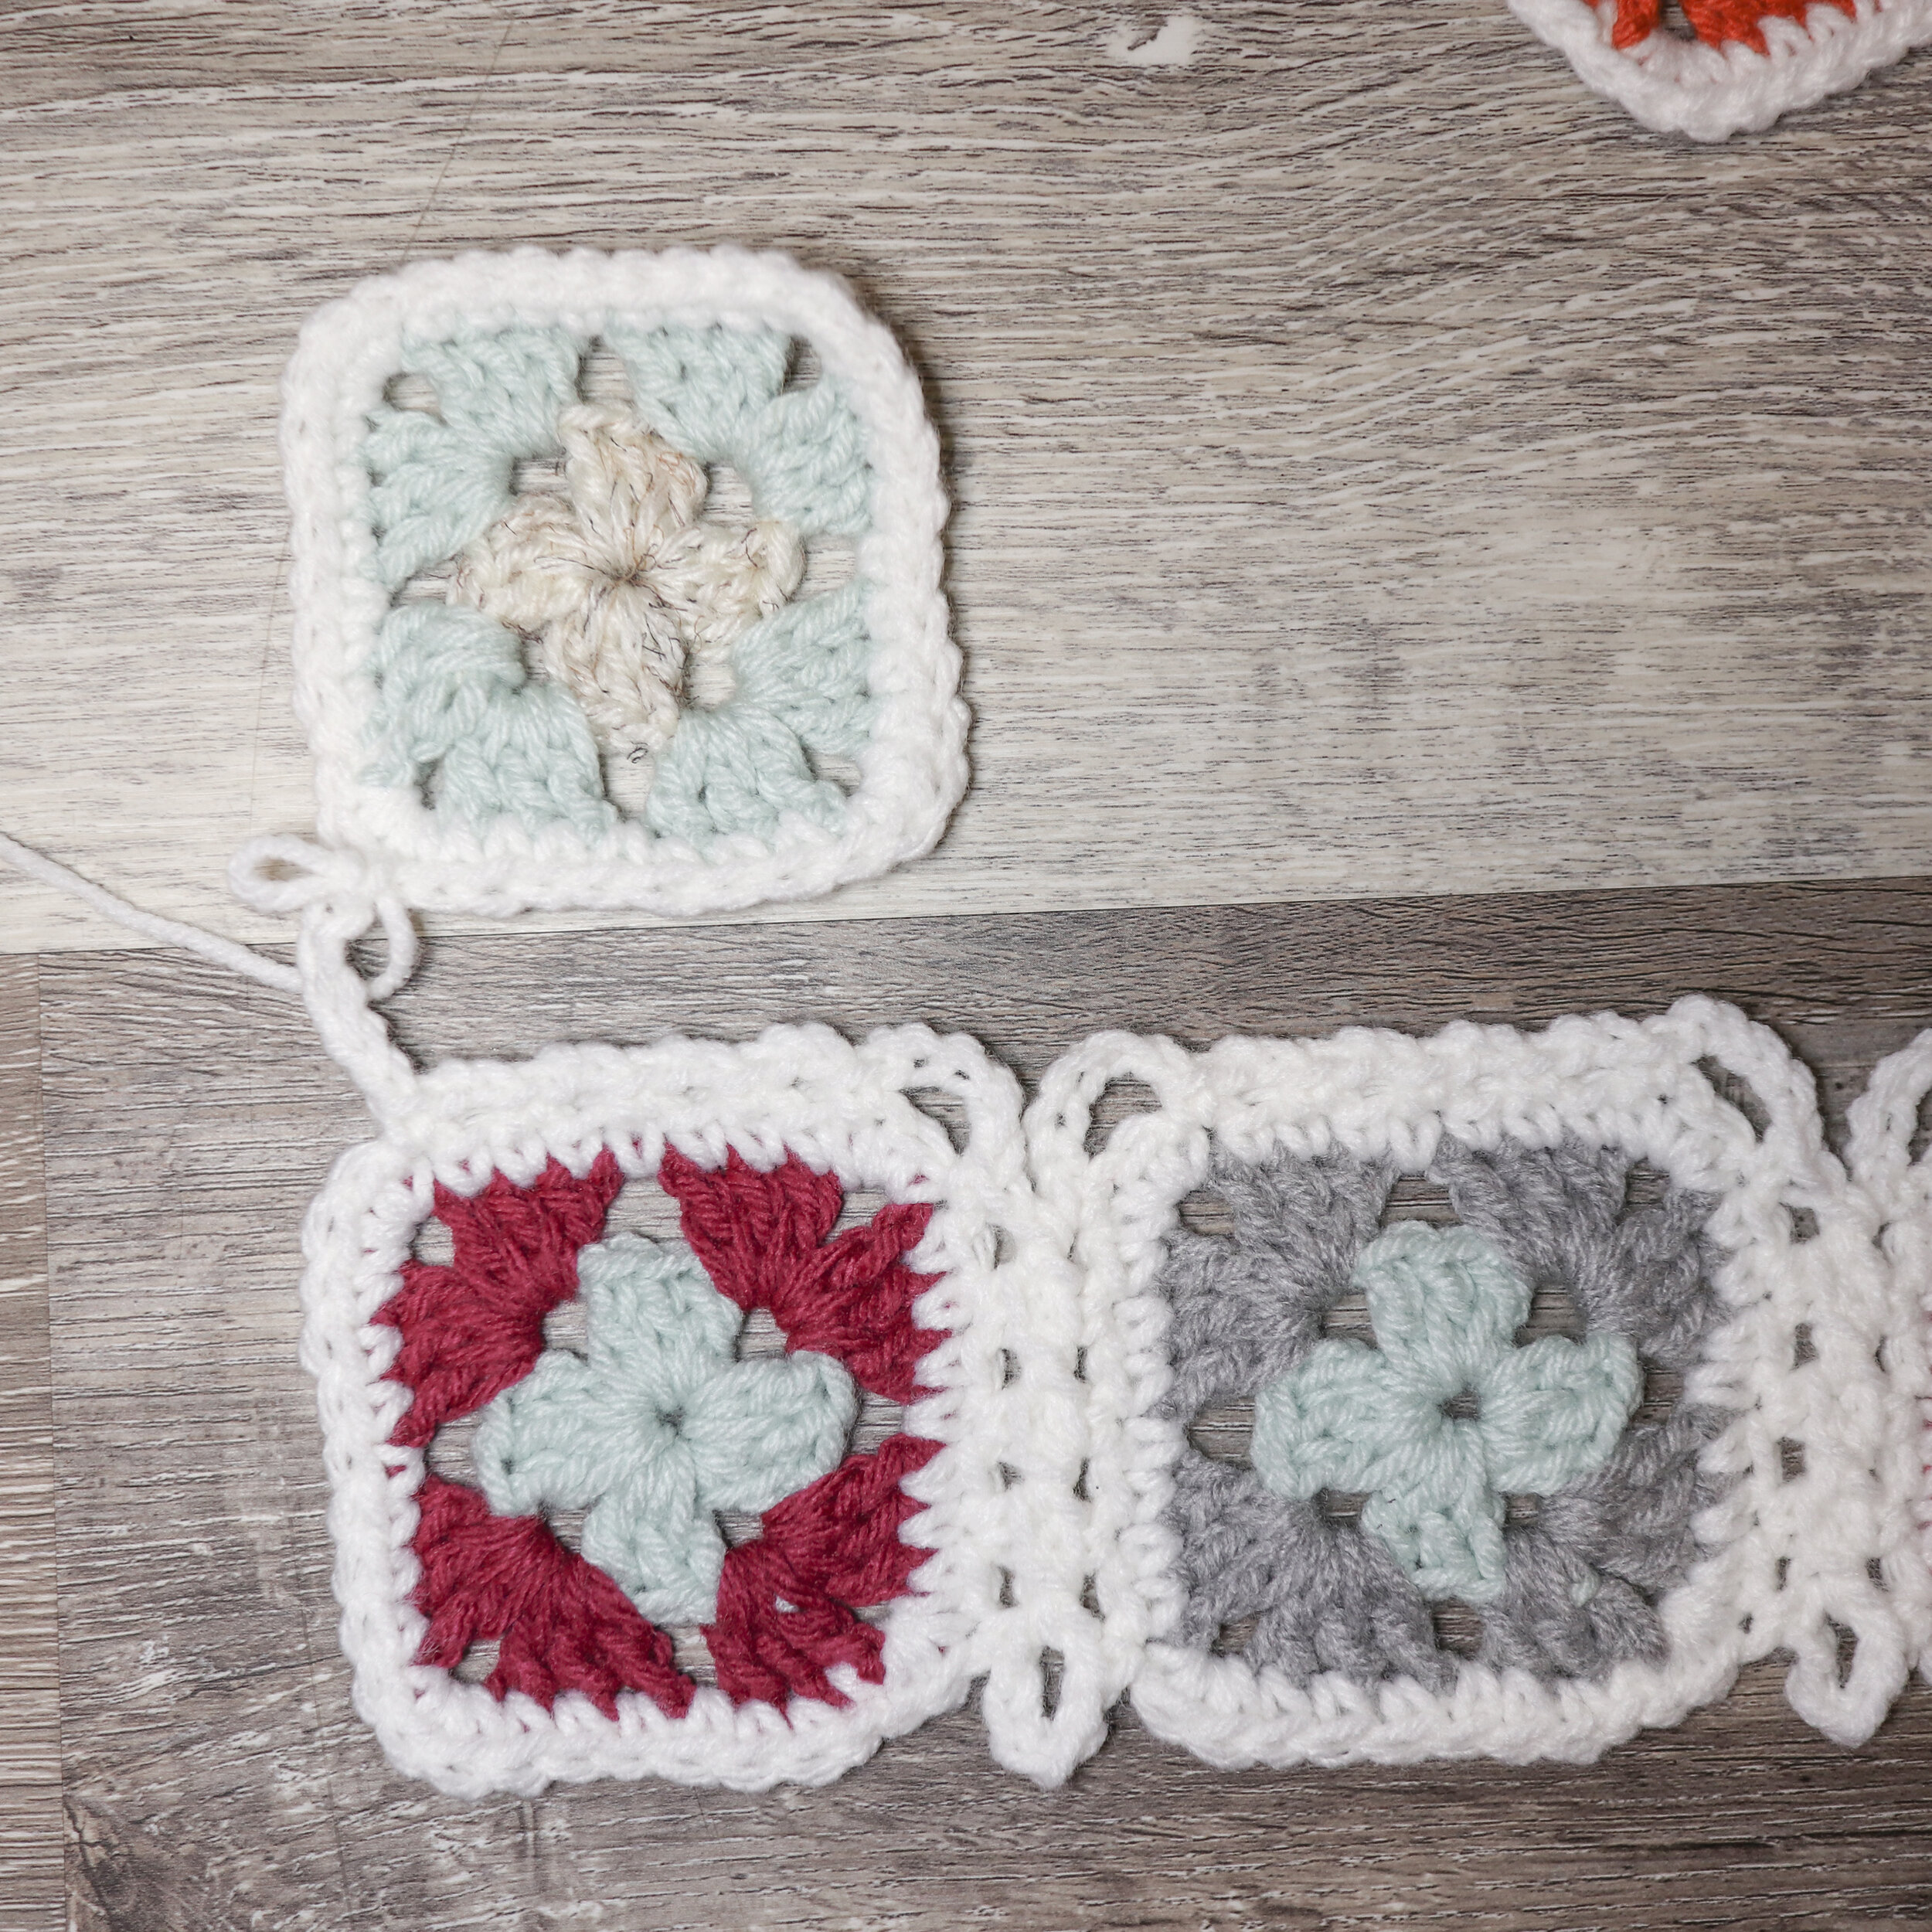
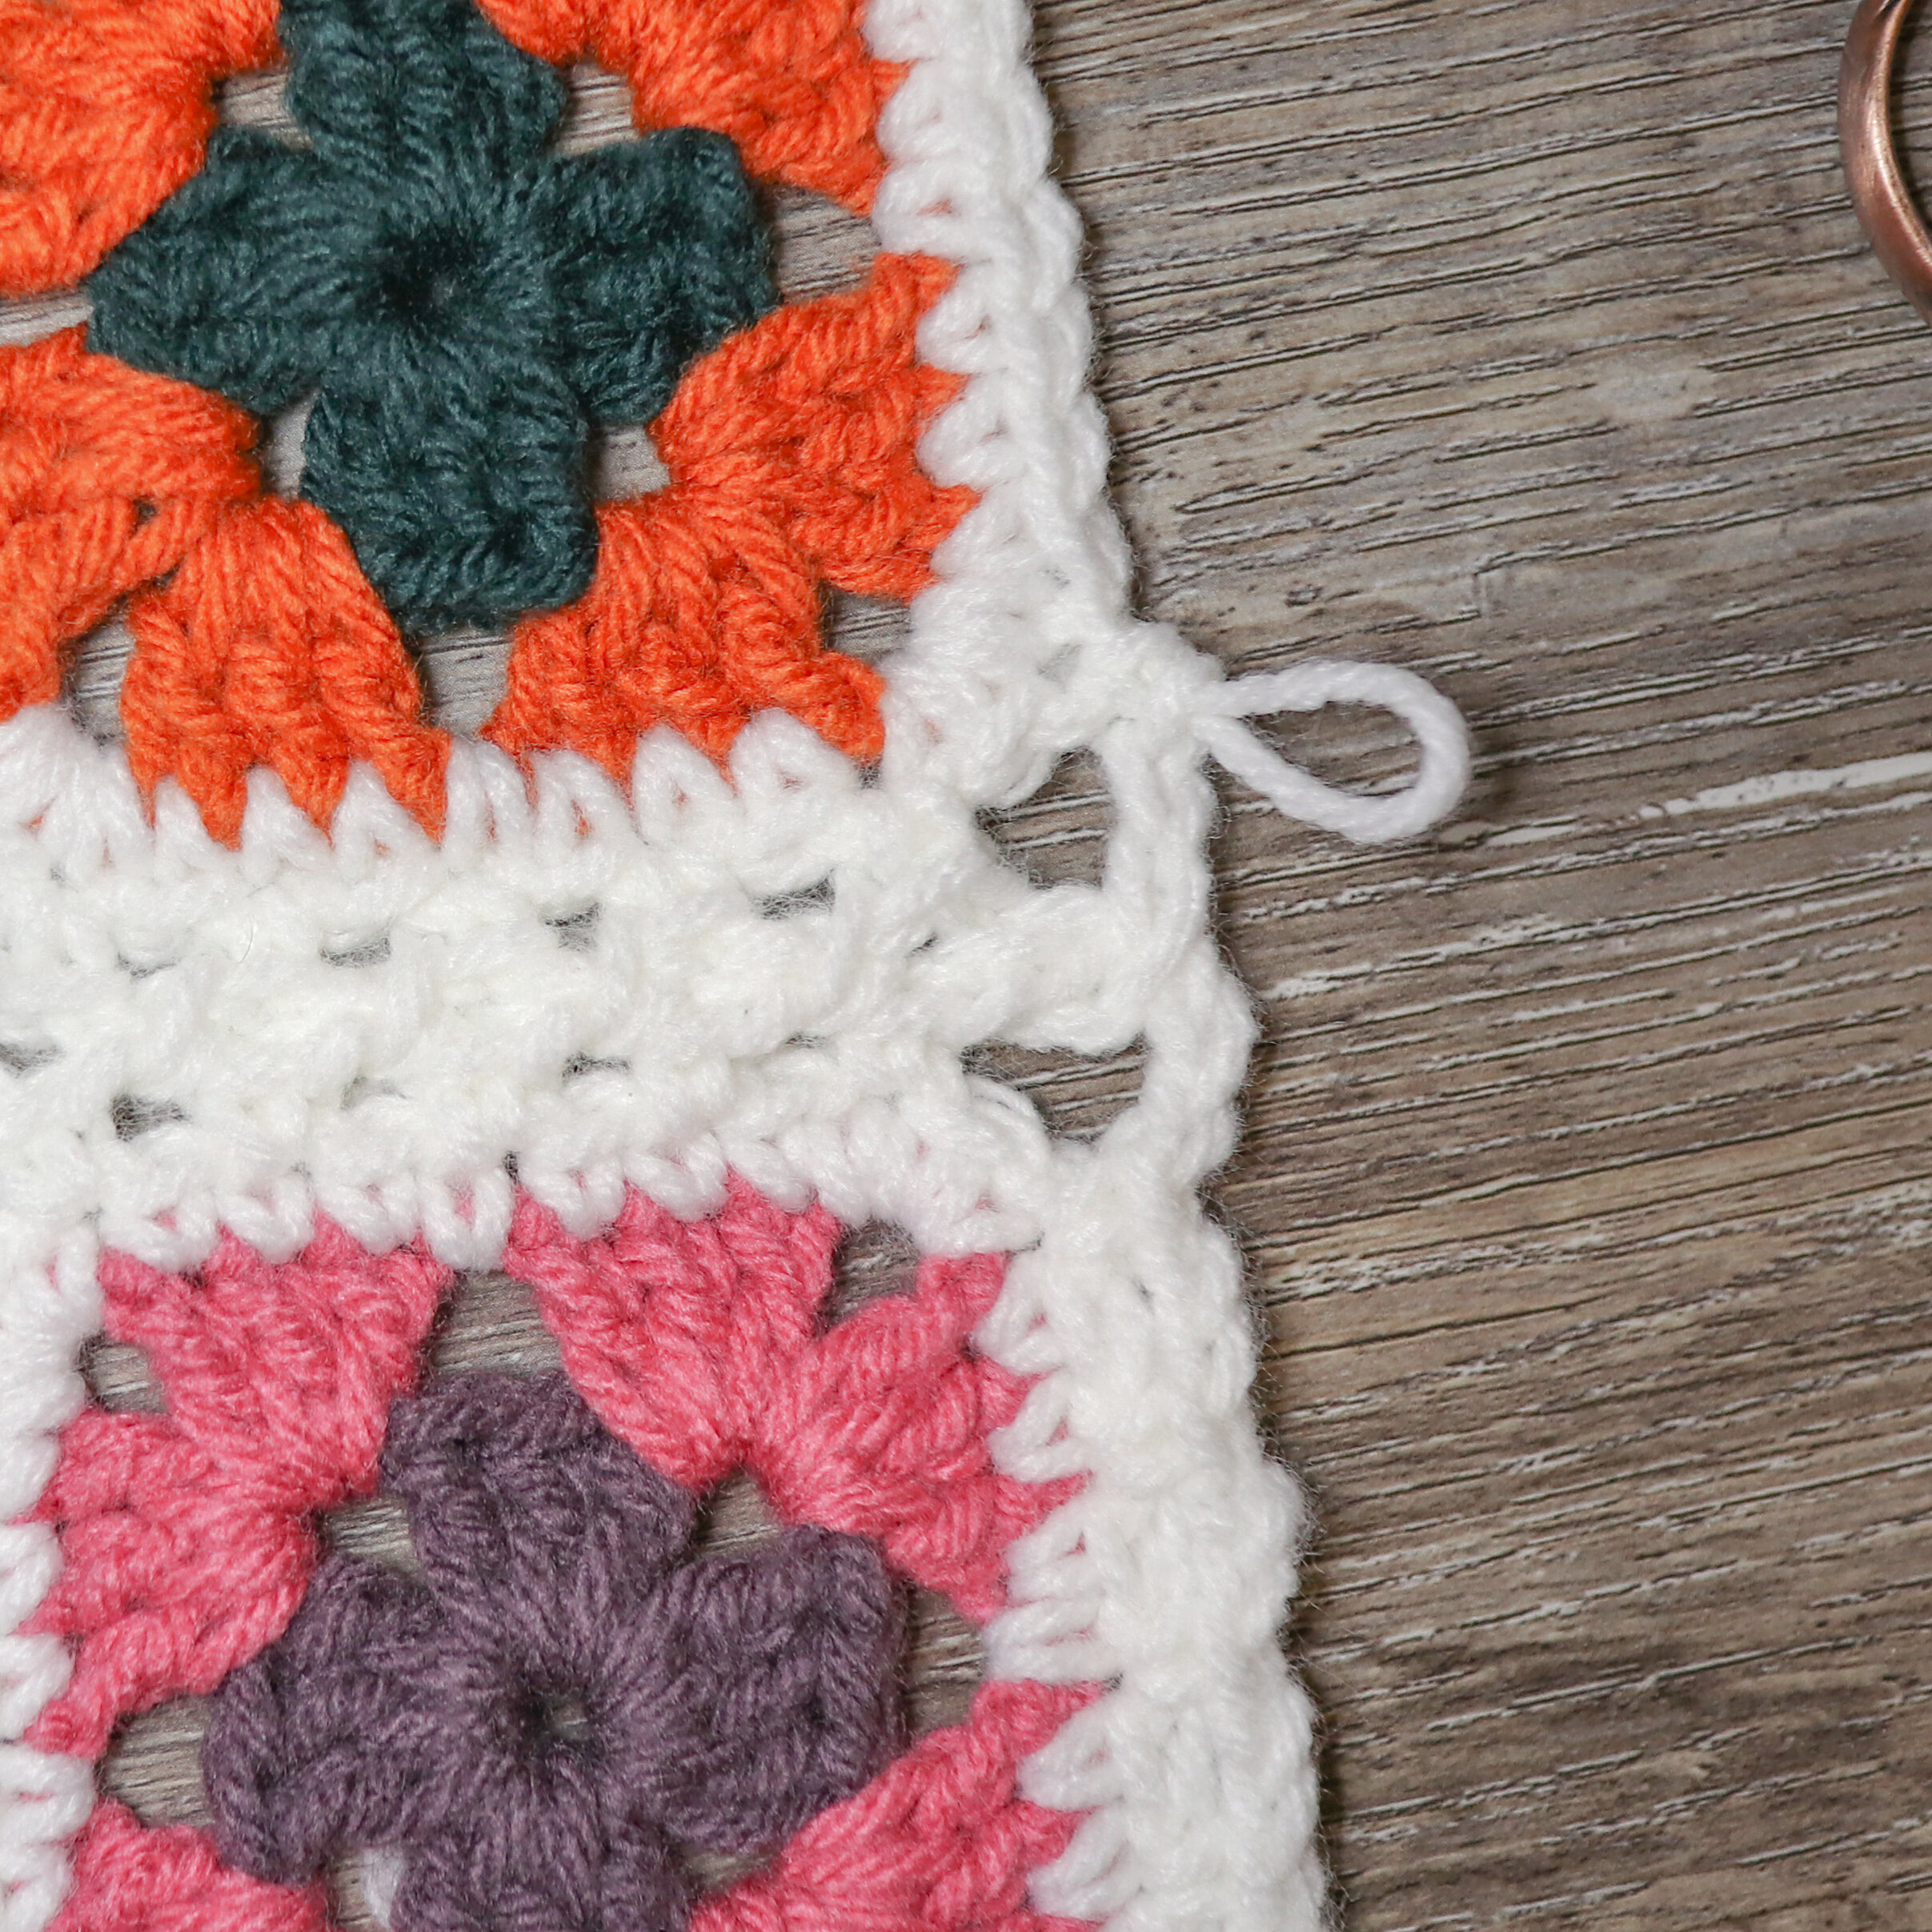
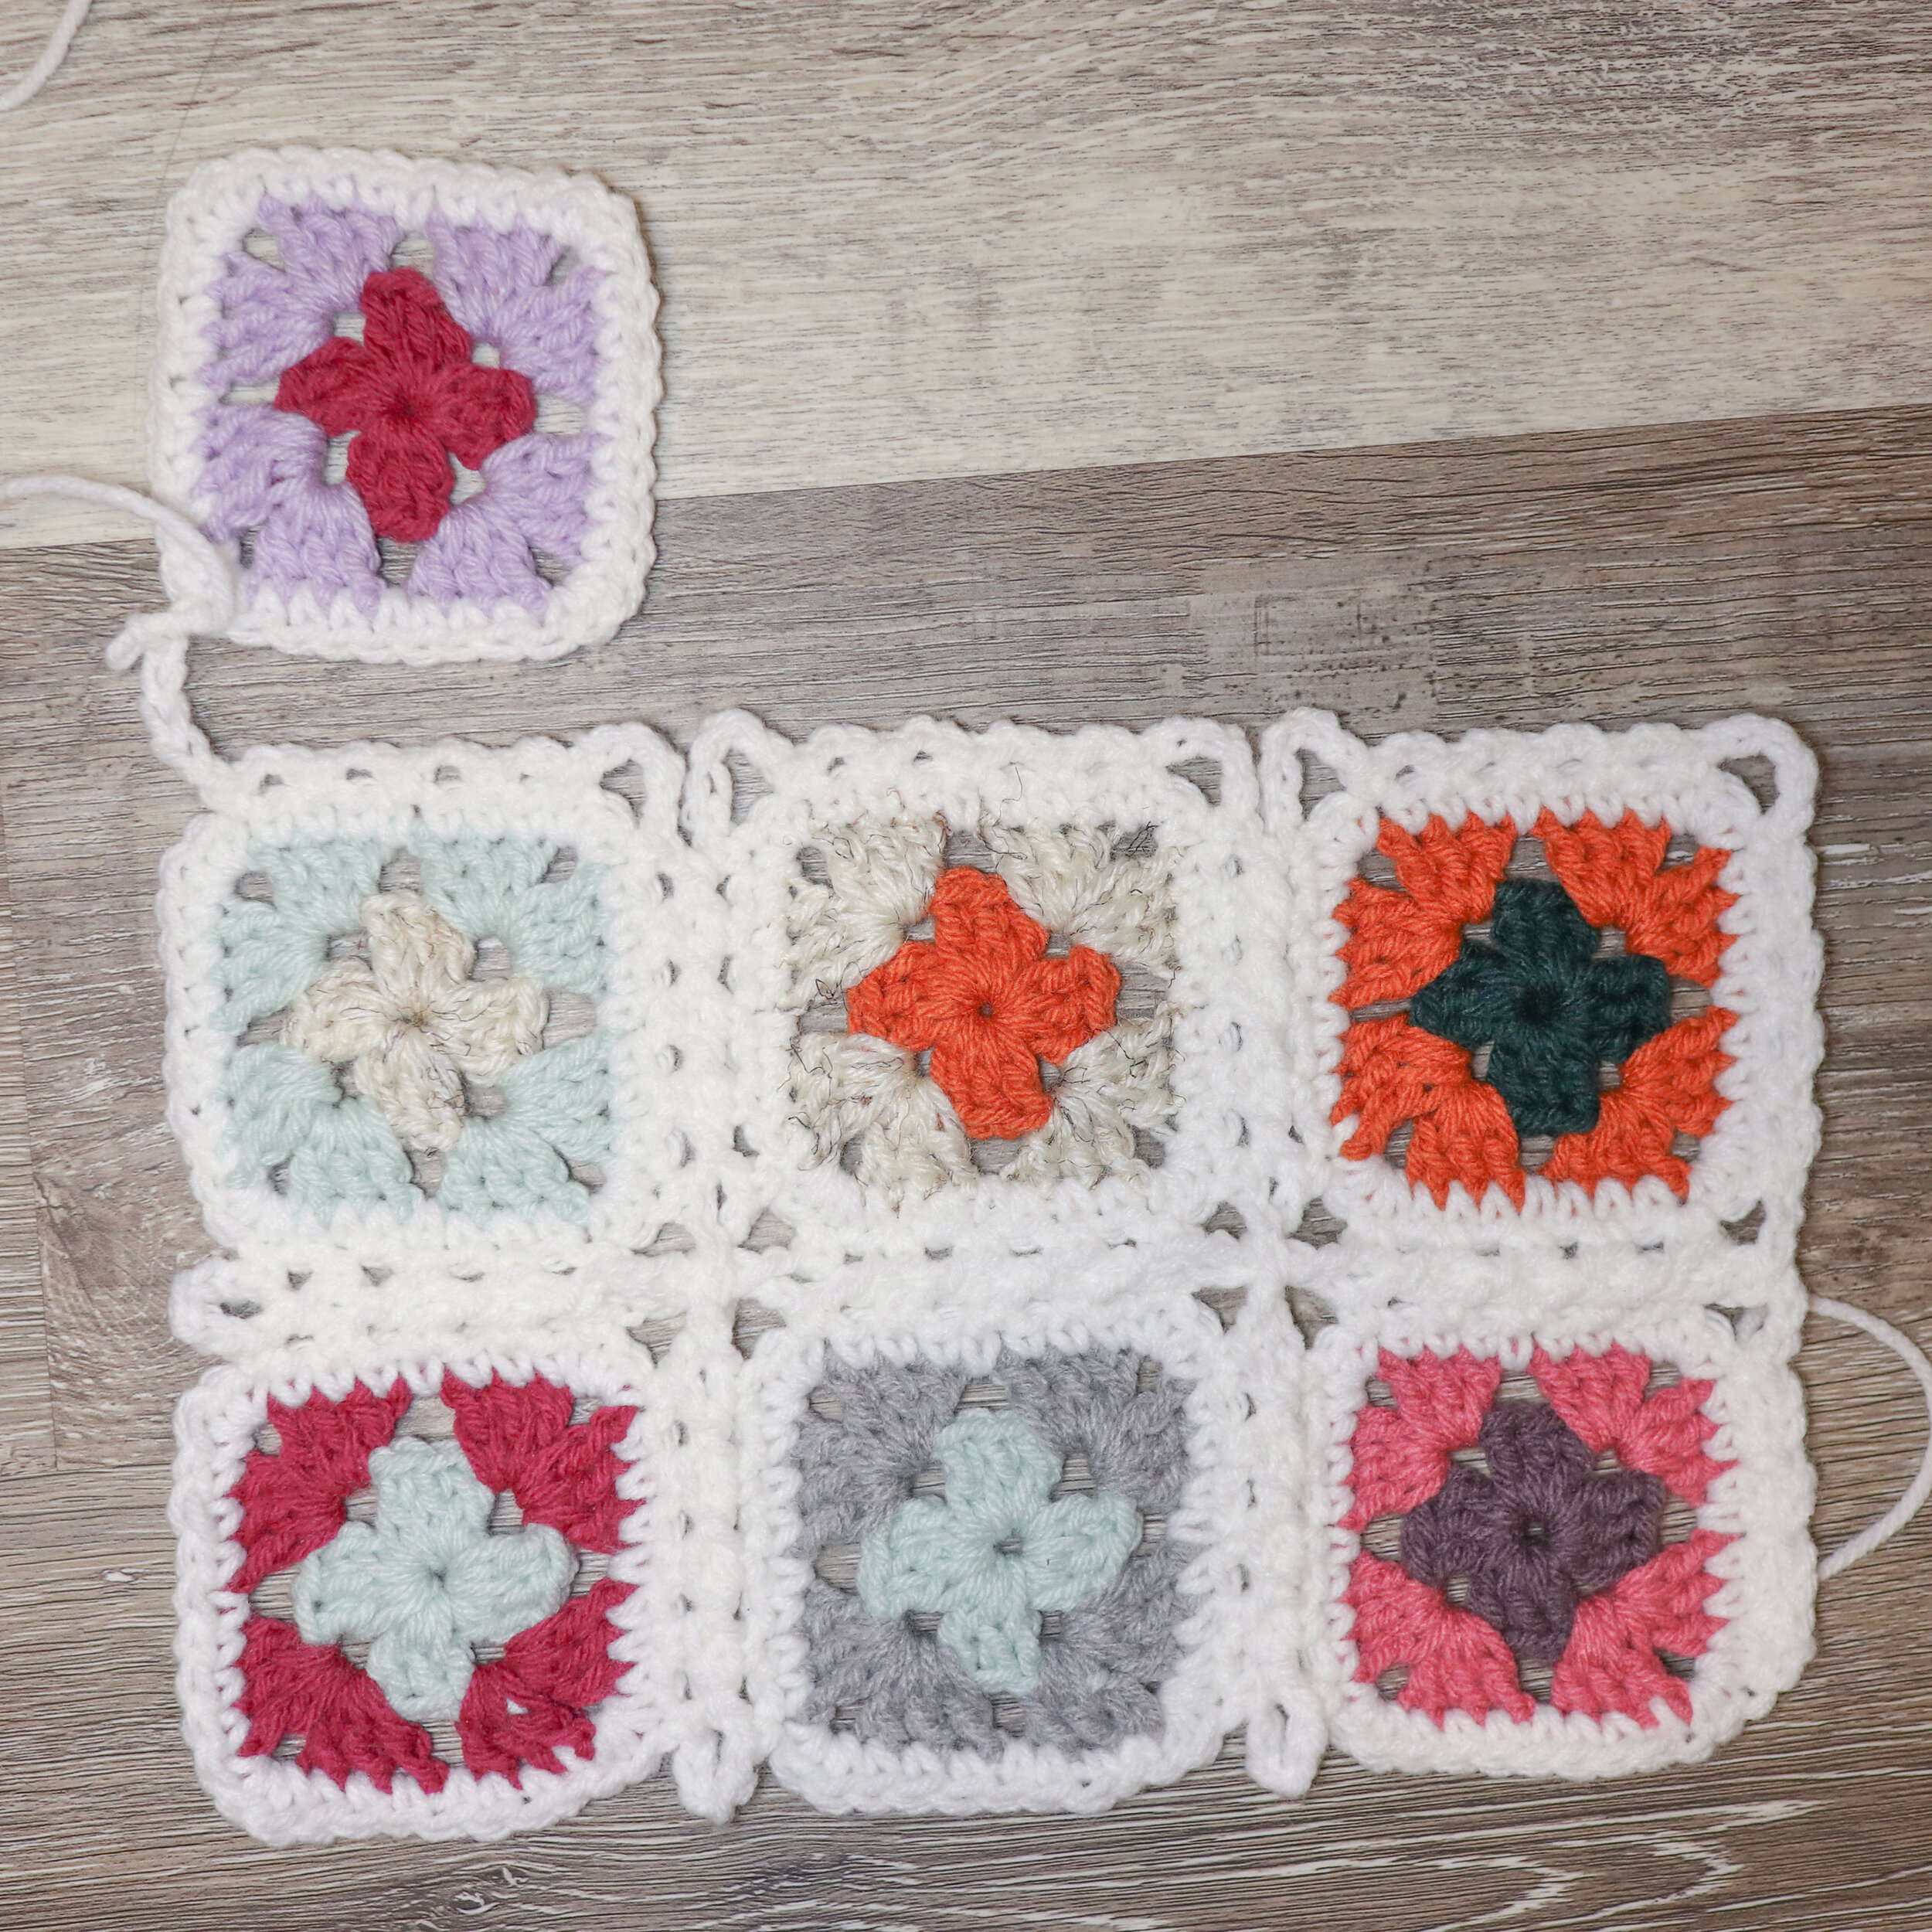
With Square 1 and starting in corner 1, attach the yarn in the 3rd sc that makes up the corner (image 1) with a sc, [*ch2, sk1, sc* x4 up the side, ch5, sk center sc of corner 2, sc] (image 2) rep [ ] to corner 4 but do not perform the last sc. (You should have finished 3 sides as per image 3 below).

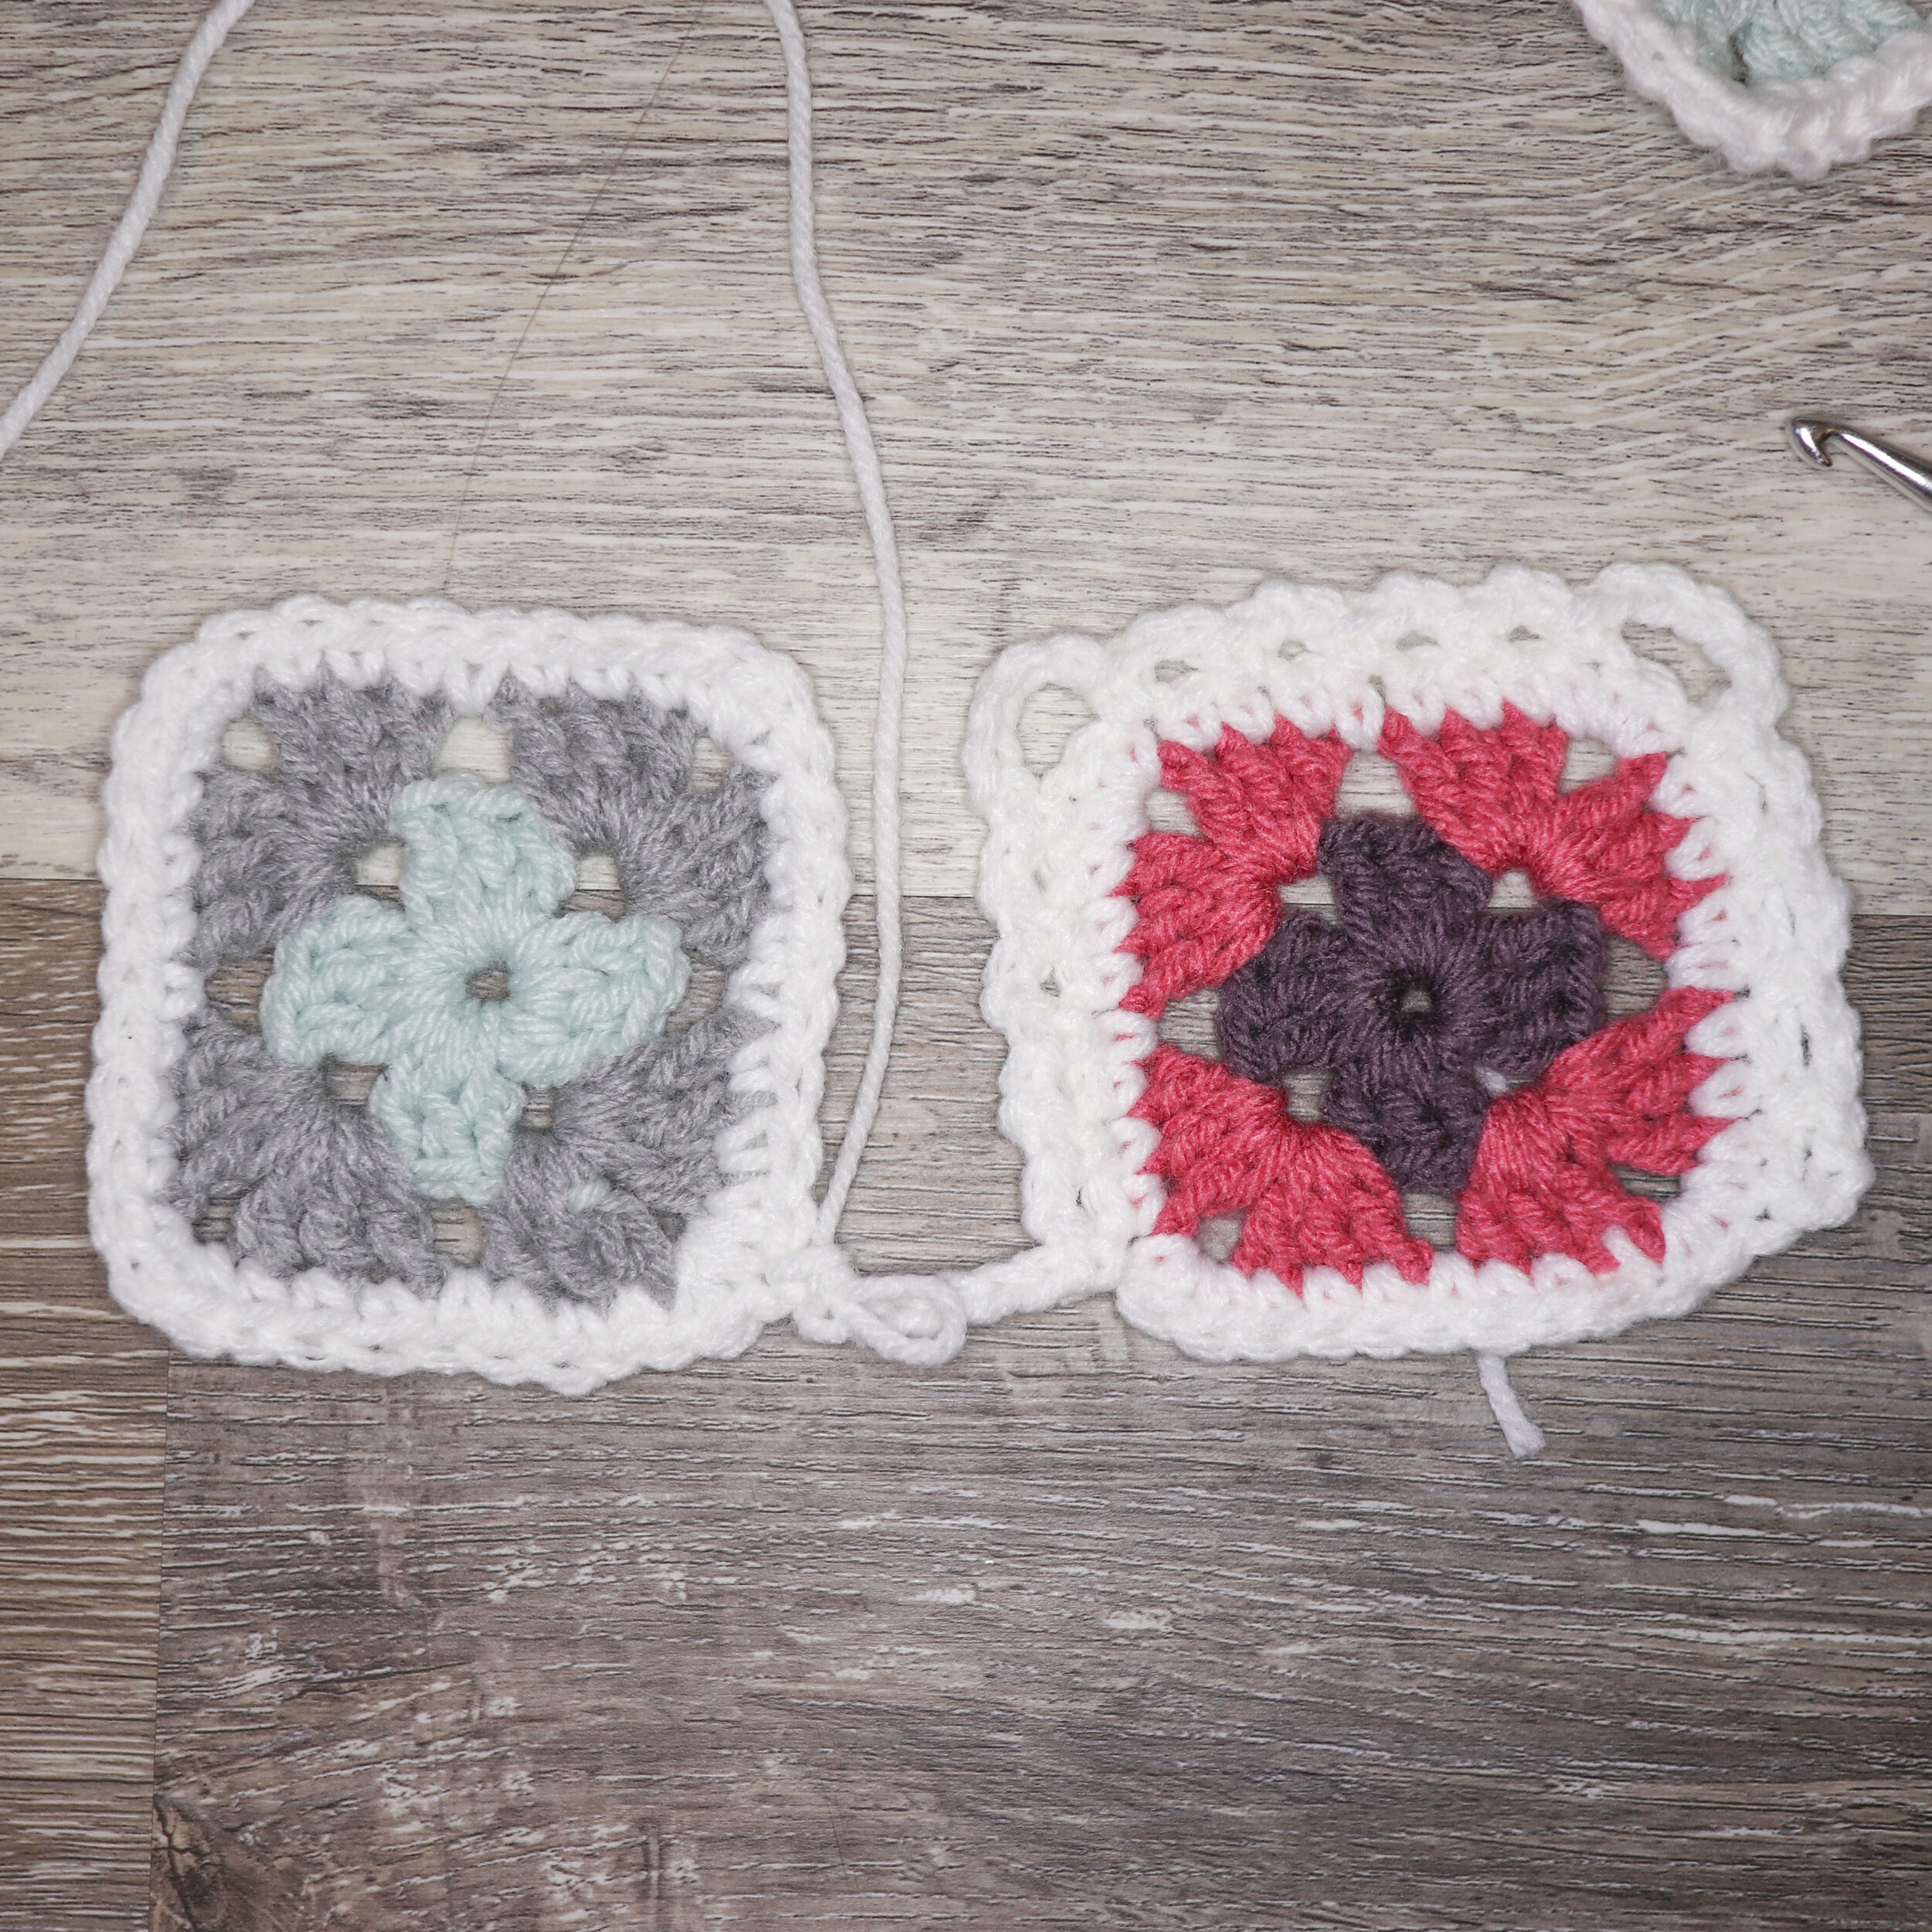
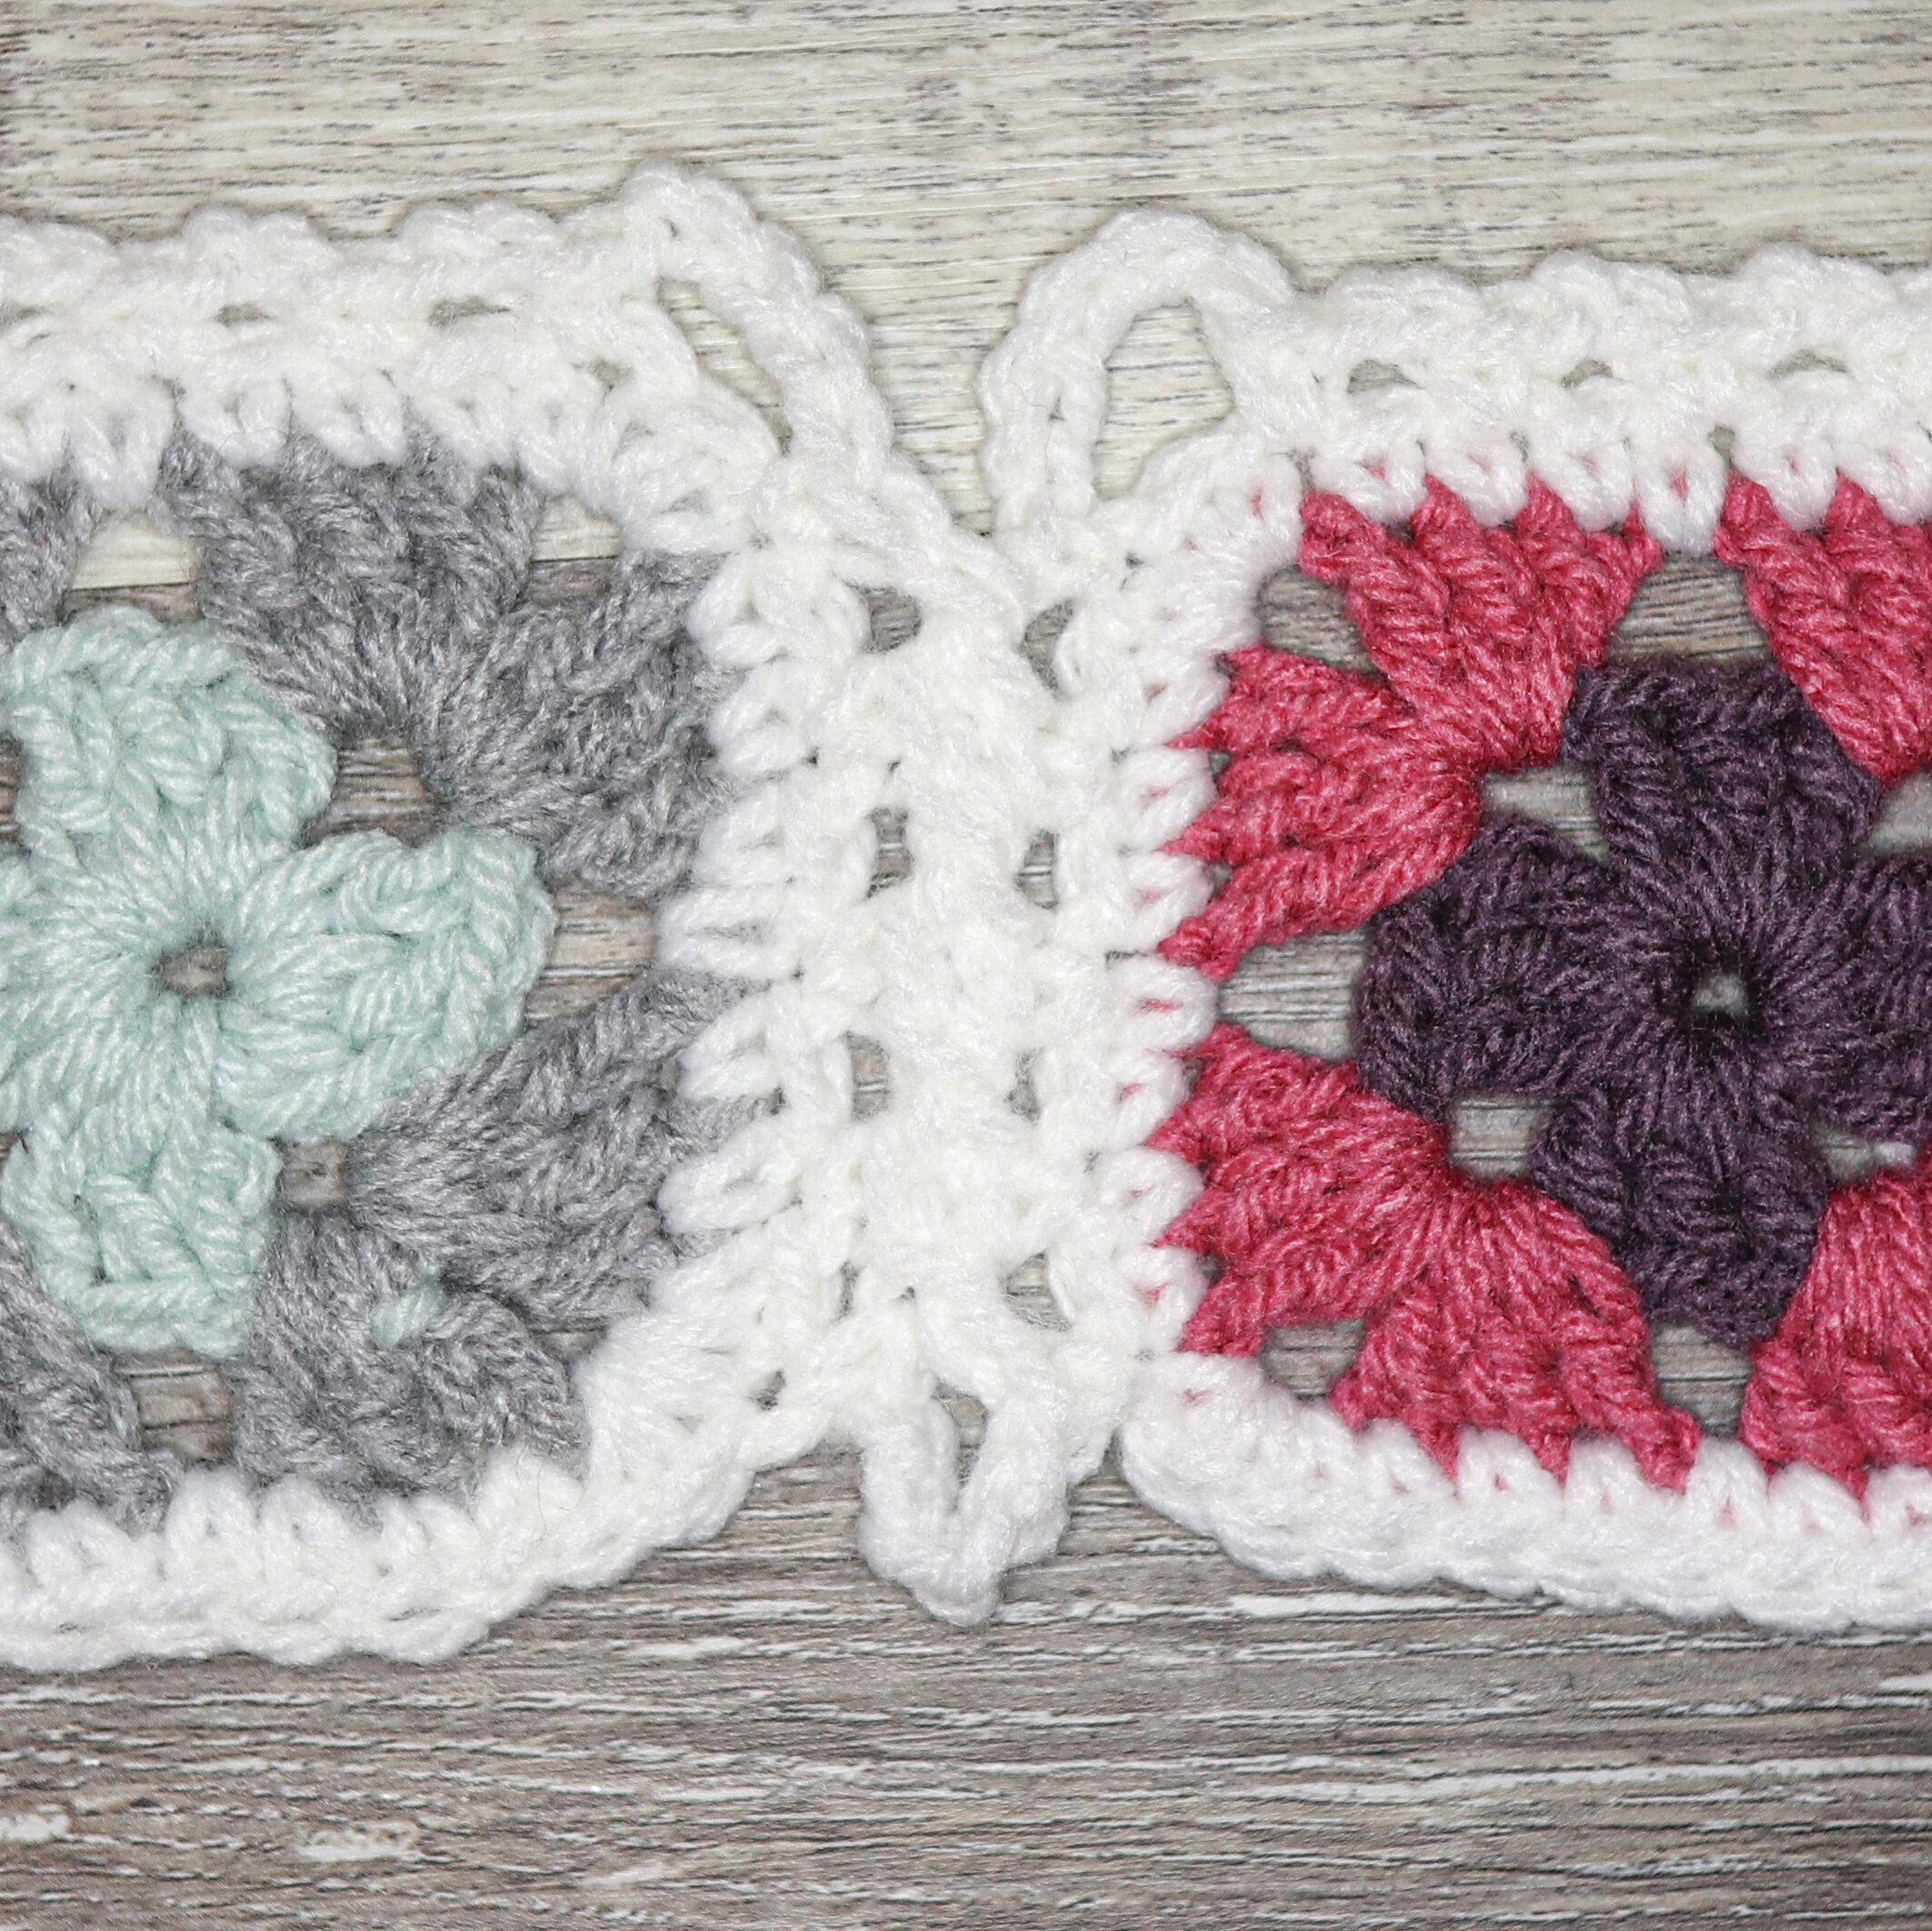
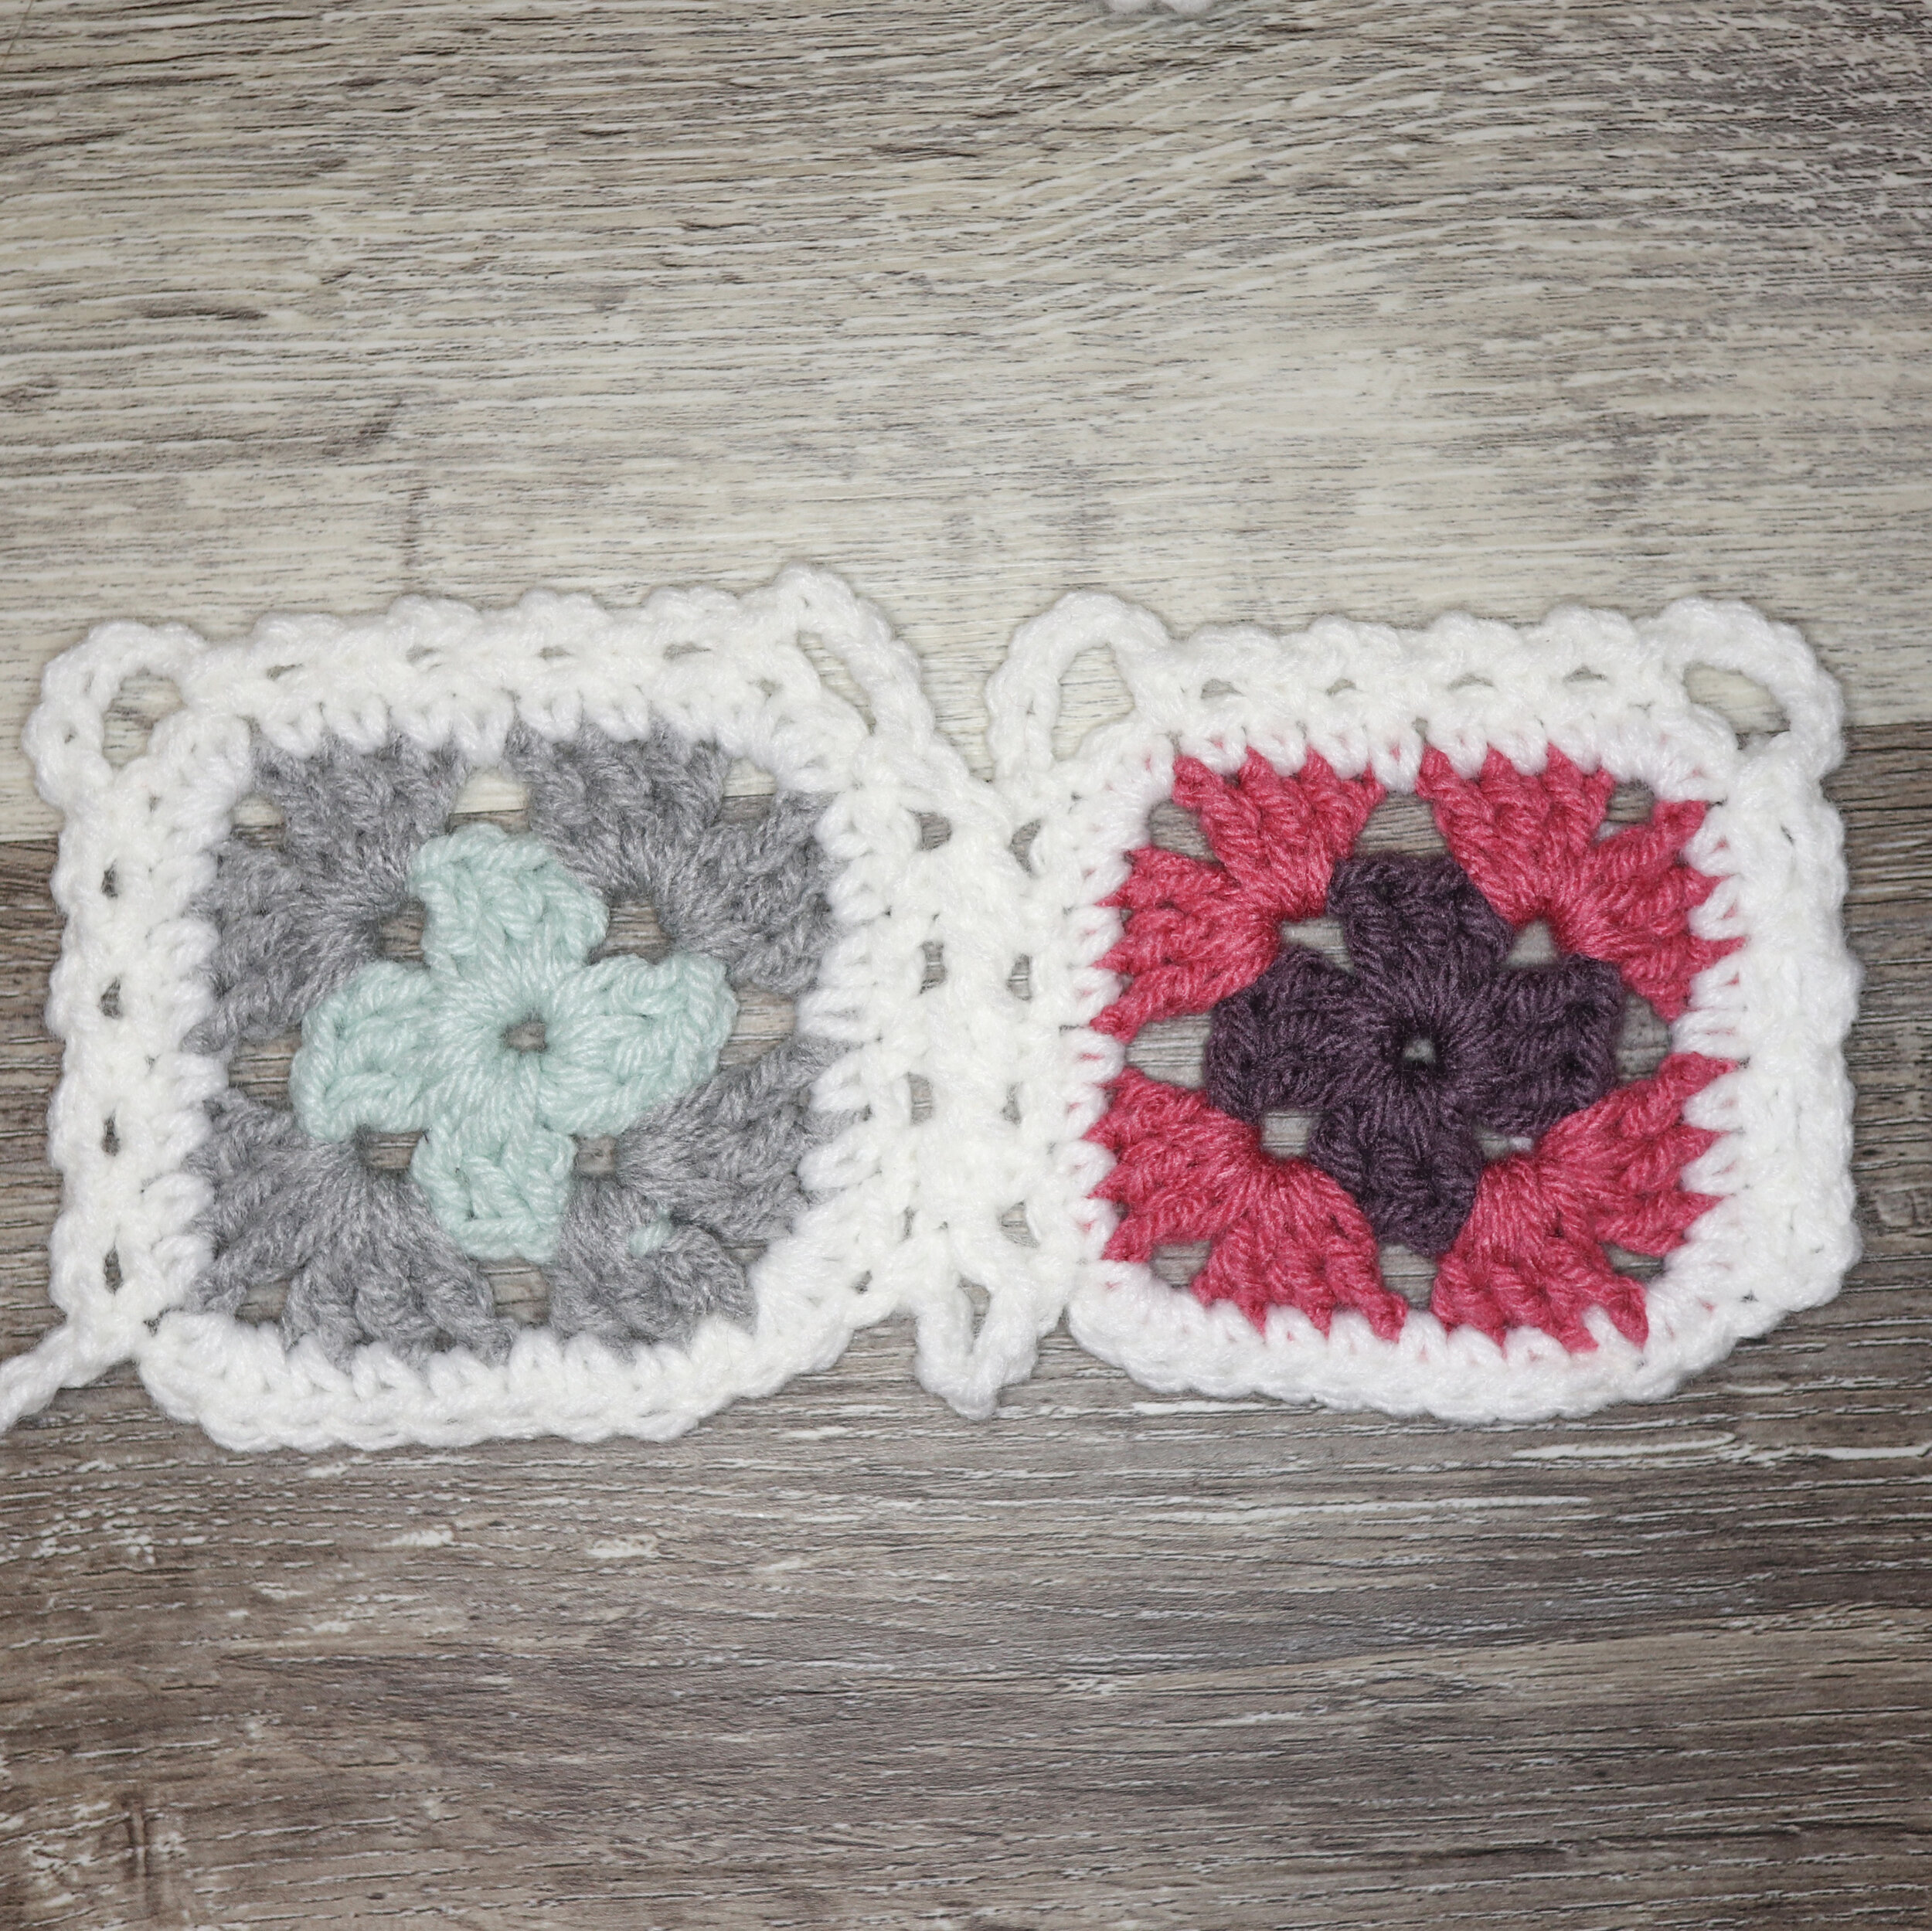
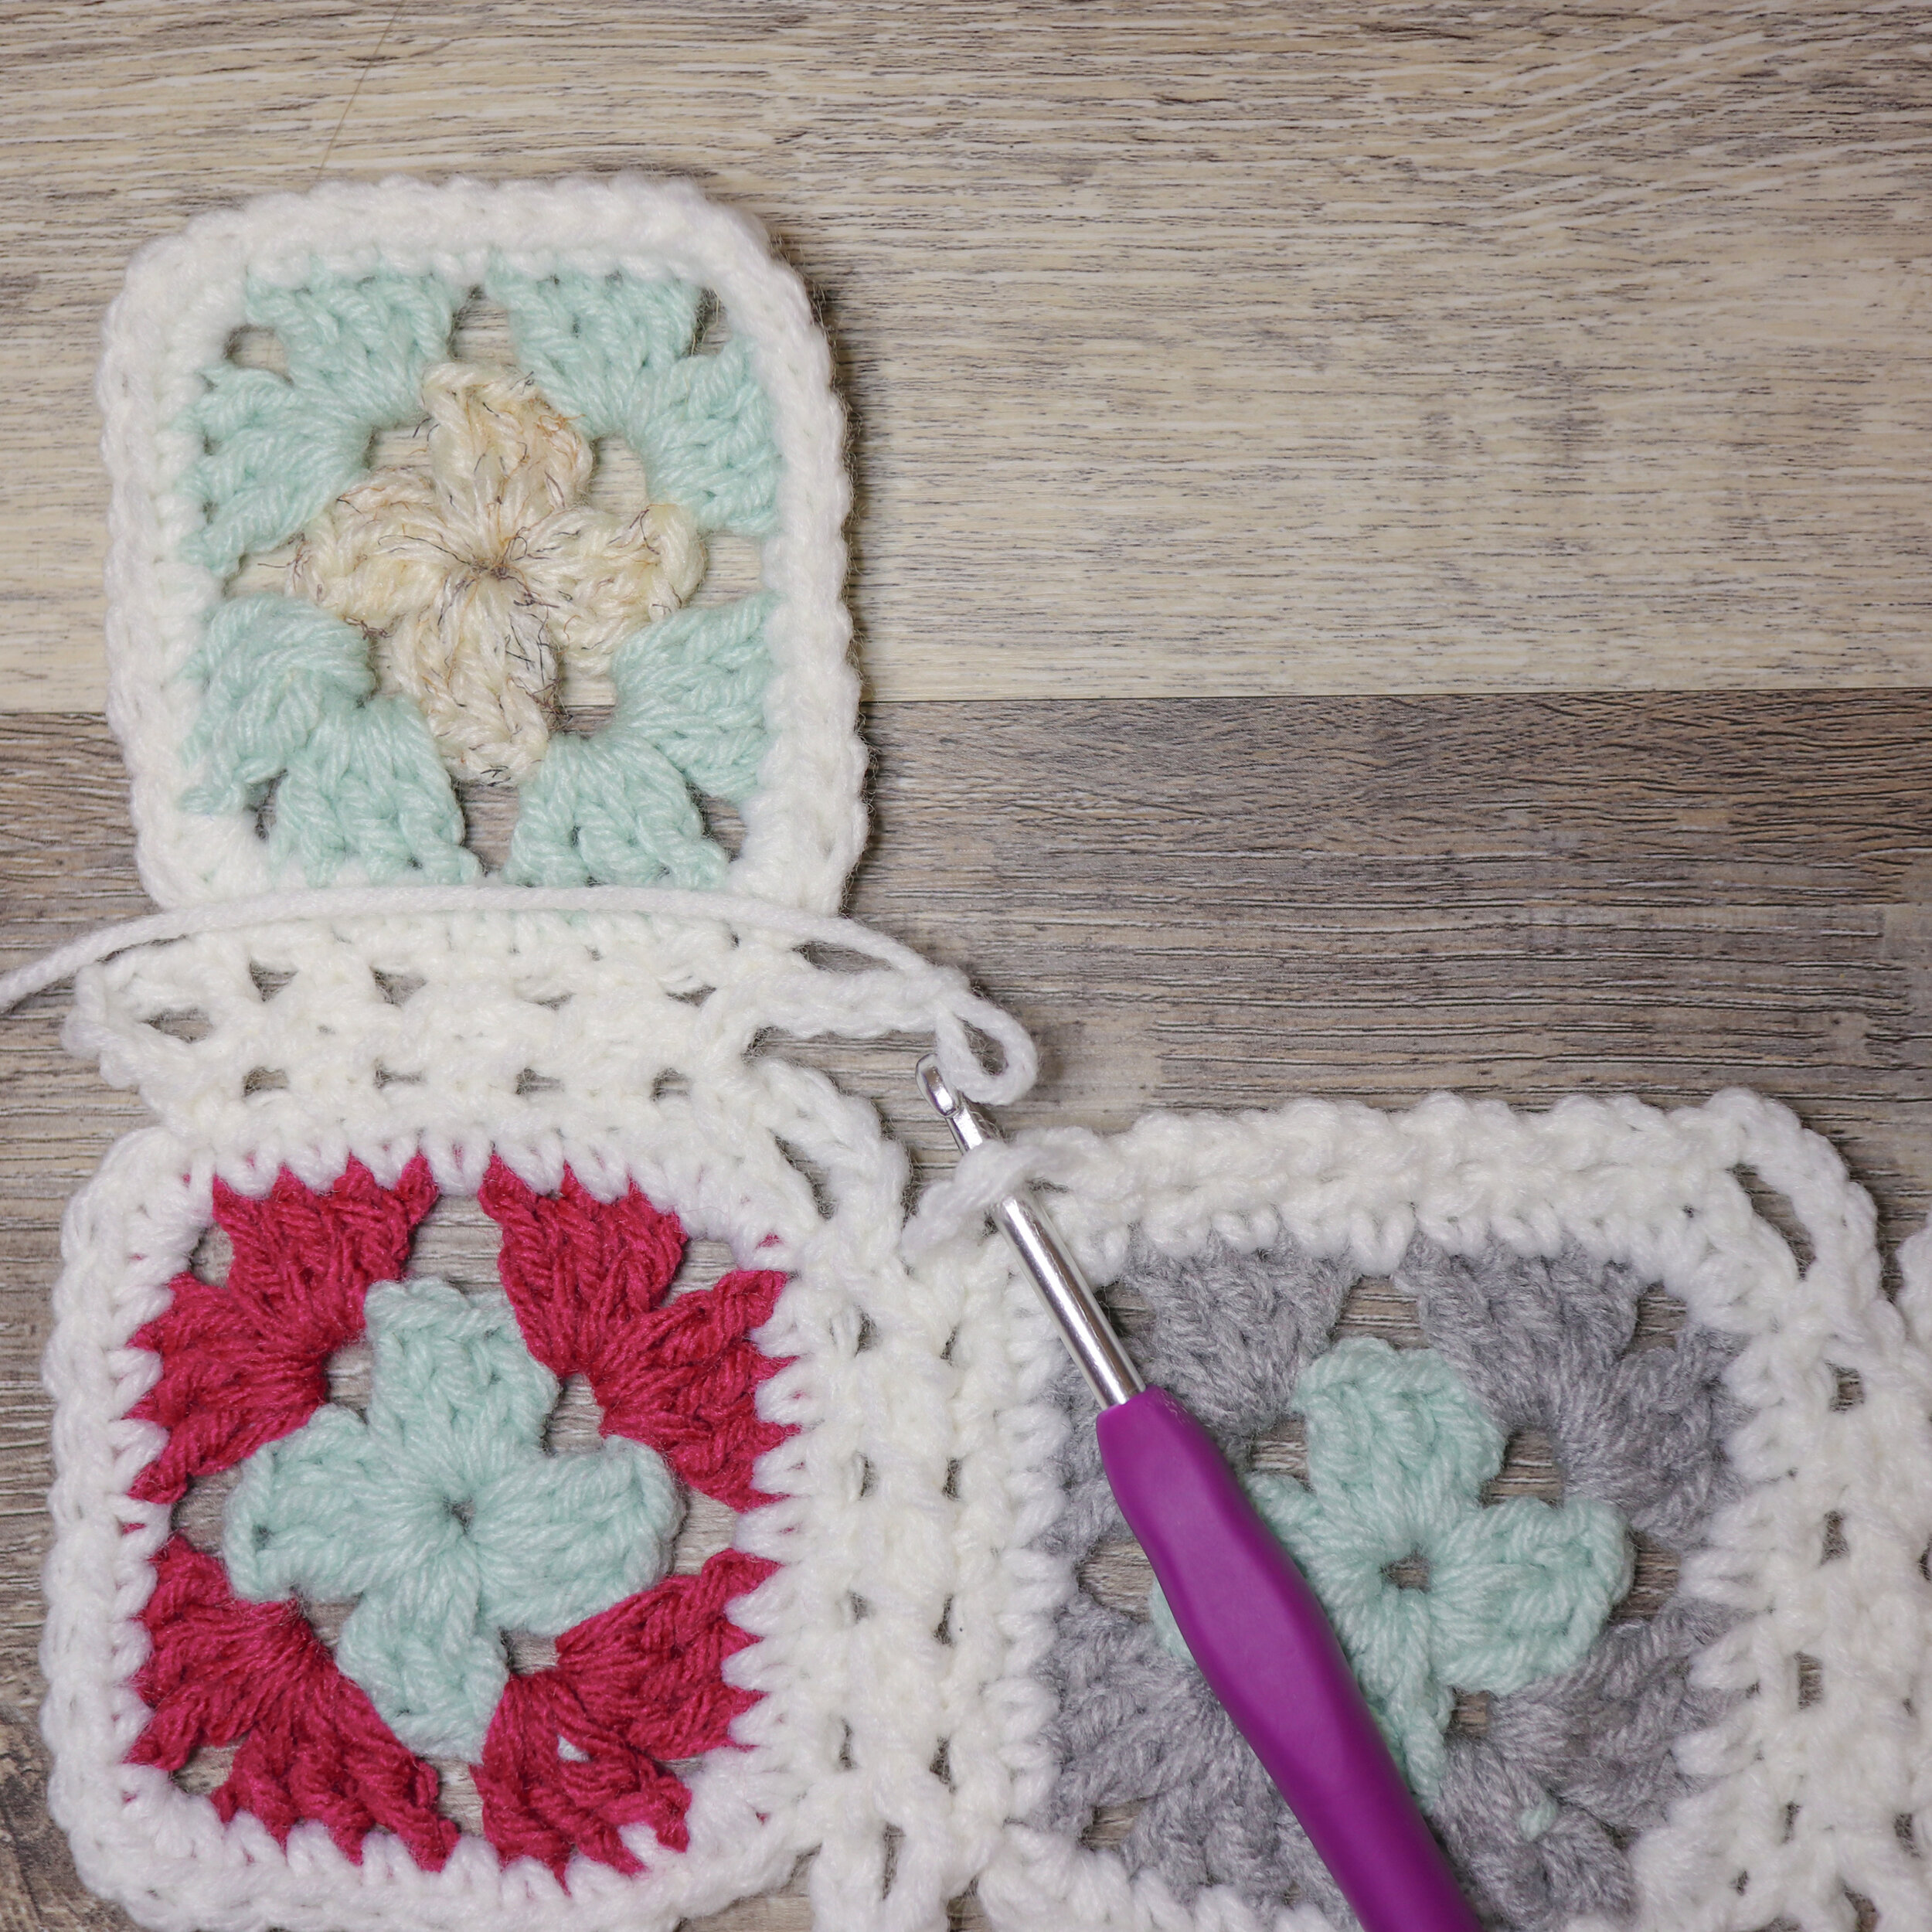
STEP 2:
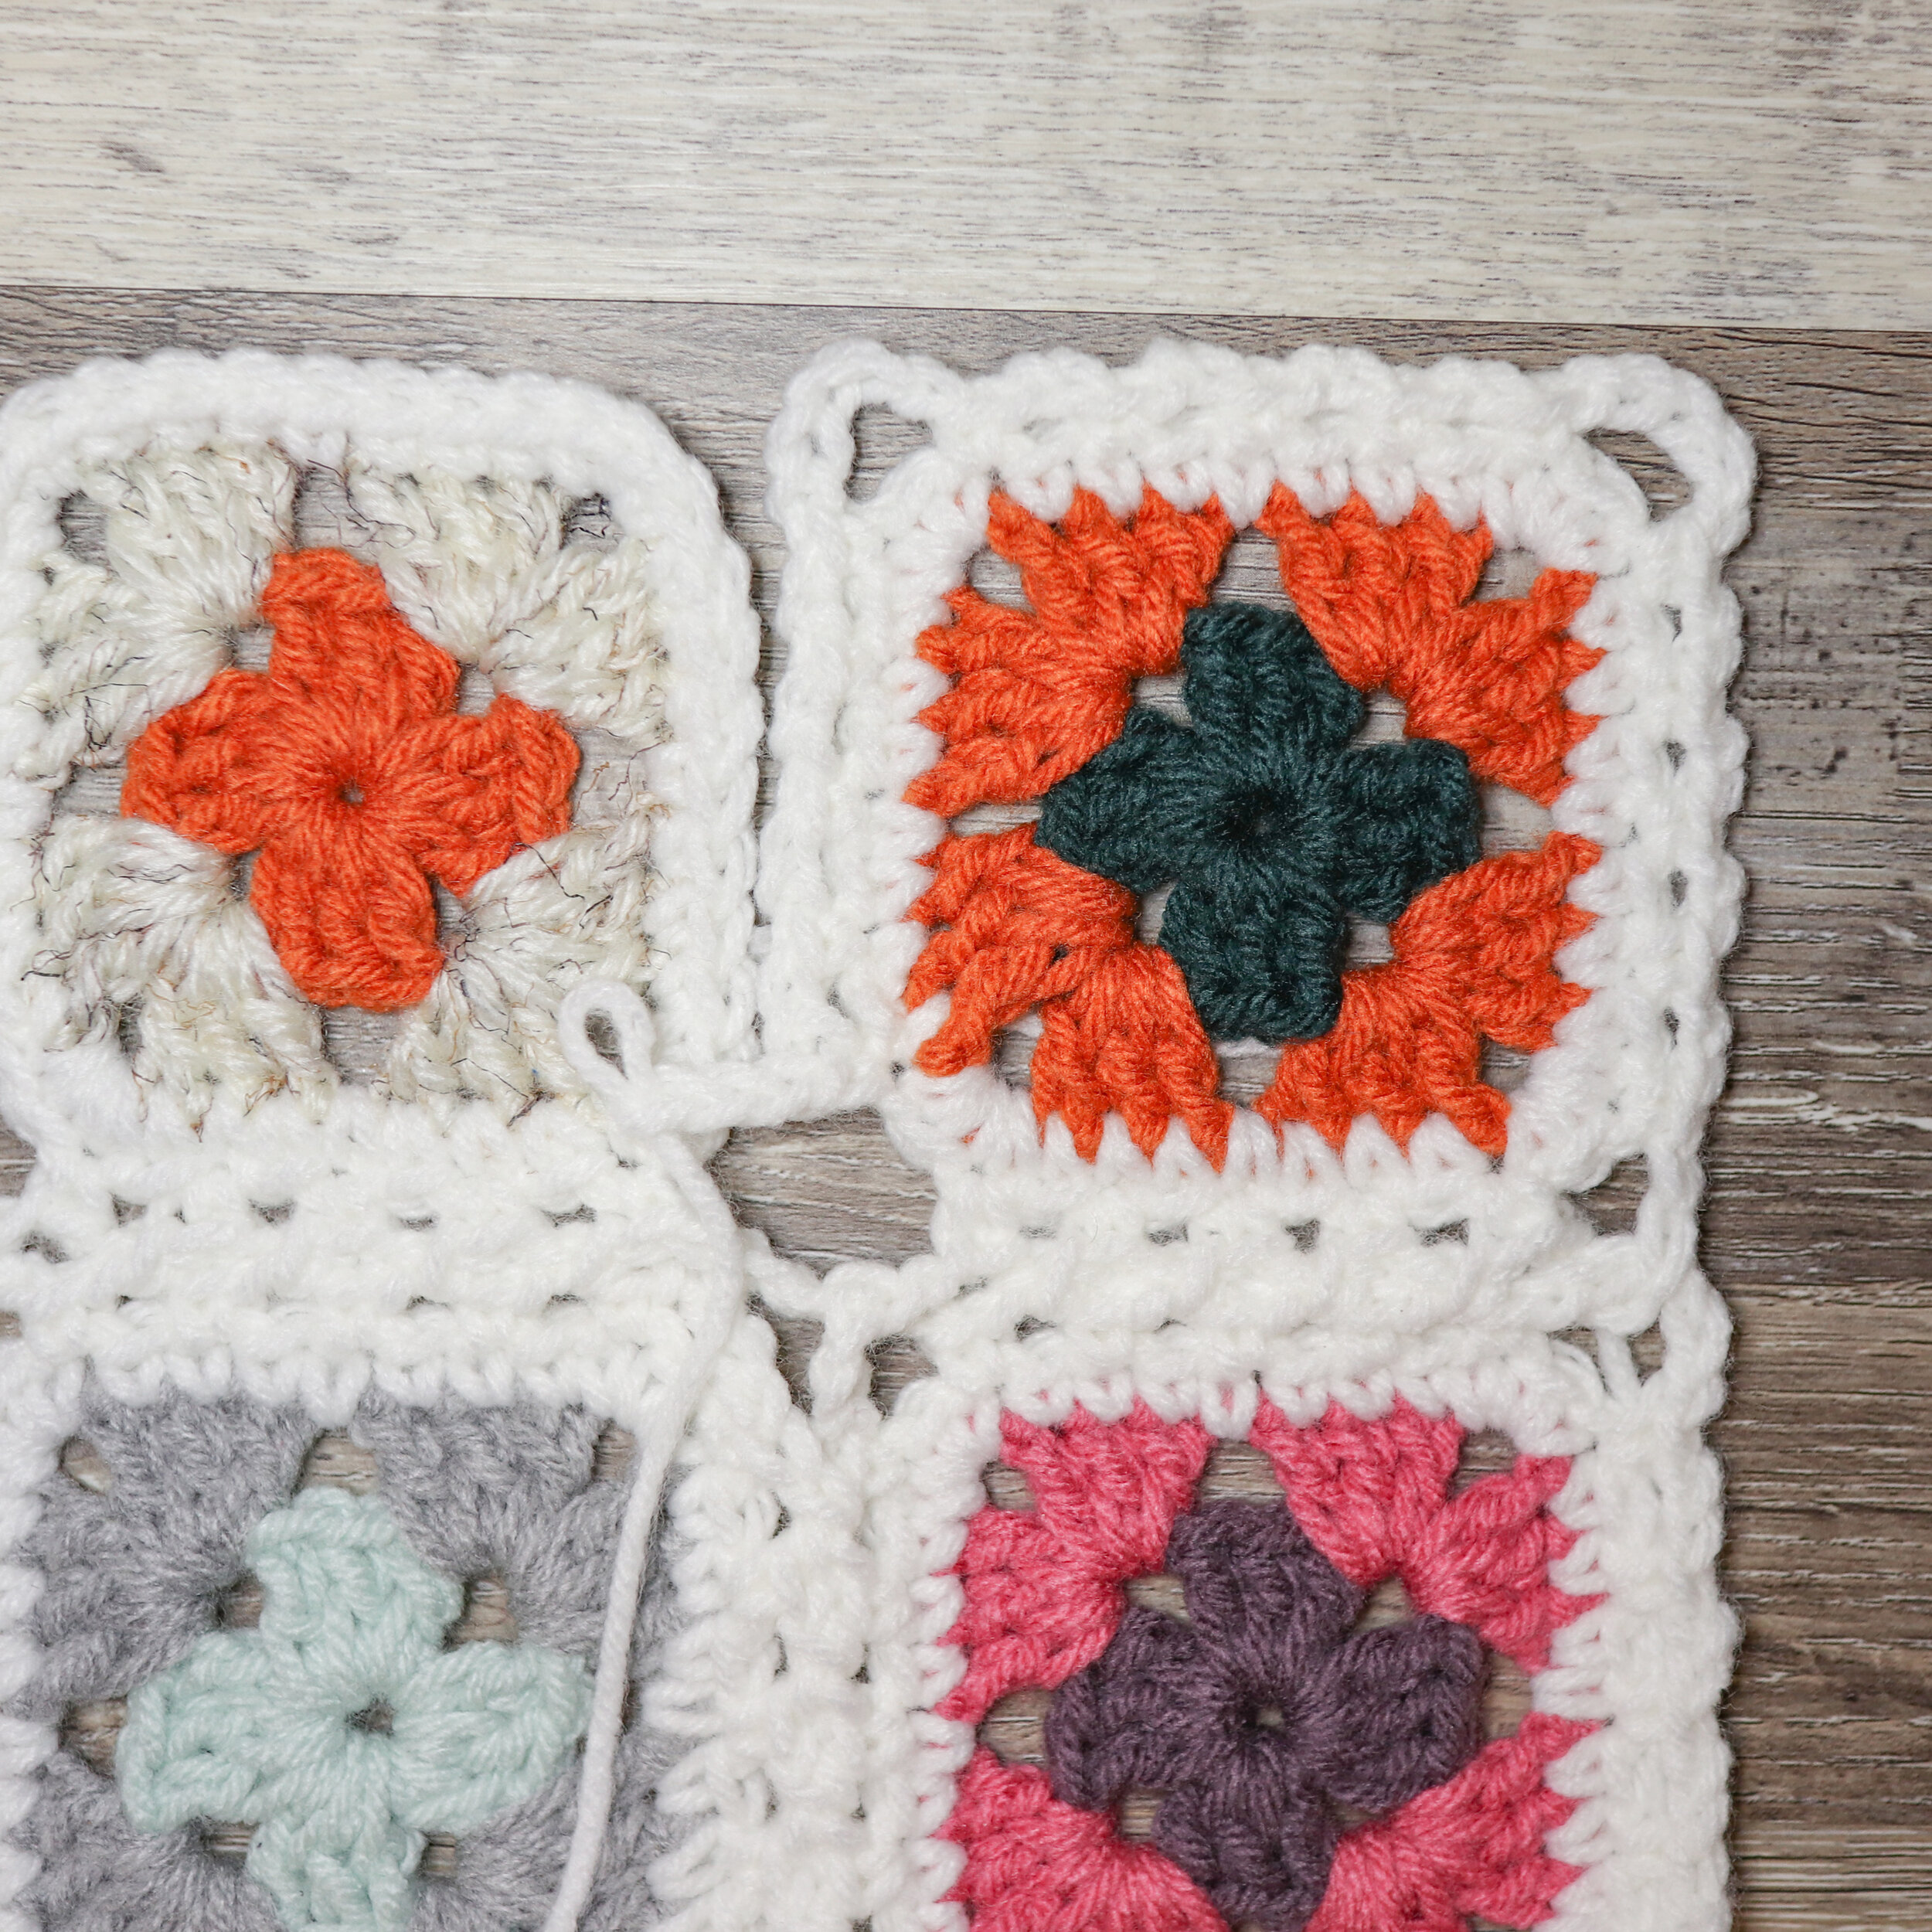
Attach to Square 2 in the 3rd sc that make up corner 1 with sc (image 1), *ch1, remove hook from loop, place hook through 1st ch2 space on Square 1 and pull through, ch1, sk1 on Square 2 and sc in next st*, rep * * 3 more times placing the hook through the 2nd, 3rd, and 4th ch2 spaces along the side. (Image 2), ch5 (do not connect ch5s), sk1, sc, rep [ ] from Step 1 (image 3).
Rep Step 2 until you get to the last square of Row 1.
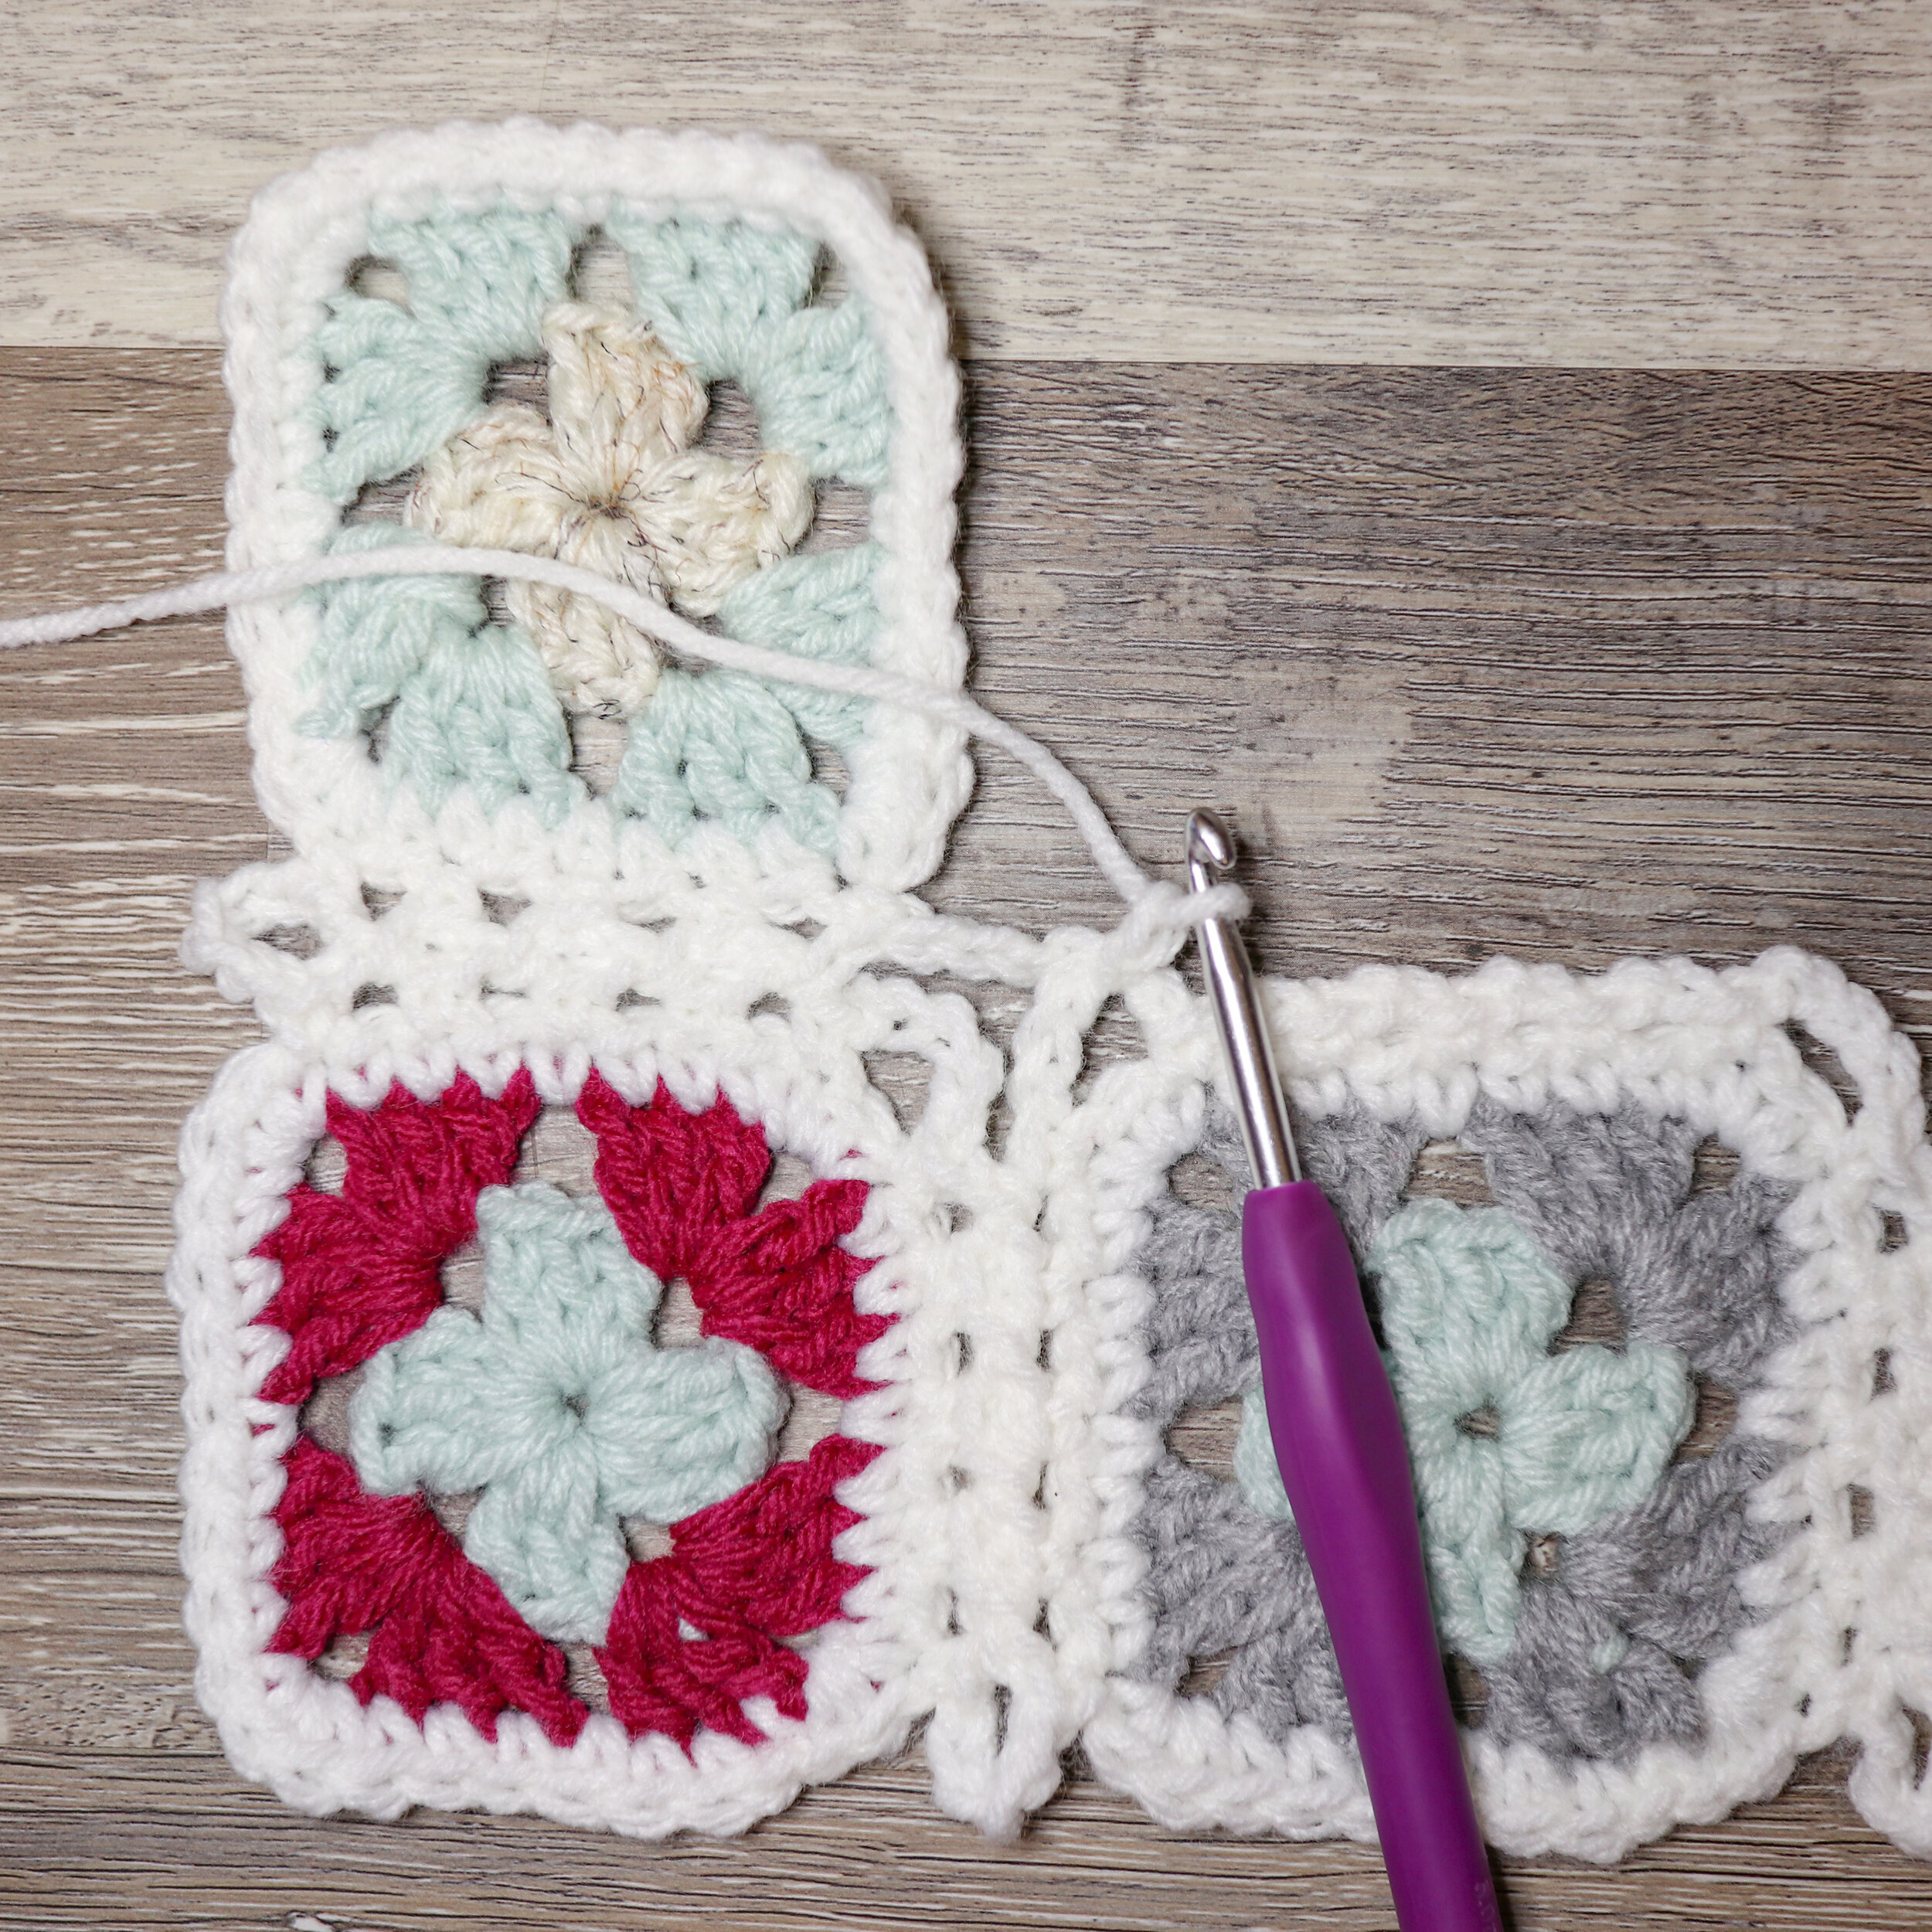
STEP 3:
To attach the last square for Row 1, rep steps from Step 2 until you get to corner 3, do not complete the sc after the ch5. Leave the 3rd side unfinished, we will finish that at the end.

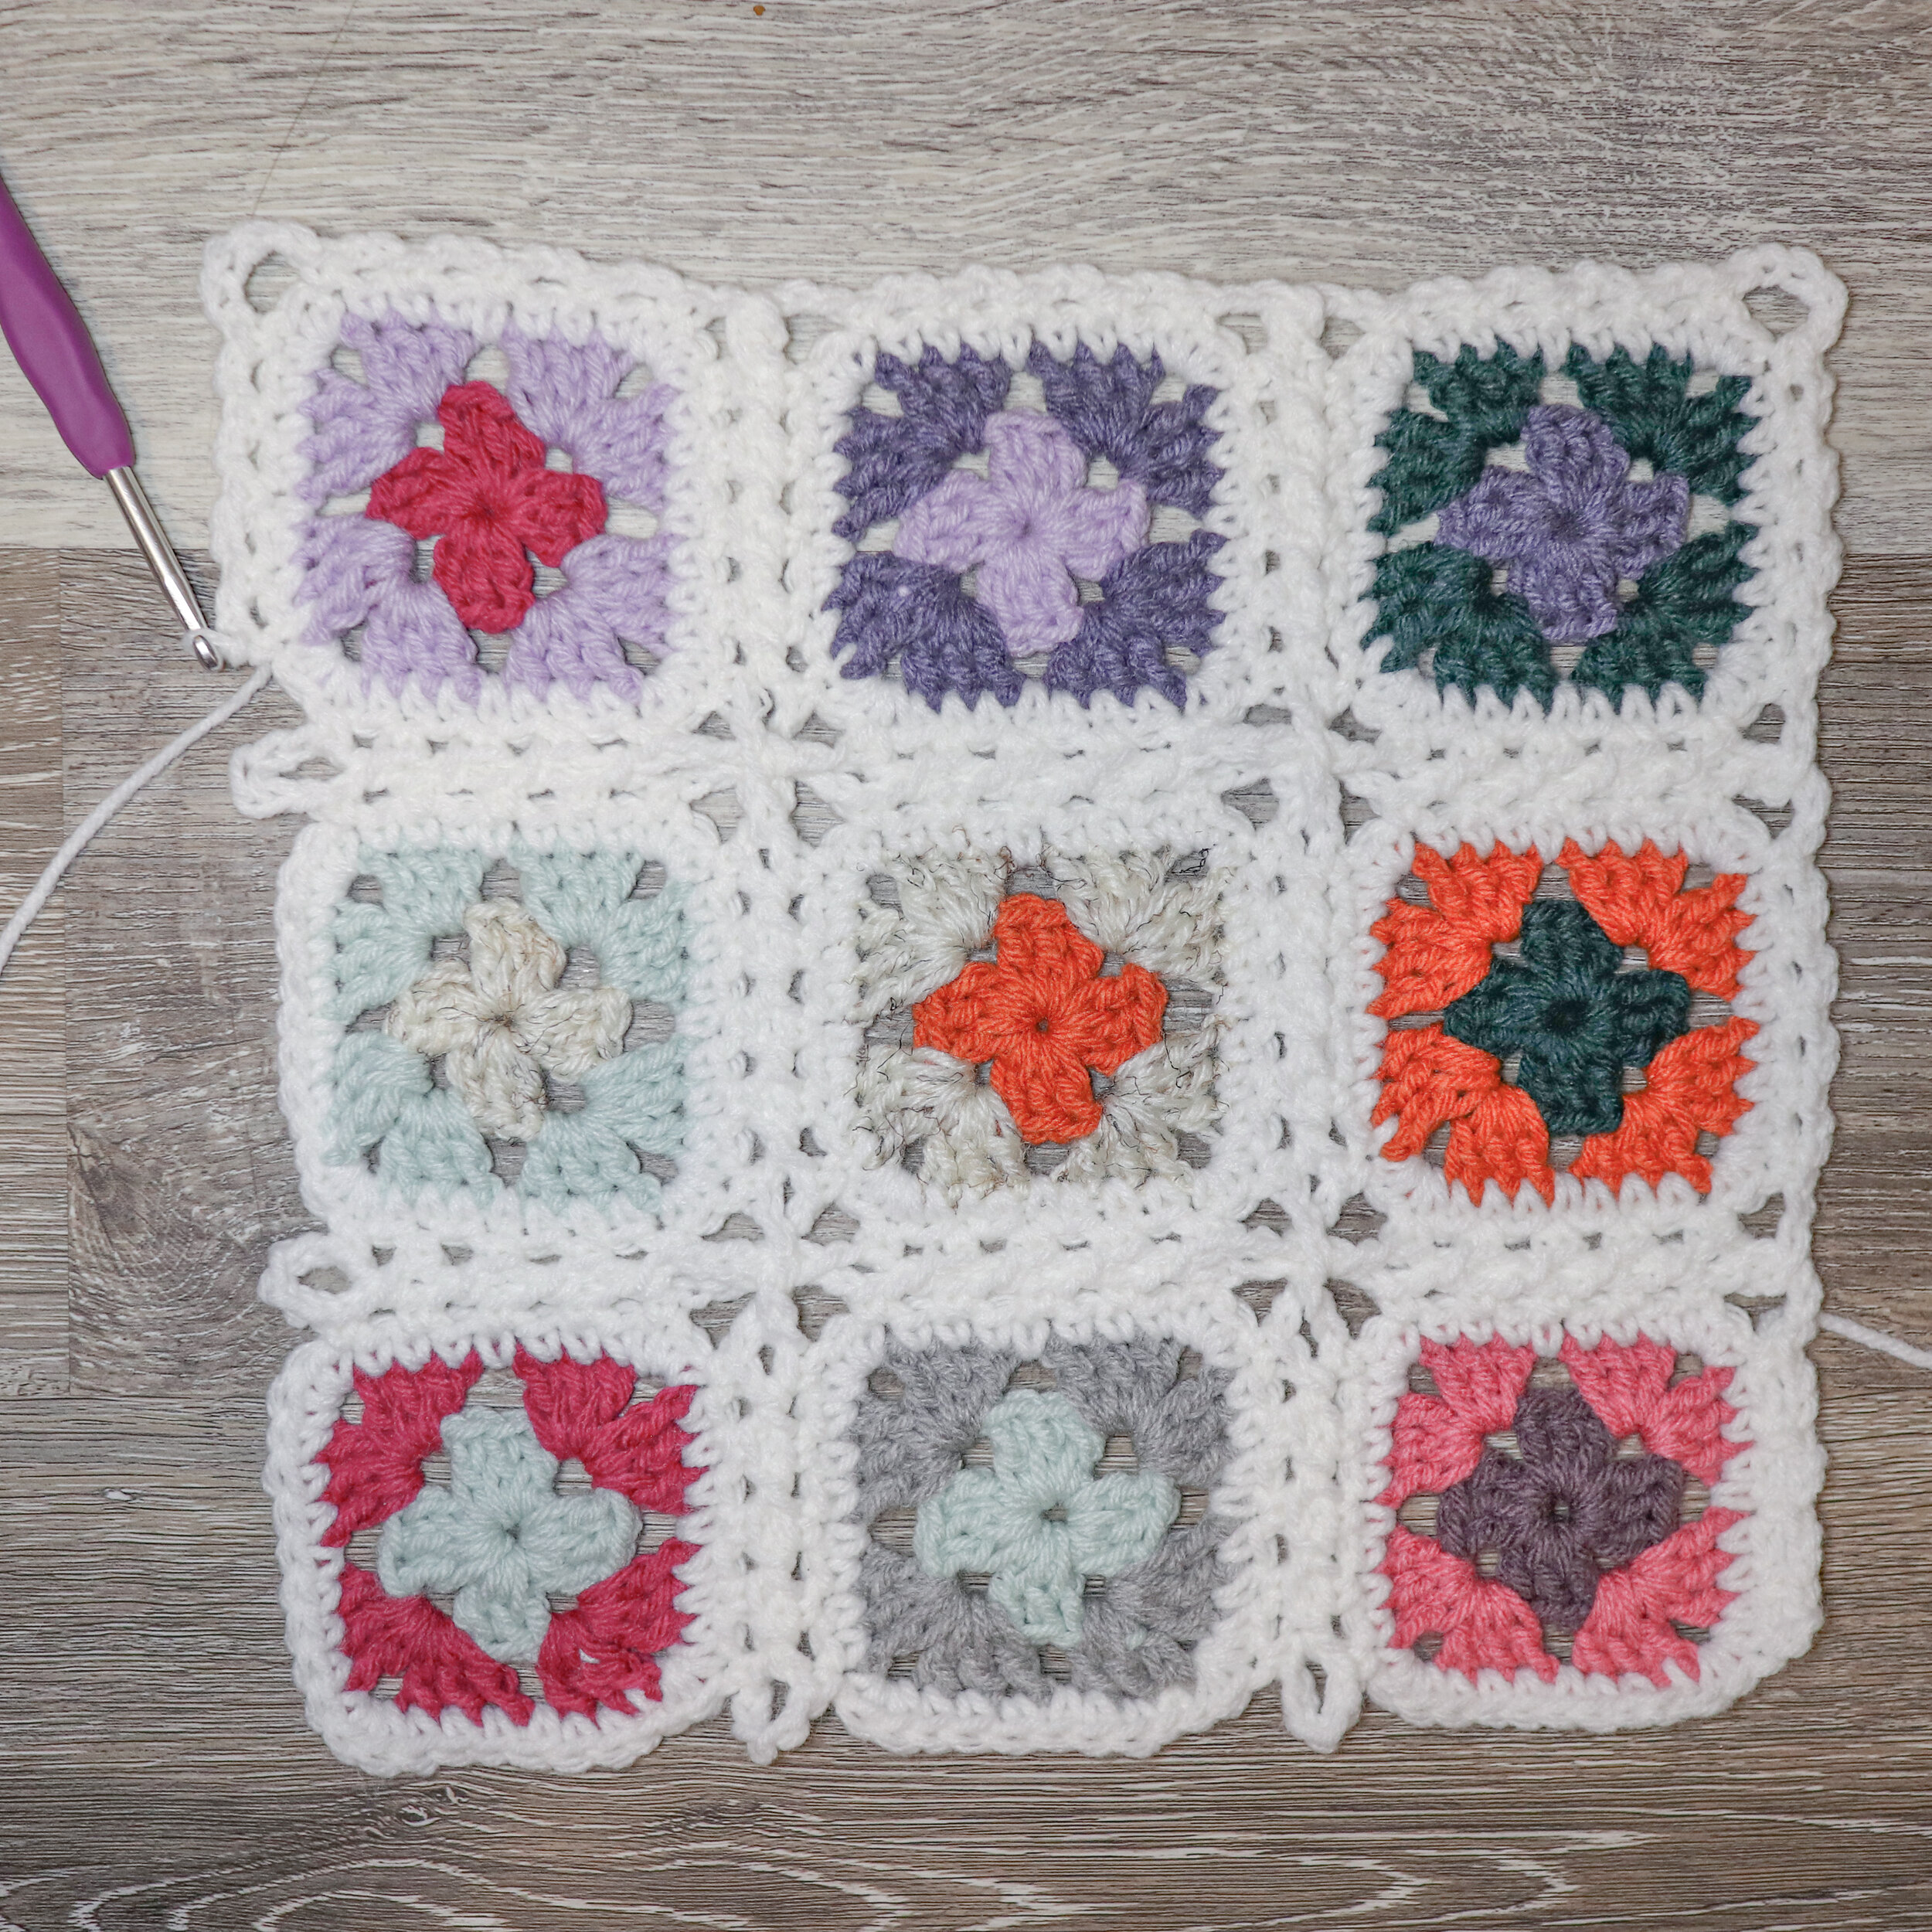
ROW 2:
STEP 1:
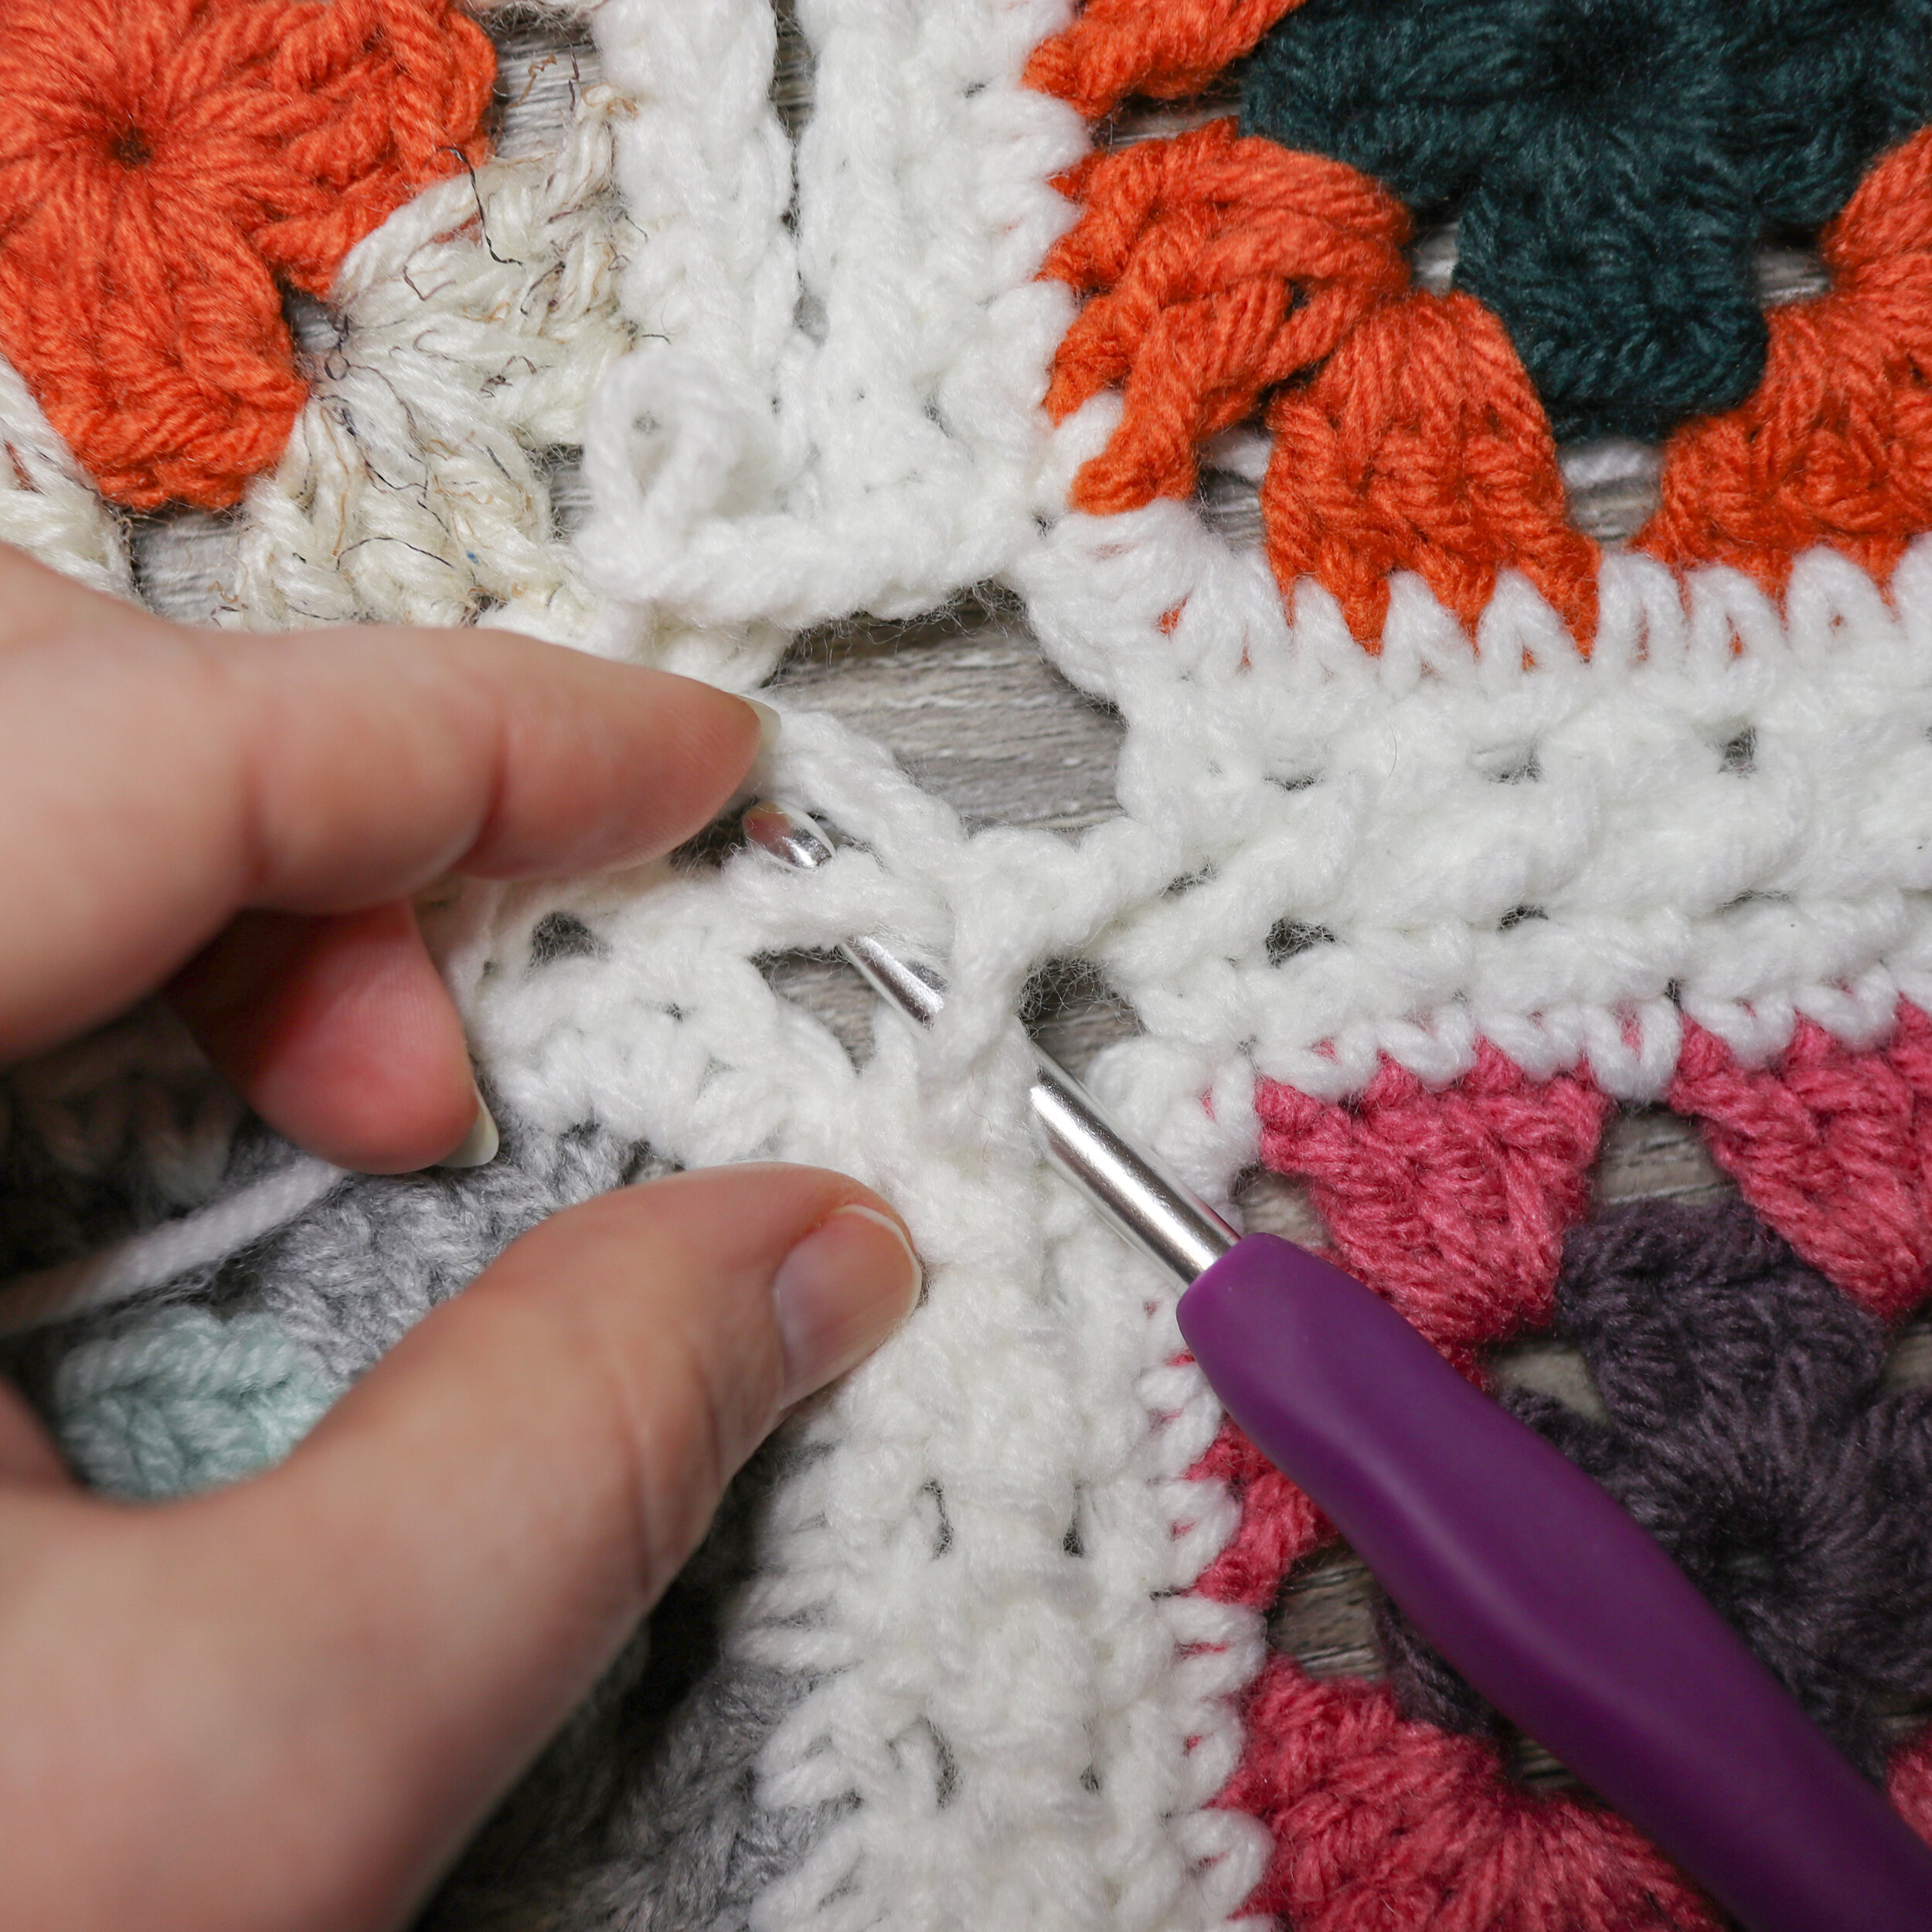
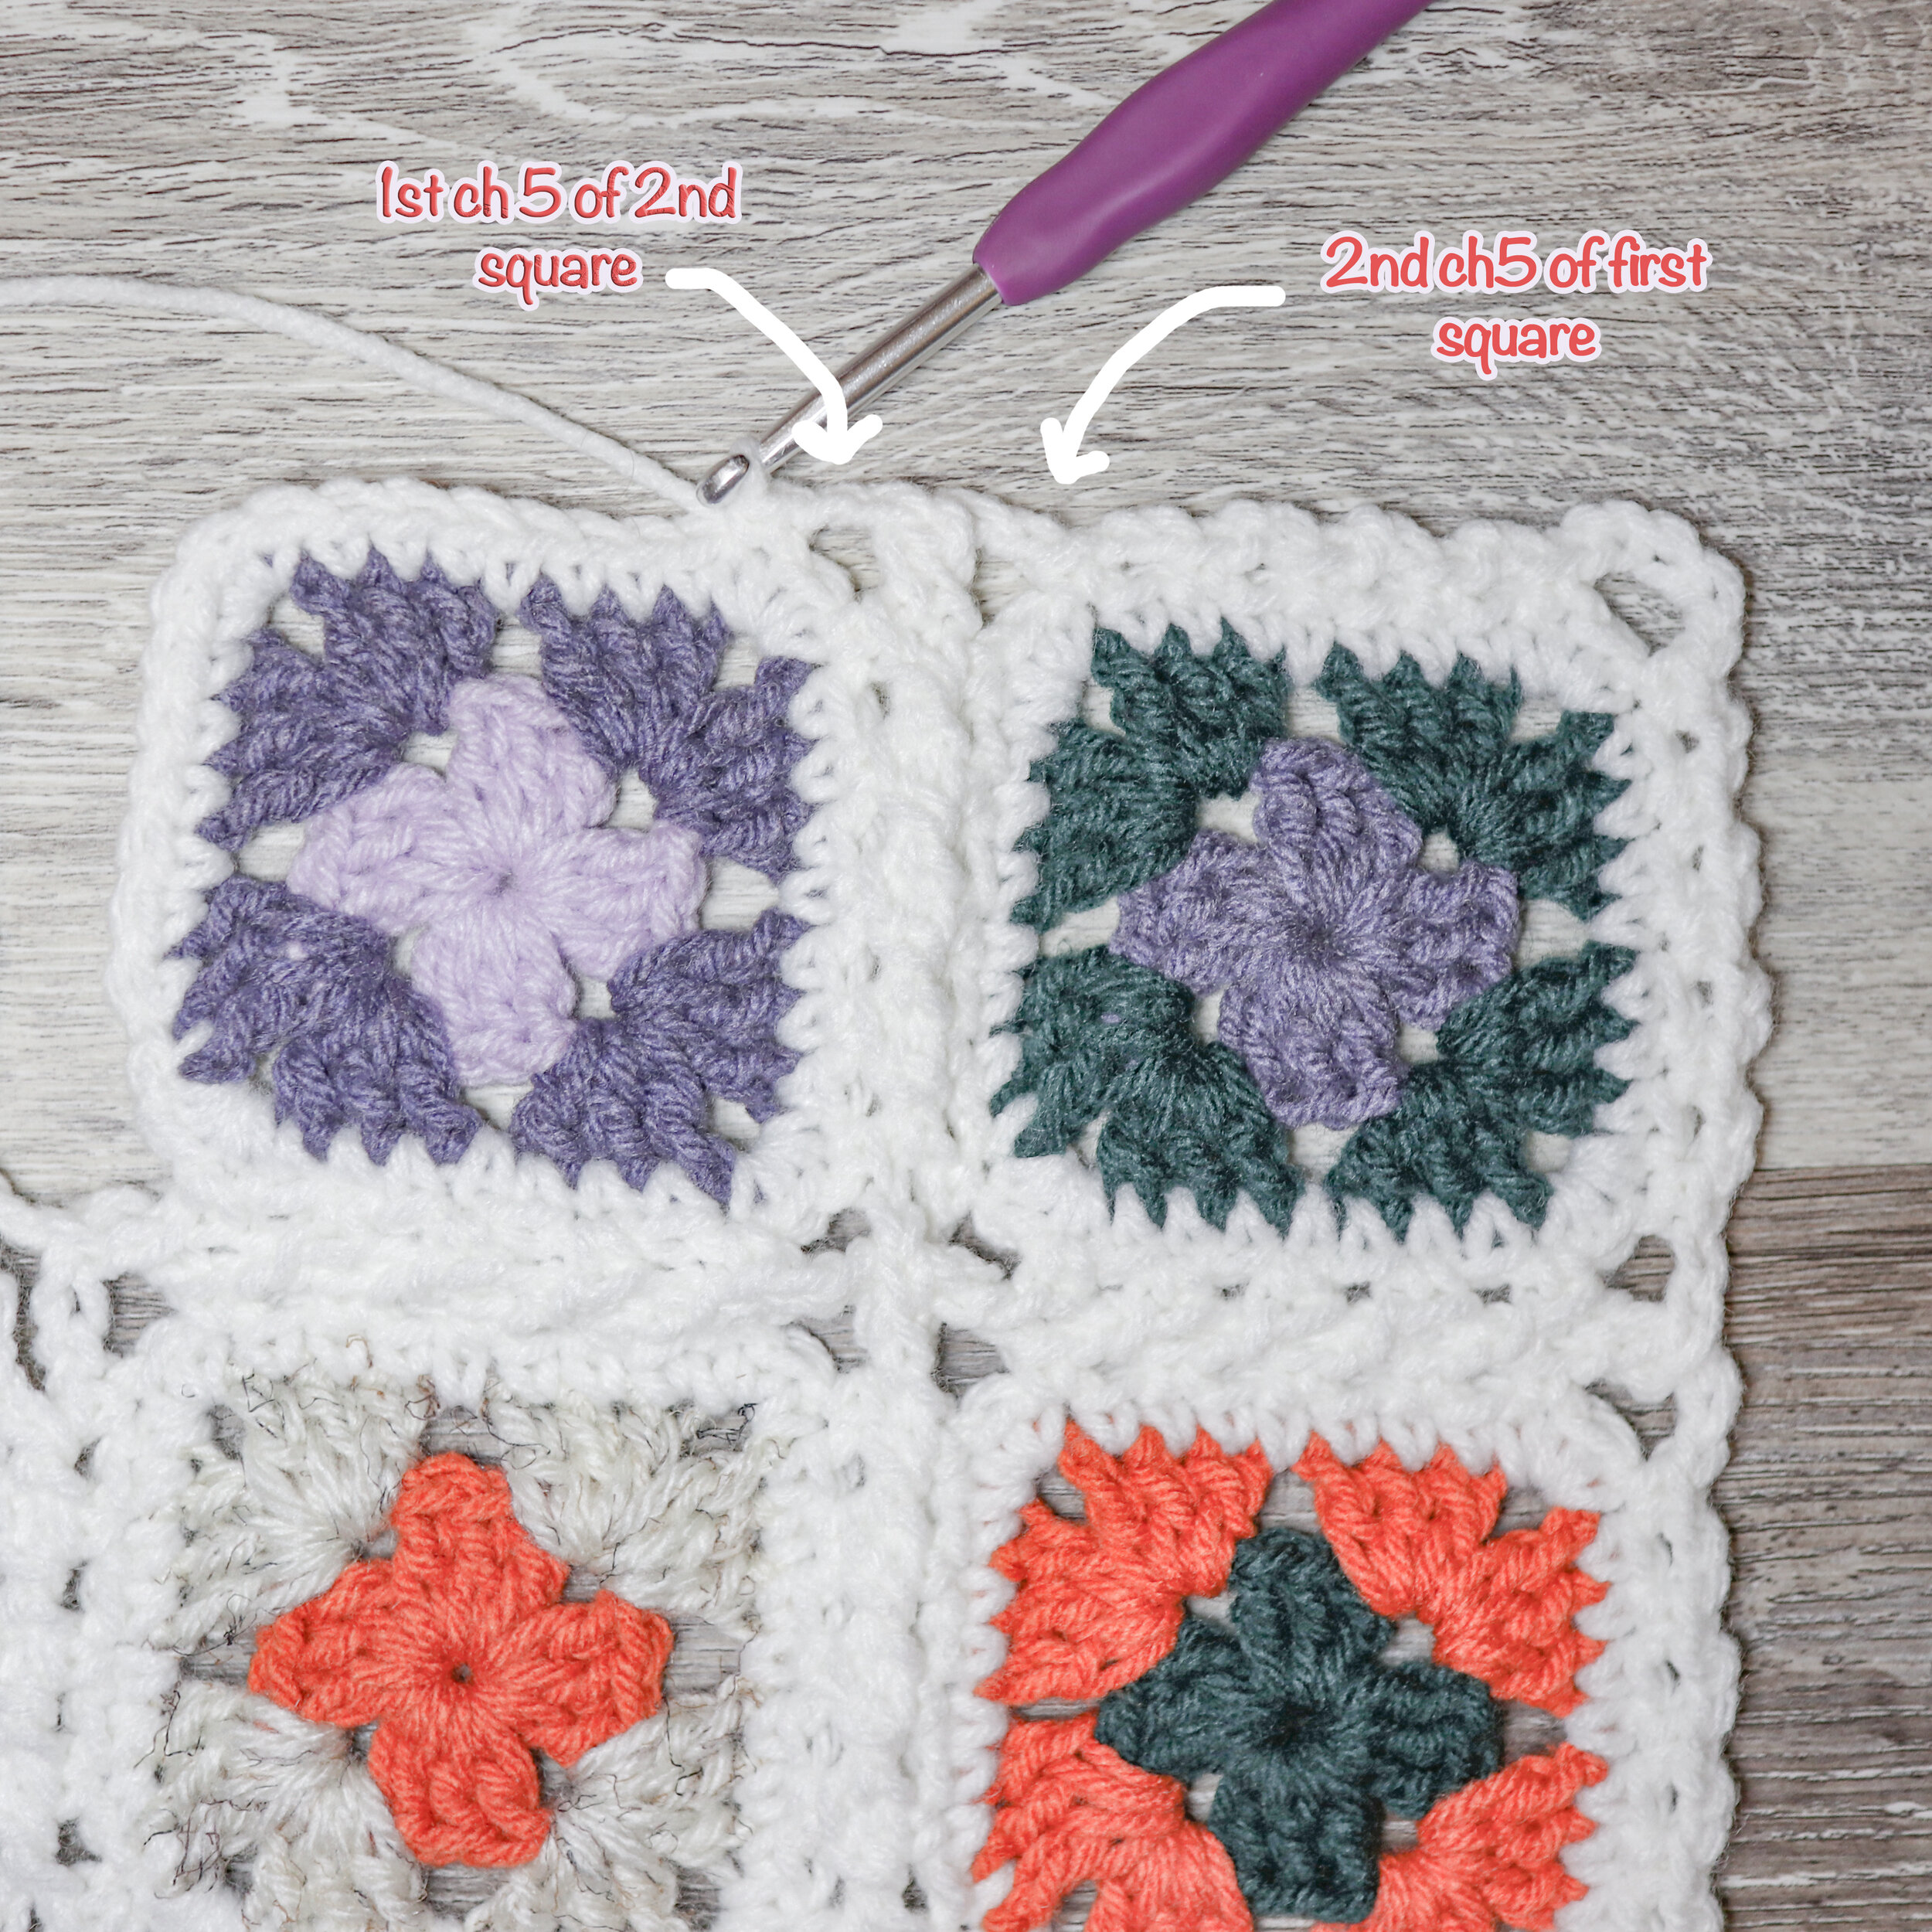
Attach the next square in the 3rd sc that make up corner 1 with sc (image 1), rep * * from Step 2 of Row 1 (image 2). Ch3, remove hook from loop, place hook through ch5 of square diagonally across from the square you are working now (image 3) leaving the ch5 of the square directly below the square you just attached unworked, pull loop through, ch2 (image 4), attach next square in the same manner and continue across until you have attached the last square in the row (image 5), ch3, remove hook, place hook through ch5 of square directly below, pull loop through, ch2, sk1, sc (image 6)

STEP 2:
Rep steps from [ ] in Row 1:Step 1 until you get to the final ch5, ch3 instead of ch5. (Image 1)
Step 3:
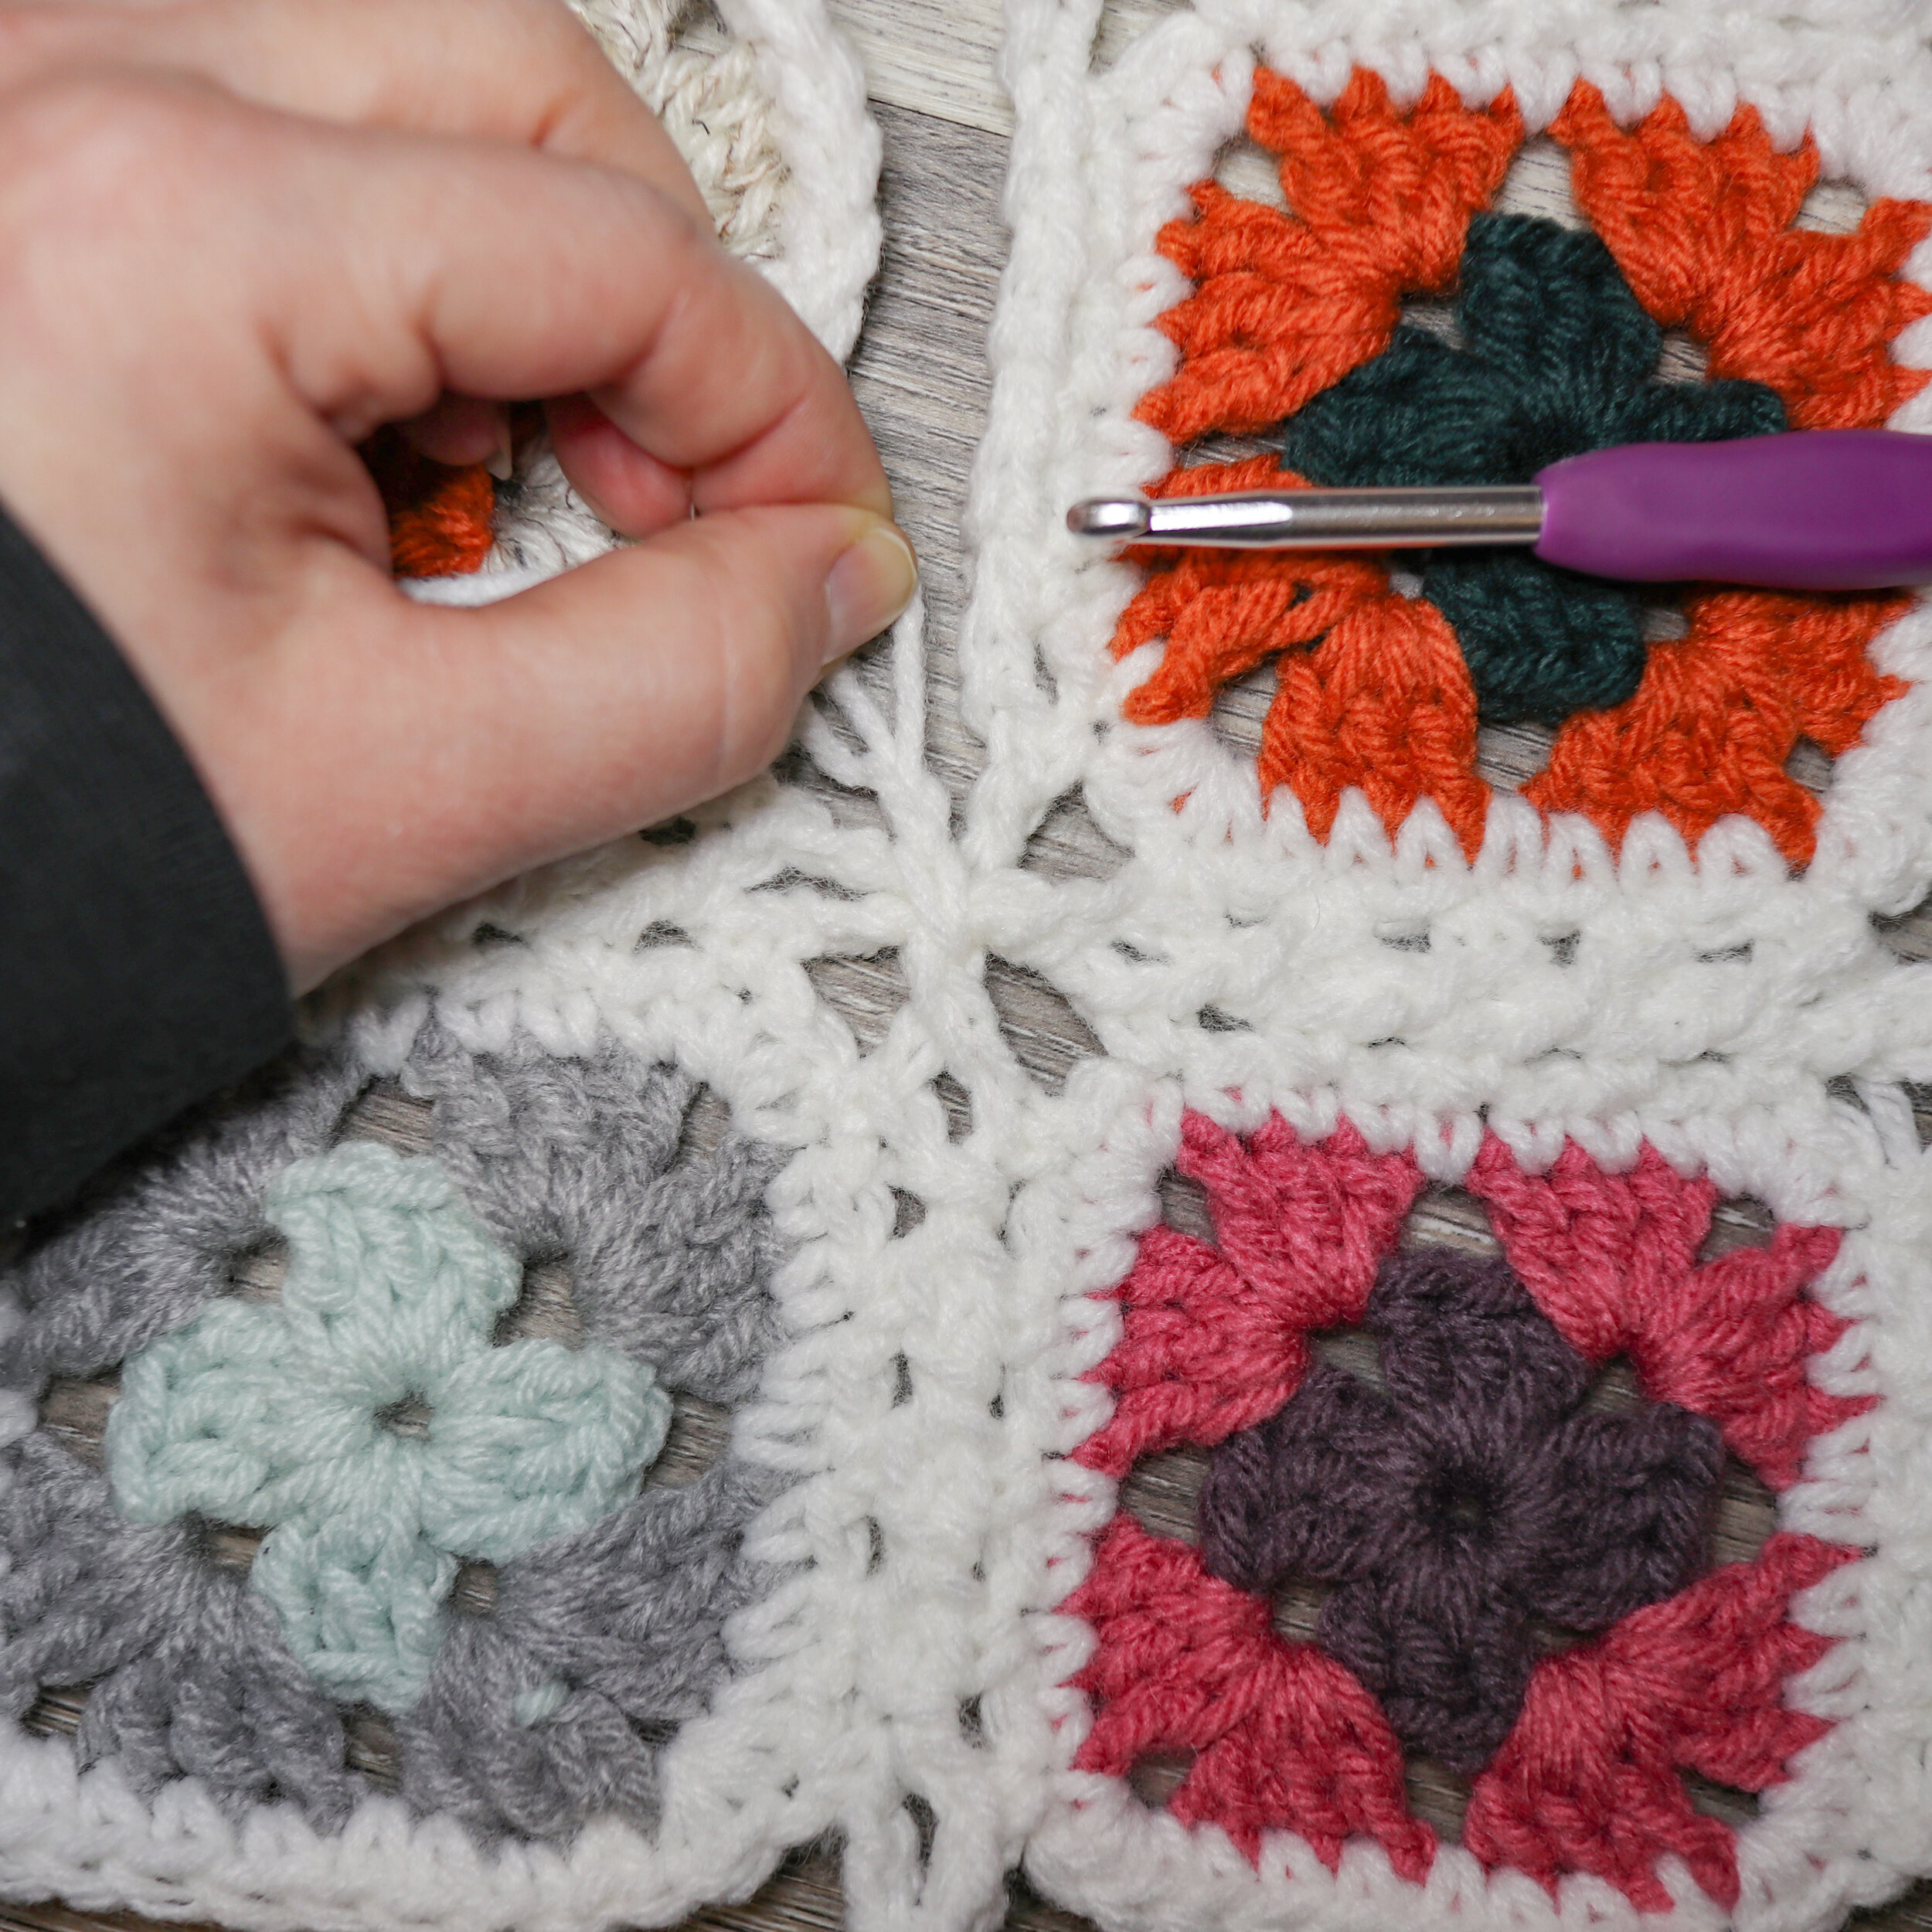
Remove hook from loop, place hook through both loops below (image 2), pull loop through and ch2 (image 3), sk1 on next square, sc, rep steps for connecting the sides together from Row 1: Step 2, then steps from Row 2: Step 2.
Rep Step 3 until last square. Do not finish last side, ch5 at corner 3 of the last square, and attach it to the 1st square of Row 3 the same as you did in Step 1 of Row 2. (Image 4)
Rep Row 2: Steps 1-3 until you have connected all rows of your garment or blanket.
LAST ROW:
STEP 1:
Your last row is going to be the same as your Row 2, except you are NOT going to leave your ch5s unattached. The 2nd ch5 of the 1st square will be attached to the 1st ch5 of the second square by [ch3, remove hook from loop, place hook through ch5, pull loop through, ch2] (image 1) and then carrying on until you get to the last square. Finish the last square as if you were finishing the 1st square from Row 1 (finish all 3 sides) until you get to the 1st ch5 loop on the side. (image 2)
STEP 2:
At ch5 loop, ch2, sl st to top of ch5, ch2. Sk1 on next square, sc (image 1). Cont down side until you get to the bottom. [Ch 5, sk1, sc] to turn the corner, then cont along the bottom in the same manner until you get to the end. Ch5, sl st into 1st sc of the 1st square. And you’re done! (image 2)
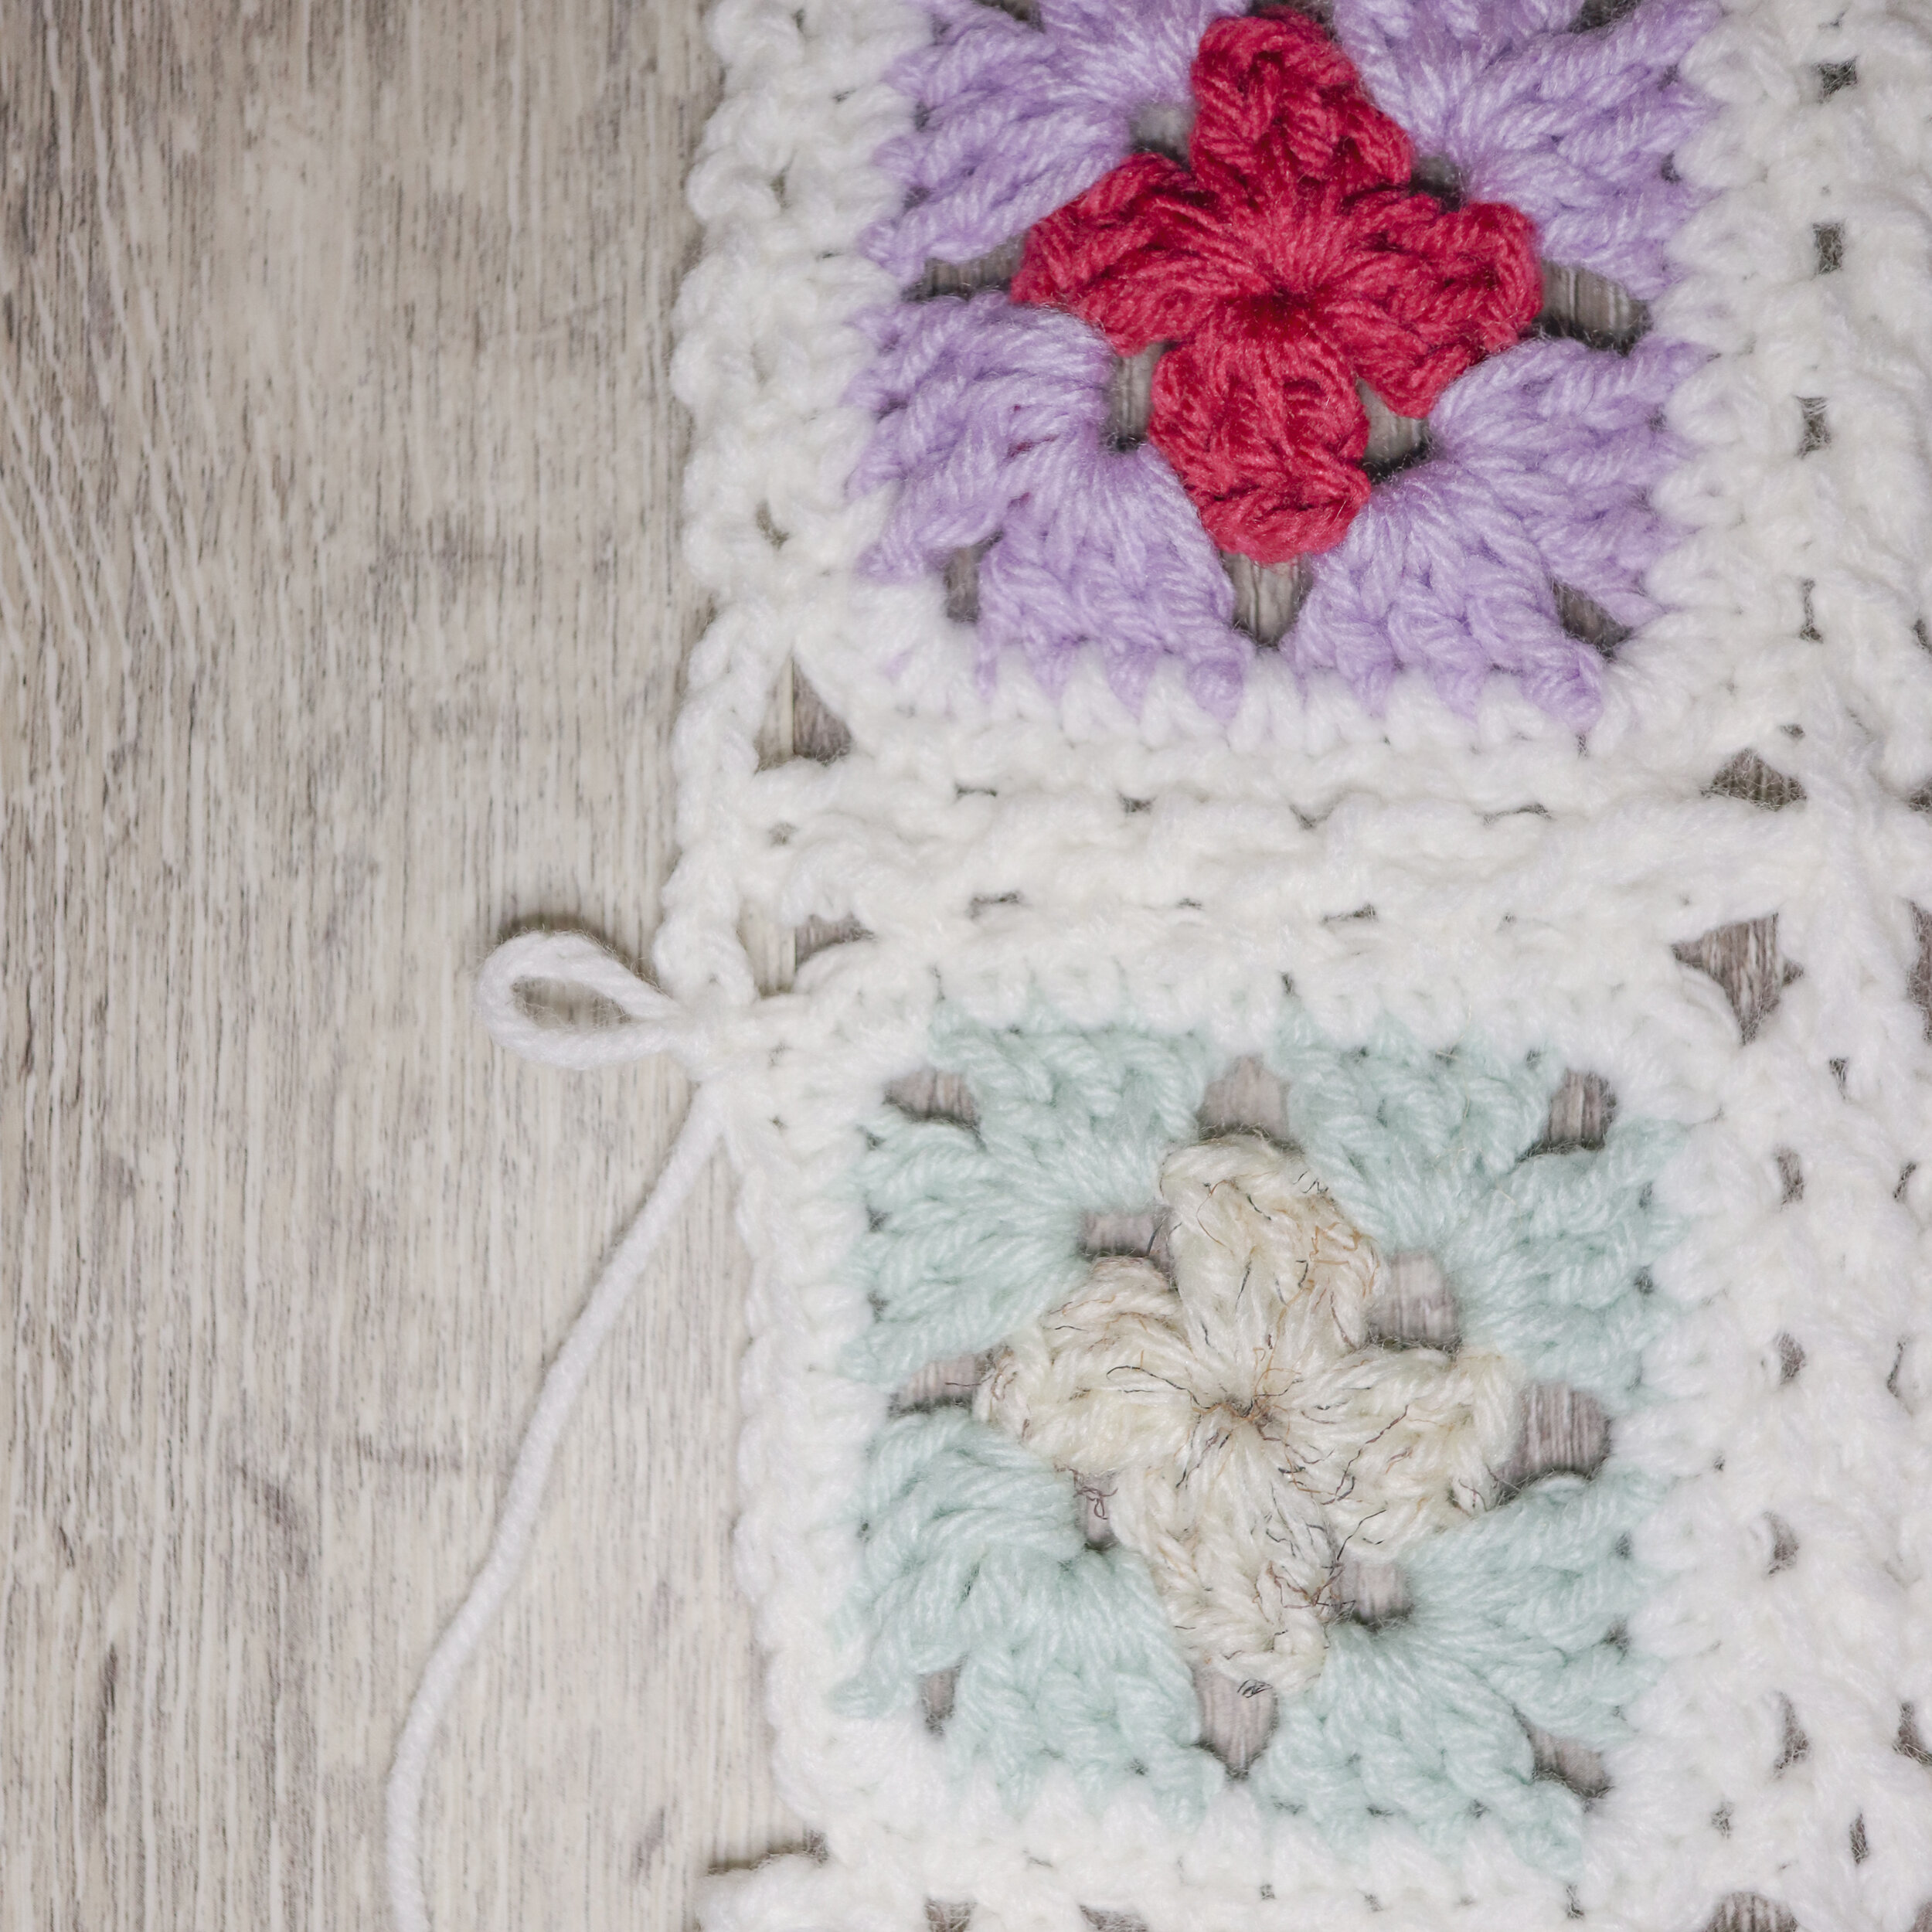
Now, this join really benefits from a blocking or washing to open up all those beautiful lacy looking bits! For washable things, I usually like to throw them in the washing machine. When it comes out of the dryer, the Continuous Flat Braid Join just looks AMAZING! For non-washable garments and such, wet blocking does the trick!

Happy Crocheting!
IF YOU LIKED THIS PATTERN, PLEASE SUPPORT ME ON PATREON OR BUY ME A COFFEE!

BUY ME A COFFEE
SUPPORT ME ON PATREON
I LOVE TO SEE WHAT YOU CREATE!
Please share your creations with the community on social media tagging @ravinsekaidesigns
I can’t wait to see the beautiful things you come up with!
FOLLOW ME ON SOCIAL MEDIA
Facebook: Ravin Sekai Designs
Ravelry: RavinSekai
Instagram: @ravinsekaidesigns
Pinterest: Ravin Sekai Designs
Patreon: Ravin Sekai Designs