
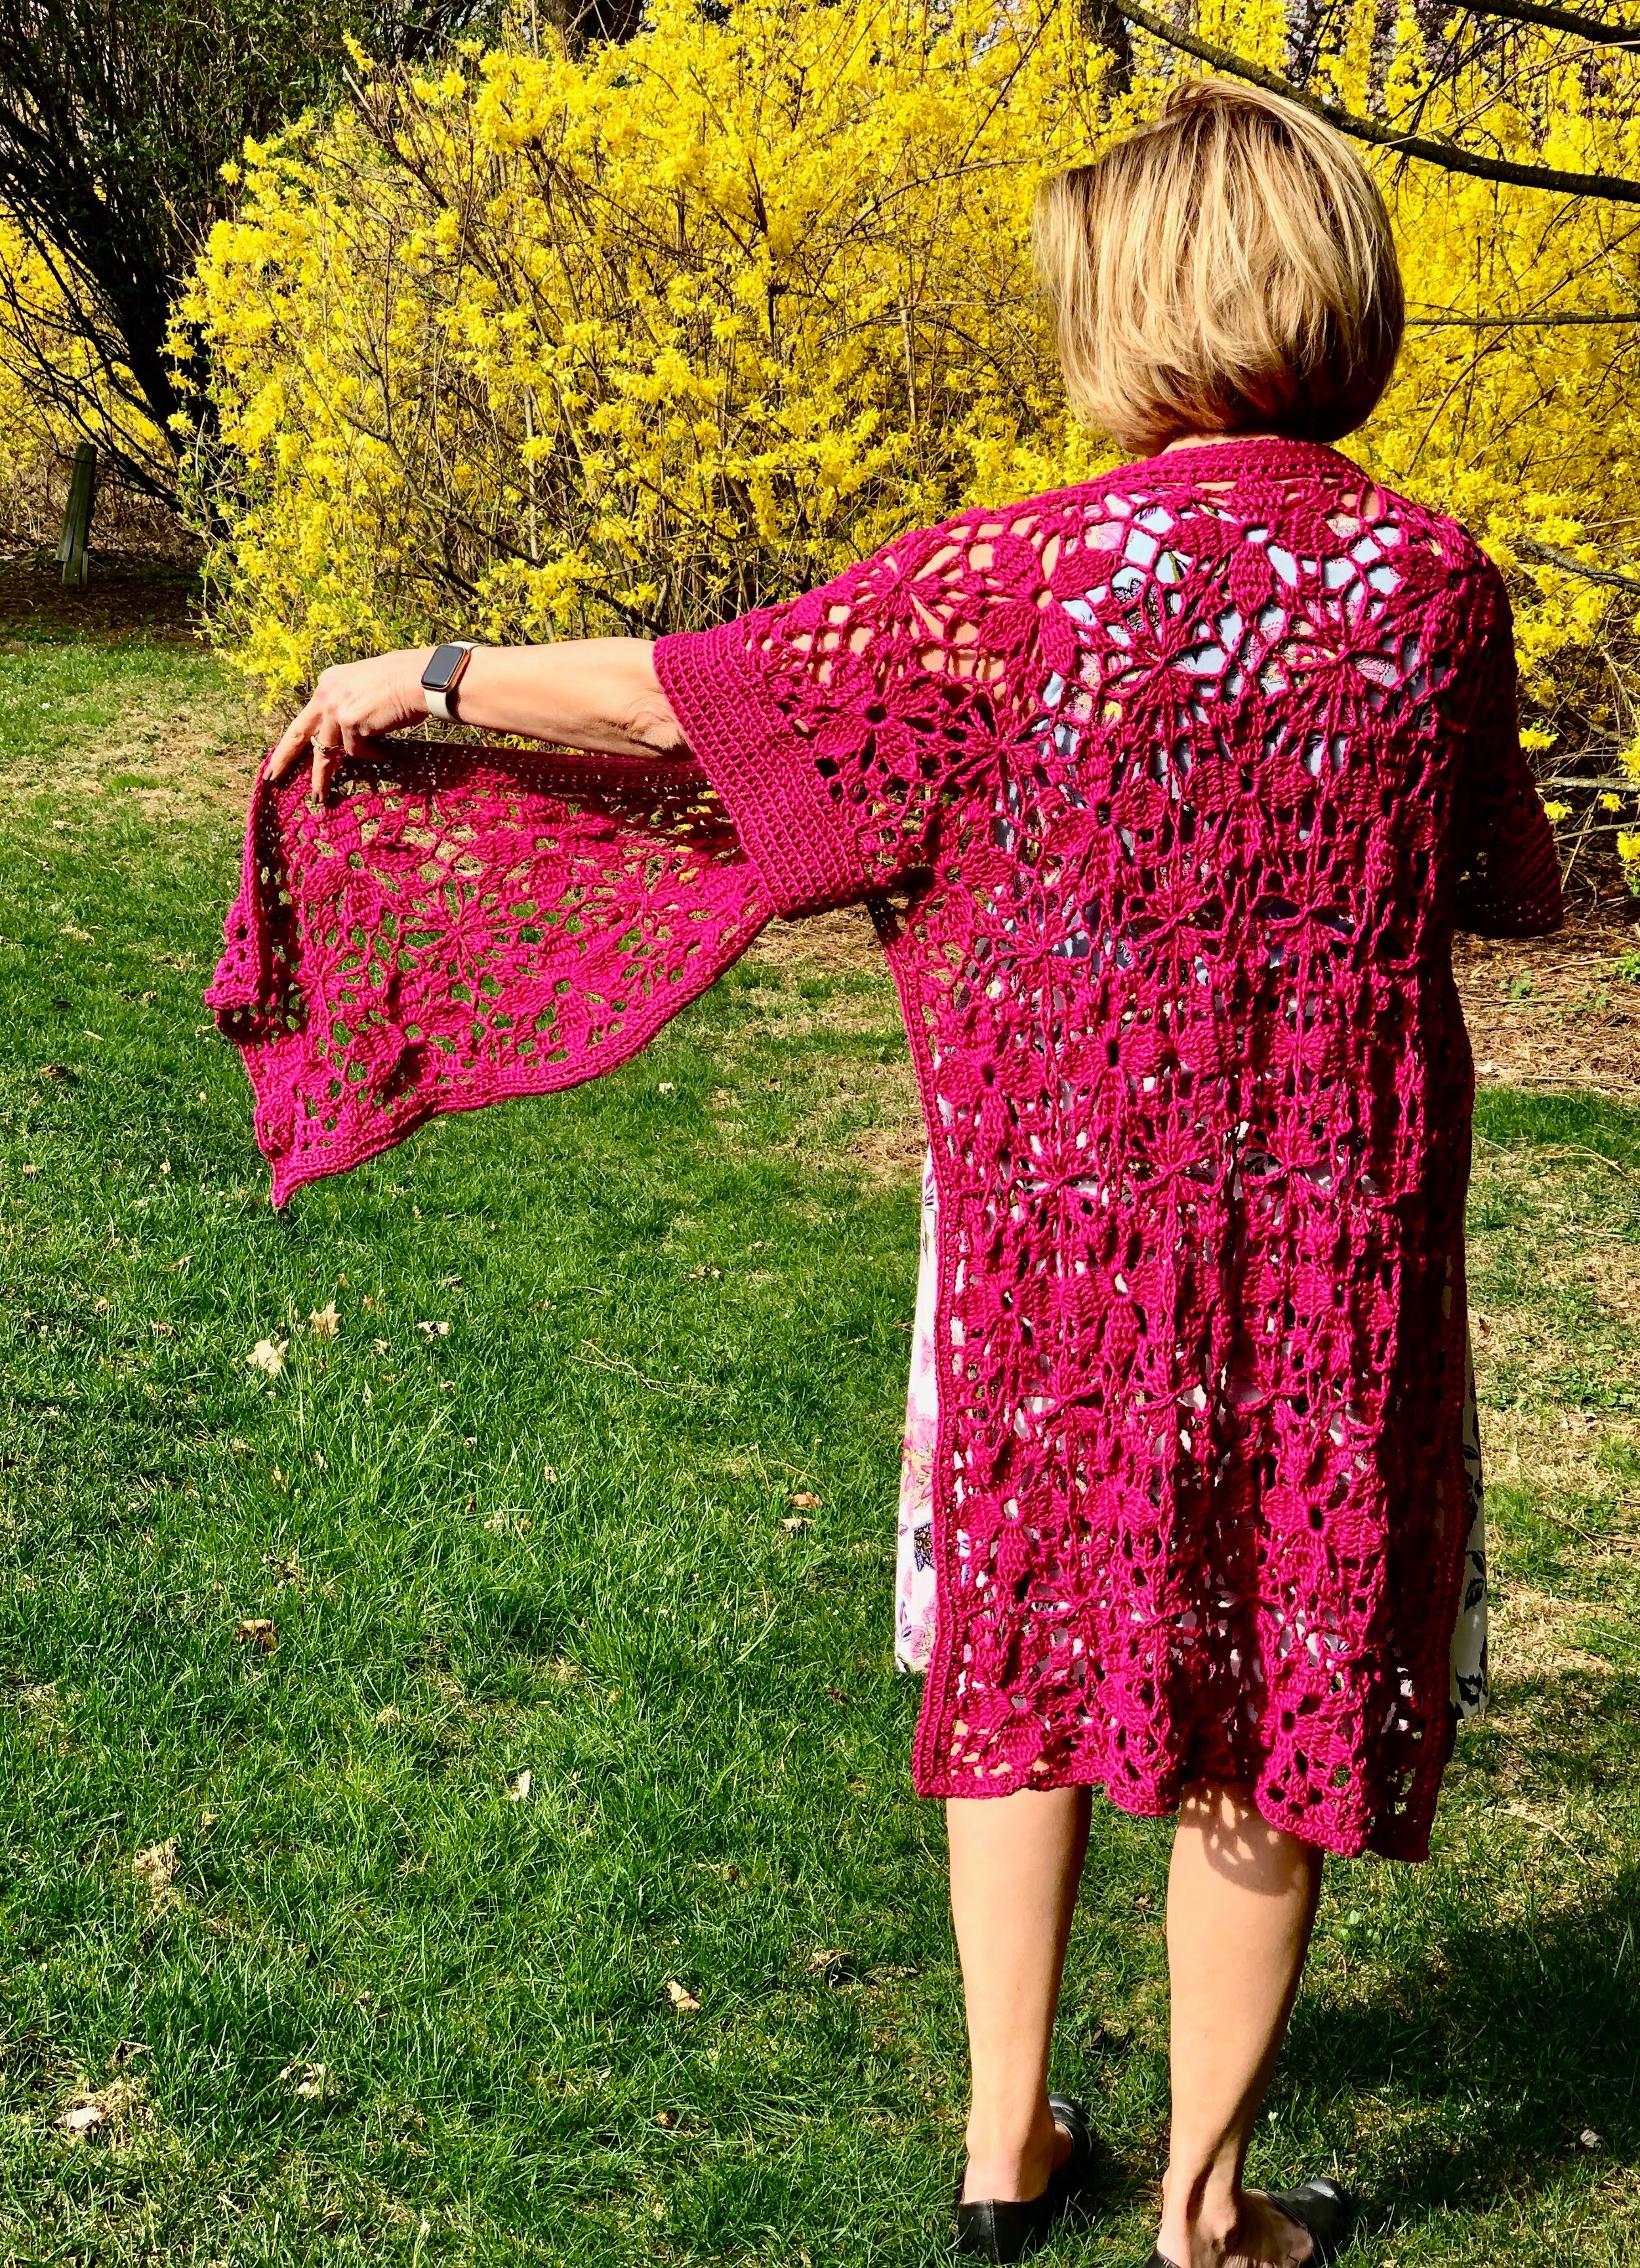
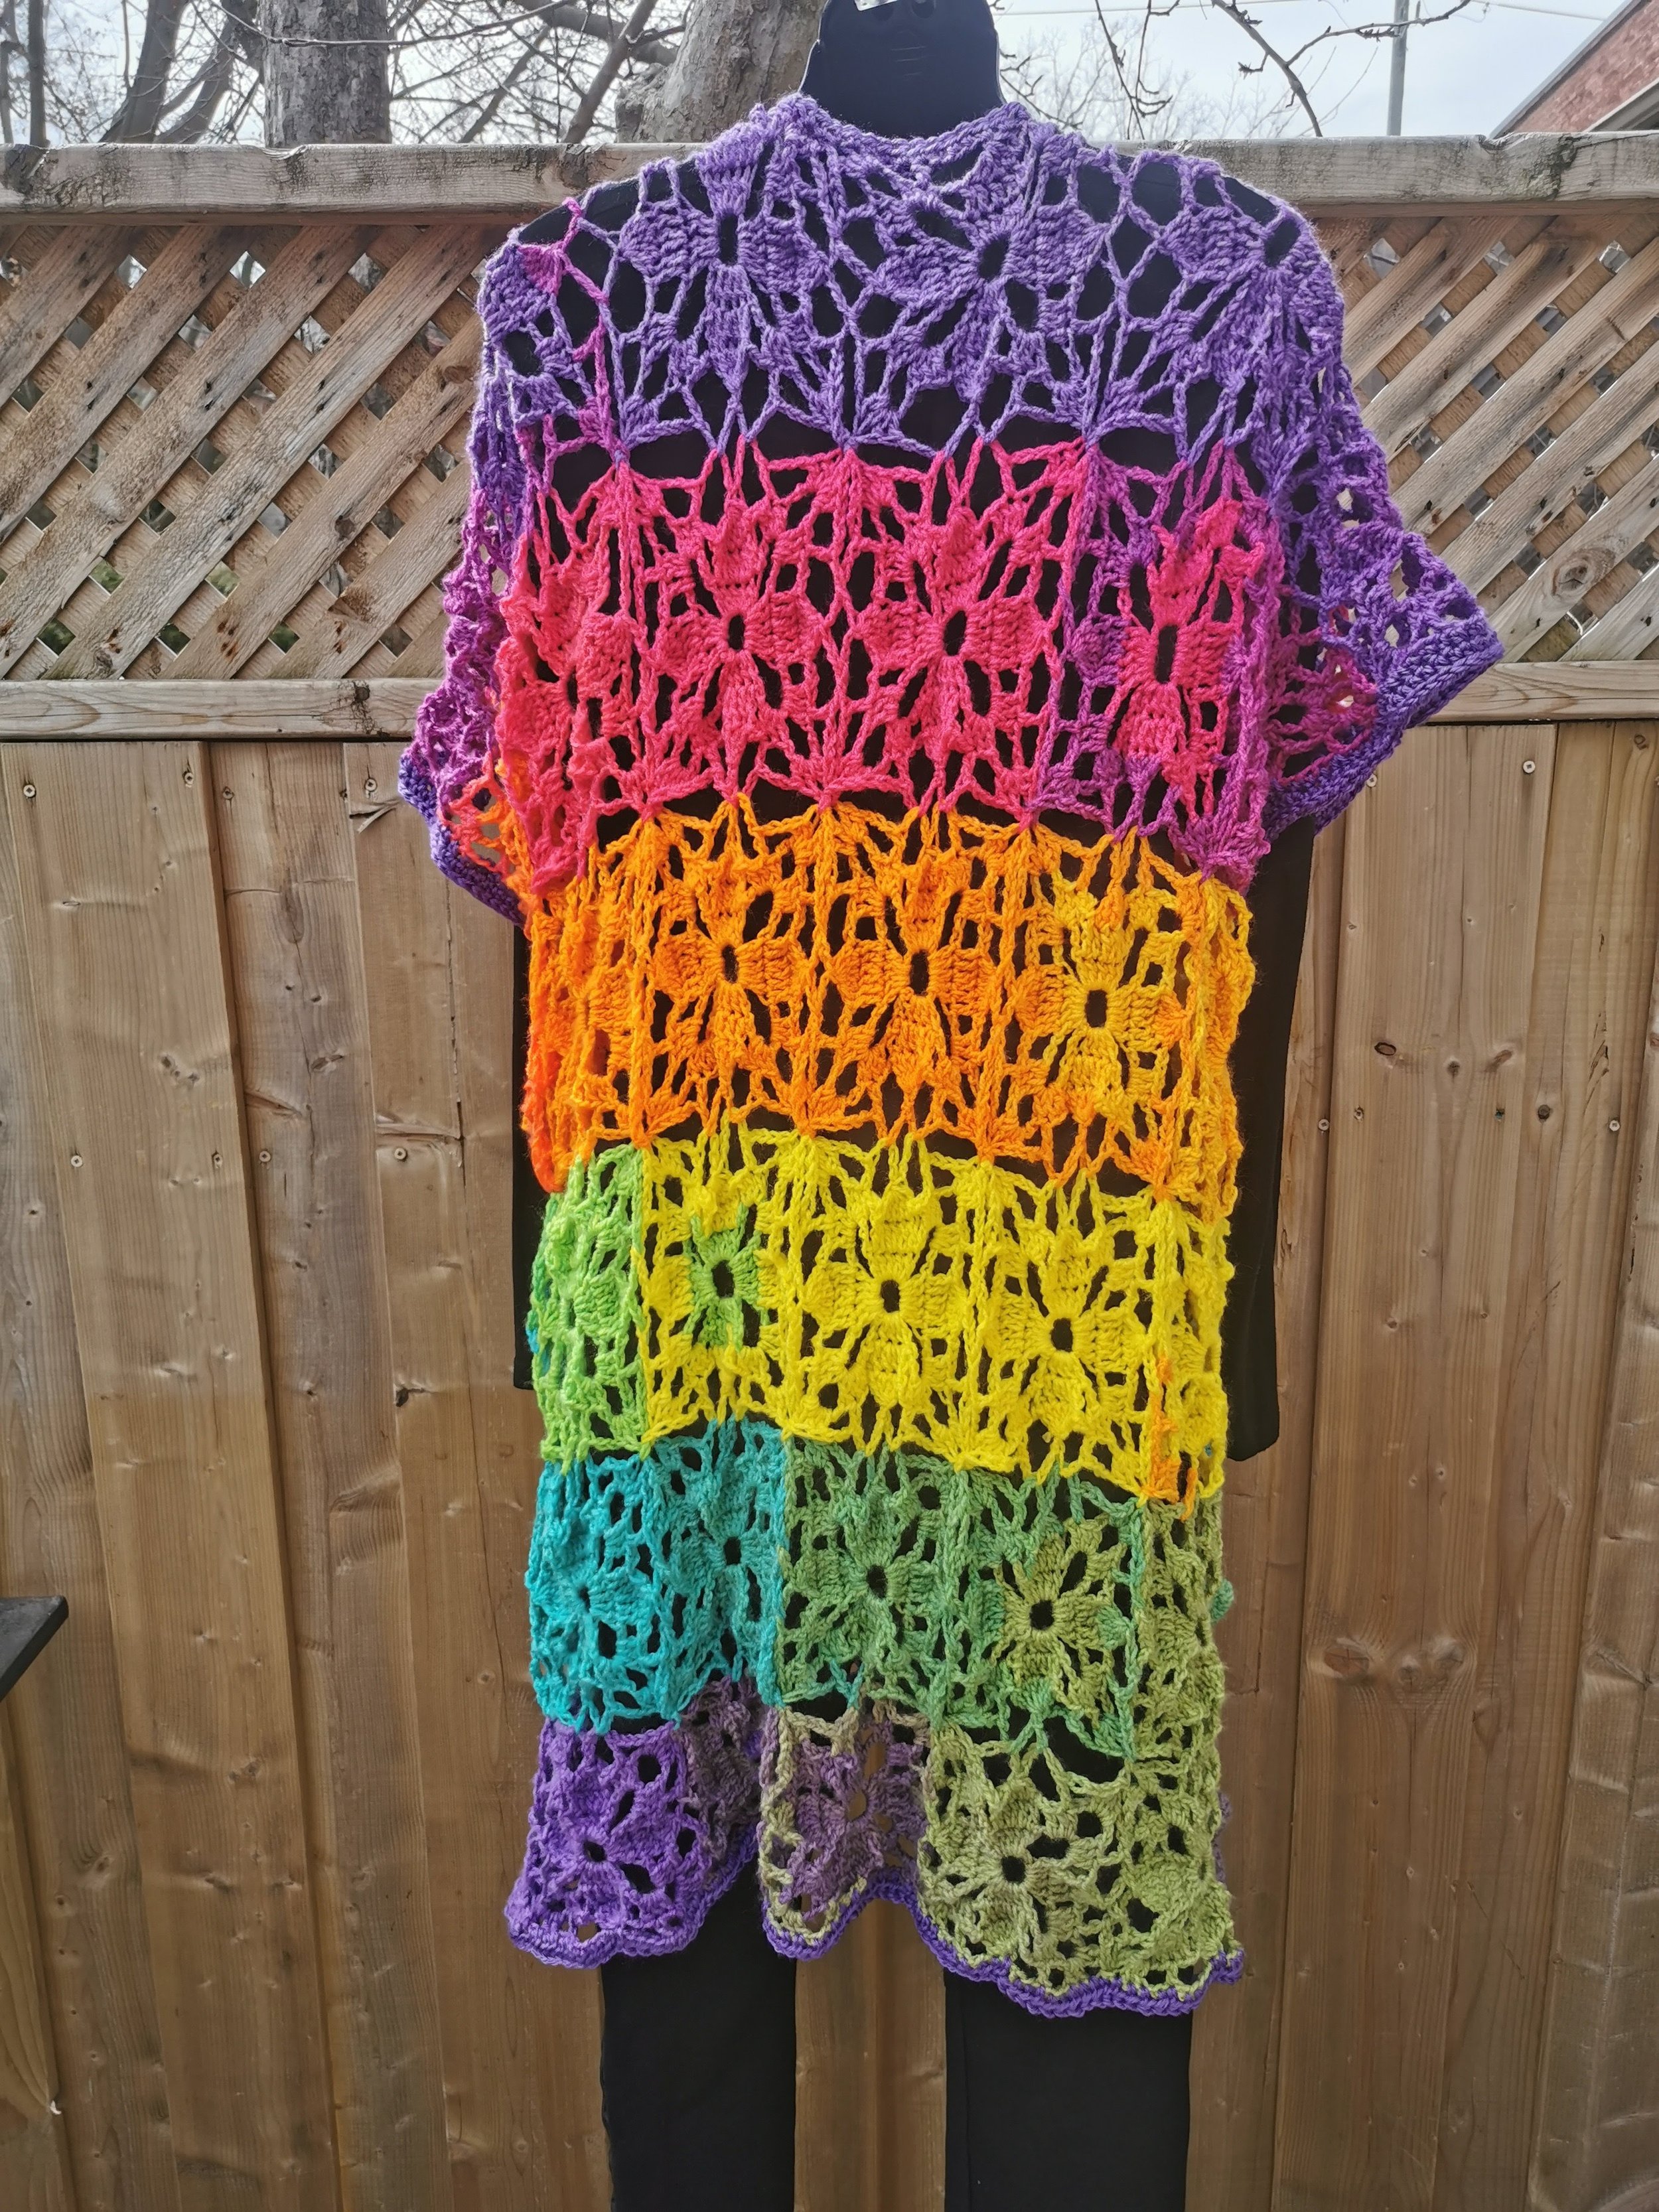
Sweet Summer Ruana

Spring is in the air! Well, mostly anyway. We have a lot of rain here. But, the temperature is getting a little warmer each day!
I’d be remiss in not mentioning it, so I wanted to touch on current events just a tiny bit, even though we’re probably all so sick of reading about it and living it. How is everyone doing out there? How has your social distancing been treating you? Vin and I have been lucky. We’ve been sheltering in place for nearly a month now. Every day definitely isn’t easy, especially with the nicer weather coming in. But, I have to believe that what we are doing will make some kind of difference.

Also, to all my subscribers that are essential workers: doctors, nurses, EMTs, healthcare providers, service industry workers, kitchen staff, delivery drivers, mail carriers, factory workers, you know who you are. You are all AMAZING! Thank you for your service. You’re the heros here!
About This Ruana:
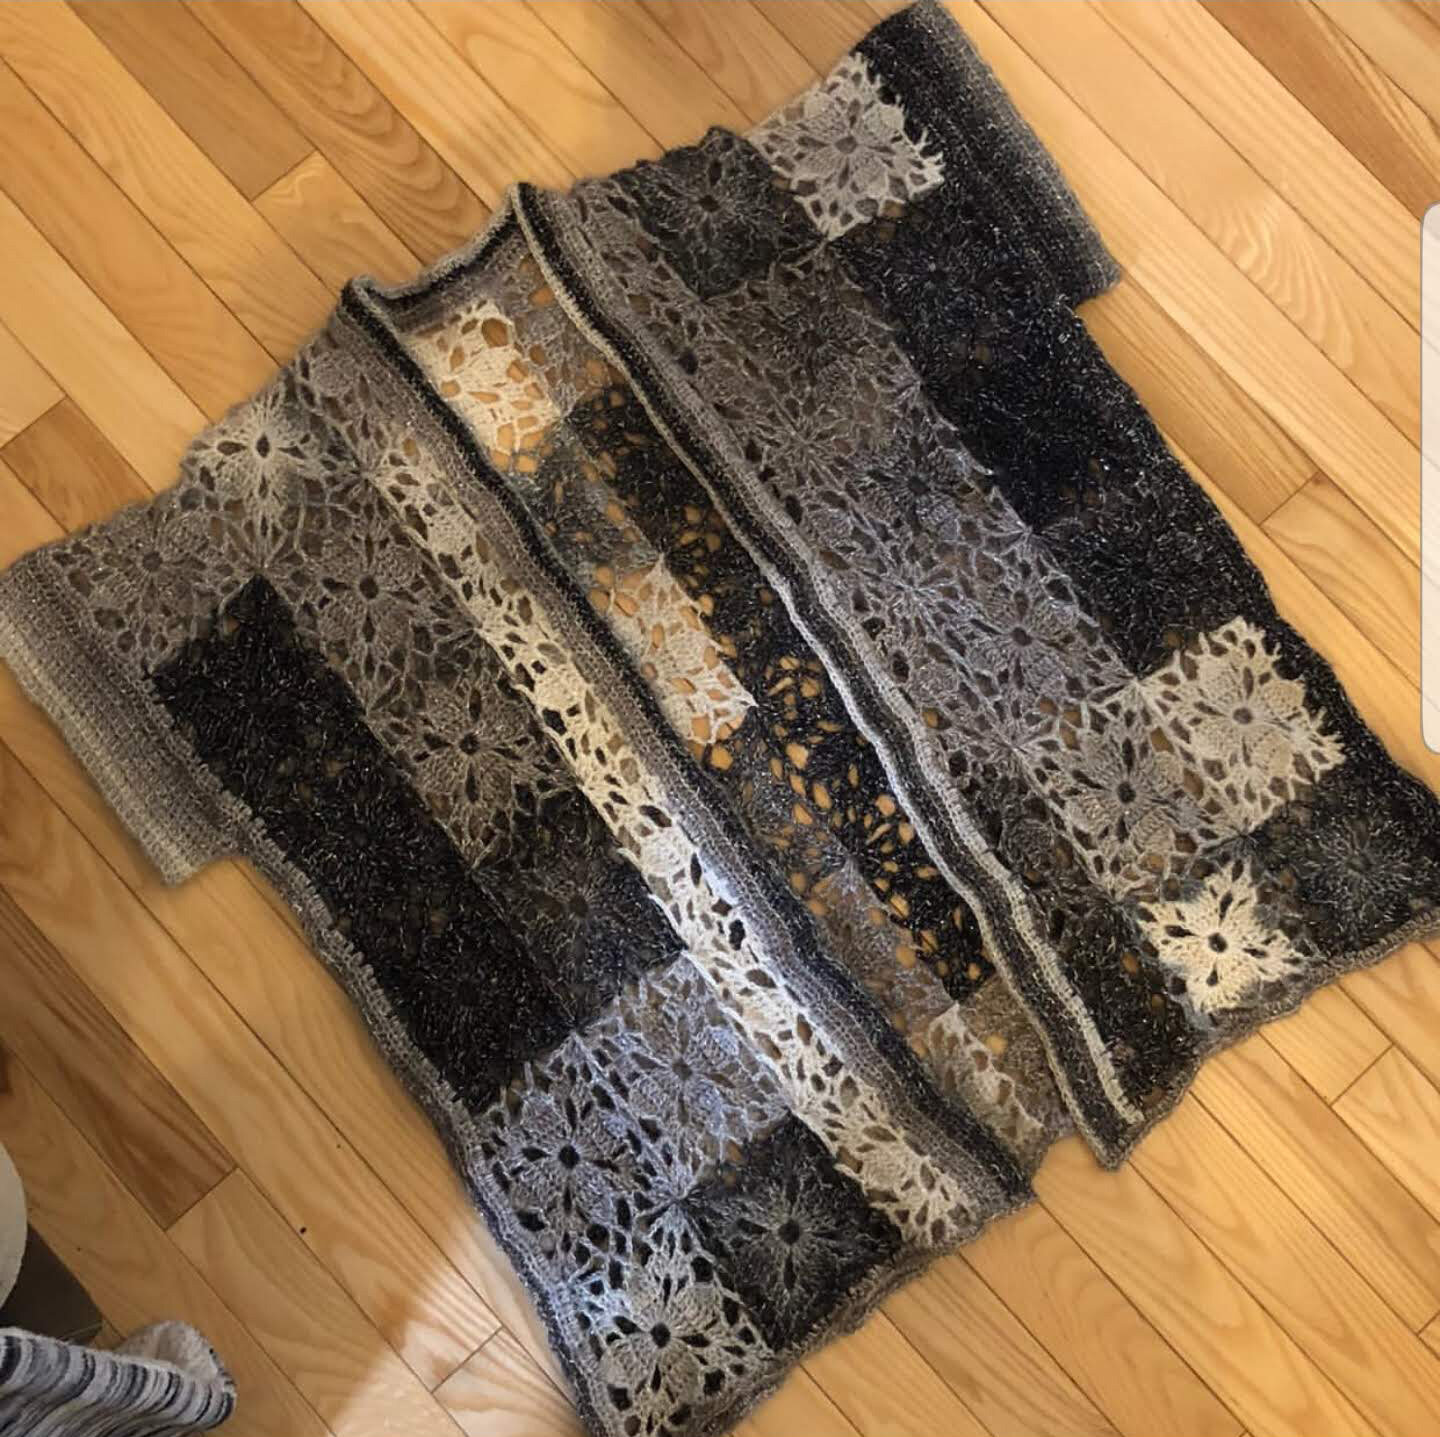
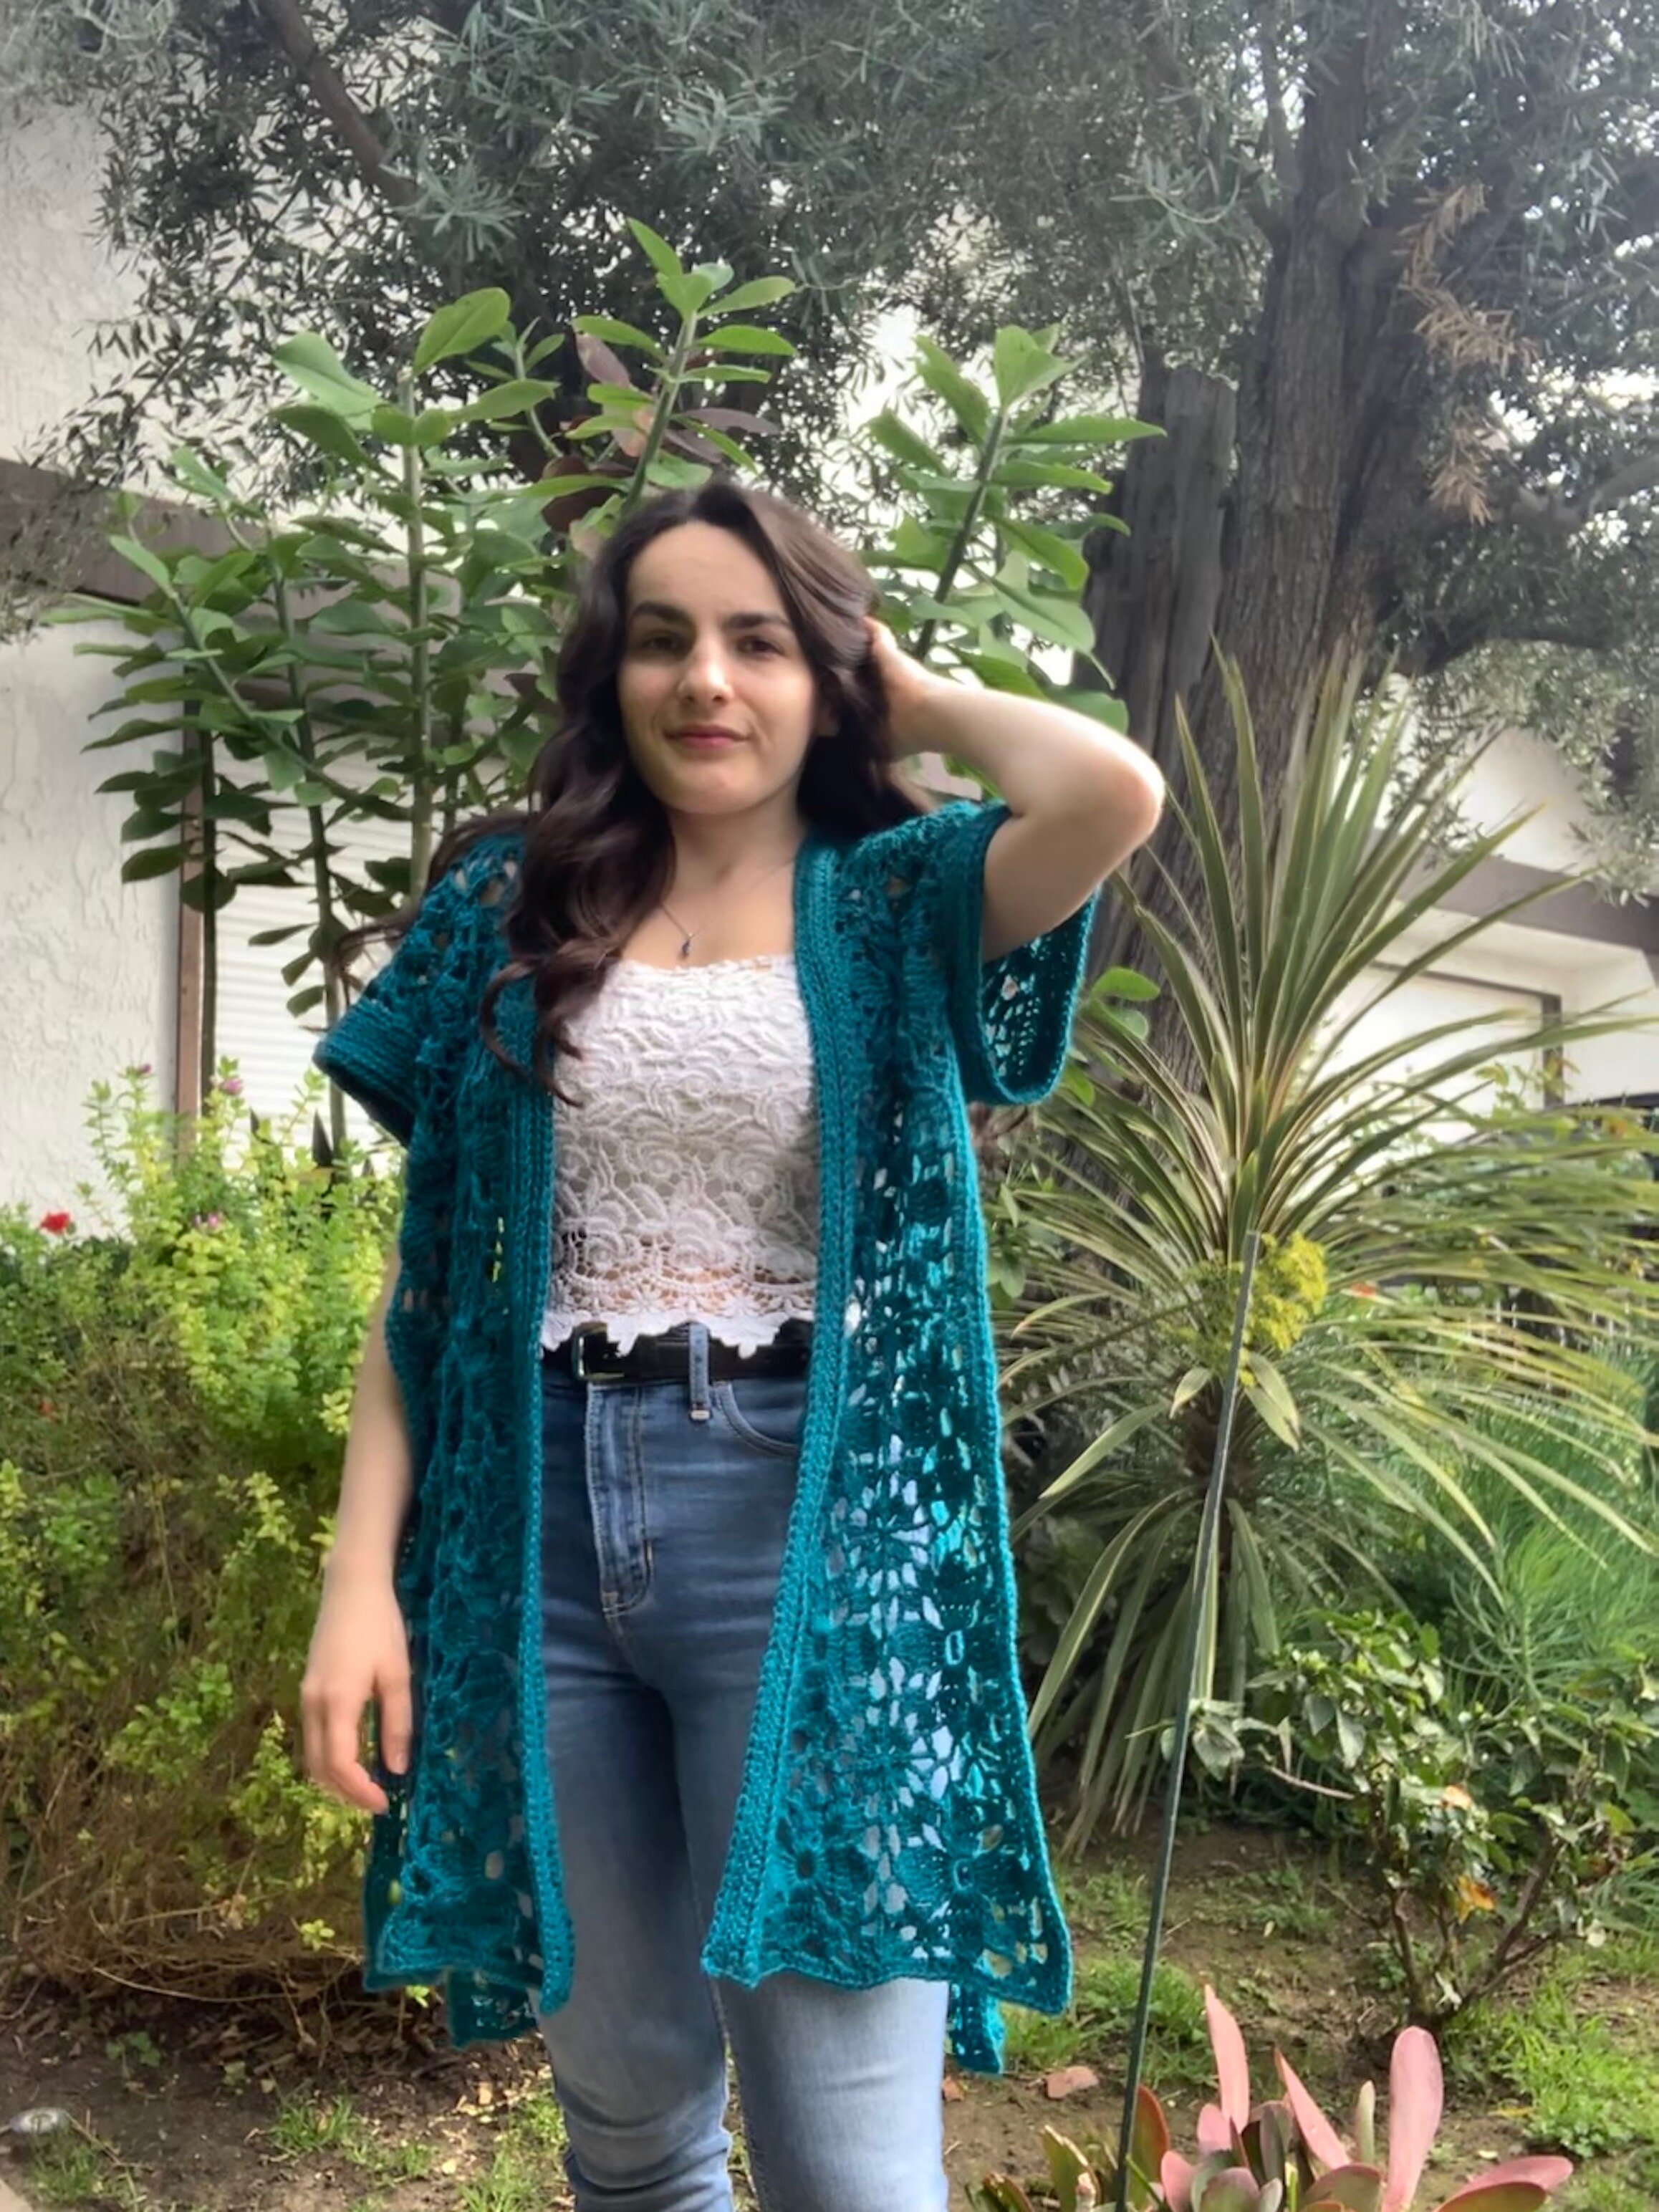
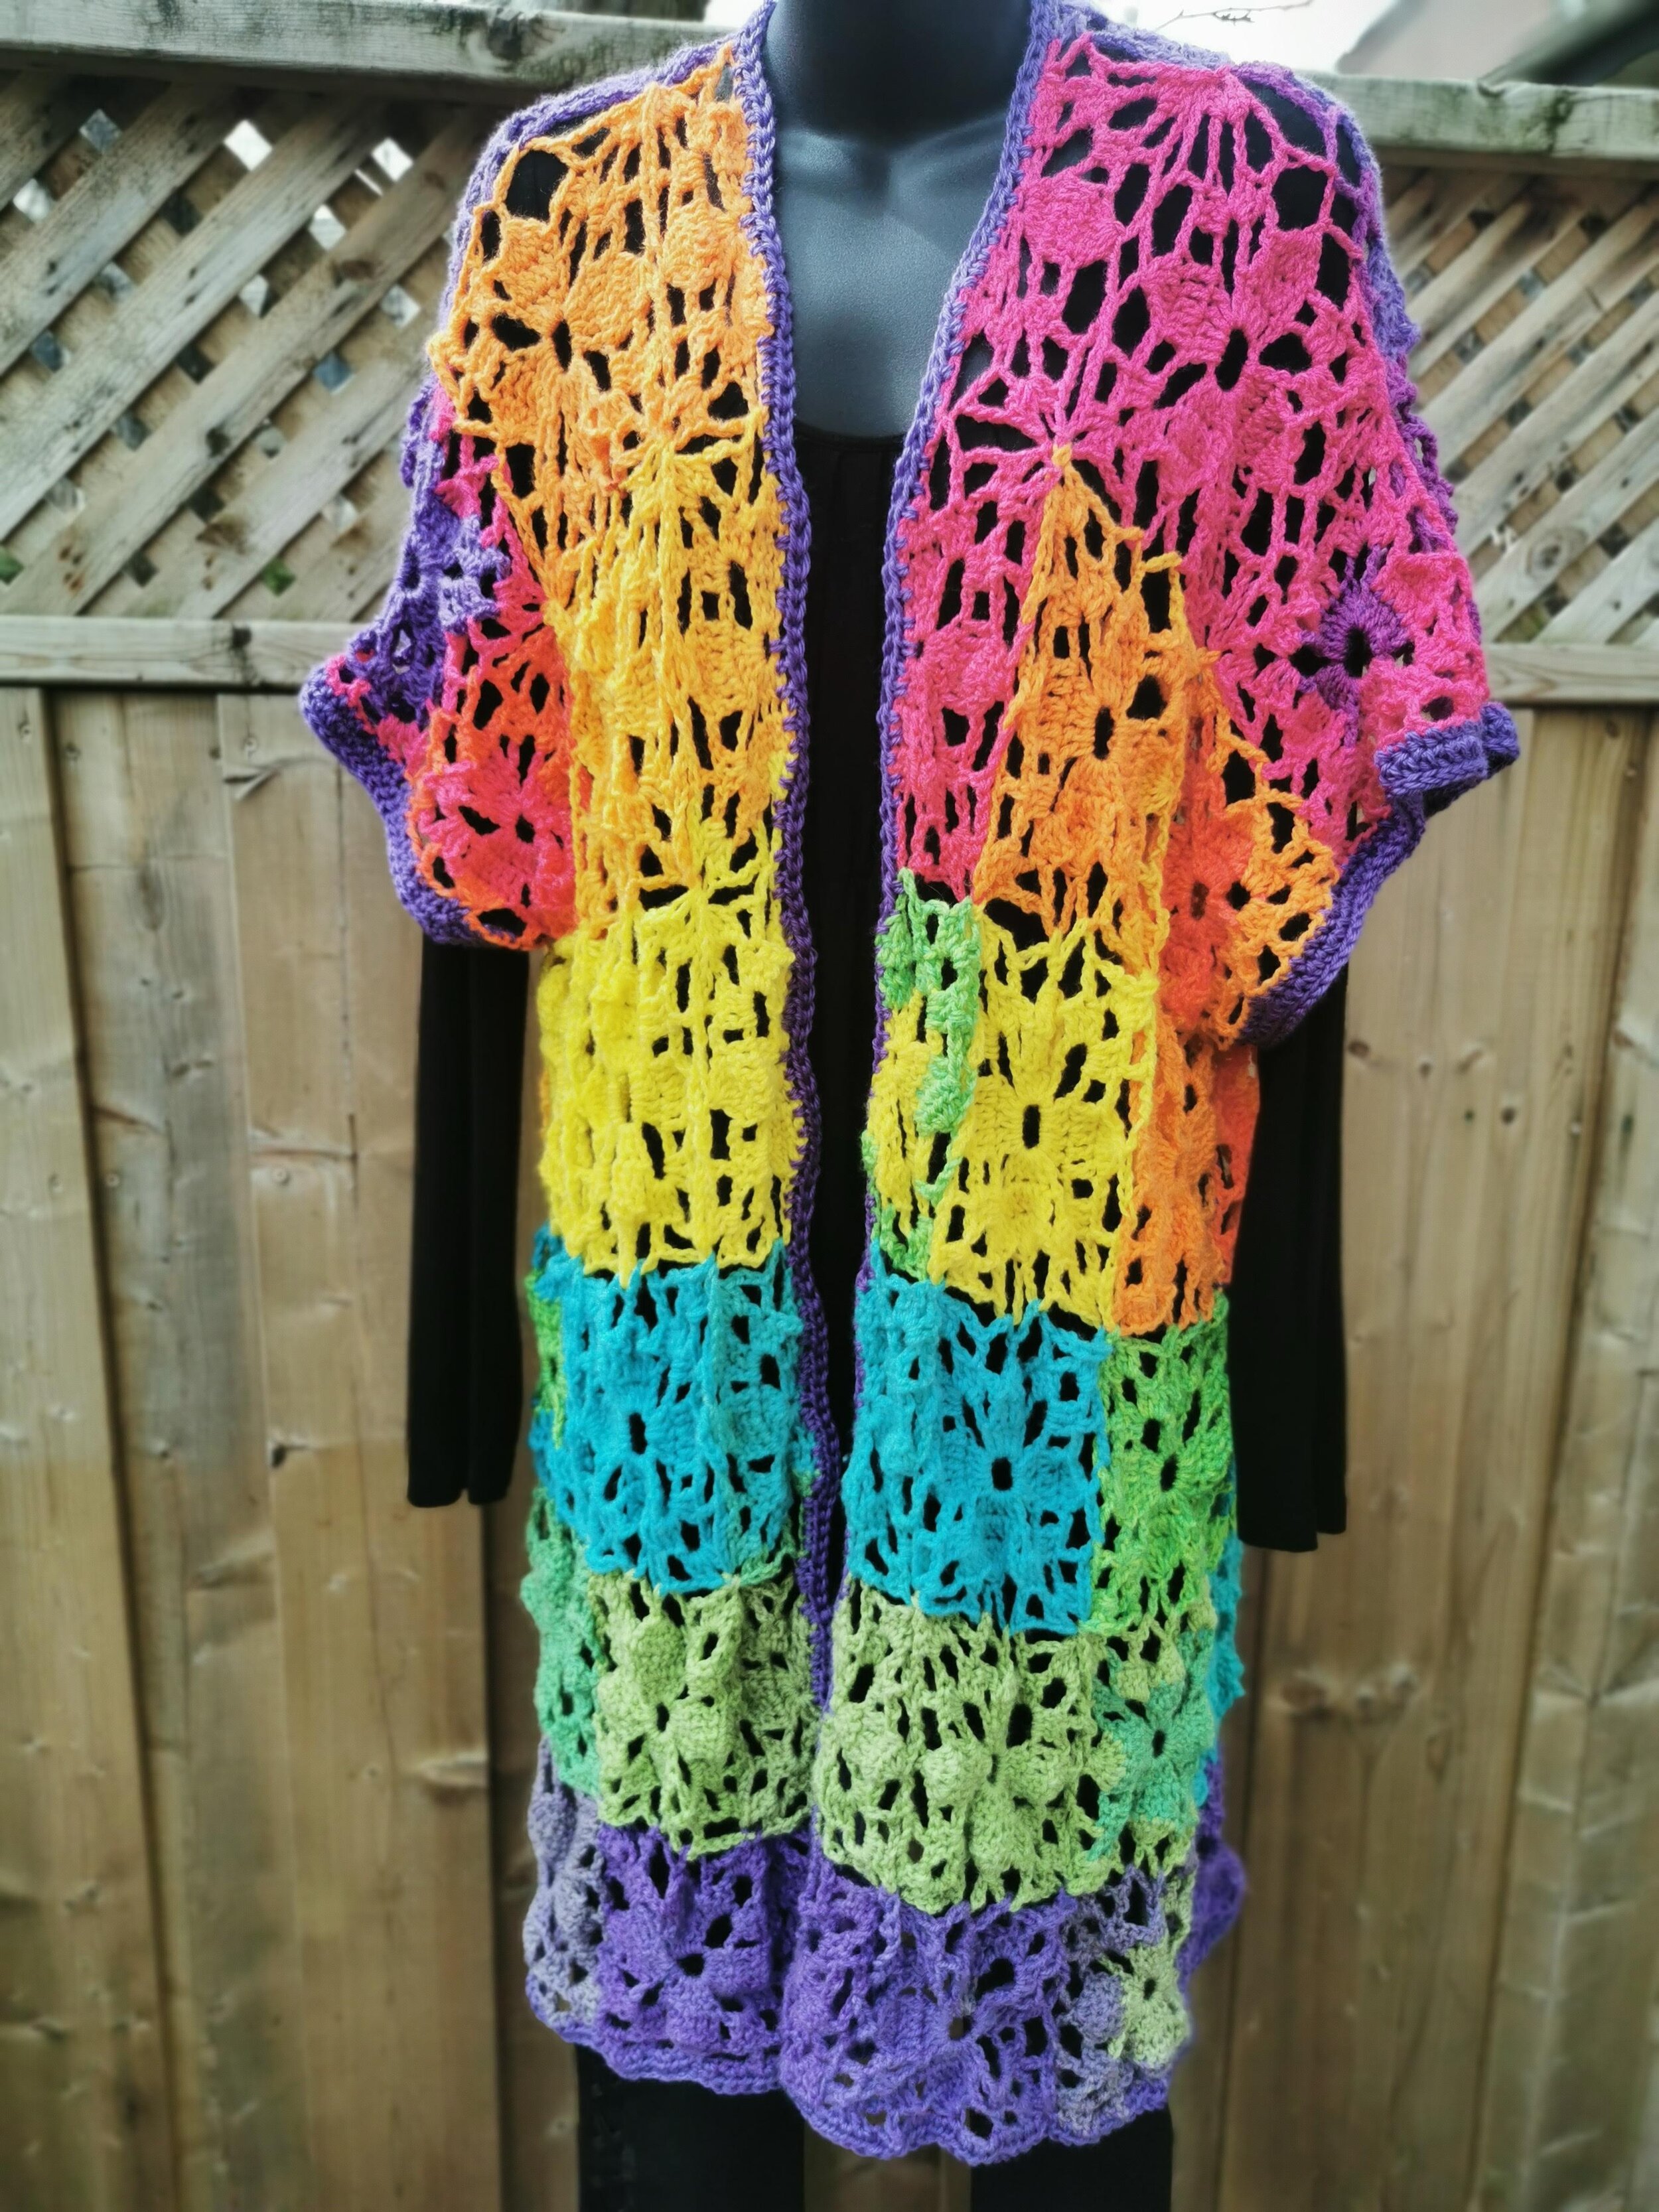
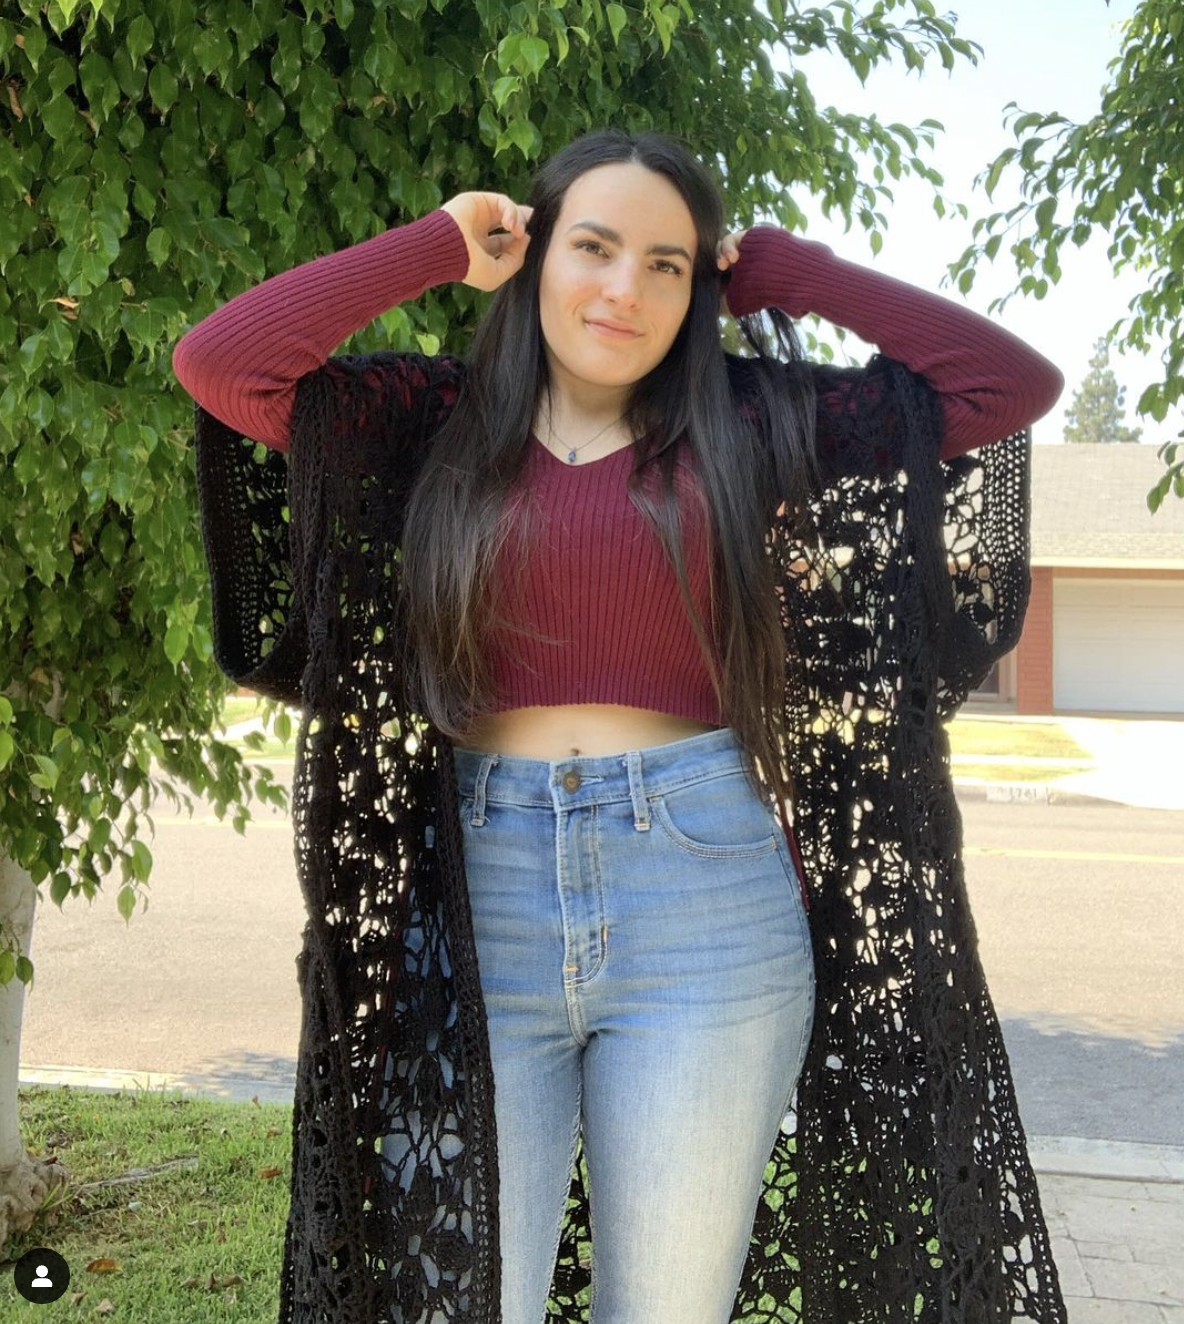
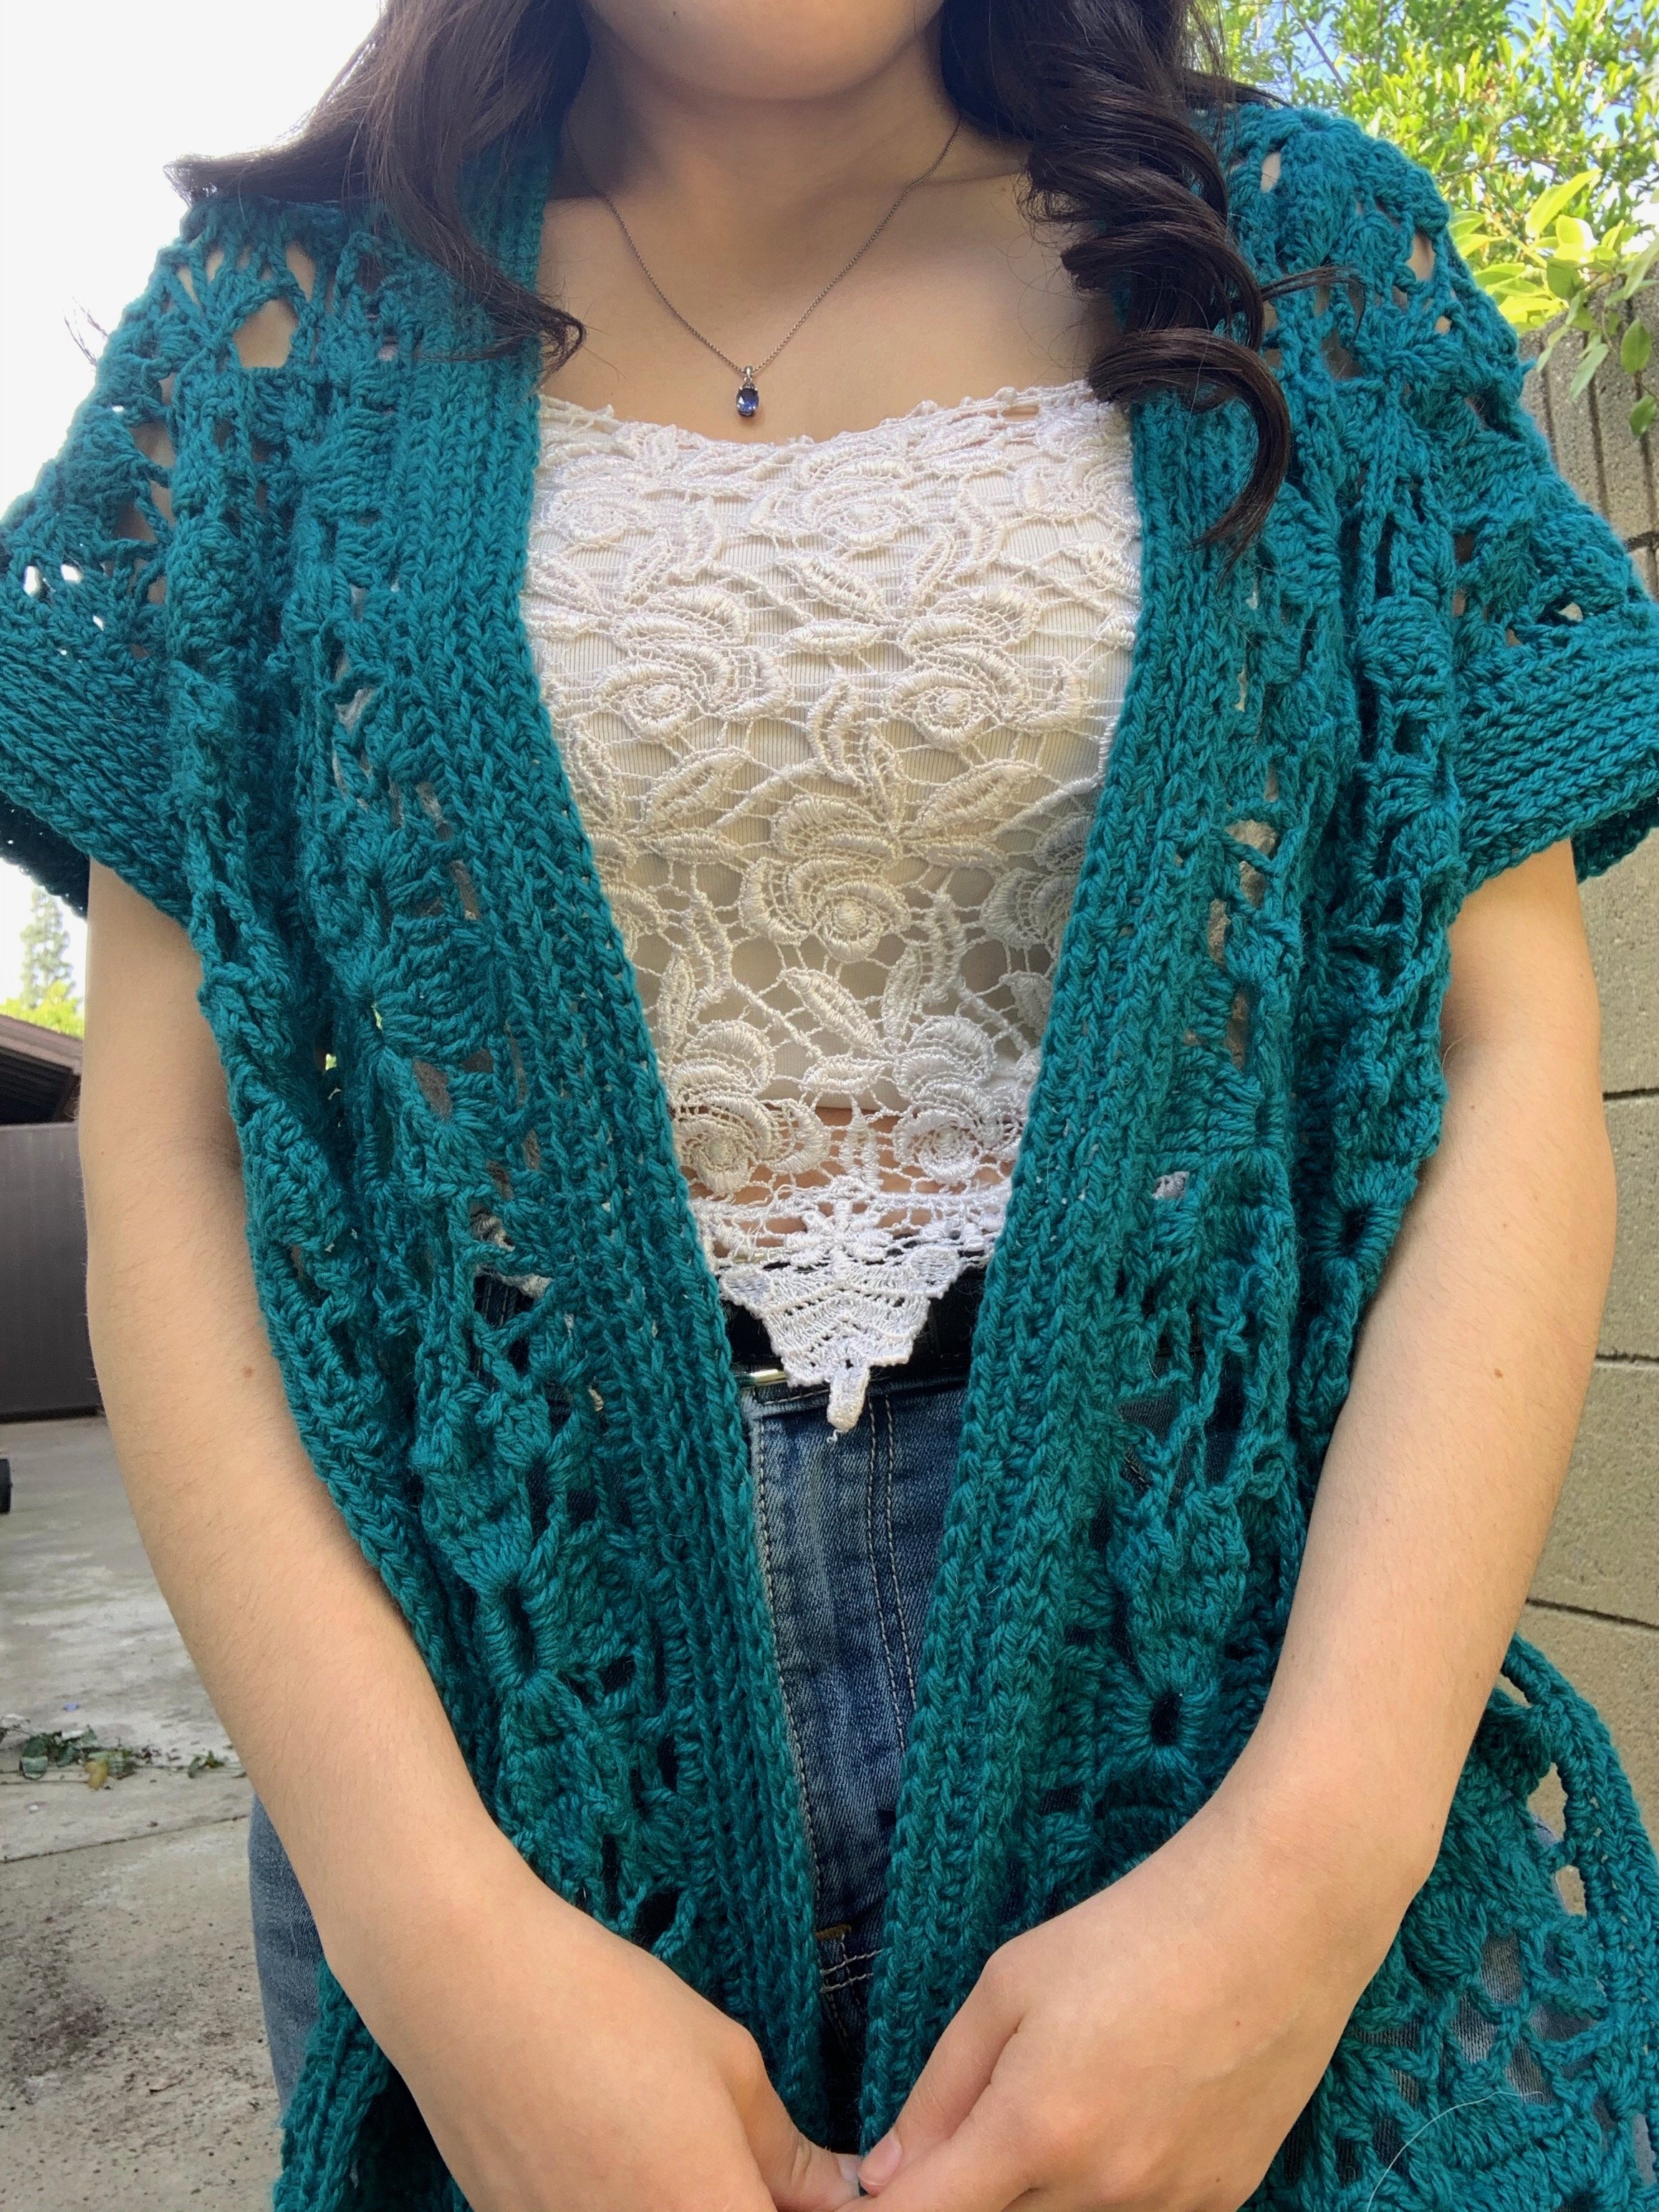
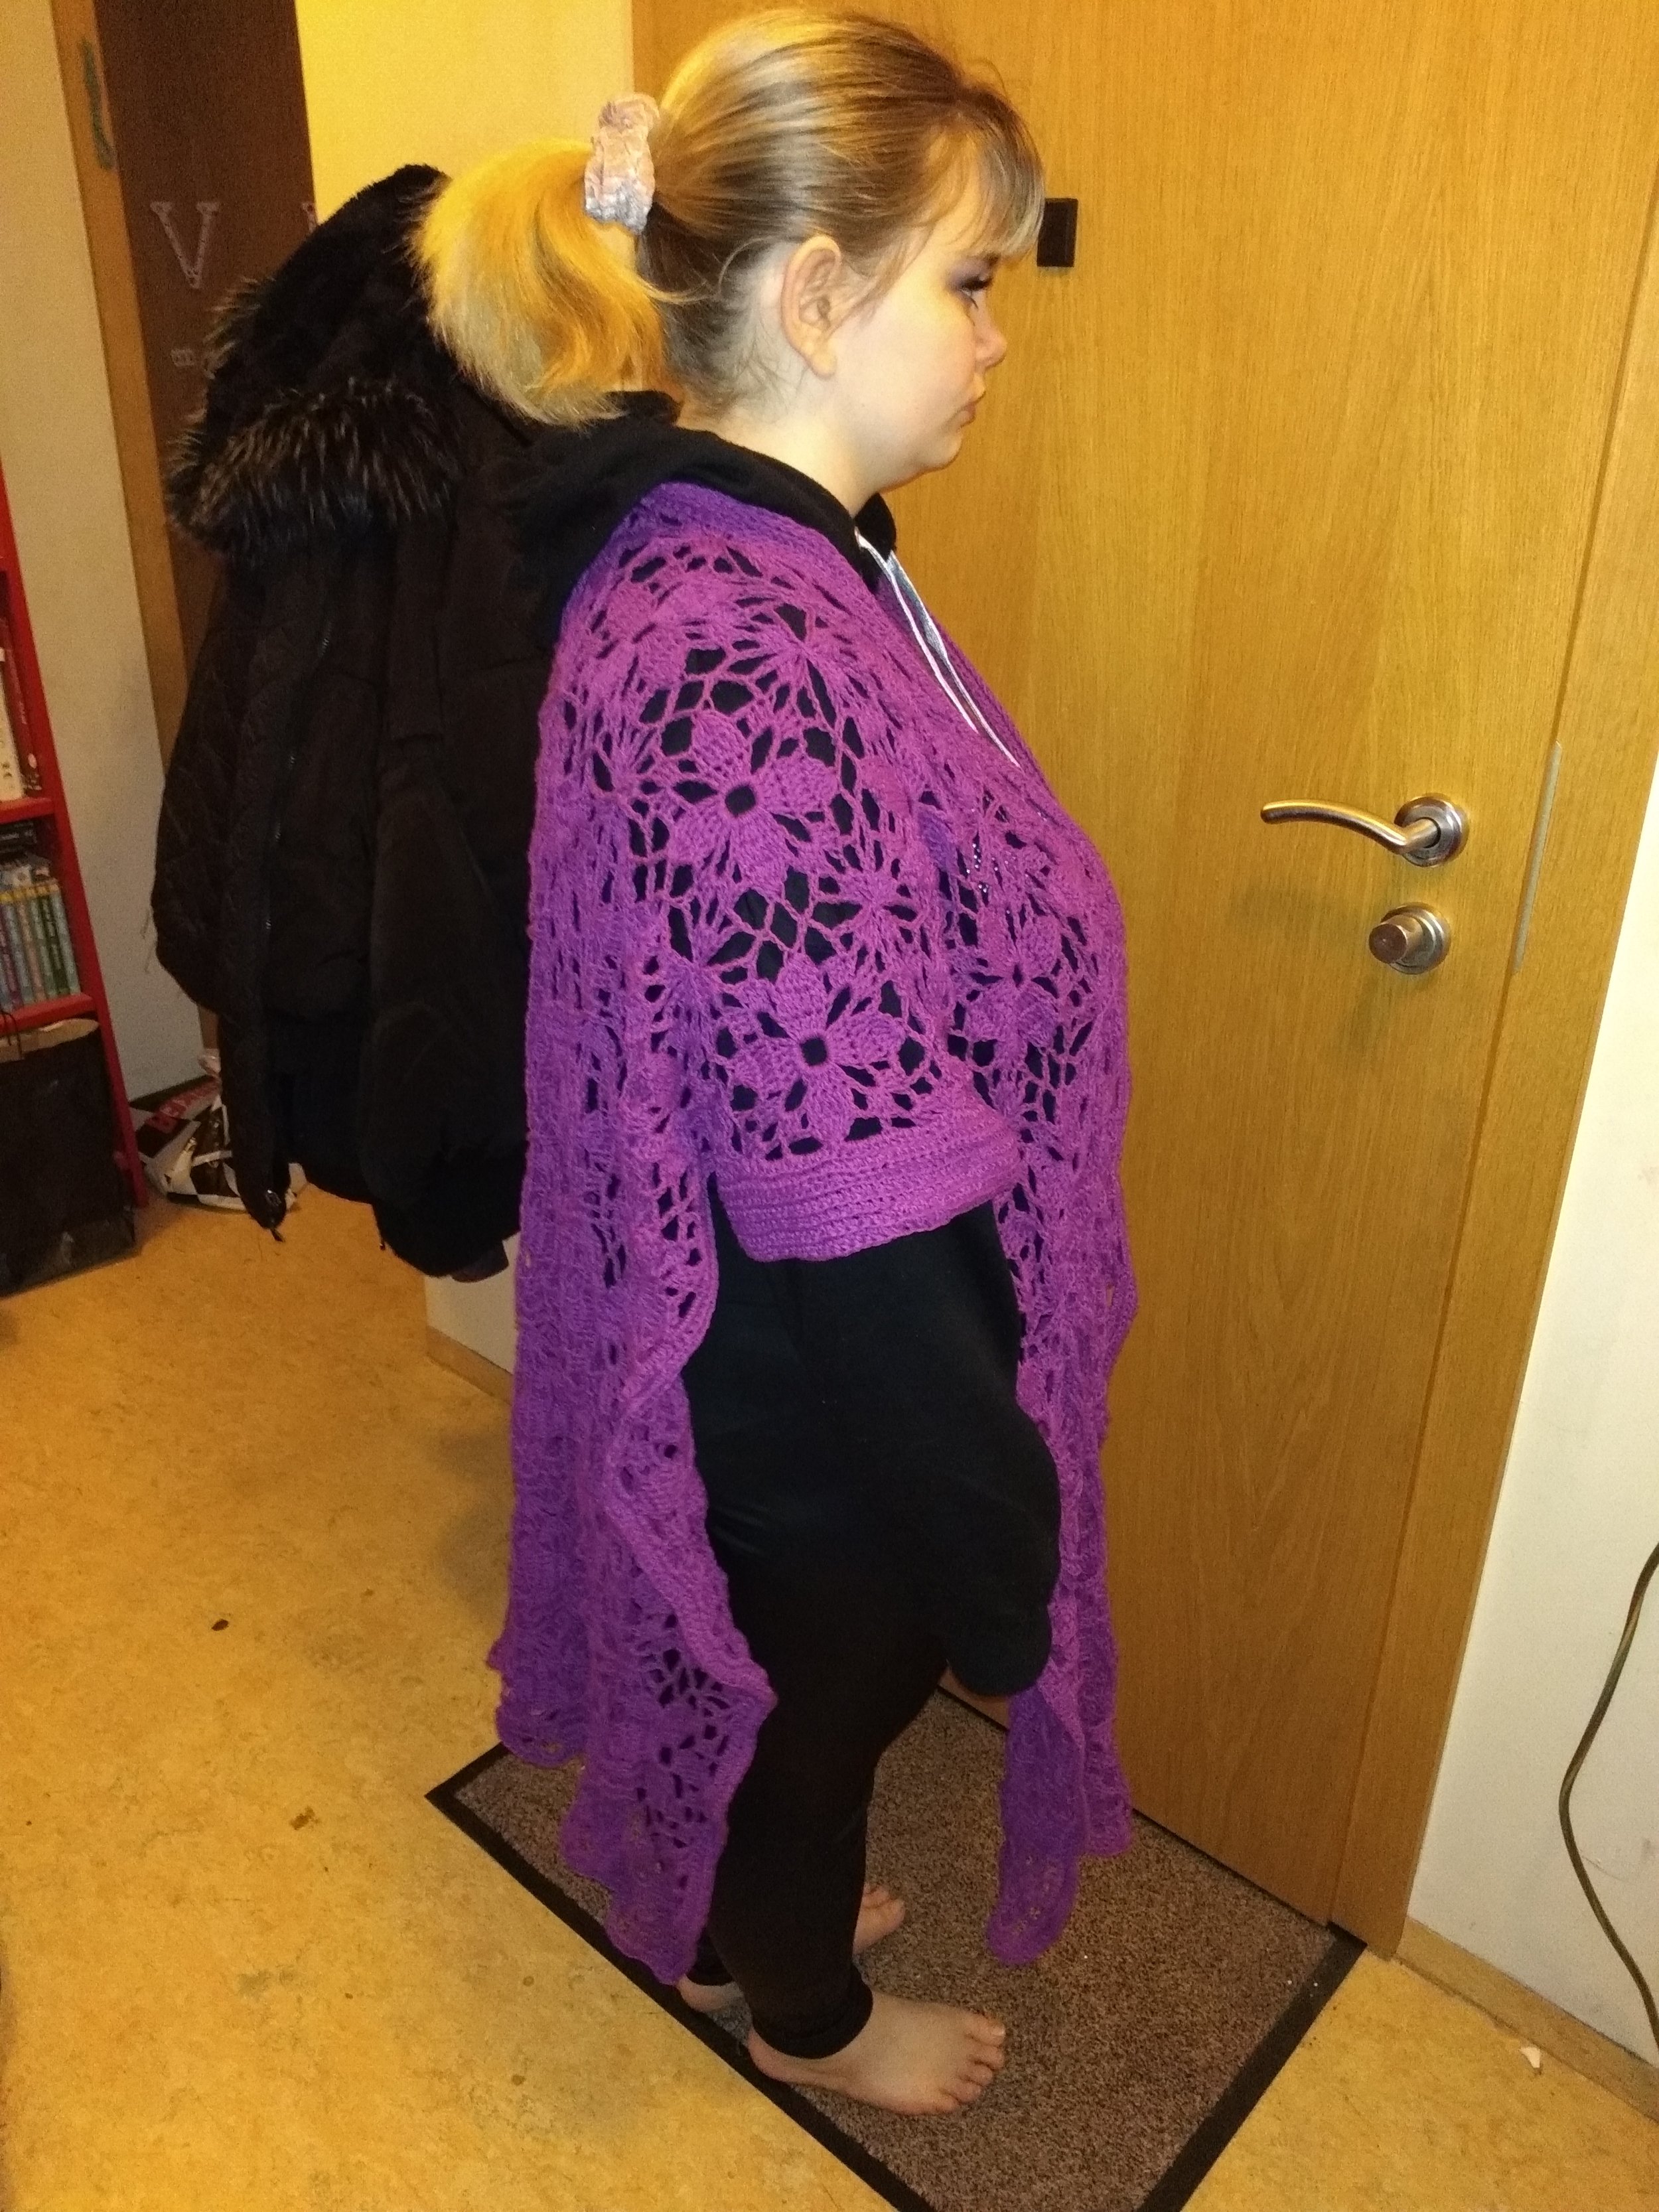
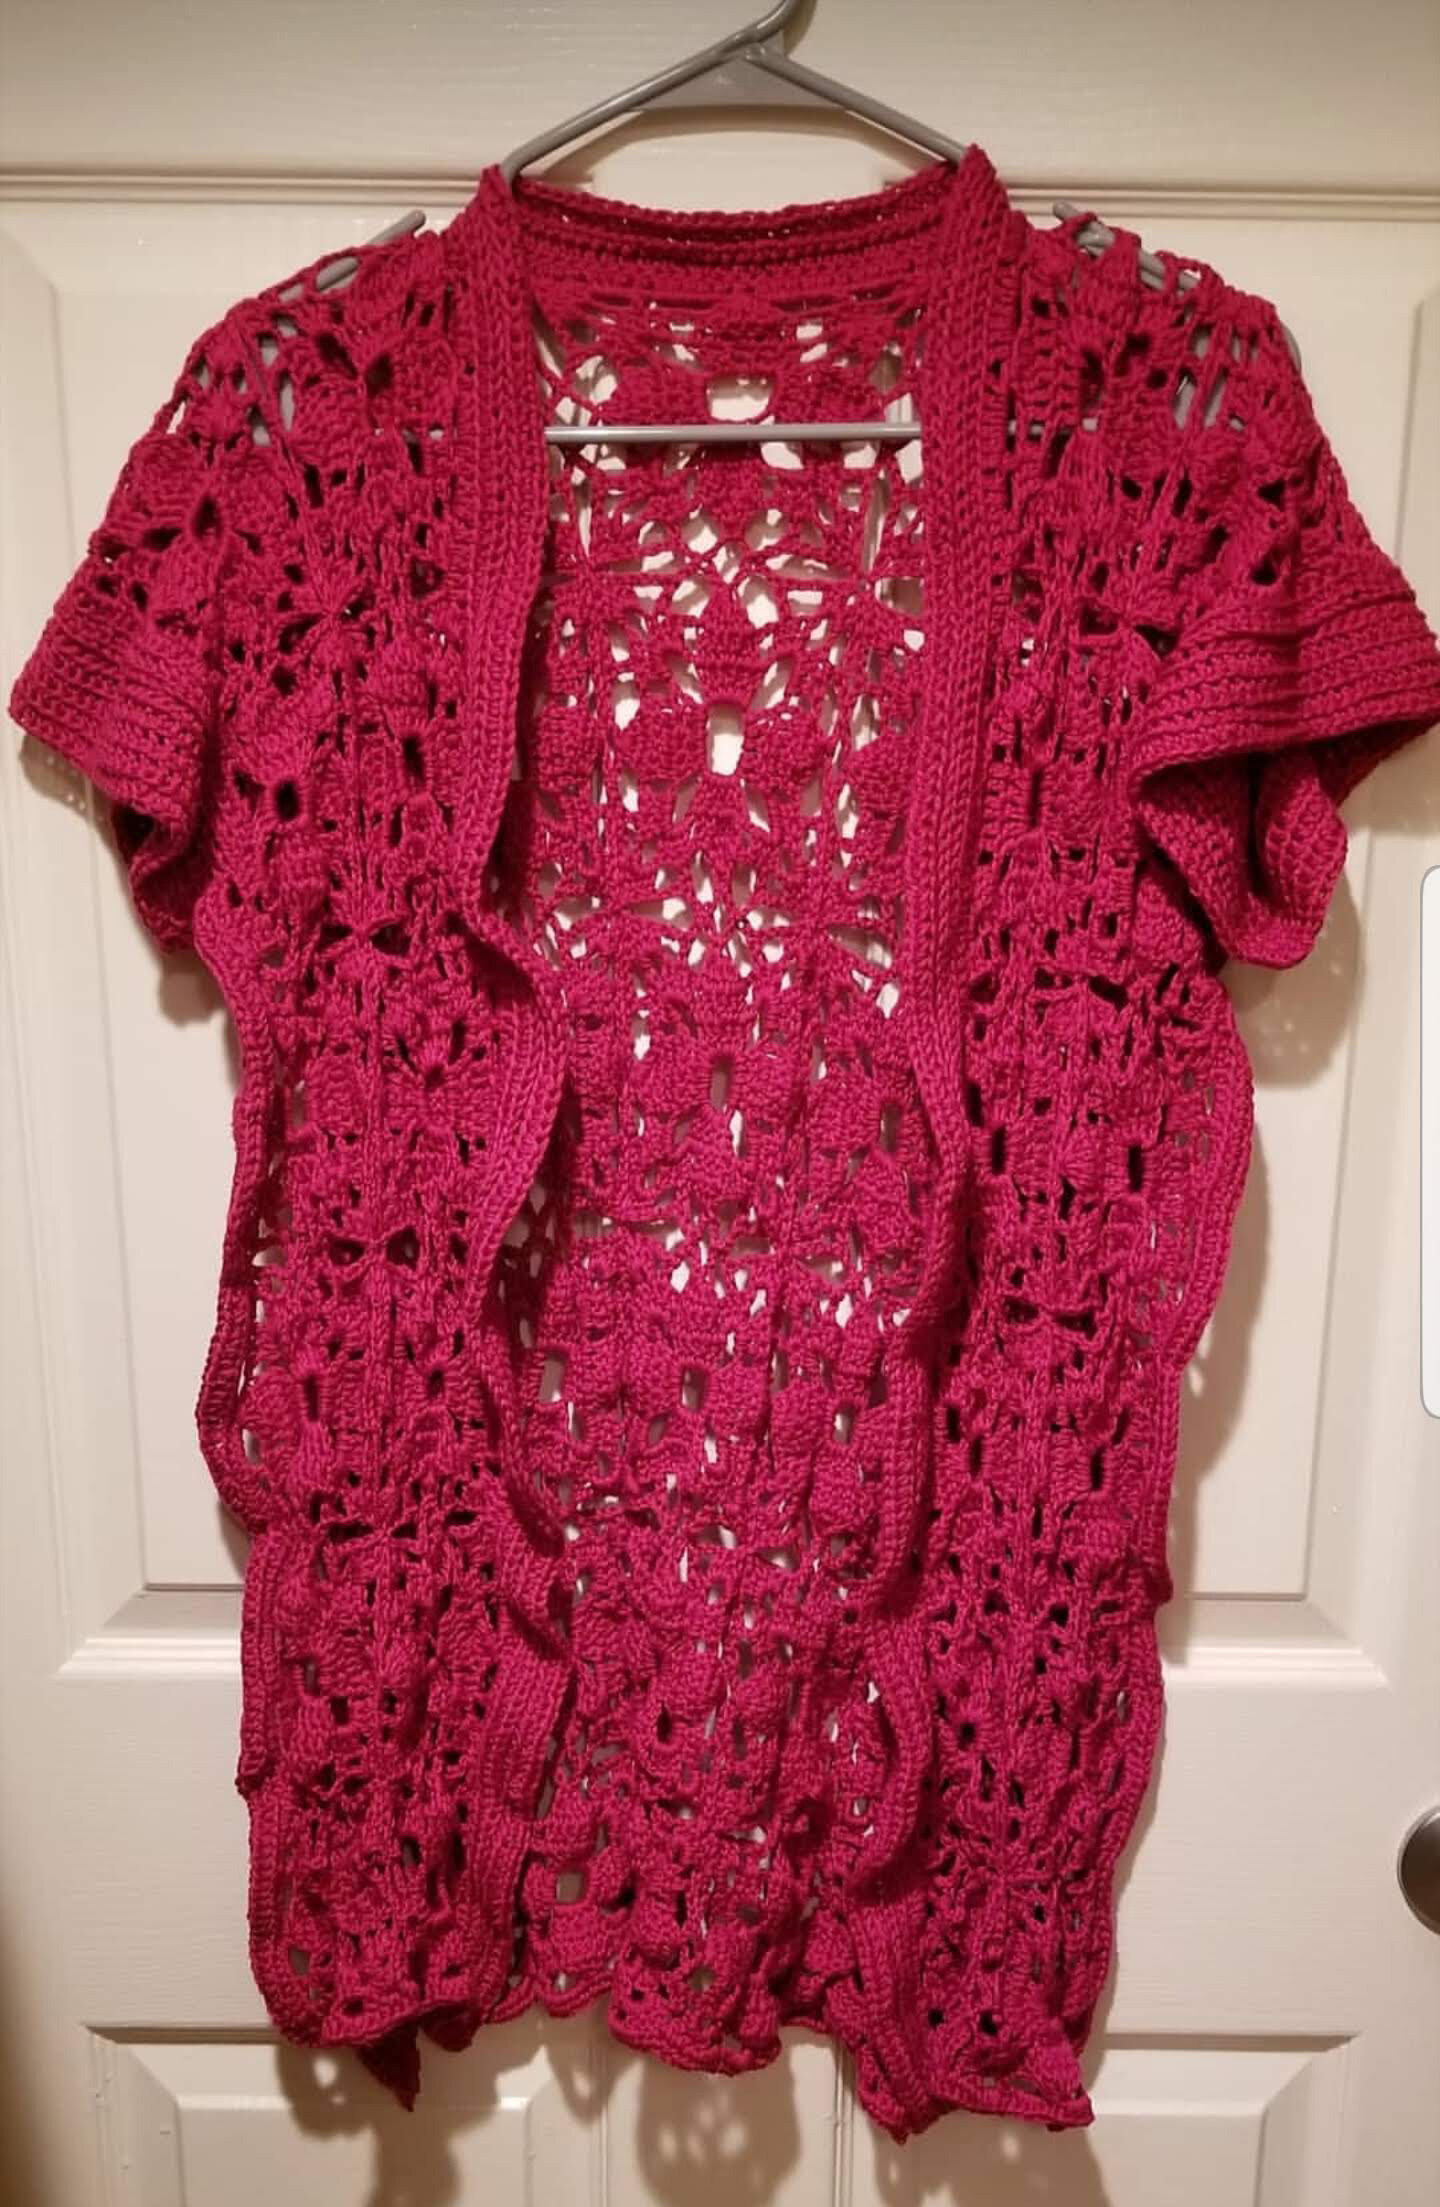
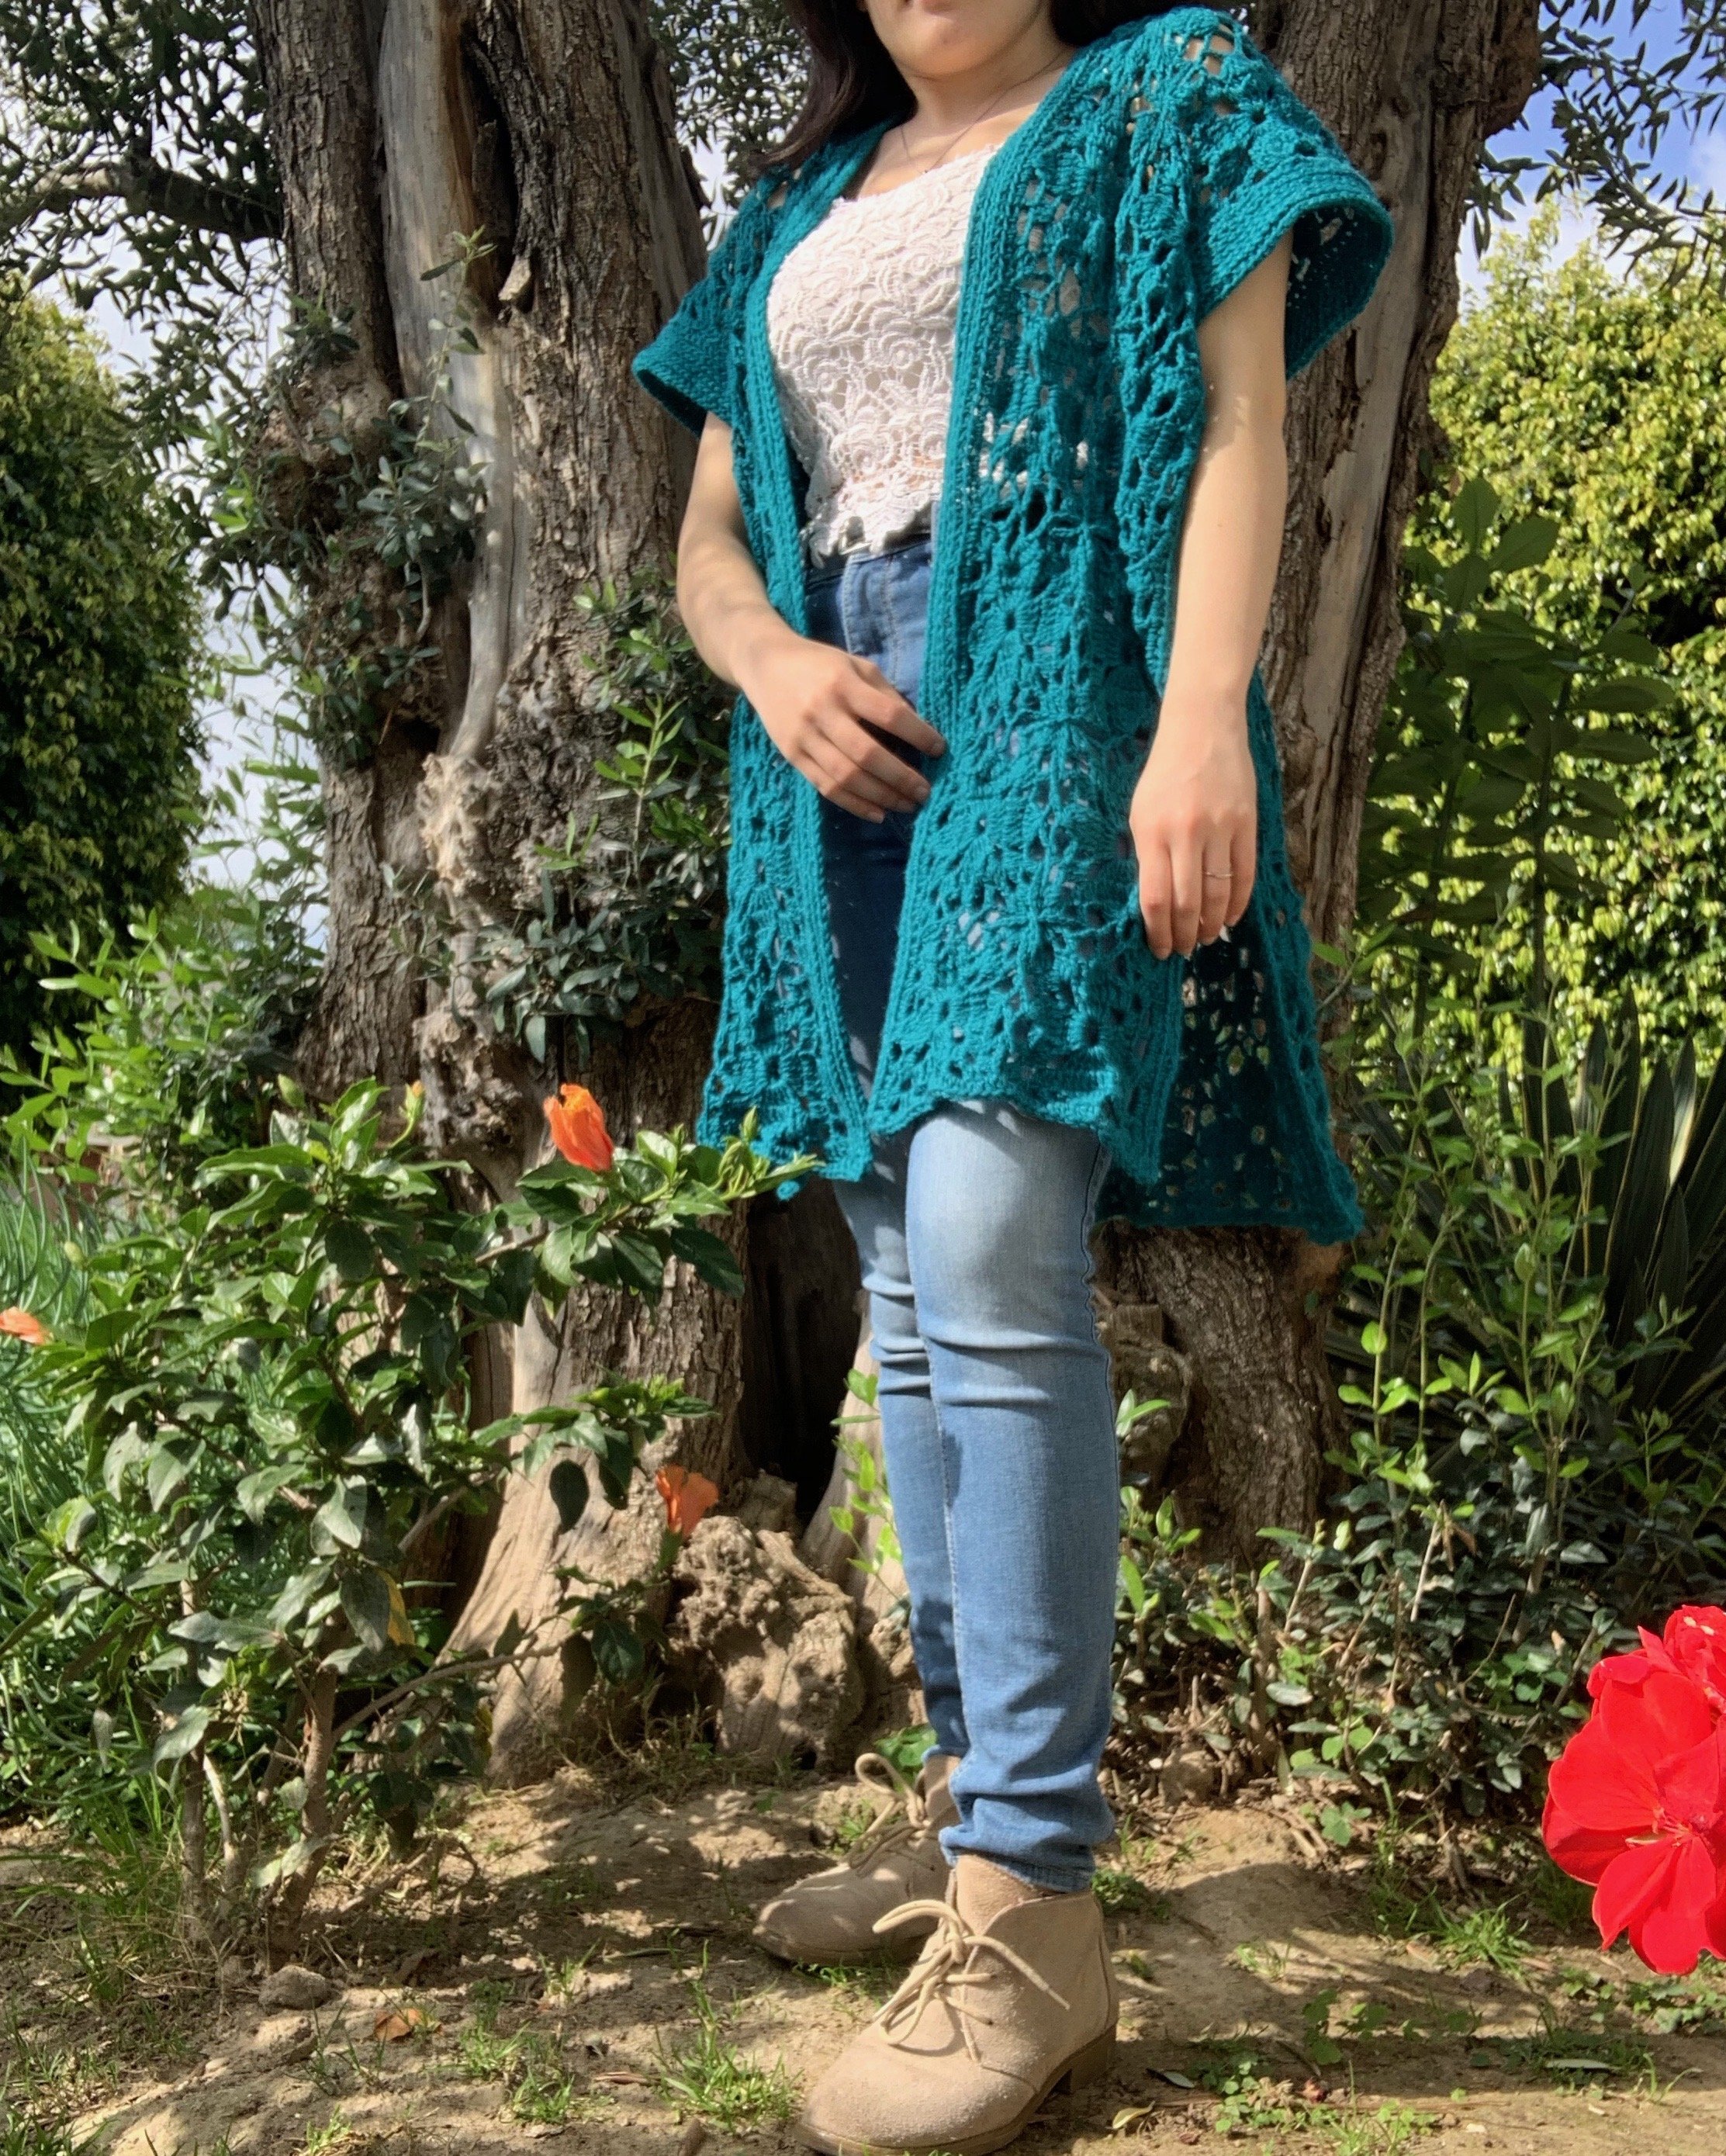
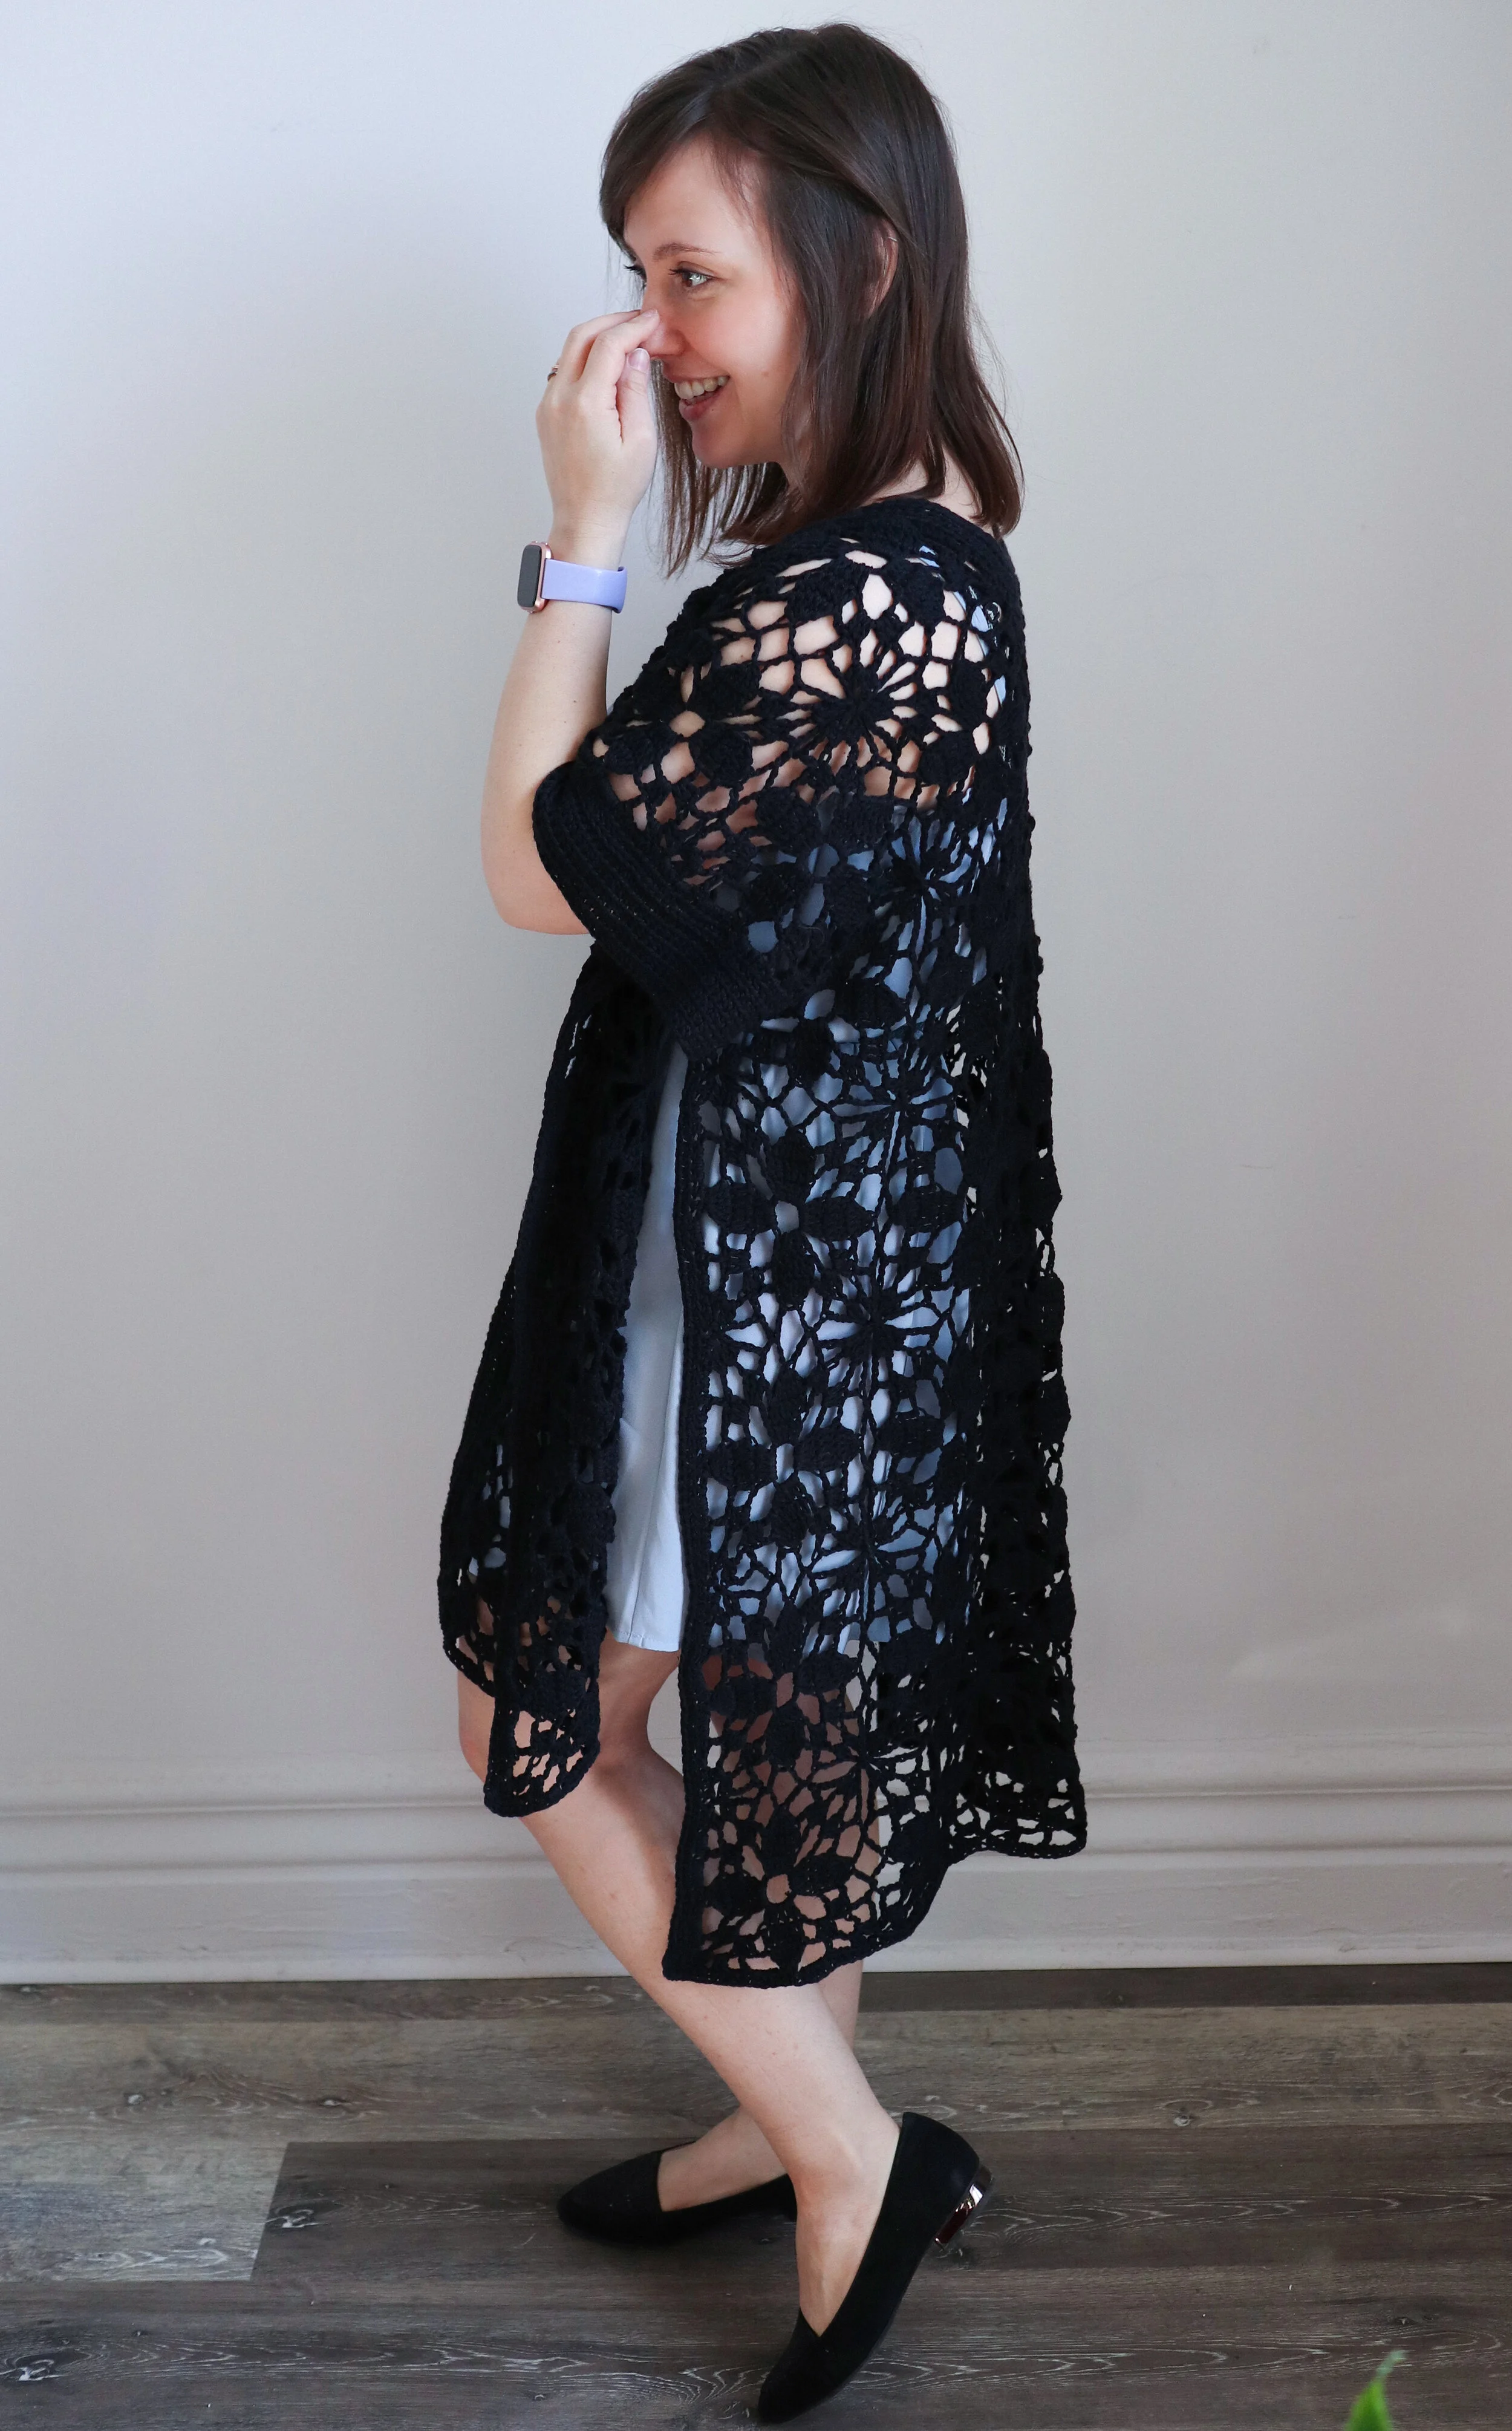
The Sweet Summer Ruana is the perfect spring to summer piece. It can go with a multitude of different outfits. Throw it over jeans and a tank for a casual look, over a dress to make it a little fancier, or over your swim suit to make a coverup! Very versatile!
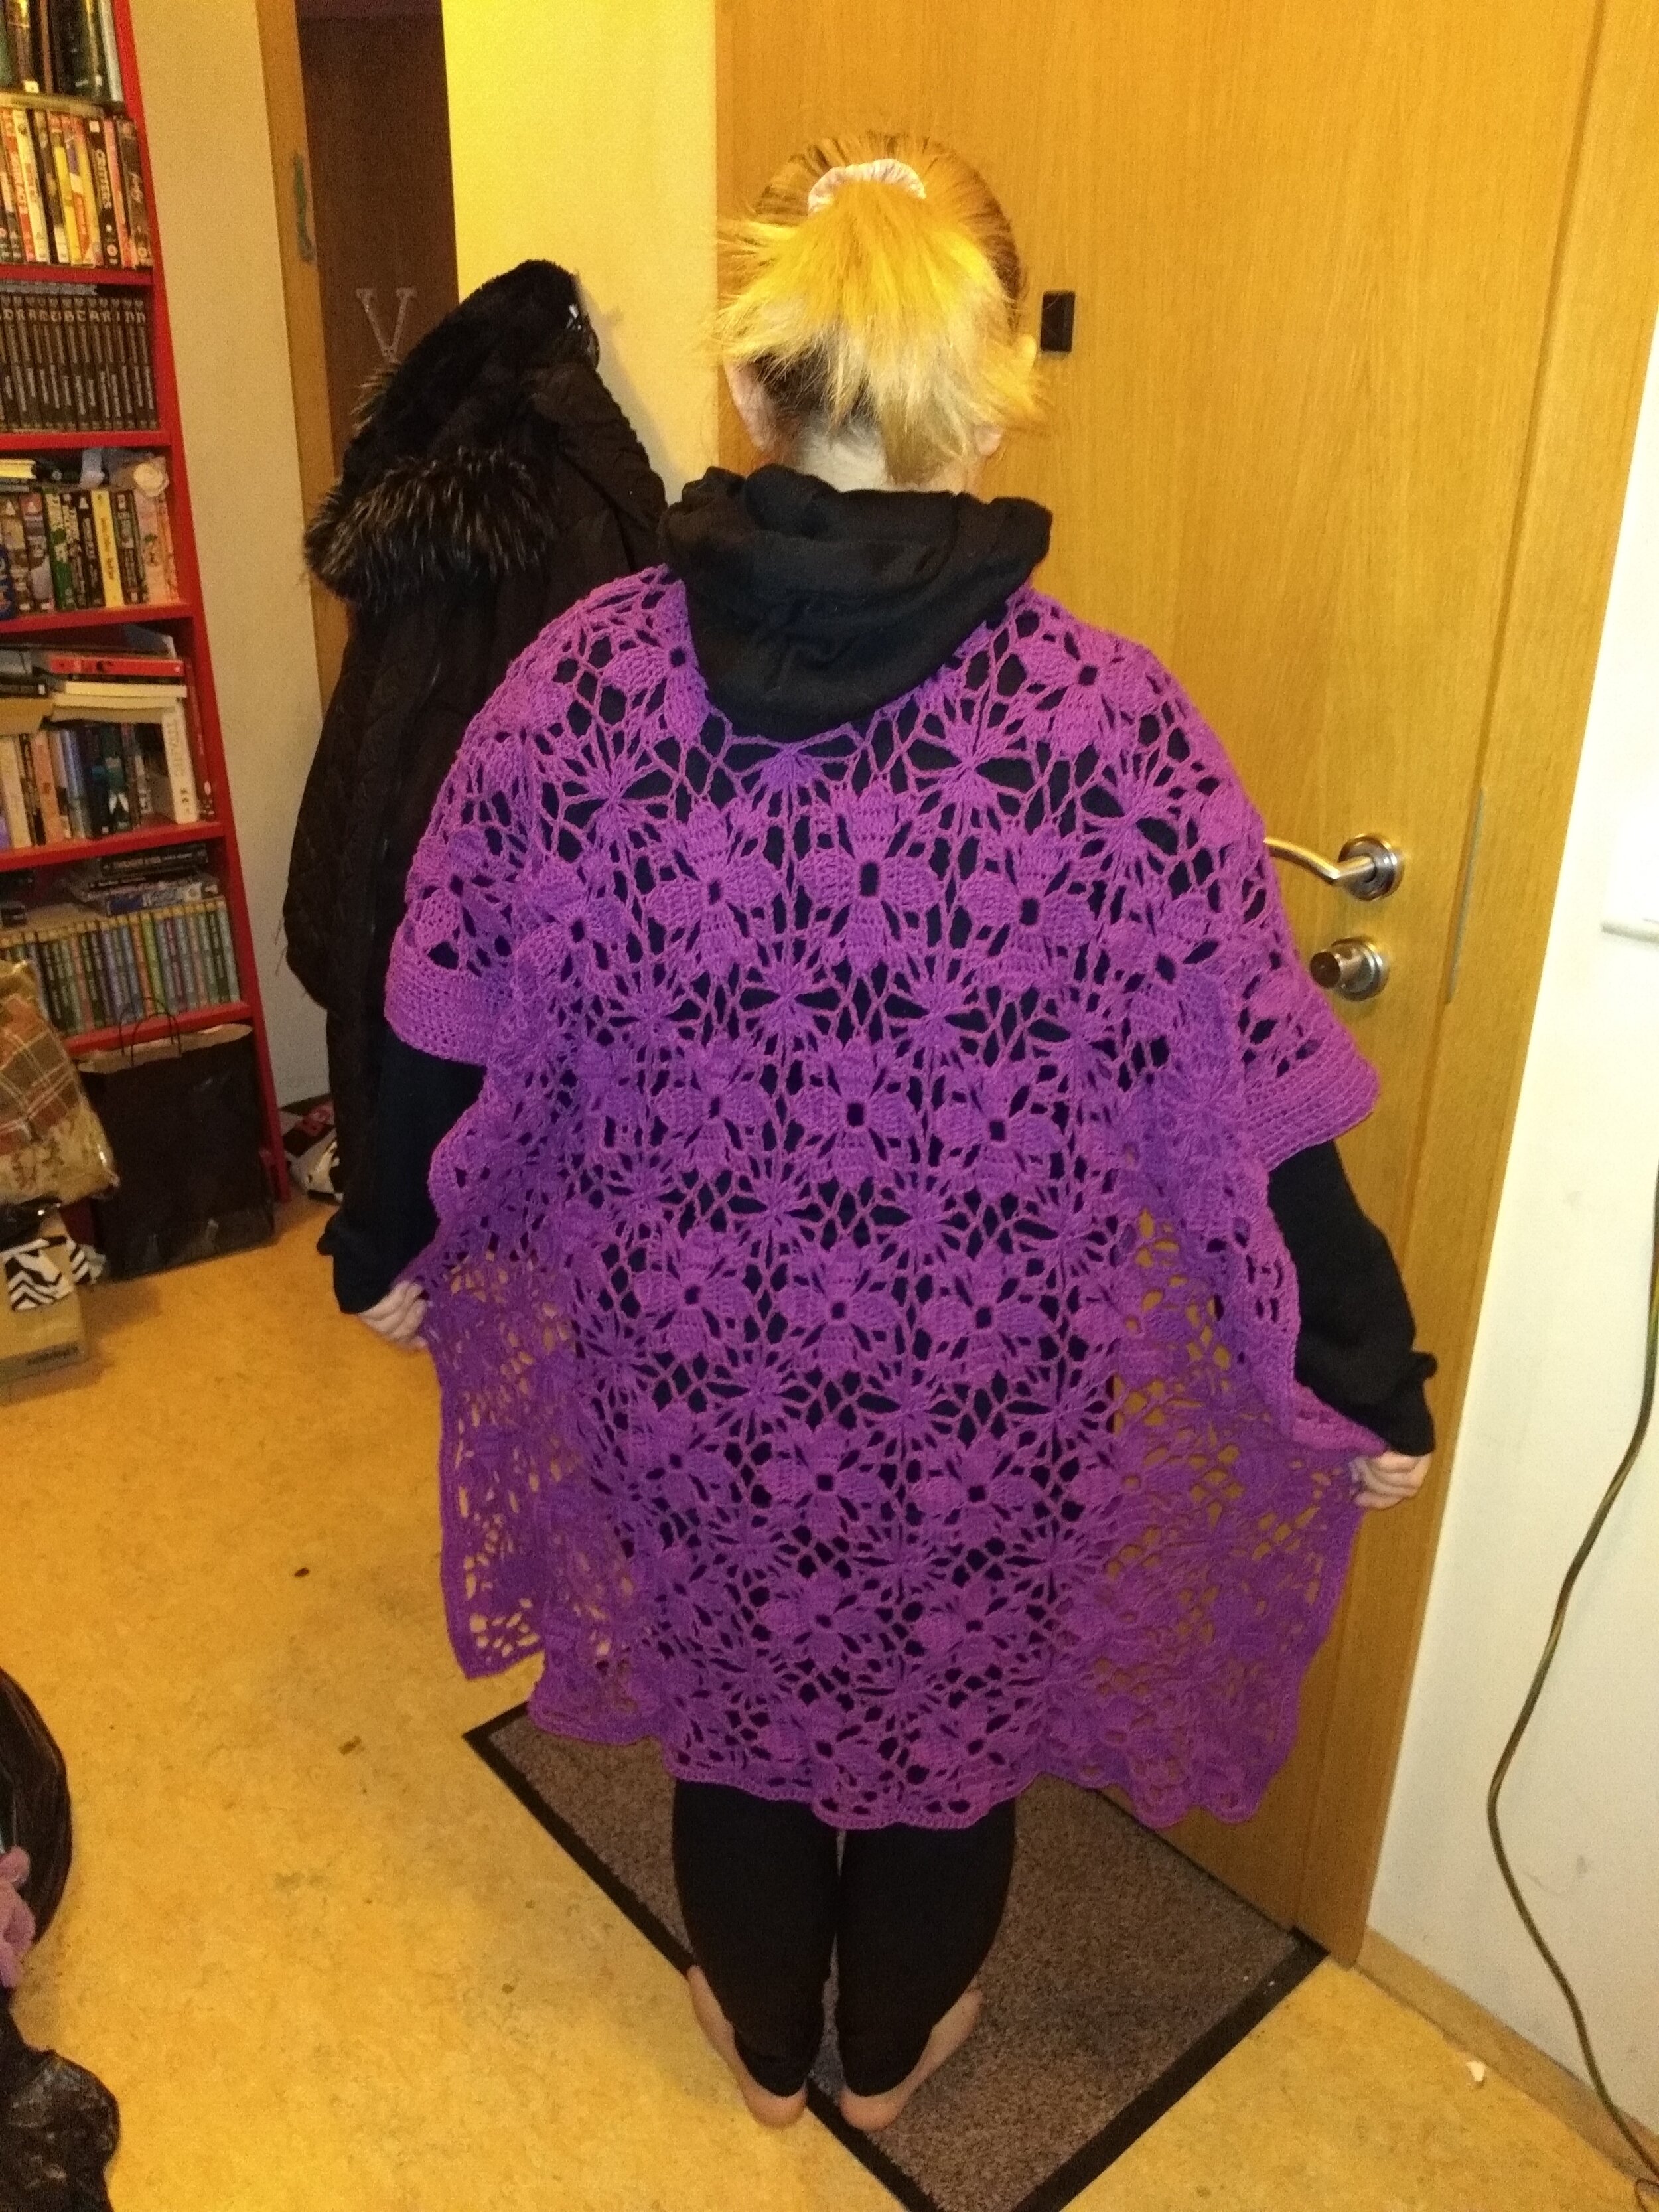
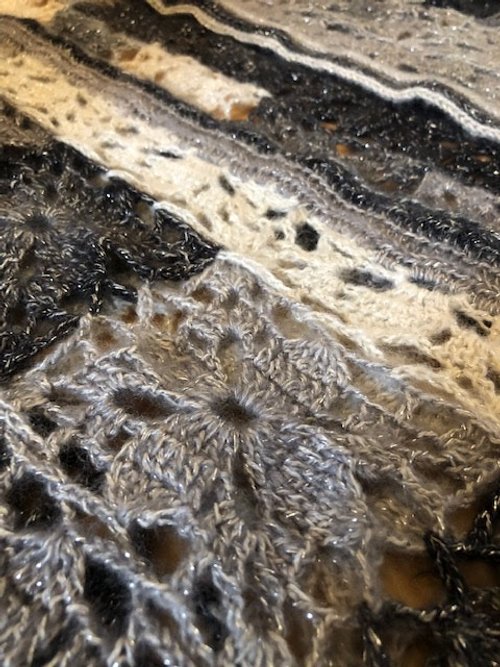
It is made with an open lace granny square called the Dogwood flower granny square and it is assembled with the join as you go method. Because of the construction of this ruana, I would say that this is an intermediate level pattern. But, hopefully the directions are clear for everyone!
The sample is crocheted with Paintbox Yarns Cotton DK, which is a weight 3 DK yarn. I think cotton is the best for this garment because it is nice and cool during the summer time. Some great substitute cotton yarns would be Lion Brand Coboo or Comfy Cotton, Knit Picks Cotlin, and Novita Cotton Soft.
ALSO: This garment needs to be blocked! I suggest wet blocking, but steam blocking works as well!
Happy Crocheting!


I LOVE TO SEE WHAT YOU CREATE!
Please share your creations with the community on social media by tagging @ravinsekaidesigns and hashtag #sweetsummerruana
I can’t wait to see the beautiful things you come up with!
Facebook: Ravin Sekai Designs
Ravelry: RavinSekai
Etsy: Ravin Sekai Designs
Instagram: @ravinsekaidesigns
Pinterest: Ravin Sekai Designs
Patreon: Ravin Sekai Designs

Pin to pinterest
What you need:
Needle Size: 4mm hook, or size needed to obtain gauge
Yarn: Light/DK weight 3 yarn. Sample crocheted in Paintbox Yarns Cotton DK. 1233(1507, 2077) yards
Gauge: 13st/10 rows= 4” in double crochet (gauge is after blocking). Each granny square is approx 5.25” x 5.25”
Ideal Bust Measurements: S/M: 32”-39”, L/XL: 40”-47”, 2XL/3XL: 48”-55”
Finished Garment Sizing: size is for garment laid flat S/M: 27.5” width x 63.25” height, L/XL: 32.5” width x 63.25” height, 2XL/3XL: 37.75” width x 73.75” height
Model: model is 4’11” tall, 35” bust 27.5” waist 38” hips, wearing size S/M
Abbreviations
Abbreviations in US terms
Ch: chain
Sl st: slip stitch
Hdc: half double crochet
Dc: double crochet
Rep: repeat
Sk: skip
YO: yarn over
Dc2tog: double crochet 2 stitches together.
dc3tog: double crochet 3 stitches together.
Dc5tog: double crochet 5 stitches together.
Dc6tog: double crochet 6 stitches together.
Hdcflo: half double crochet in the front loop only.
Hdcblo: half double crochet in the back loop only.
FO: fasten off
Cont.: contiune
S1, S2, S3, S4: Square 1, 2, 3, and 4 respectively.
The Pattern:
For the free pattern for this garment please continue on this page. Please consider supporting me by purchasing the 100% ad-free PDF download with full crochet charts for this pattern on my Ravelry or ETSY pages. Or consider joining my Patreon for member perks.
For this garment, you are going to attach the squares as you work them according to the diagram below. The L/XL version will be using half squares around the collar area. These squares are connected in the same manner as the full squares with the complete petal facing in, the half petals and starting circle facing out.

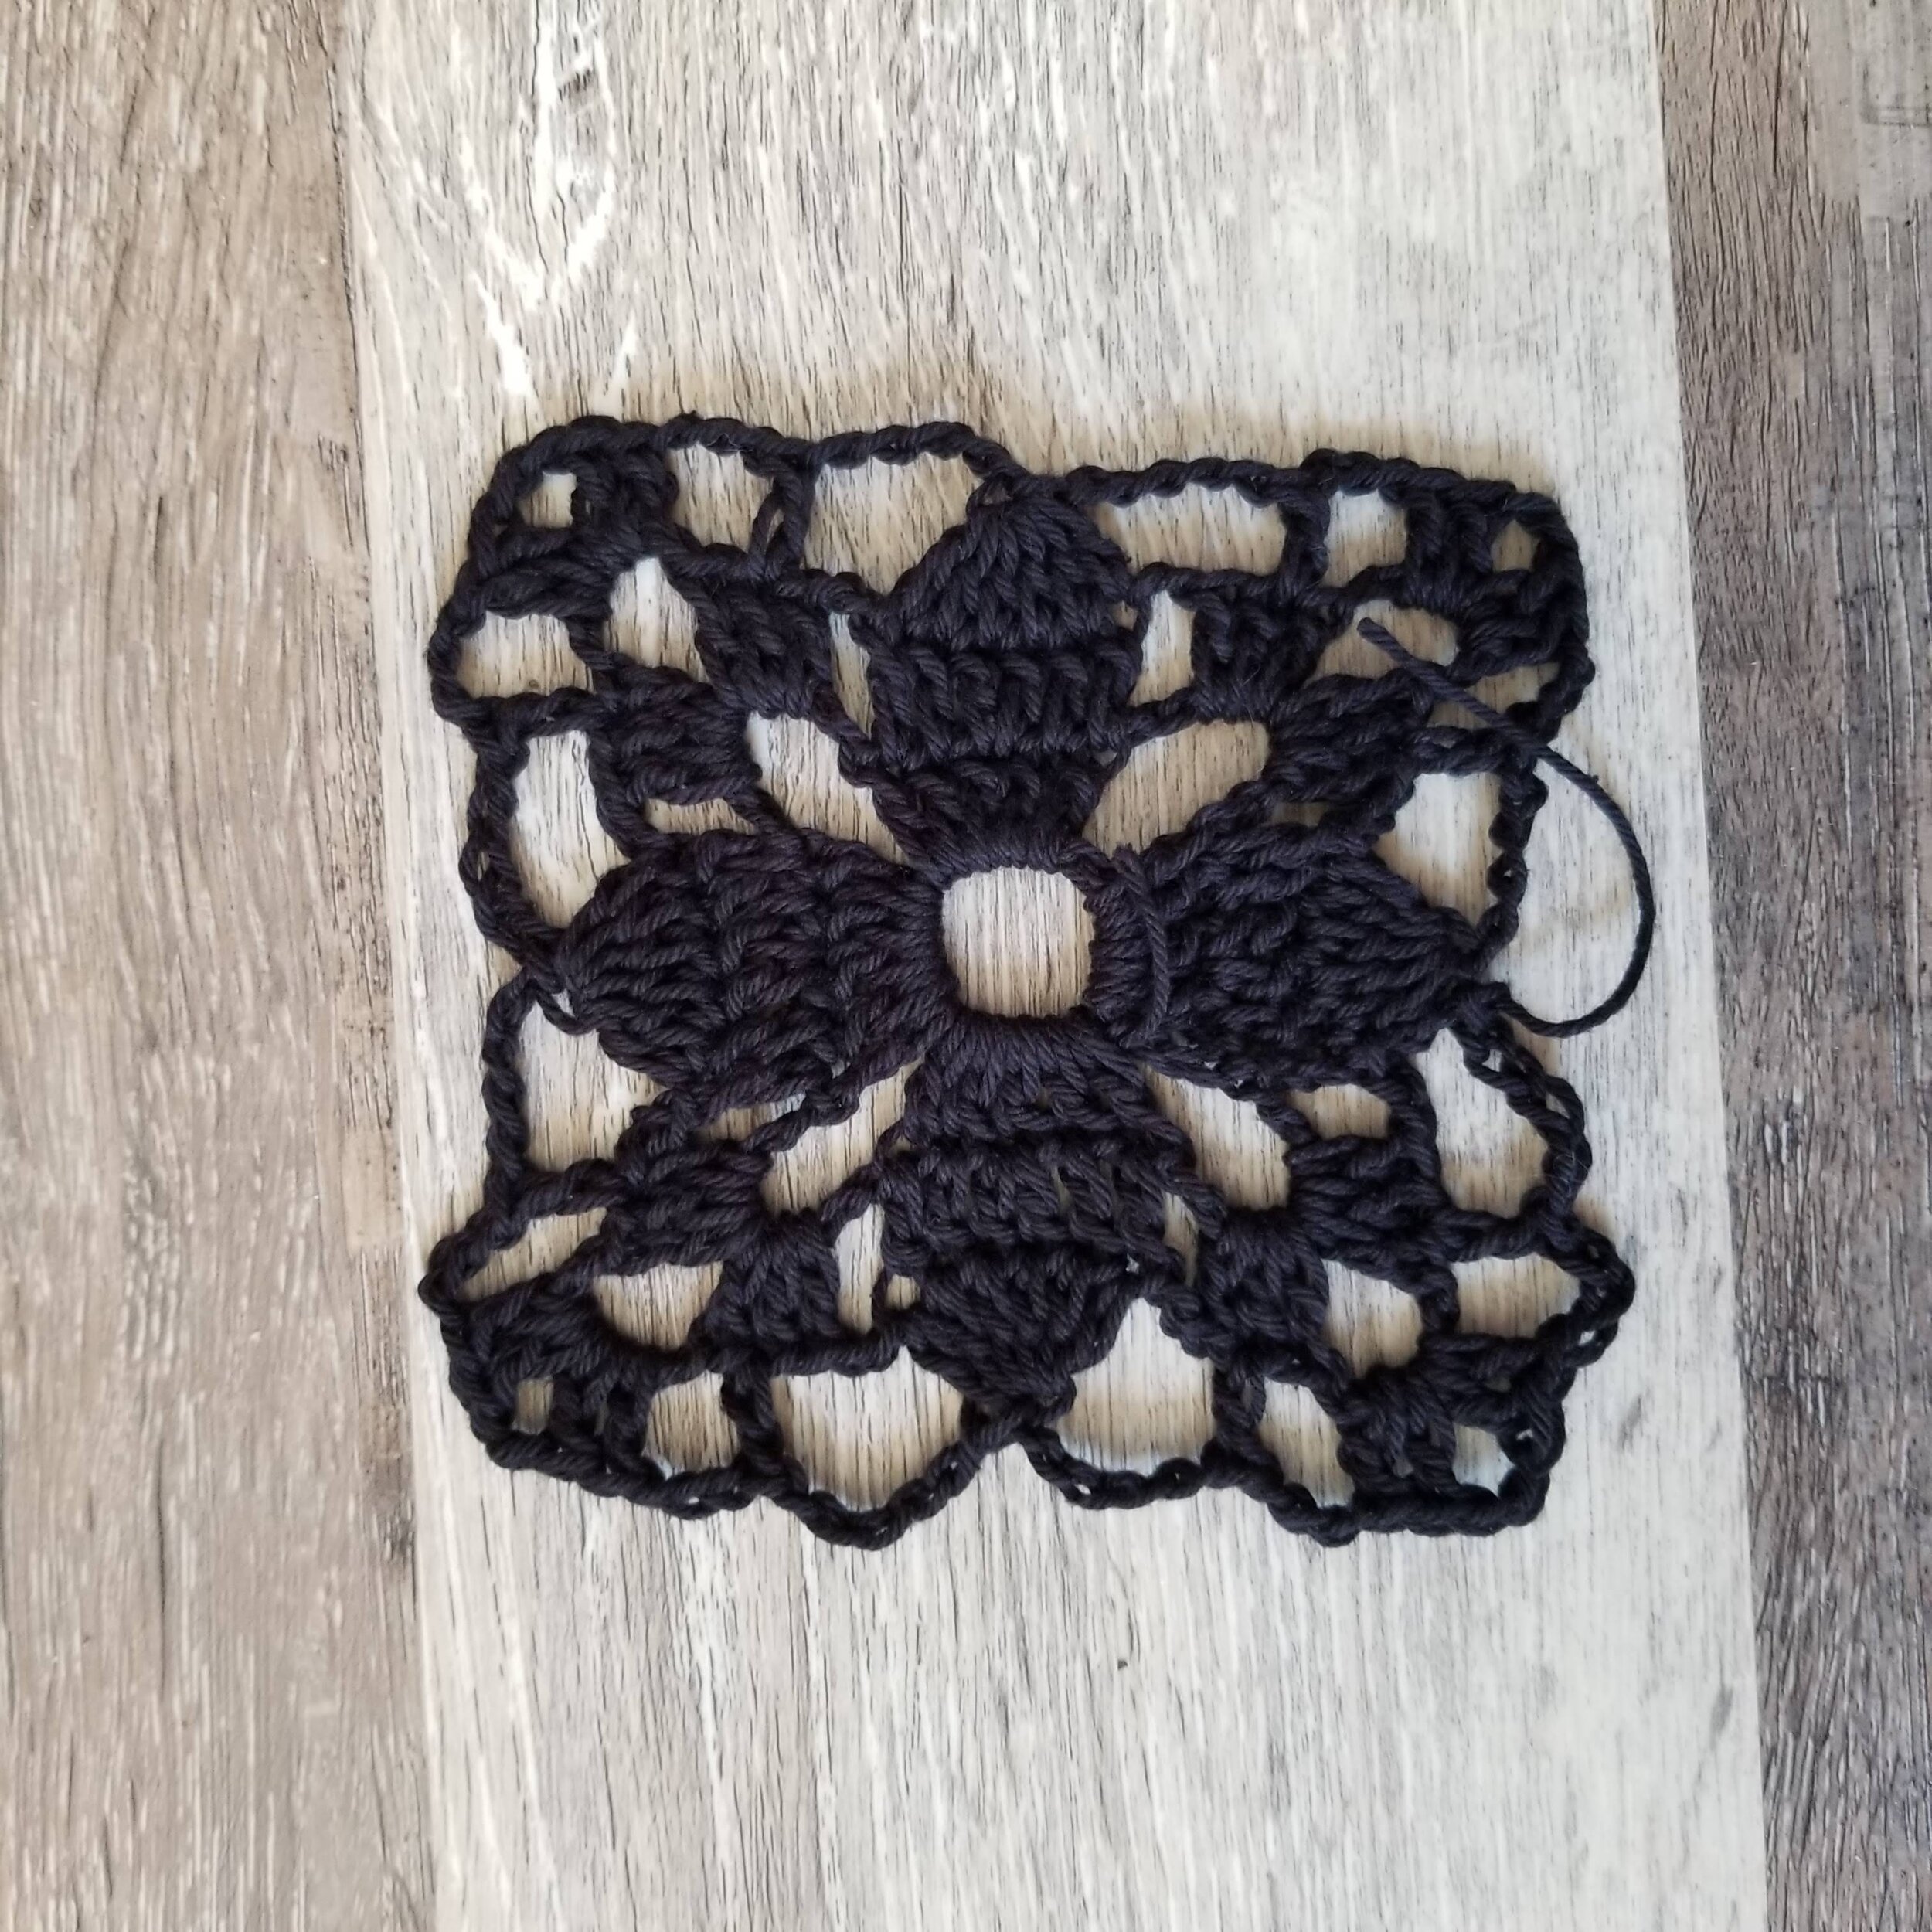
The Full Granny Square:
Ch10, sl st in 1st ch (makes a circle)
Row 1: ch3(counts as dc), 4dc into circle, *ch7, 5dc into circle* rep * * twice more, ch7, sl st into top of starting ch3.
Row 2: ch3(counts as dc), 1dc in next dc, 2dc in next (center) dc, 1dc in each next 2 dc, *ch2, 3dc in ch7 below, ch5, 3dc in ch7 again, ch2, 1dc in each next 2 dc, 2dc in center dc, 1dc in each next 2 dc* rep * * twice more, ch2, 3dc in ch7 below, ch5, 3dc in ch7 again, ch2, sl st into starting ch3.
Row 3: ch2(counts as dc), dc5tog, *ch5, 1dc in center dc of 3 dc below, ch3, [2dc, ch2, 2dc] all in ch 5 below, ch3, 1dc in center dc of 3 dc below, ch5, dc6tog* rep * * twice more, ch5, 1dc in center of 3 dc below, ch3, [2dc, ch2, 2dc] all in ch5 below, ch3, 1 dc in center dc of 3 dc below, ch5, sl st into starting ch2.
FO
The Half Granny:
Ch5 sl st in 1st ch (makes a circle)
Row 1: ch3(counts as dc), dc in circle, ch7, 5dc into circle, ch7, 2dc in circle, turn.
Row 2: ch3(counts as dc), dc in same st, dc in next, ch2, 3dc in ch7 below, ch5, 3dc in ch7 again, ch2, 1dc in each next 2 dc, 2dc all in center dc, 1dc in each next 2 dc, ch2, 3dc in ch7 below, ch5, 3dc in ch7 again, ch2, 2dc in next dc, 1dc in top of ch3 below, turn.
Row 3: ch2(counts as dc), dc2tog, ch5, 1dc in center dc of 3 dc below, ch3, [2dc, ch2, 2dc] all in ch 5 below, ch3, 1dc in center dc of 3 dc below, ch5, dc6tog, ch5, 1dc in center dc of 3 dc below, ch3, [2dc, ch2, 2dc] all in ch 5 below, ch3, 1dc in center dc of 3 dc below, ch5, dc3tog.
FO

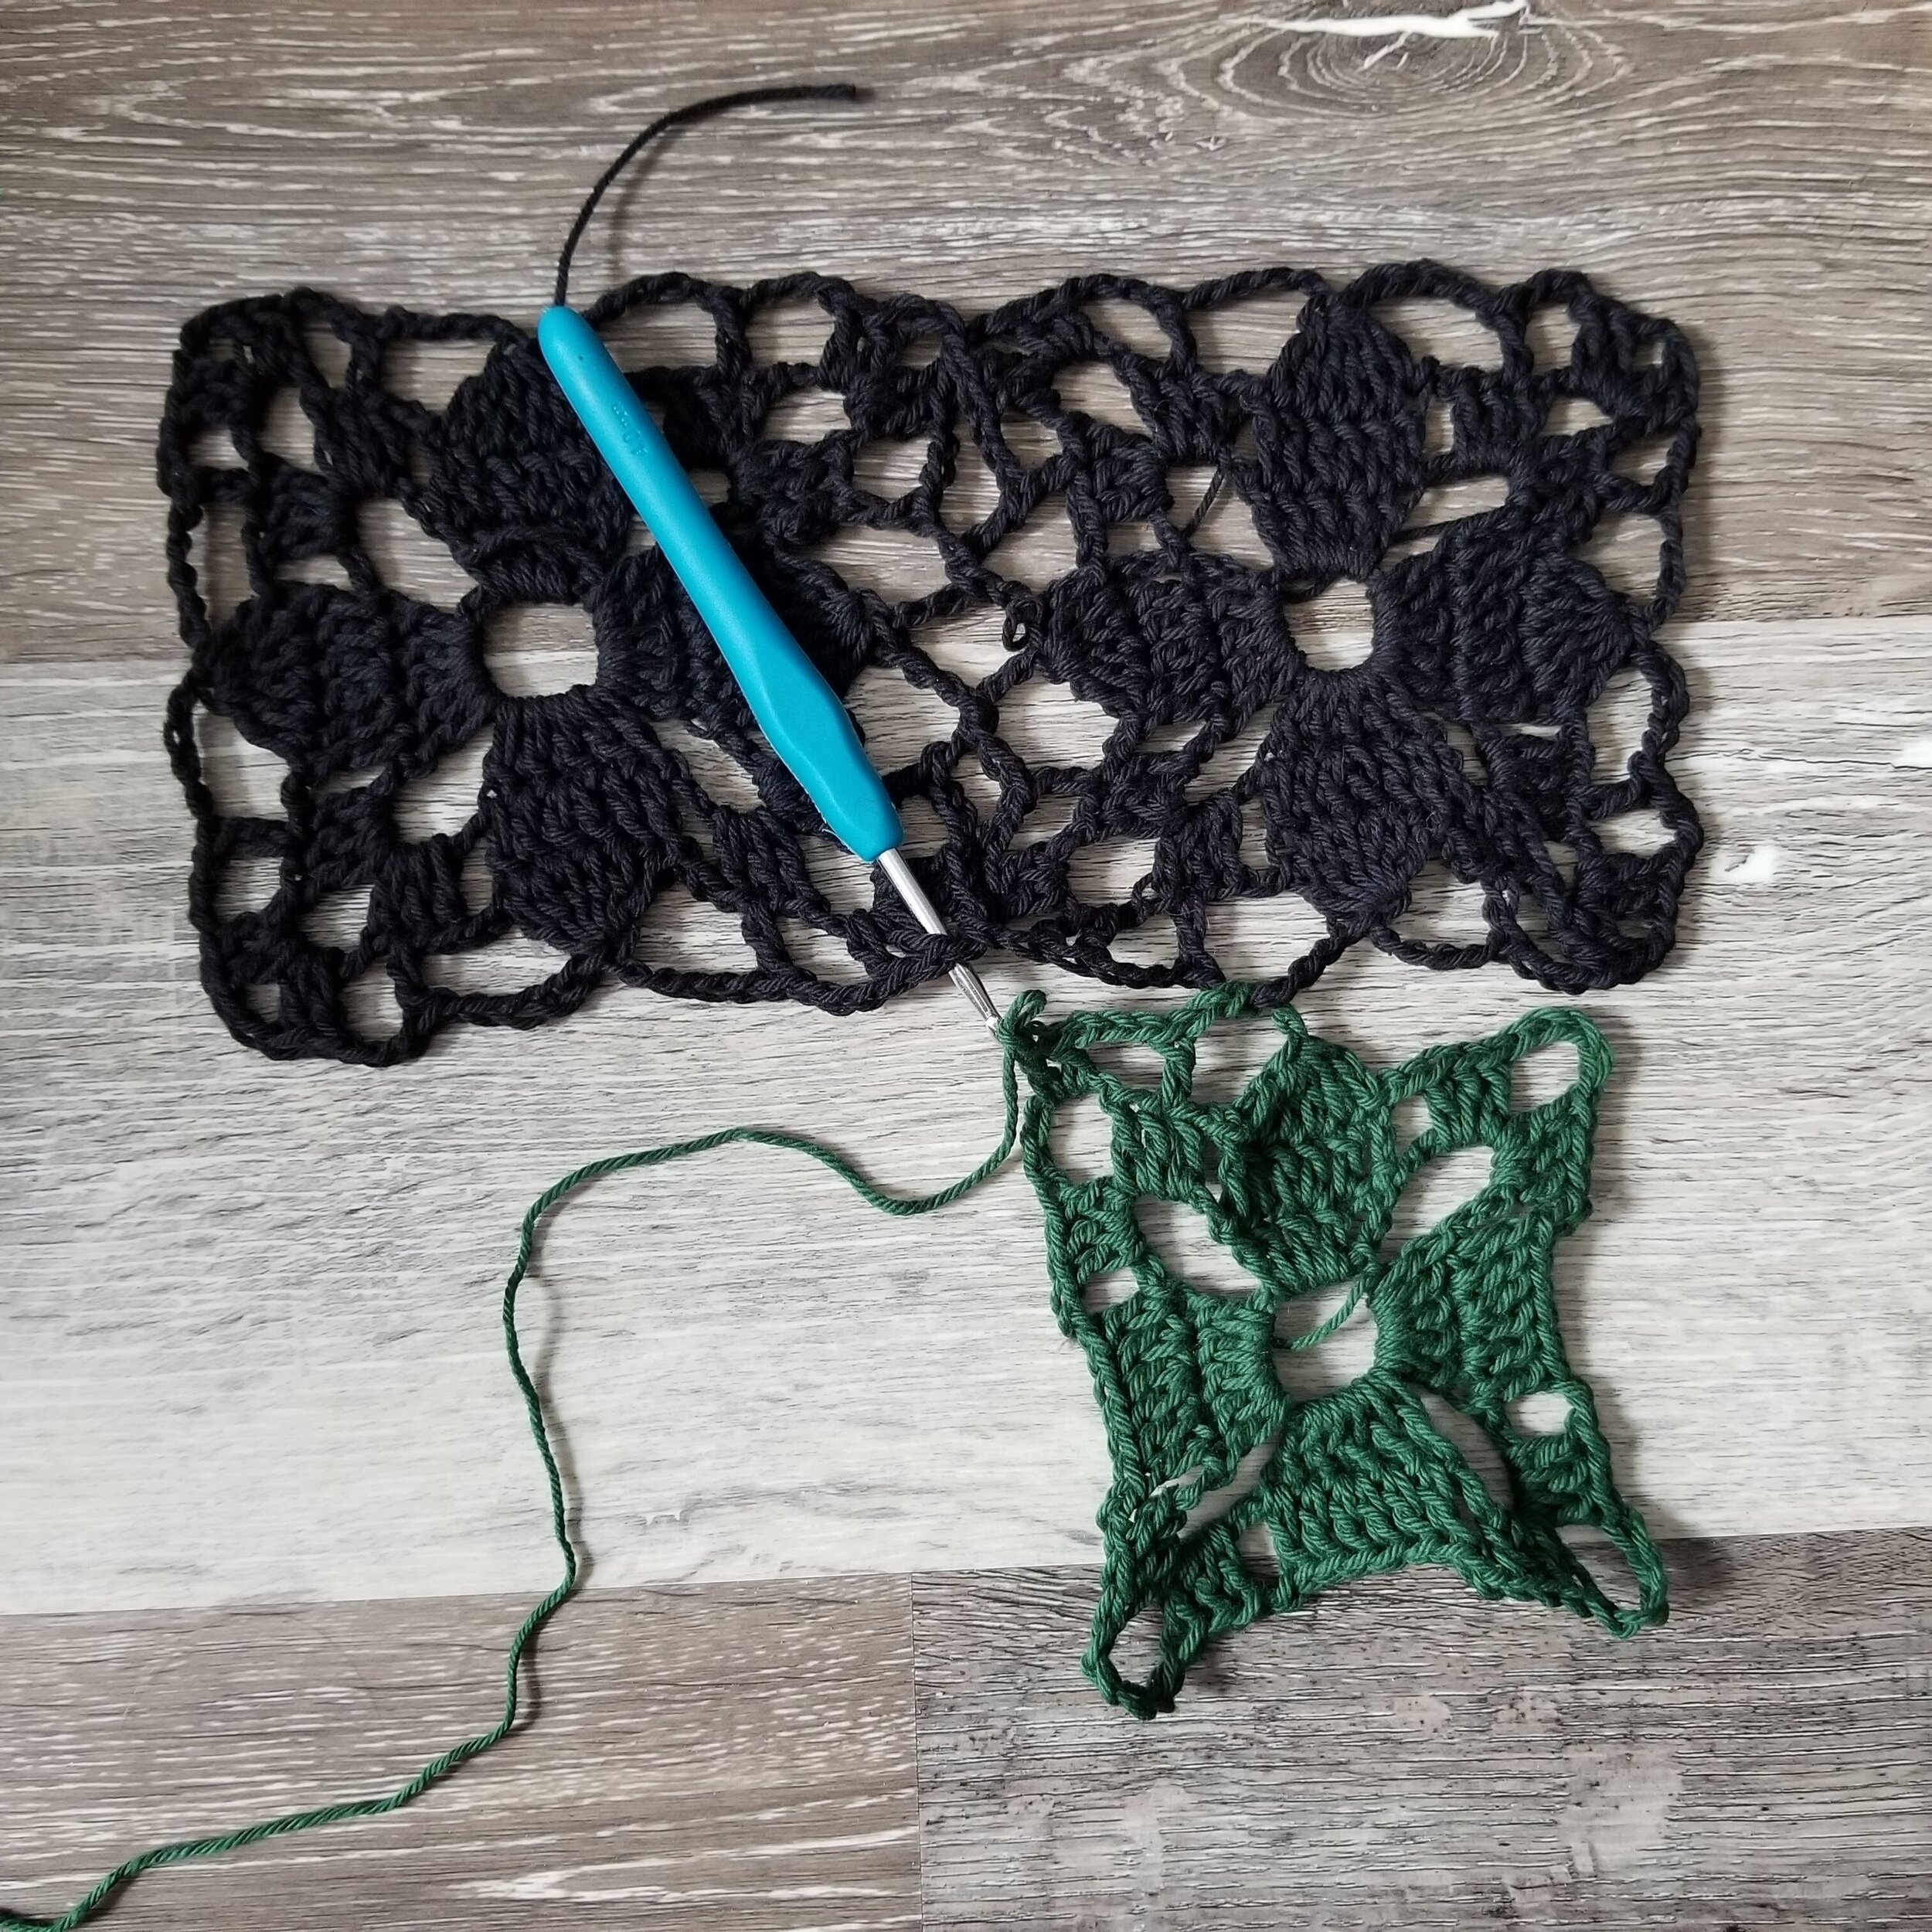
How to Connect Squares:
Square 1: Crochet the first granny square in full.
Square 2:
Row 1 - Row 2: Make your 2nd square through Row 2
Row 3: ch2, dc5tog, ch3, remove loop from hook, insert hook in ch5 space (#1) of S1 and pull loop through, ch2, 1dc in center dc of 3 dc below, ch3, 2dc in ch5 below, ch1, remove loop from hook, insert hook in ch2 space (#2) of S1 and pull loop through, ch1, 2dc in ch5 below, cont. Row 3 until last corner, 2dc in ch5 below, ch1, remove loop from hook, insert hook in ch2 space (#3) of S1 and pull loop through, ch1, 2dc in ch5 below, ch3, dc in center dc of 3 dc below, ch3, remove loop from hook, insert hook in ch5 space (#4) of S1 and pull loop through, ch2, sl st into top of dc5tog.
FO


Square 3:
Row 1 - Row 2: Make your 2nd square through Row 2
Row 3: ch2, dc5tog, ch3, remove loop from hook, insert hook in ch5 space of S1 and pull loop through, ch2, 1dc in center dc of 3 dc below, ch3, 2dc in ch5 below, ch1, remove loop from hook, insert hook in ch2 space of S2 directly across and pull loop through, ch1, 2dc in ch5 below, cont. Row 3 from S2 to finish connecting square.
FO

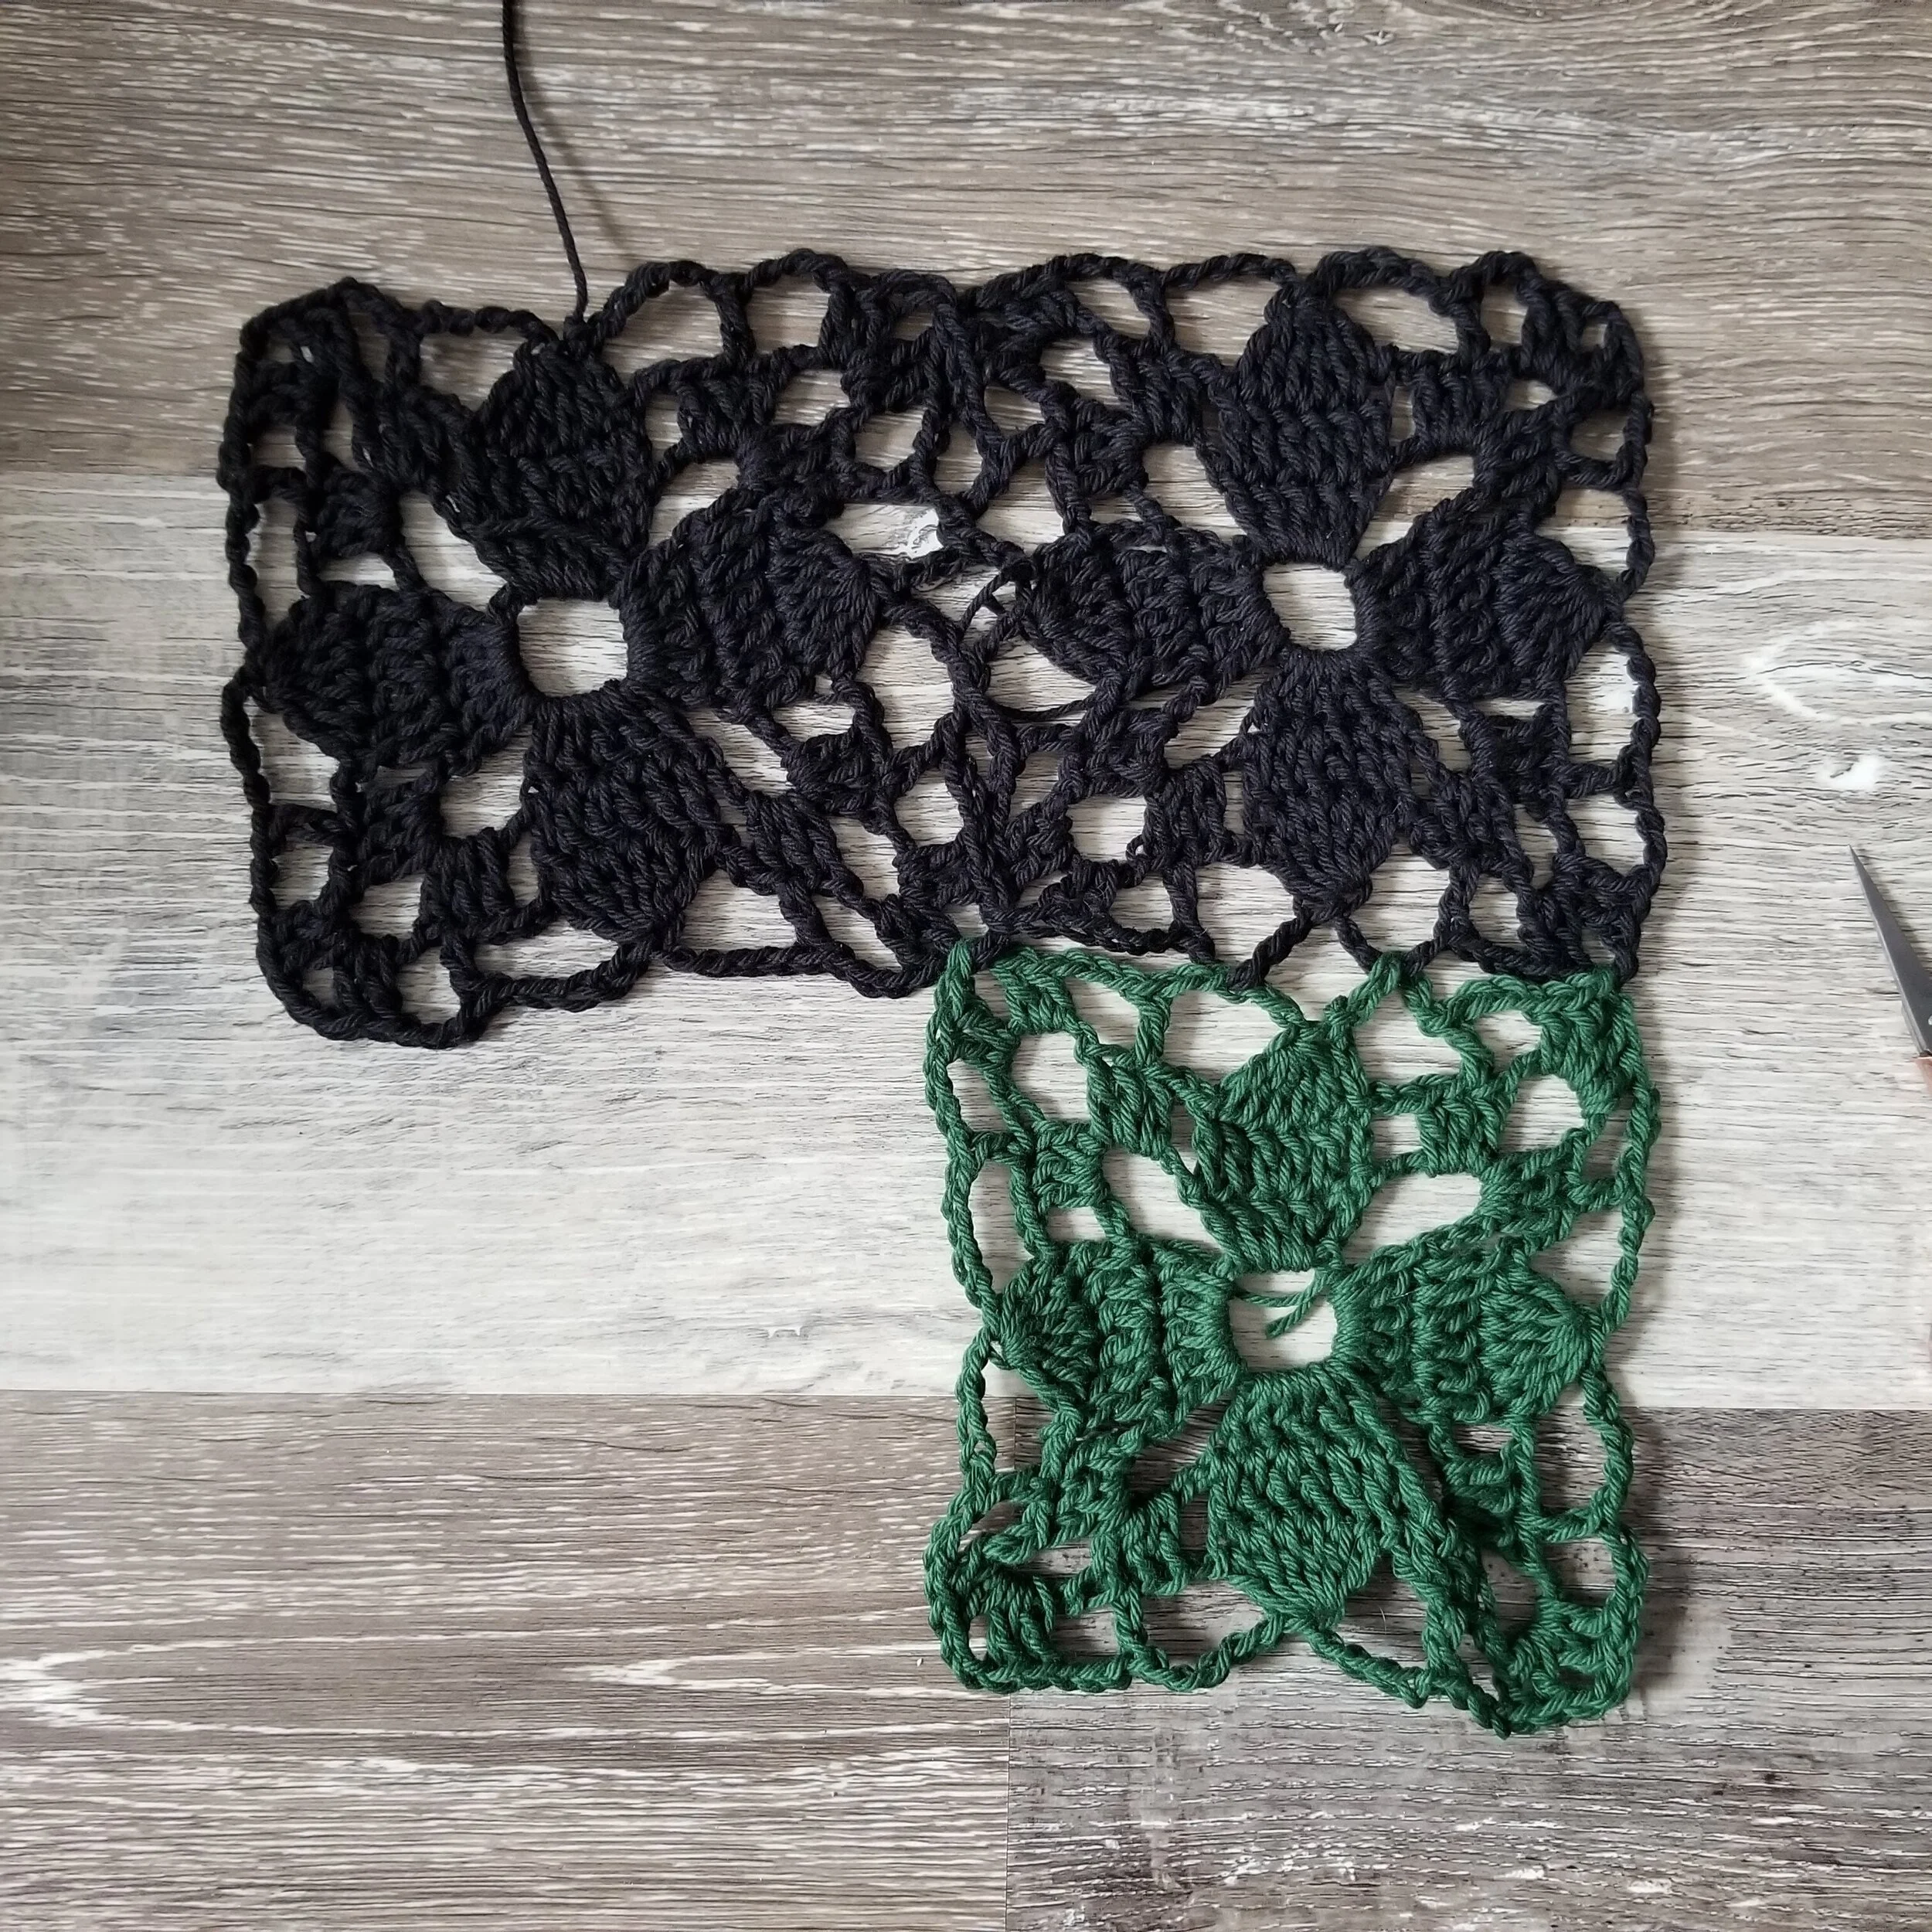
Square 4:
Row 1 - Row 2: Make your 2nd square through Row 2
Row 3: rep directions from S3, attaching S4 to bottom of S2 first, then to S3 until you get to the last corner joining all 4 squares together, 2dc in ch5 below, ch1, remove loop from hook, insert hook in ch2 space of S1 directly across (#9) and pull loop through, ch1, 2dc in ch5 below, finish Row 3 as you would S2.
FO


Cont. connecting squares according to the diagram. The L/XL version utilizes half squares around the collar. Attach these in the same manner as all the other squares. Block garment to size.
Collar:
NOTE: For the collar and right/left side edging, you will hdc evenly along the collar/sides. I personally put 25 hdc into each granny square for these sections. For me, this is what looked best and even. However, depending on your tension, you may want to put more or less hdc along the sides. Remember: too many stitches along the edge will make the edging/collar wavy, too few will make them pucker.
With RS facing, attach yarn to the bottom corner of the inside left front panel with a sl st.
Row 1: ch2 (does not count as a st), hdc in same st as ch2, hdc evenly along collar of ruana to opposite bottom corner. Turn.
Row 2: ch2, hdcflo in first and each st across, placing last st in ch2 from row below. Turn.
Row 3: ch2, hdcblo in first and each st across. Turn.
Row 4: rep Row 2.
FO
Right Side:
Edging:
With RS facing, attach yarn to bottom corner of the outside right front panel with a sl st.
Row 1: ch2 (does not count as a st), hdc in same st as ch2, hdc evenly along right side of ruana to opposite bottom corner. Turn.
Row 2: ch2, hdcflo in first and each st across, placing last st in ch2 from row below.
FO
Sleeve:
Lay the garment out and with a st marker, pin the front and back together 9 (10, 11) inches from the shoulder. Then, with front panel RS facing, attach yarn to the st with the st marker in it.
Round 1: ch2, hdcblo around shoulder to where the st marker is on the backside, sl st into the top of the starting ch2 on the front of the garment.
Round 2: ch2, hdcblo around, sl st into starting ch2.
Round 3 - Round 5: rep Row 2
FO
Left Side:
Edging:
With RS facing, attach yarn to bottom corner of the outside left back panel with a sl st.
Row 1: ch2 (does not count as a st), hdc in same st as ch2, hdc evenly along left side of ruana to opposite bottom corner. Turn.
Row 2: ch2, hdcflo in first and each st across, placing last st in ch2 from row below.
FO
Sleeve:
Lay the garment out and with a st marker, pin the front and back together 9 (10, 11) inches from the shoulder. Then, with back panel RS facing, attach yarn to the st with the st marker in it.
Round 1: ch2, hdcblo around shoulder to where the st marker is on the front side, sl st into the top of the starting ch2 on the front of the garment.
Round 2: ch2, hdcblo around, sl st into starting ch2.
Round 3 - Round 5: rep Row 2
FO
Bottom Edging:
Turn garment upside down and attach yarn to right side of back panel with sl st.
Row 1: ch2, hdc evenly across.
Rep for both front panels.
FO
You can block garment a final time if you feel it lost shape while finishing.


IF YOU LIKED THIS PATTERN, PLEASE SUPPORT ME ON PATREON OR BUY ME A COFFEE!

BUY ME A COFFEE
Support me on Patreon
Enjoy!
I LOVE TO SEE WHAT YOU CREATE!
Please share your creations with the community on social media by tagging @ravinsekaidesigns and hashtag #sweetsummerruana
I can’t wait to see the beautiful things you come up with!
Facebook: Ravin Sekai Designs
Ravelry: RavinSekai
Instagram: @ravinsekaidesigns
Pinterest: Ravin Sekai Designs
Patreon: Ravin Sekai Designs

HI! I’M RACHEL.
I’m a quirky world traveller, avid knitter, crochet lover, pattern maker, and all around nerd! I spend a lot of time clowning around, and I often have the goofiest smile on my face. This website is the landing place for my new patterns, random thoughts, and general craziness. I hope you enjoy my randomness and my yarnie goodness!
Archive
- LGBTQ+
- PRIDE
- accessories
- accessory
- asymmetrical
- autumn
- backpack
- bag
- beach
- beanie
- bias shawl
- blanket
- blog hop
- blue
- bobble
- bookbag
- boyfriend
- cardigan
- case
- celtic weave stitch
- clutch
- clutch bag
- collaboration
- color block
- color work
- cover
- cover-up
- cowl
- crochet
- crochet pattern
- crochetpattern
- crop top
- croptop
- decor
- diy
- dress
- ds case
- duster
- earwarmer
- easy
- fall
- festivaltop
- free pattern
- gauge
- ghost
- granny squares
- halloween
- handbag
- hat
- headband


